Blog
Replacing Segment Computed & SQL Traits With dbt & RudderStack Reverse ETL
Replacing Segment Computed & SQL Traits With dbt & RudderStack Reverse ETL

Benji Walvoord
Director of Solutions Engineering
12 min read
June 9, 2022
We recently helped a customer migrate from Segment to RudderStack and decided to document it in a series of blog posts because we thought it might be useful to data engineers considering making a similar migration. In our last post, we discussed the differences between Segment Personas and RudderStack. As a follow up, we wanted to take a deep dive into how data teams can use open source tools like dbt from dbt labs and RudderStack Reverse ETL to leverage the power of your data warehouse to sync enriched users, audiences and other data to downstream tools.
In this post, We’ll walk you through the basics of creating your own dbt model and setting up the output table as a RudderStack Reverse ETL. We'll also highlight a more advanced technique where we restrict the Reverse ETL so it only sends updates to downstream destinations when there is a change to the user record, which is useful when you only want to sync changes.
Laying the groundwork
It will be helpful to set the stage, as no two technical stacks are the same and not all data warehouse platforms provide the same functionality. It’s for the latter that we really like tools like dbt, and the sample files provided here should provide a good starting point for your specific use case. Our instance leverages the dbt cloud and connects to our Snowflake data warehouse, where data models output tables in a designated dbt schema.
Why Do This In The First Place?
There are two basic reasons. The first is because your data warehouse has important information about your users that comes from data sets from other parts of your stack, both internal and external. This could be something as simple as measuring lead engagement by counting the number of track calls for that particular user, or something complex like running that same user through a machine learning model workflow to calculate a likelihood of churning in the next 24 hours. The benefit of RudderStack is that by having all of this data in your warehouse, your options are limitless in terms of how you enhance your user profiles.
The second reason follows from the first. The more holistic a view you create of your customers, the better your results will be. Creating a custom Facebook audience derived from first time purchasers of a new product is great, but including data from customer complaint service tickets, warranty claims, and returns will significantly increase the efficacy of any campaigns that your marketing runs to that audience.
"It is always difficult to build a pipeline that can be maintained / updated in one place but needs to satisfy a number of different destinations. RudderStack's transformations let you do whatever logic you need for each of those destinations, especially in places where SQL logic would fall short or be unnecessarily complex. This way one warehouse model and one warehouse action can update a whole slew of downstream destinations with ease."
Maximilian Werner, Obsessive Analytics
The Basics - Enhancing Users In Customer.io
Here at RudderStack, we use Customer.io to support email marketing initiatives, and we needed the ability to segment audiences based on where a user happens to be in the sales funnel as well as his or her engagement with the free version of our app. This requires aggregating certain data points collected from the RudderStack application as well as our Salesforce instance. Our application streams live events, like logins and connections created, and we leverage the RudderStack Cloud Extract pipeline to ingest various objects from Salesforce.
For our initial example, we want to create specific campaigns around whether or not a user has engaged with the application — have they logged into the app and created anything (source, destination, transformation, or connection)? We also want to differentiate the messaging based on whether the lead is the first person from their organization (or email domain) to convert on our website.
There are also additional properties we can pull in from the lead record in Salesforce, such as whether the lead has been flagged as a Marketing Qualified Lead (MQL), the Industry of the organization for targeting certain verticals, and the user’s first and last name as that may not have been submitted to Customer.io as of yet.
Lastly, for this example we want to calculate a lead score which takes elements from their app engagement and Salesforce lead profile and combines them into a composite number that sales and marketing can use to inform their activities..
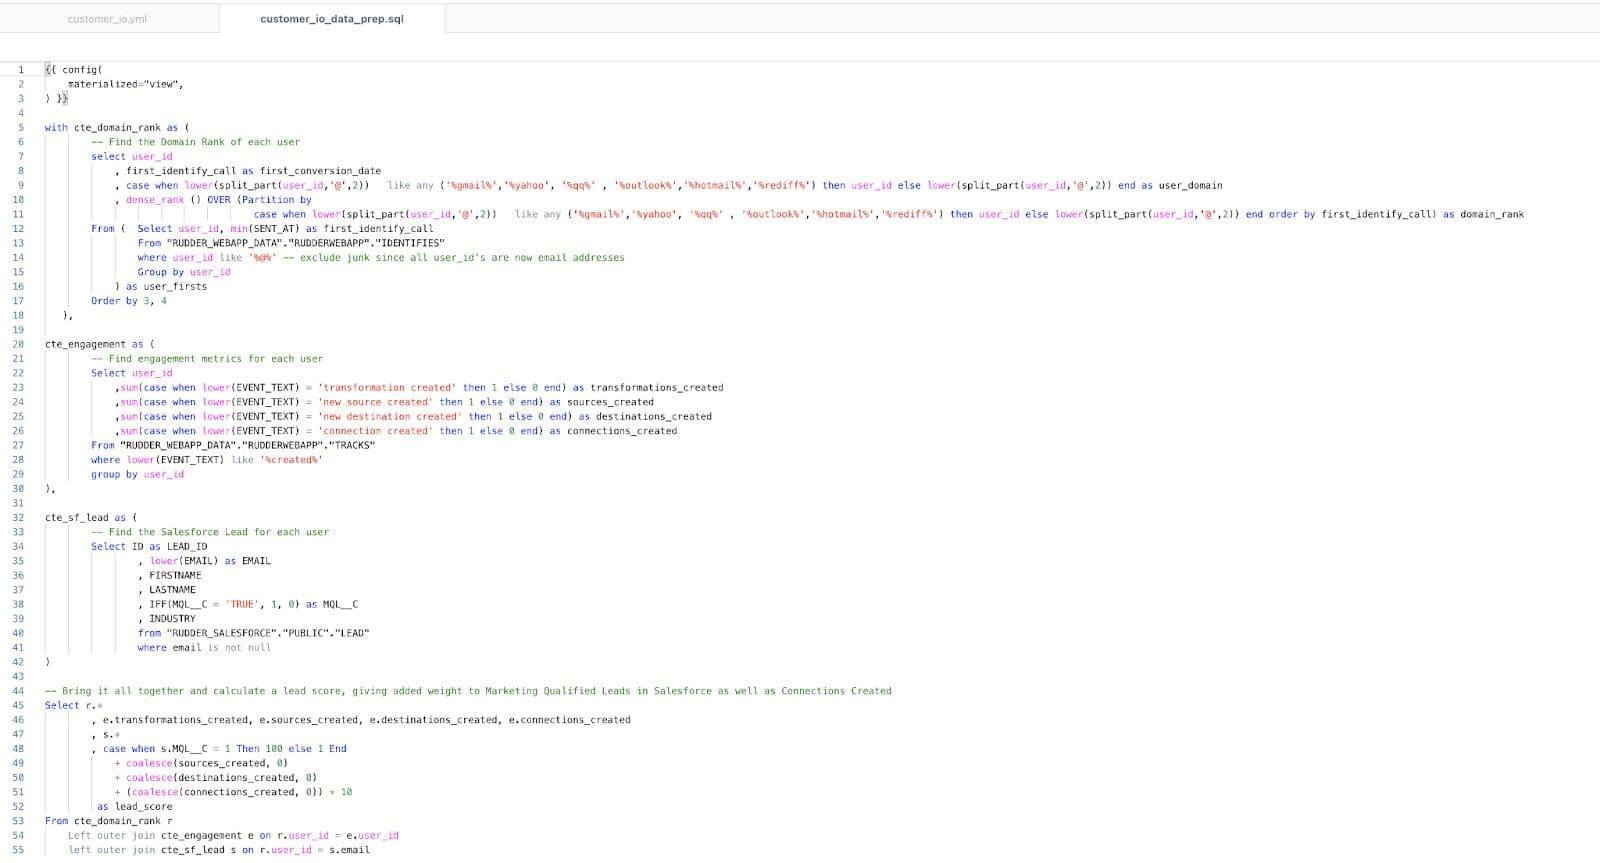
We added the following SQL to our customer_io_demo.sql model in dbt. Note, if you are using Postgres, you could do the same with a cron job or similar scheduling agent of your specific warehouse.
SQL
Now that we have the dbt model created and executed, we can see the output table and results in our Snowflake schema. As a reminder, the model name becomes the name of the table in dbt.
SQL
The next step is to create a RudderStack Reverse ETL to send this data to Customer.io
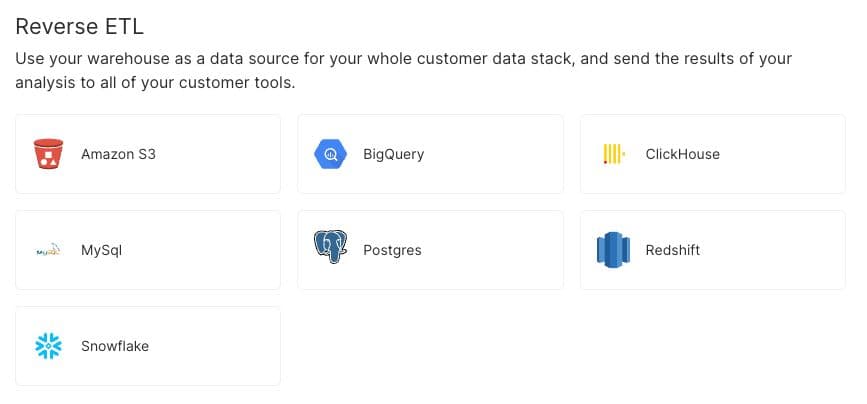
We will choose Snowflake. Because we have created a connection in the past, all we need to do is name our source and select the option to Use Existing Credentials.
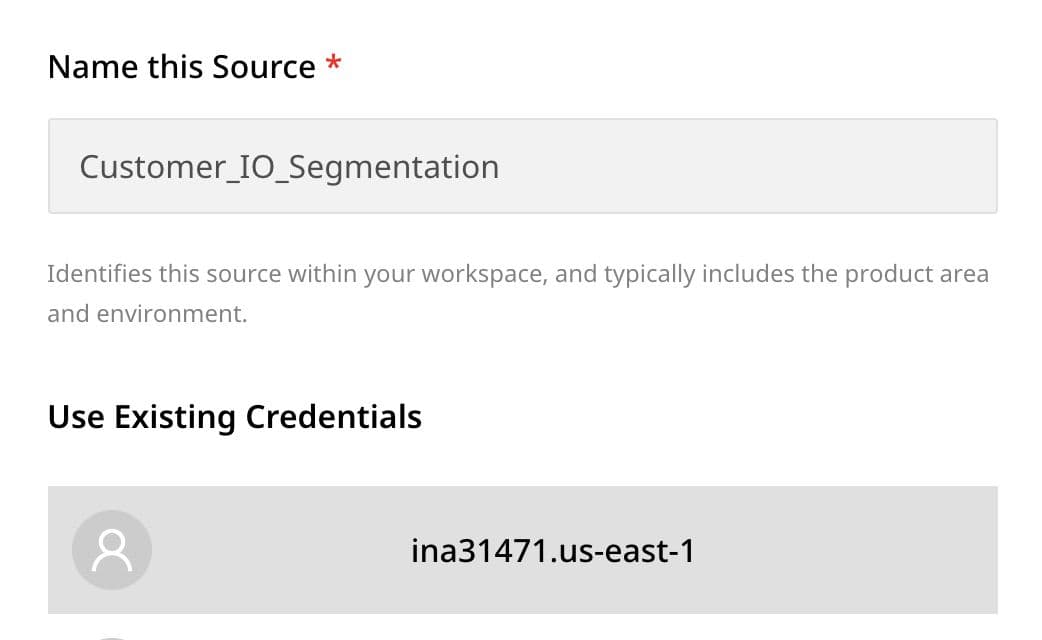
NOTE: Each data warehouse platform has its own requirements when it comes to the appropriate access credentials for creating a Reverse ETL. For more information on how to set up a connection to Snowflake, please see our documentation on RudderStack Reverse ETL Sources.
Click the NEXT button to set the Schedule for how often the warehouse action should execute.
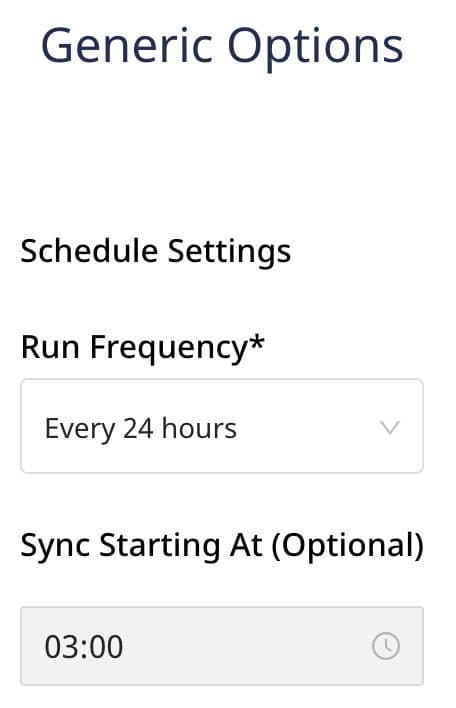
For our purposes, we want the Reverse ETL to run every 24 hours.
We are then prompted to select a destination. In our example, we chose an existing connection to Customer.io.
Next, we will select the dbt_USE_CASES schema that we defined in our dbt as well as the CUSTOMER_IO_DEMO table created by our dbt.
NOTE: It is important to set the schedule in dbt to fire before the sync of the Reverse ETL. Typically each will only need to be fired once every 24 hours, but if your source data and destinations require more frequent updating, scheduling in dbt and Reverse ETL can be set accordingly
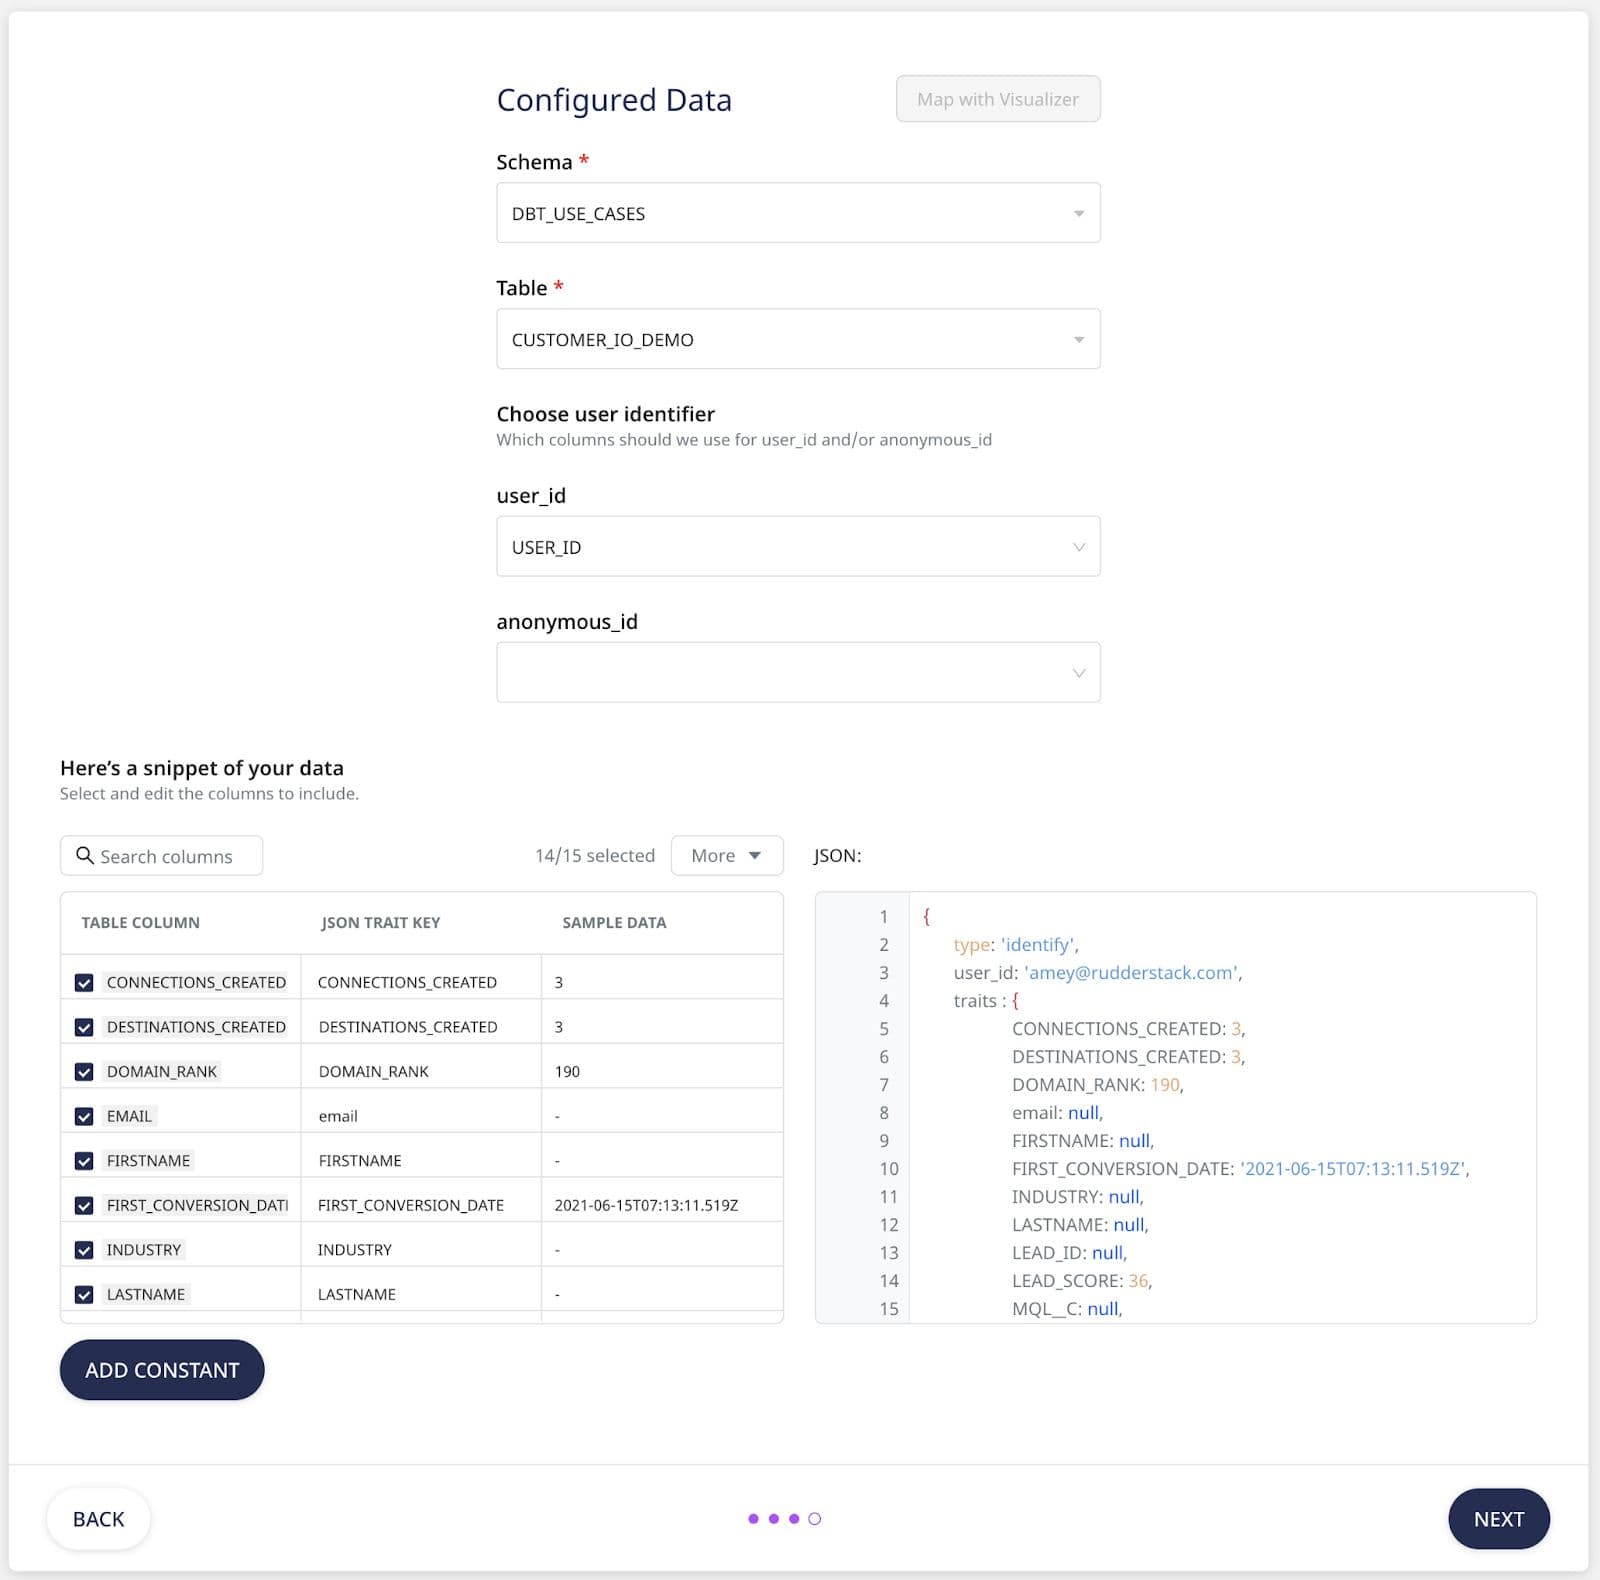
After we select our table, we see that our USER_ID field from Snowflake has already been mapped to the user_id field required in our Customer.io destination.
The additional fields from our table are included by default as keys in the JSON .identify payload.
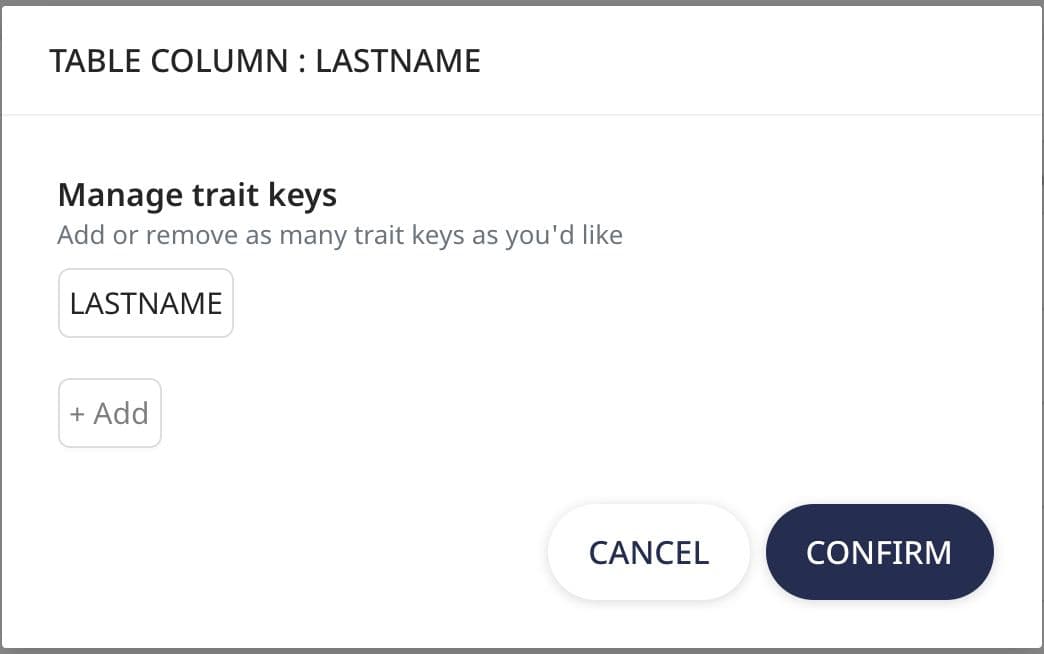
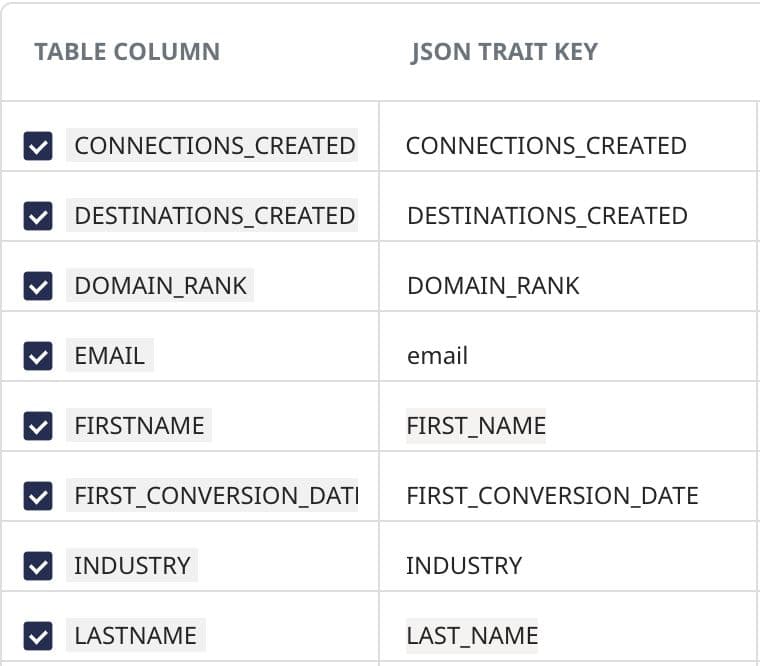
If we want to change the name of one of our traits, we can do so by clicking the value of the JSON TRAIT KEY and editing it. In our example, we will rename FIRSTNAME to FIRST_NAME and LASTNAME to LAST_NAME as that’s how they were previously defined in Customer.io.
If more customization to the payload is required, Reverse ETL also supports user transformations on the destination, but for our example, simply changing the Key names was sufficient. Now we have our Reverse ETL connected and scheduled to push updates to our Customer.io destination every 24 hours.
Level up – only send updated values
What if we have 1 million users, and we only want to create a Reverse ETL for users that have updates?
We can add a step to our dbt project that compares today’s value of each user’s computed traits to the last time it ran, and if there is a difference, insert that row into a new_updates table. We will revise our Reverse ETL to use the new Customer_IO_Updates table instead of the _DEMO table above.
To make this process a little cleaner within dbt, we are going to make a few tweaks to the model we created above, so the entire job flows like this:
0) Customer_io_demo table is created via dbt schedule
24 hours pass
- Call the same SQL query used previously to create the customer_io_demo table. It is now materialized as a view using the customer_io_data_prep.sql model
- Compare the results of the _data_prep view with the existing _demo table (step 0) using the MINUS function in Snowflake, so only new or different rows from our view are inserted using the custtomer_io_updates.sql model.
- Once the updates table has been created, refresh the _demo table by calling the _data_prep model
Here are the changes to the dbt model:
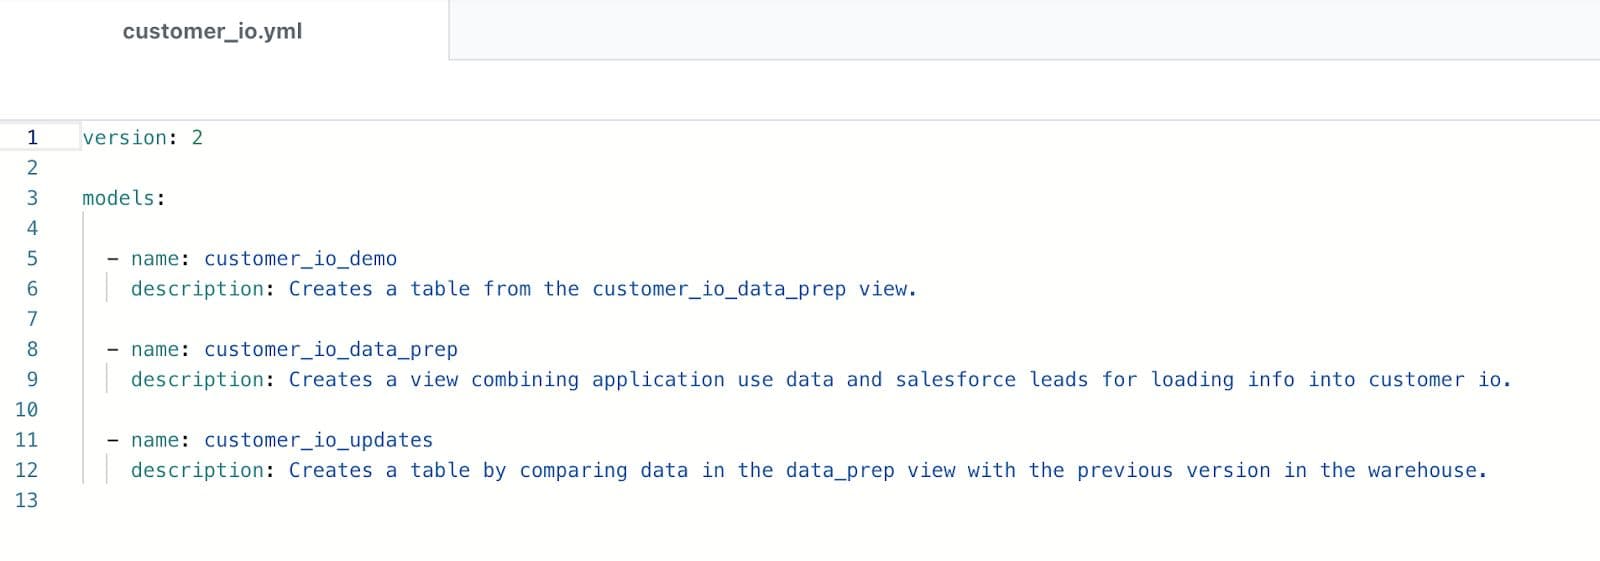
Revise the customer_io.yml file to recognize the new models
Create the new customer_io_data_prep.sql model and materialize it as a view. This SQL was previously in the customer_io_demo.sql model.
Create a new customer_io_updatets.sql model to compare the “current” values for each user to the previous value. We only want to include new and changed values in our Reverese ETL, so we use the MINUS function.
Note: There are multiple ways to solve for this same set of data depending on your needs. One option is to insert all new deltas into the same _demo table and apply a timestamp. The reason we create a distinct table is because the current version of Reverse ETL only supports selecting tables from a source table. If we could use a view, we could apply a dense rank or other filtering on the _demo table to only give us the updated records we want to forward on. With this in mind, we have some exciting updates coming to Warehouse Actions. Subscribe to our product updates newsletter below to be the first to know more.

The customer_io_demo model can be updated to reference the view we created earlier.

The last step is to update the RudderStack Reverse ETL to point to the new _updates table. Since the underlying schema is the same, the rest of the configuration can stay the same.
Advanced dbt & Reverse ETL – programmatic field mapping
The examples we just walked through assumed you would always have the same number of columns in your underlying source table. For some organizations, this won’t always be the case. For example, if your sales team has added an additional field to the Salesforce Account, and they want that value propagated to all of the other tools in your org, it would involve a nontrivial amount of analytics engineering time to make sure the property is propagated throughout all of the tools. In addition, each new field added would force a complete pass given the logic in our dbt model above. Lastly, it would require remapping all of the individual Reverse ETL like the one we set up.
One creative way to get around this is to modify the SQL in our dbt model to combine all of the user traits into a single column of matching pairs. Depending on your warehouse, there are varying ways to do this (Postgres even has a build JSON array function), but to simplify things (because life and this solution are already complicated enough), let’s take the table below.
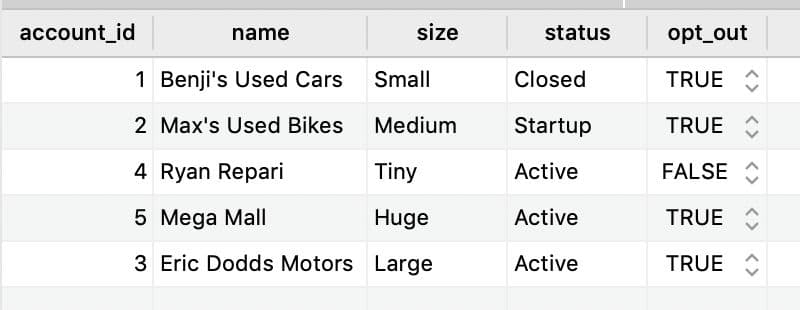
In our first two passes, the Reverese ETL applied to this table would ingest the user_id and 5 additional columns (user traits).

If we combine all of our traits into matched pairs, then the data warehouse source will not have to be altered, no matter how many values we have in our pairs column.
OK, so now what?
The Reverse ETL will ingest each row as an event. All we need to do is whip up a user transformation to unpack it, and voila, all of our user traits are now available.
But wait, there’s more!
In our previous example we modified the dbt model to compare today’s version of each user’s traits to yesterday’s, and if it was different or a new user, to include that row. Thanks to our friend Max from Obsessive Analytics, we can now perform the comparison logic in the transformation itself.
So, now we just include the old value of a user’s traits with their new value and have the transformation unpack them and call a second method to compare the two. If they are the same, there are no changes to the user and we ignore the event. A major advantage of performing this step within the transformation is that if there is a new property present in the new value string, but it’s empty, we can tweak our logic to not treat this as an actual update. The same goes when a property is deprecated and missing from the new payload. In other words, we can finely tune the logic in the transformation for when we want to send updates downstream.

Once we have the matched pairs we want to pass in our Reverse ETL, we can use a transformation to parse the matched pair into the appropriate user traits or event properties depending on the downstream destination.
JAVASCRIPT
JAVASCRIPT
Make Updating Downstream Destinations Easier
So, there you have it. Now you can get started replacing your Segment computed & SQL traits with dbt skills & RudderStack Reverse ETL. Soon you’ll be updating all of your downstream destinations in your sleep. If you’d like to try RudderStack today, sign up free, and let us know if we can help.
Published:
June 9, 2022
More blog posts
Explore all blog posts
Understanding event data: A guide to behavioral data collection
Danika Rockett
by Danika Rockett

How AI data integration transforms your data stack
Brooks Patterson
by Brooks Patterson

Behavioral segmentation: Examples, benefits, and tools
Brooks Patterson
by Brooks Patterson


Start delivering business value faster
Implement RudderStack and start driving measurable business results in less than 90 days.