

Don't go through the pain of direct integration.
RudderStack’s JavaScript SDK makes it easy to send data from your JavaScript website to Google Analytics and all of your other cloud tools.
For more details, see our JavaScript SDK to Google Analytics integration.
Pre-requisites
Before getting started, your Angular app will need to be installed and set up. If it’s not done yet, visit the official Angular installation doc for more information.
Step 1: Integrating your Angular app with the RudderStack JavaScript SDK
Creating a source in RudderStack
First, you need to set up a JavaScript source in your RudderStack dashboard that will track events from your Angular app. Follow these steps to set up the source:
1. Log into your RudderStack dashboard. If you’re new to RudderStack, sign up here.
2. Write down the Data Plane URL. You will need this later.

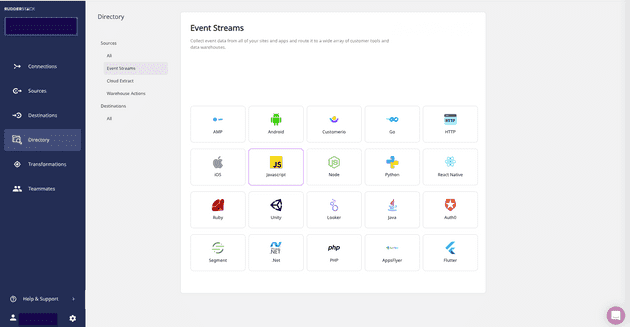
3. Create a Source by clicking on the Add Source option. You can also click on the Directory option in the left nav bar and select Event Streams under Sources. Next, select JavaScript.
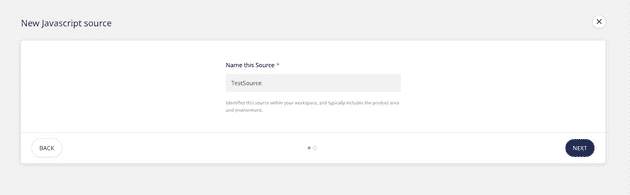
4. Add a relevant name for the JavaScript Source and click on Next.
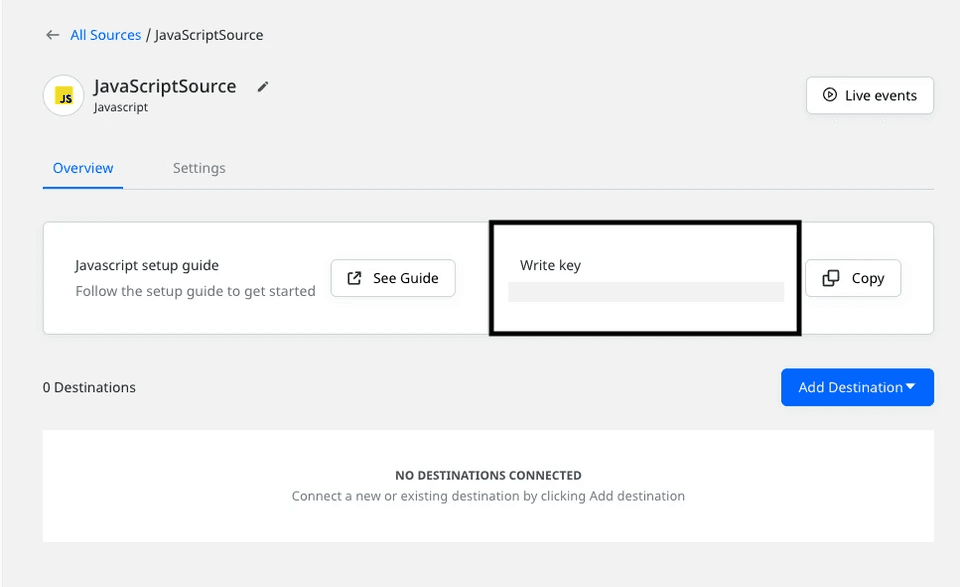
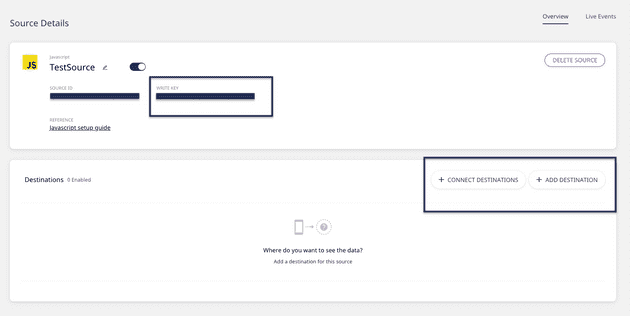
5. Your JavaScript source is now configured and ready to track events. Write down the Write Key associated with this source. You will need this later.
Integrating your Angular App with RudderStack
Integrate RudderStack JavaScript code with your Angular app and set up the tracking code following steps given below:
- Navigate to the
srcfolder in your Angular project directory.
Now open yourindex.htmlfile in an editor and insert the following lines of code within the<head></head>tag:
JAVASCRIPT
Important: You can refer to our sample Angular app present in our RudderStack Angular app repository for more information on modifying these files.
Step 2: Creating a destination in RudderStack for routing your Angular app events
In this section, we will route our Angular app events to Google Analytics.
To add Google Analytics as a destination in RudderStack, follow the steps given below:
1. In your RudderStack dashboard’s left navigation bar, click on Destinations and then select Add Destination as shown:
Note: You can use the Connect Destinations option if you have already configured a destination in RudderStack and want to send your event data to that platform.
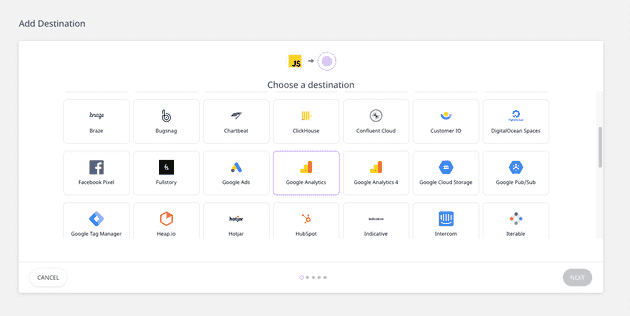
2. Next, choose Google Analytics as your destination.
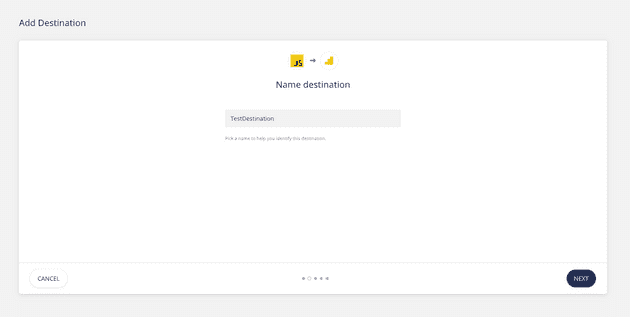
3. Add a name to your destination and click on Next, as shown:
4. Now, connect the JavaScript source that we previously configured in Step 1.

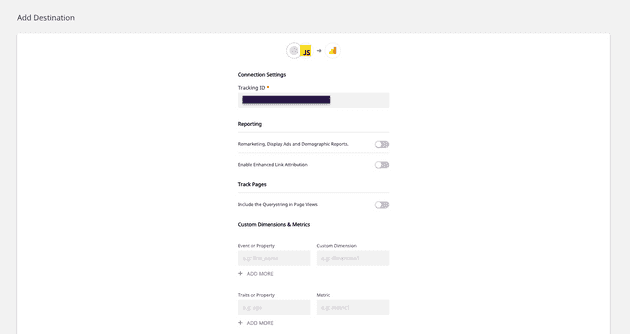
5. On the Connection Settings page, configure your Google Analytics destination with your Google Analytics Tracking ID and other optional settings, as shown below. Then, click Next.
6. You can also transform your events before sending them to Google Analytics. For more information on this feature, check out our documentation on User Transformations.
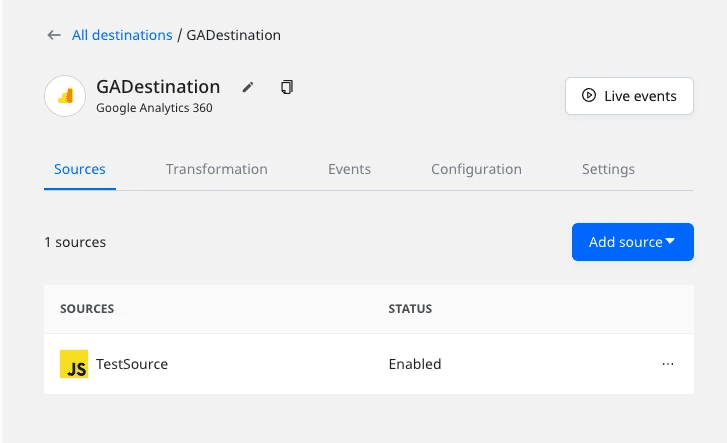
7. Well done! Your Google Analytics is now configured as a destination. You should see the following source-destination connection in your dashboard:
Step 3: Deploying your Angular app and verifying the event stream
To verify if your event stream works correctly, deploy your Angular app and test if the events are tracked by the JavaScript source and delivered to your Google Analytics destination.
You can do this by following these steps:
1. In your Terminal or cmd, navigate to the root folder containing your Angular app.
2. To deploy the app, execute ng serve --open command, as shown:
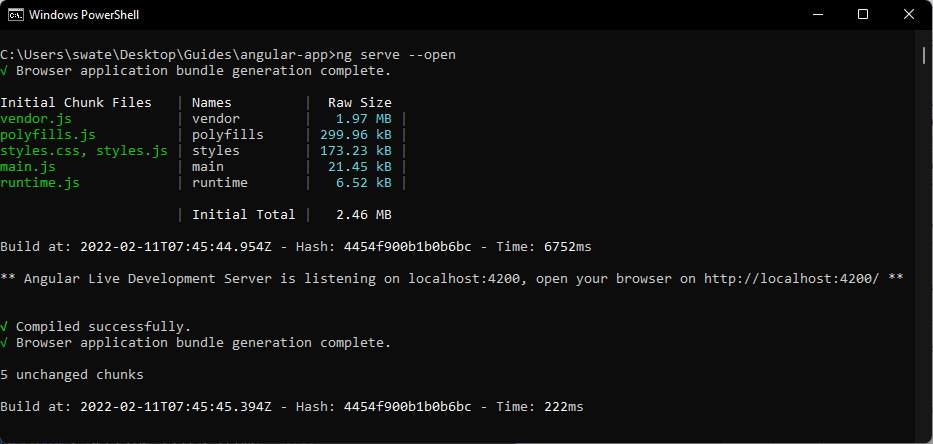
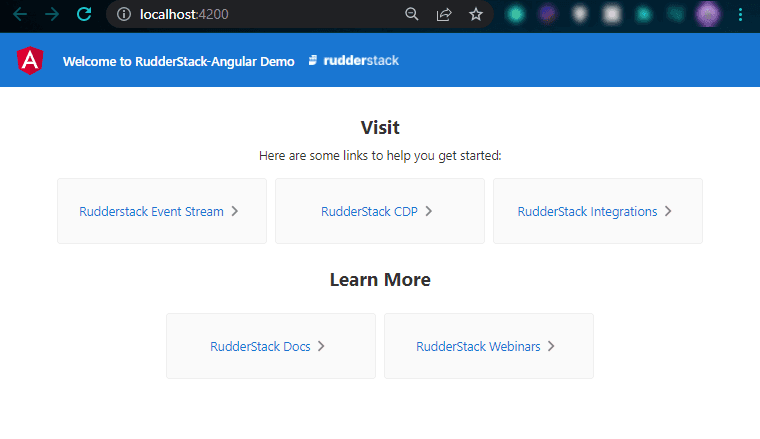
3. Open your Angular app by visiting the server address mentioned in the cmd or http://localhost:4200 on your browser.
4. Next, verify whether rudder-analytics.js (RudderStack’s JavaScript SDK) has loaded correctly or not. To do this, open your browser’s Developer tools and navigate to the Network tab. The following screenshot highlights this option for Google Chrome:

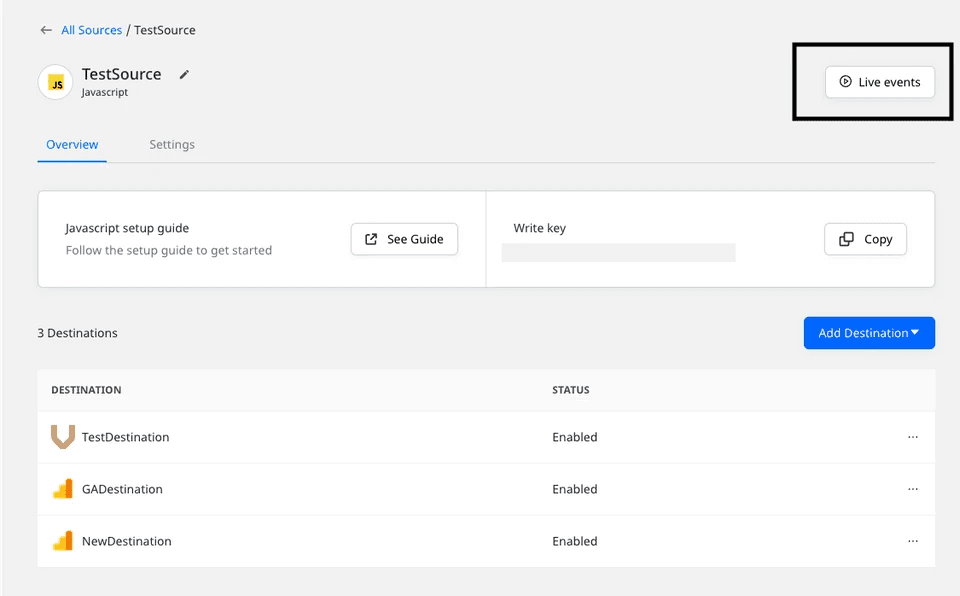
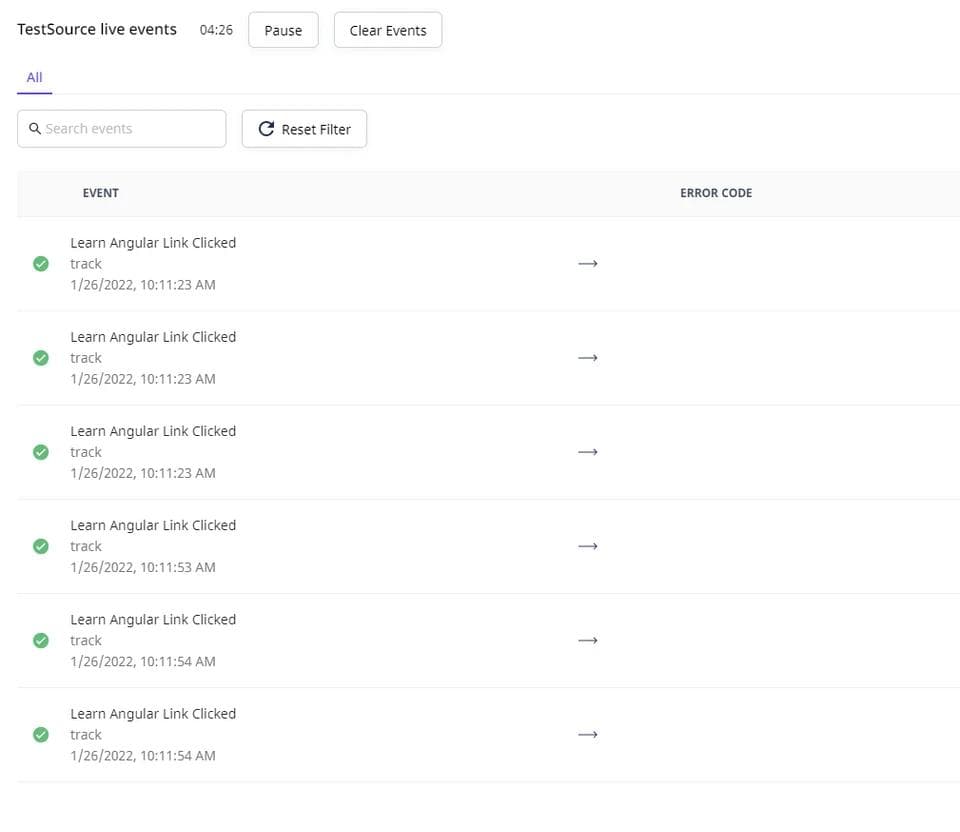
5. Check if RudderStack can track the different page views and clicks by clicking on the Live Events tab of your JavaScript source on the RudderStack dashboard page:
Note: After deploying your app, there can be a slight lag before events start sending and are visible in your dashboard and destination.
6. Great! RudderStack has successfully tracked and captured the event:
7. Finally, check if the events are delivered to your Google Analytics destination. Go to your Google Analytics dashboard and navigate to the Realtime > Events option.
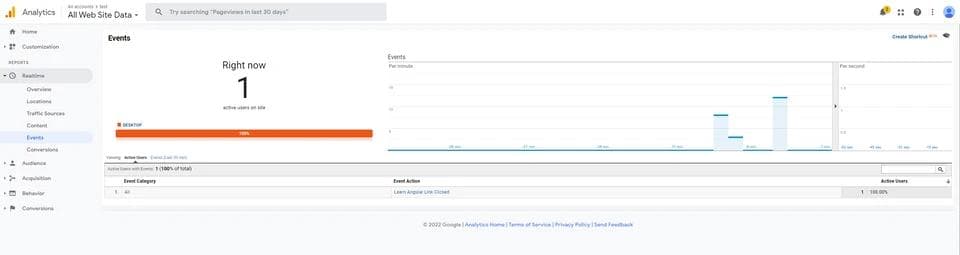
As you can see, there is one active user on the Angular app, and the track event is visible as well. This means the event was tracked and delivered successfully.
Questions?
In this guide, we covered how to instrument your Angular app with the RudderStack JavaScript SDK to send event data to your preferred destinations in real-time, using Google Analytics as an example. If you have any questions about this integration or would like to learn more about RudderStack, please contact us or start a conversation in our Slack community.
Sign Up For Free And Start Sending Data
Test out our event stream, ELT, and reverse-ETL pipelines. Use our HTTP source to send data in less than 5 minutes, or install one of our 12 SDKs in your website or app.
Don't want to go through the pain of direct integration? RudderStack's JavaScript SDK makes it easy to send data from your JavaScript website to Google Analytics.