# How to Create an Audience in RudderStack


<blockquote class="announcement">
  <div class="tip-quote">
    
    <div class="tip-text"><p><strong>This Audiences feature leverages the Reverse ETL workflow.</strong></p>
<p>To build targeted, no-code audience segments from warehouse data and activate them downstream, use <a href="https://www.rudderstack.com/docs/activate/lookout/" >Rudder Lookout</a> instead.</p>
</div>
  </div>
</blockquote>

<p>RudderStack provides a visual <strong>Audience builder tool</strong> which you can use to build audiences without any prior knowledge of SQL or how to store the data.</p>
<ol>
<li>Log in to your <a href="https://app.rudderstack.com" >RudderStack dashboard</a>.</li>
<li>From the left navigation bar, go to <strong>Activate</strong> &gt; <strong>Audiences</strong> and click <strong>New audience</strong>.</li>
<li>Configure the settings explained in the following sections:</li>
</ol>
<!-- end-chunk -->
<!-- begin-chunk -->
<h2 id="select-source">Select source</h2><p>Select the warehouse source for which you want to create an audience. RudderStack supports the Audiences feature for the following sources:</p>
<ul>
<li><a href="https://www.rudderstack.com/docs/sources/reverse-etl/google-bigquery/" >BigQuery</a></li>
<li><a href="https://www.rudderstack.com/docs/sources/reverse-etl/databricks/" >Databricks</a></li>
<li><a href="https://www.rudderstack.com/docs/sources/reverse-etl/amazon-redshift/" >Redshift</a></li>
<li><a href="https://www.rudderstack.com/docs/sources/reverse-etl/snowflake/" >Snowflake</a></li>
<li><a href="https://www.rudderstack.com/docs/sources/reverse-etl/trino/" >Trino</a></li>
</ul>
<!-- end-chunk -->
<!-- begin-chunk -->
<h2 id="specify-warehouse-credentials">Specify warehouse credentials</h2><p>Specify the warehouse credentials to authenticate RudderStack. See the <strong>Configure warehouse credentials</strong> section of the <a href="https://www.rudderstack.com/docs/sources/reverse-etl/#supported-reverse-etl-sources" >source-specific documentation</a> (for example, <a href="https://www.rudderstack.com/docs/sources/reverse-etl/amazon-redshift/#configuring-the-connection-credentials" >Redshift</a>) for more details.</p>
<!-- end-chunk -->
<!-- begin-chunk -->
<h2 id="specify-audience-name-and-source">Specify audience name and source</h2><ul>
<li>
<p><strong>Source name</strong>: Assign a name to uniquely identify the source in the RudderStack dashboard.</p>
</li>
<li>
<p>Configure your audience source by specifying the below fields:</p>
<ul>
<li><strong>Schema</strong>: Select the warehouse schema from the dropdown.</li>
<li><strong>Table</strong>: Choose the required table from which RudderStack syncs the data.</li>
<li><strong>Primary key</strong>: Select the column from the above table that uniquely identify your records in the warehouse.</li>
</ul>
</li>
</ul>
<!-- end-chunk -->
<!-- begin-chunk -->
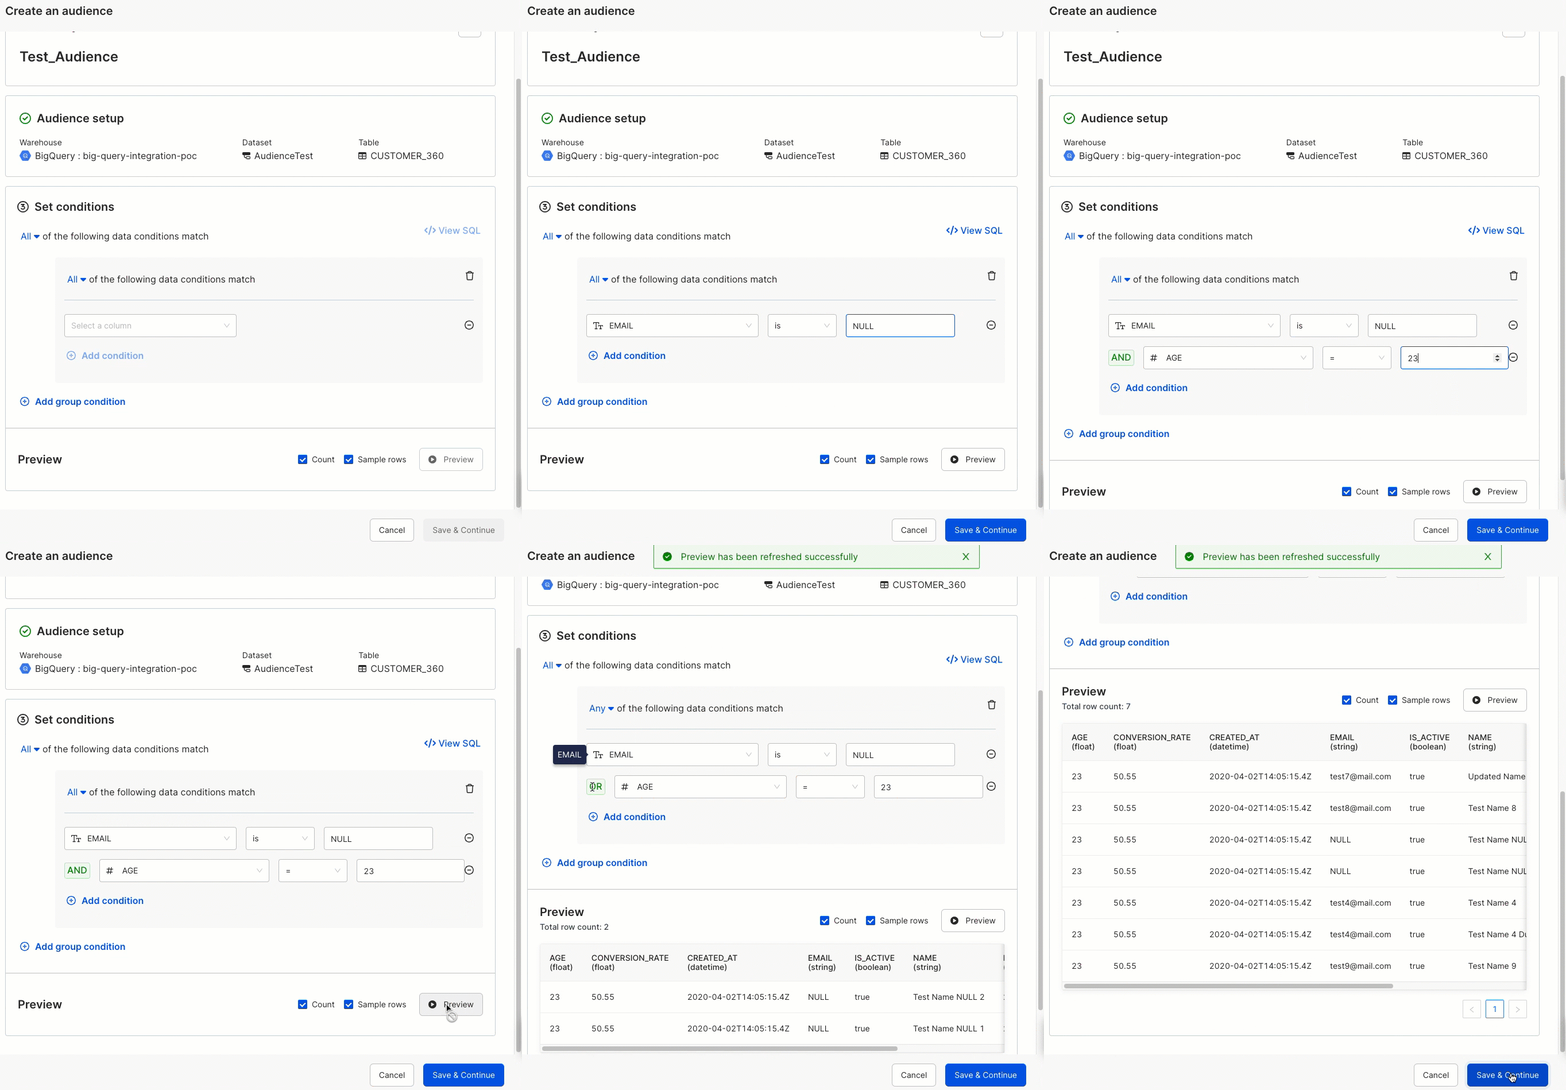
<h2 id="set-audience-conditions">Set audience conditions</h2><p>You can set the required filtering conditions, view the corresponding SQL query and preview the resultant data from your data filters:</p>

<figure class="image--main "  >
    <a 
         href="/docs/images/warehouse-actions-sources/set-condition-audience.gif"
        
        >
        <img src="/docs/images/warehouse-actions-sources/set-condition-audience.gif" 
         alt="Set conditions in audience"  
         
         
        decoding="async" loading="lazy" class="img-shortcode"/>
    </a>
    
</figure>

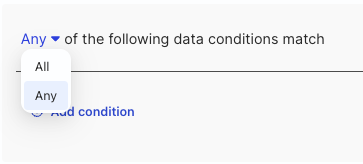
<p>You can add multiple filters within a condition by clicking <strong>Add condition</strong> or add multiple group filters by clicking <strong>Add group condition</strong>. Select <strong>All</strong> or <strong>Any</strong> to implement the AND or OR operator respectively between different filtering conditions.</p>

<figure class="image--main "  >
    <a 
         href="/docs/images/warehouse-actions-sources/and-or-condition-audience.webp"
        
        >
        <img src="/docs/images/warehouse-actions-sources/and-or-condition-audience.webp" 
         alt="AND/OR conditions in audience"  
         
         
        decoding="async" loading="lazy" class="img-shortcode"/>
    </a>
    
</figure>

<p>Click <strong>Preview</strong> to see the results and verify if the audience conditions are correct. Click <strong>Continue</strong> to proceed.</p>
<!-- end-chunk -->
<!-- begin-chunk -->
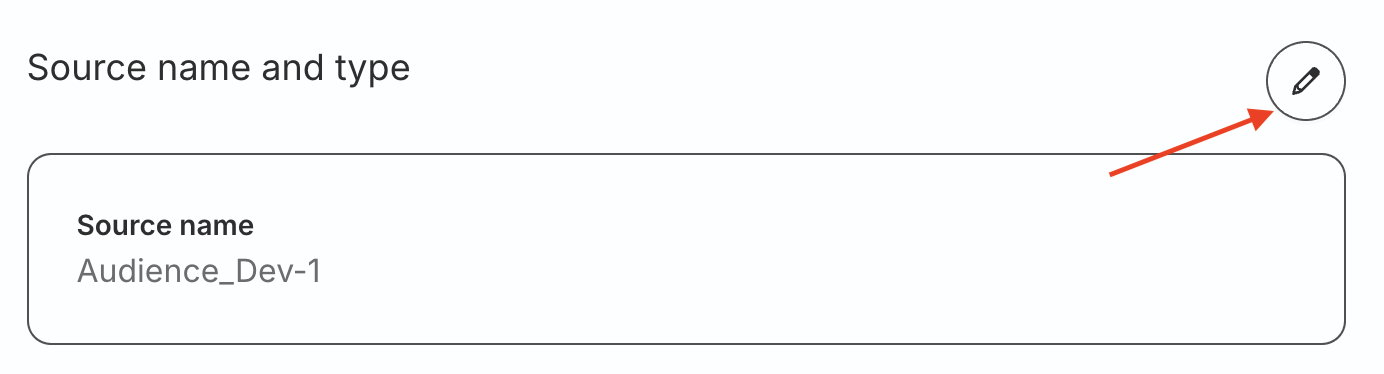
<h2 id="review-and-complete-setup">Review and complete setup</h2><p>To make any changes to the warehouse credentials or audience configuration, click the edit icon present next to those sections.</p>

<figure class="image--main "  >
    <a 
         href="/docs/images/data-pipelines/edit-audience-configuration.webp"
        
        >
        <img src="/docs/images/data-pipelines/edit-audience-configuration.webp" 
         alt="Edit audience configuration"  
         
         
        decoding="async" loading="lazy" class="img-shortcode"/>
    </a>
    
</figure>

<p>Once you have reviewed your configuration, click <strong>Create source</strong> to complete the setup.</p>
<p>To change the source configuration, description, or filter conditions later, see <a href="https://www.rudderstack.com/docs/activate/audiences/update-audience/" >How to Update an Audience</a>.</p>
<!-- end-chunk -->
<!-- begin-chunk -->
<h2 id="connect-audience-to-destination">Connect audience to destination</h2>

<p>To start using the newly-created source, you can connect it to:</p>
<ul>
<li>A new <a href="https://www.rudderstack.com/docs/destinations/overview/" >destination</a>, or</li>
<li>An existing destination that is <strong>not already connected</strong> to any other source.</li>
</ul>
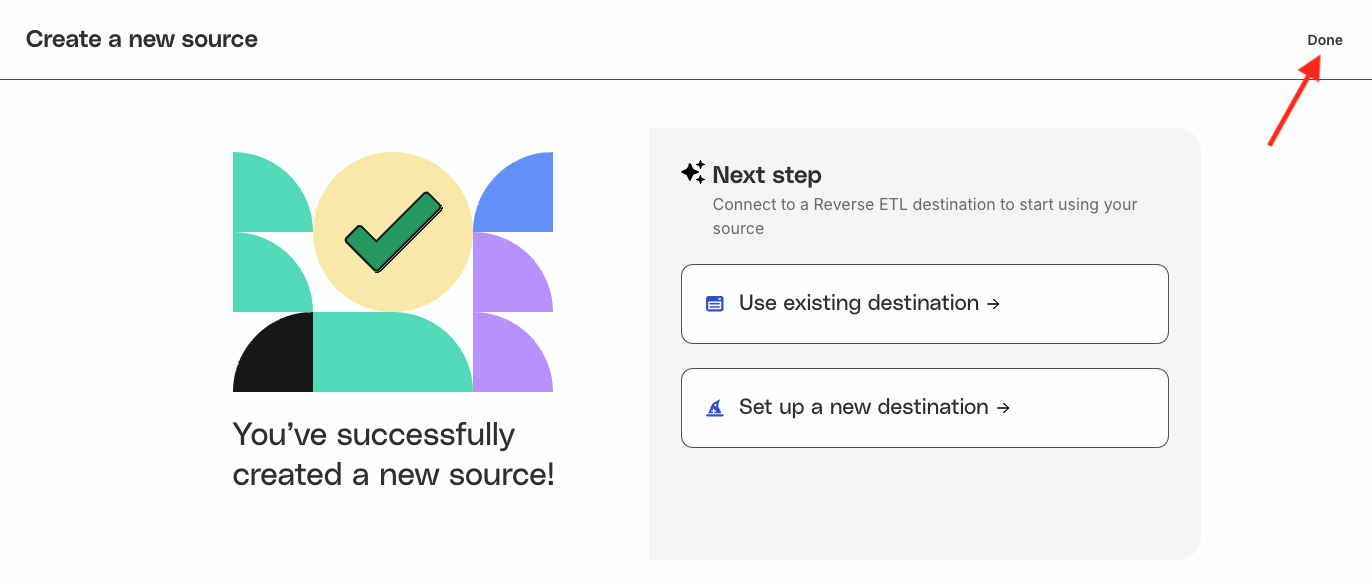
<p>To connect to a destination later, click <strong>Done</strong> on the top right:</p>

<figure class="image--main "  >
    <a 
         href="/docs/images/retl-sources/created-source.webp"
        
        >
        <img src="/docs/images/retl-sources/created-source.webp" 
         alt="Next steps"  
         
         
        decoding="async" loading="lazy" class="img-shortcode"/>
    </a>
    
</figure>

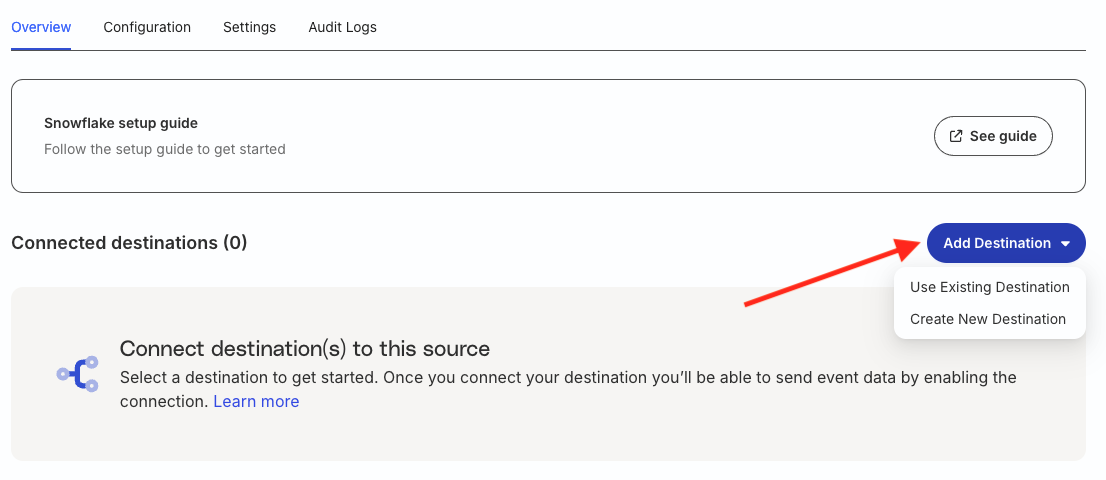
<p>You will then be redirected to the <strong>Overview</strong> page of the source where you will see the option of connecting it to a new or existing destination.</p>

<figure class="image--main "  >
    <a 
         href="/docs/images/retl-sources/add-destination.webp"
        
        >
        <img src="/docs/images/retl-sources/add-destination.webp" 
         alt="Add destination"  
         
         
        decoding="async" loading="lazy" class="img-shortcode"/>
    </a>
    
</figure>

<p>See <a href="https://www.rudderstack.com/docs/data-pipelines/reverse-etl/developer-guides/retl-connection-setup/" >Set up Reverse ETL Connection</a> section for more information.</p>

<p>See <a href="https://www.rudderstack.com/docs/activate/audiences/supported-destinations/" >Supported Destinations</a> for the destinations you can connect to an audience.</p>
<p>When you set up data mappings, destinations that don&rsquo;t support audiences by default (for example, Salesforce, Customer.io, or HubSpot) require an <a href="https://www.rudderstack.com/docs/activate/audiences/audience-identifier/" >Audience Identifier</a>. Facebook Custom Audience and Google Ads Remarketing Lists have audience support by default, so they don&rsquo;t show this setting.</p>
<!-- end-chunk -->
<!-- begin-chunk -->
<h2 id="faq">FAQ</h2><!-- end-chunk -->
<!-- begin-chunk -->
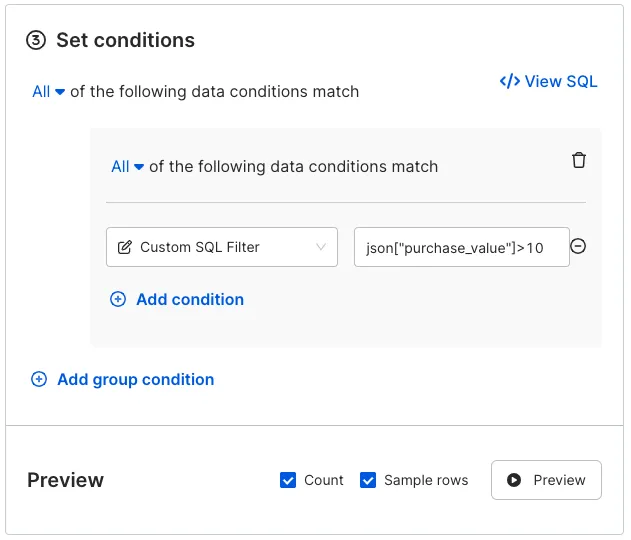
<h4 id="can-i-create-a-filter-on-the-json-columns-in-my-warehouse-table">Can I create a filter on the JSON columns in my warehouse table?</h4><p>Yes, you can. Select the <strong>Custom SQL filter</strong> option from the dropdown and enter the corresponding SQL query, which includes the relevant filtering condition for the JSON column:</p>

<figure class="image--main "  >
    <a 
         href="/docs/images/warehouse-actions-sources/custom-sql-filter.webp"
        
        >
        <img src="/docs/images/warehouse-actions-sources/custom-sql-filter.webp" 
         alt="Connect audience"  
         
         
        decoding="async" loading="lazy" class="img-shortcode"/>
    </a>
    
</figure>

<!-- end-chunk -->
<!-- begin-chunk -->
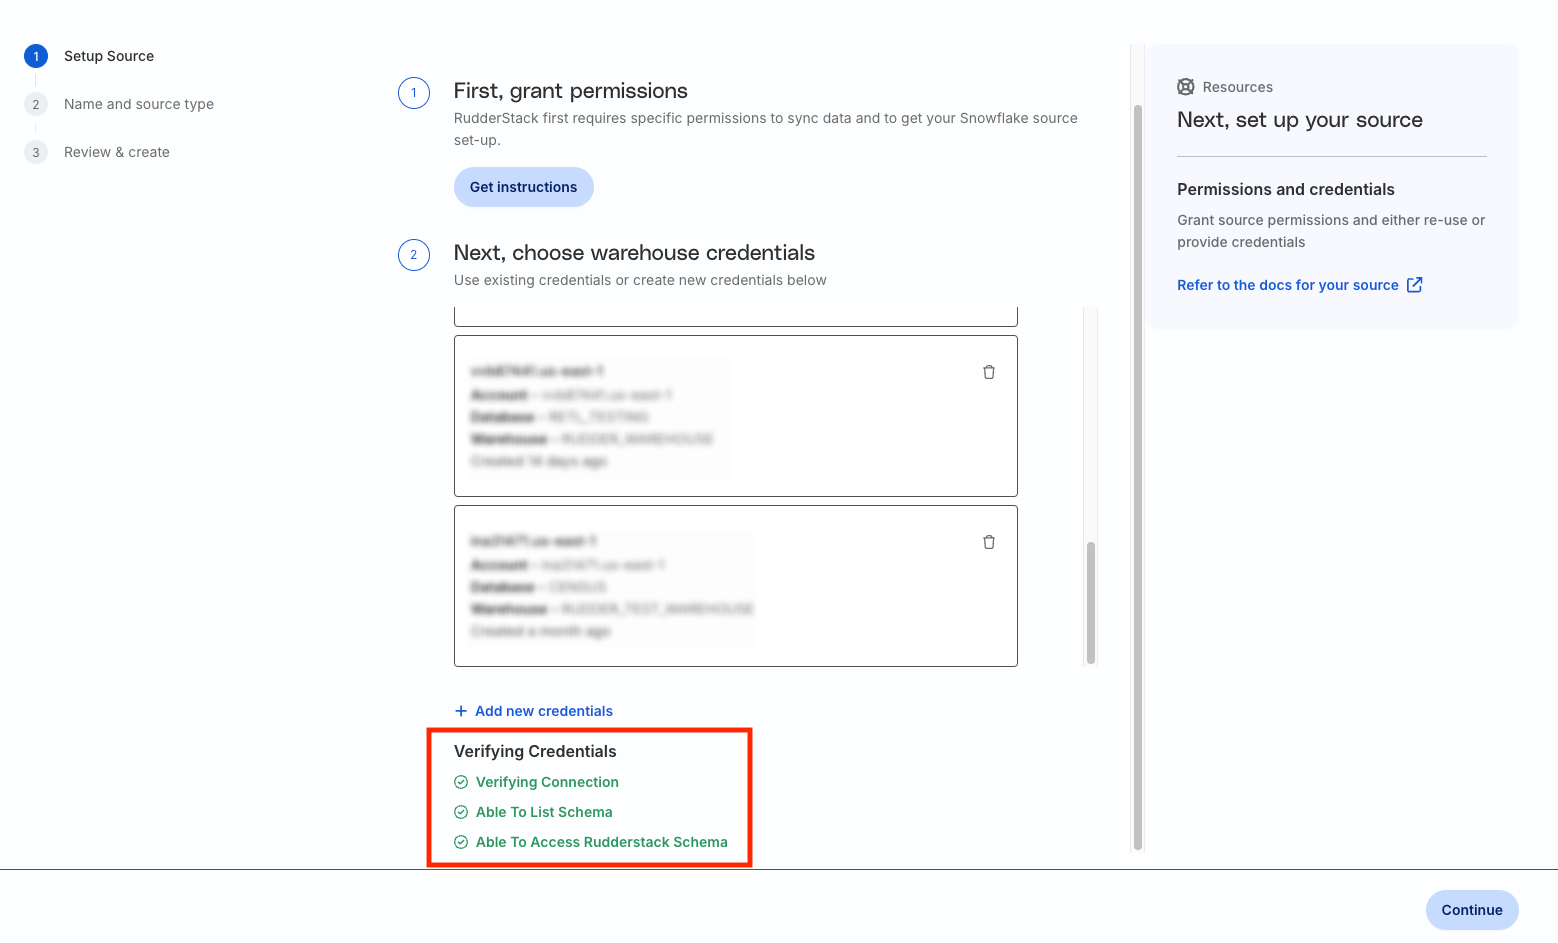
<h4 id="what-do-the-three-validations-under-verifying-credentials-imply">What do the three validations under Verifying Credentials imply?</h4><p>Once you proceed after entering the connection credentials, you will see the following validations under the <strong>Verifying Credentials</strong> option:</p>

<figure class="image--main "  >
    <a 
         href="/docs/images/retl-sources/retl-credentials-validate.webp"
        
        >
        <img src="/docs/images/retl-sources/retl-credentials-validate.webp" 
         alt="Validating credentials"  
         
         
        decoding="async" loading="lazy" class="img-shortcode"/>
    </a>
    
</figure>

<p>These options are explained below:</p>
<ul>
<li><strong>Verifying Connection</strong>: Indicates that RudderStack is trying to connect to the warehouse with the information specified in the connection credentials.</li>
</ul>

<blockquote class="warning">
  <div class="tip-quote">
    
    <div class="tip-text">If this option gives an error, it means that one or more fields specified in the connection credentials are incorrect. Verify your credentials in this case.</div>
  </div>
</blockquote>
<ul>
<li>
<p><strong>Able to List Schema</strong>: Checks if RudderStack is able to fetch all schema details using the provided credentials.</p>
</li>
<li>
<p><strong>Able to Access RudderStack Schema</strong>: Checks if RudderStack has the required access to the <code>_RUDDERSTACK</code> / <code>_rudderstack</code> schema (depending on your warehouse). To create the schema, run all commands listed in the <strong>Permissions</strong> section of the respective Reverse ETL source documentation:</p>
<ul>
<li><a href="https://www.rudderstack.com/docs/sources/reverse-etl/google-bigquery/#granting-permissions" >BigQuery</a></li>
<li><a href="https://www.rudderstack.com/docs/sources/reverse-etl/databricks/#granting-permissions" >Databricks</a></li>
<li><a href="https://www.rudderstack.com/docs/sources/reverse-etl/amazon-redshift/#granting-permissions" >Redshift</a></li>
<li><a href="https://www.rudderstack.com/docs/sources/reverse-etl/snowflake/#granting-permissions" >Snowflake</a></li>
<li><a href="https://www.rudderstack.com/docs/sources/reverse-etl/trino/#granting-permissions" >Trino</a></li>
</ul>
</li>
</ul>

<blockquote class="warning">
  <div class="tip-quote">
    
    <div class="tip-text">If this option gives an error, verify if you have successfully created the <code>_RUDDERSTACK</code> / <code>_rudderstack</code> schema and given RudderStack the required permissions to access it.</div>
  </div>
</blockquote>