Before you start the migration process, make sure to go through the limitations and post-migration considerations explained in this section.
Limitations
This section covers the limitations of the Snowflake Streaming destination integration.
Merge mode support
The Snowflake Streaming destination does not support merge mode. The Snowpipe Streaming API only supports inserts and writes rows directly into tables to reduce latency.
The Snowflake Streaming destination does not support the users table.
RudderStack maintains the users table by merging user traits. Since the Snowpipe Streaming API only supports inserts (no merge operations), the users table cannot be maintained.
For Identity Stitching, see RudderStack’s Profiles product where you can create a more comprehensive identity graph around users.
JSON column support
If you have enabled the JSON Column Support feature at the event level, then you will need to change your warehouse integration configuration from SNOWFLAKE to ALL.
As a best practice, RudderStack recommends running deduplication queries on the target tables after you migrate to Snowflake Streaming. Therefore, the compute cost of migrating will be affected by:
The number of target tables
The total duration of time it took to migrate
Total record count across your deduplication queries
Assisted migration
The assisted migration feature is only supported for Snowflake batch destinations that have key-pair authentication enabled.
If you’re currently using RudderStack’s traditional Snowflake batch destination and want to upgrade to real-time streaming, the new assisted migration feature makes the transition seamless and safe with step-by-step guidance.
How assisted migration works
With the assisted migration feature, you maintain control throughout the migration process with the ability to rollback changes with no data loss if there are any validation or event delivery errors in the newly created Snowflake Streaming destination(s).
The assisted migration process guides you through each step to ensure a smooth transition:
Initiate migration: You will see a banner at the top of your existing batch destination. Within the banner, click Proceed and the process will be initiated.
Automatic destination setup: RudderStack creates and configures your new Snowflake Streaming destination(s) using your existing batch destination credentials and configuration, preserving your schema and table mappings.
Verify streaming: The wizard will prompt you to review and validate that your new Snowflake Streaming destination is receiving data correctly
Trigger final sync: The wizard will then trigger a final sync from the Snowflake batch destination. You can open a new tab to verify that the final sync succeeds with no errors.
Complete migration: Run deduplication queries on demand when you’re ready to finalize the process. RudderStack will expose the start and end timestamps of the migration process within the wizard so that you can use them for the deduplication queries.
Deduplication queries are necessary to run only on the duration of time it took to start and complete the migration. RudderStack provides the timestamps to use for the deduplication queries if you used the assisted migration feature.
After the migration is complete, you can safely delete your old Snowflake batch destination if desired.
Get started
To upgrade, visit your existing Snowflake destination in the RudderStack dashboard and look for the Migrate to Snowflake Streaming banner to begin the assisted migration process.
For manual migration instructions, see the rest of the sections below.
Manual migration
The following sections cover the details of manually migrating from your Snowflake batch destination to a new Snowflake Streaming destination.
Case 1: Namespace configured in Snowflake destination
If you defined the Namespace setting while creating your Snowflake destination, you will need to migrate it to use Snowflake Streaming.
RudderStack provides the following two options for this migration process:
1: Ingest data to same schema and disable Snowflake destination
RudderStack recommends using the same schema for the Snowflake Streaming destination as Snowflake allows concurrent writes on tables — this way, your downstream reporting and modeling will be unaffected.
In this option, you will need to:
Set up and pre-validate a new connection using Snowflake Streaming.
Migrate all sources connected to the Snowflake batch destination to the new Snowflake Streaming destination.
For the duration of migration, both the Snowflake batch destination and Snowflake Streaming destination will ingest data to same tables.
Turn off the Snowflake batch destination.
Clean up the duplicate entries.
Pre-validation
The pre-validation steps ensure that switching sources from Snowflake batch to Snowflake Streaming does not cause any issues. It is similar to setting up a demo Snowflake Streaming destination and validating the syncs, table schema, and data type.
Follow these steps for pre-validation:
Set up a Snowflake Streaming destination with a new temporary schema (configured using the Namespace setting). For example, if your Snowflake batch destination namespace is MY_PROD_DATA, you can choose MY_PROD_DATA_TEST_STREAMING as the new schema name.
Note that:
A new temporary schema is only used for validation — you will need to delete it after the validation is complete.
Make sure to consider all relevant advanced settings configured in the Snowflake batch destination like JSON columns, Skip Tracks Table, etc.
The Skip Users Table setting available in the Snowflake batch destination is not supported for Snowflake Streaming.
To maintain data types for tables created in the Snowflake destination, RudderStack recommends creating all tables in the new schema beforehand. This ensures validation of the Snowflake Streaming ingestion once you direct the data ingestion from the existing schema of the Snowflake batch destination.
CREATESCHEMAIFNOTEXISTSMY_PROD_DATA_TEST_STREAMING;DECLAREt_nameSTRING;recordsRESULTSET;BEGINrecords:=(SELECTtable_nameFROM<DB>.INFORMATION_SCHEMA.TABLESWHEREtable_type='BASE TABLE'ANDtable_schema='MY_PROD_DATA');FORrecordINrecordsDOt_name:=record.table_name;EXECUTEIMMEDIATE'CREATE TABLE MY_PROD_DATA_TEST_STREAMING."'||t_name||'" LIKE MY_PROD_DATA."'||t_name||'";';ENDFOR;END;
In the above query, replace <DB> with your database name.
Follow these steps for all sources connected to the Snowflake batch destination that you want to migrate to Snowflake Streaming:
Connect the source to the Snowflake Streaming destination. Do not disconnect this source from the Snowflake batch destination.
Validate successful event delivery from the Events tab in the Snowflake Streaming destination page.
After successful validation, disconnect all sources from the Snowflake Streaming destination and then delete this test destination.
Migration
After testing the Snowflake Streaming destination with a similar setup as the Snowflake batch destination, follow these steps for migration:
Set up a Snowflake Streaming destination with same configuration as the Snowflake batch destination, including Namespace, advanced settings, etc.
Connect all sources connected to the Snowflake batch destination to the new Snowflake Streaming destination. Note the time T_start (in UTC) you started this action — this will come in handy in running the deduplication queries later.
Validate that data ingestion for all sources is working as expected for the Snowflake Streaming destination.
This process can take a few hours — during this time, both the Snowflake batch destination and Snowflake Streaming destination will ingest the same data.
Go to your Snowflake batch destination and change the Sync Frequency to 1 day.
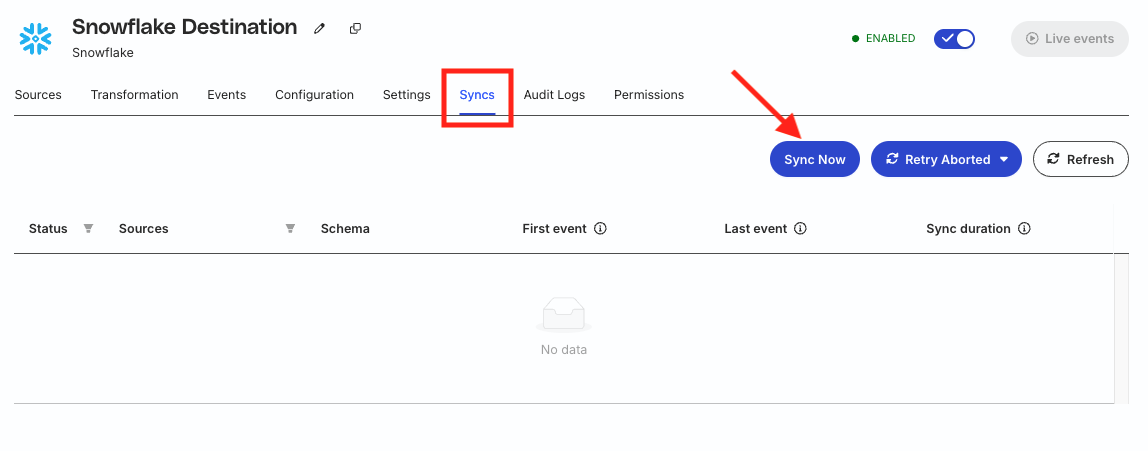
Go to the Syncs tab of the Snowflake batch destination and click Sync Now. Wait for any syncs in progress to complete. Then, take a note of the time T_end (in UTC) — this will come in handy while running the deduplication queries later.
Disconnect all sources from the Snowflake destination now that they are already connected to the Snowflake Streaming destination (as in Step 2).
Run the following deduplication script for each table:
-- Set your timestamp range
SETT_start='2024-01-01 00:00:00';SETT_end='2024-12-31 23:59:59';-- Start transaction
BEGIN;-- Step 1: Create temp table with latest row for each duplicate ID in range
CREATEORREPLACETEMPTABLETEMP_<TABLE_NAME>ASSELECT*FROM<TABLE_NAME>WHERETIMESTAMPBETWEEN$T_startAND$T_endQUALIFYROW_NUMBER()OVER(PARTITIONBYIDORDERBYTIMESTAMPDESC)=1ANDIDIN(SELECTIDFROM<TABLE_NAME>WHERETIMESTAMPBETWEEN$T_startAND$T_endGROUPBYIDHAVINGCOUNT(*)>1);-- Step 2: Delete all rows for those duplicate IDs in the range from source table.
DELETEFROM<TABLE_NAME>WHEREIDIN(SELECTIDFROMTEMP_<TABLE_NAME>)ANDTIMESTAMPBETWEEN$T_startAND$T_end;-- Step 3: Insert back the unique rows into source table
INSERTINTO<TABLE_NAME>SELECT*FROMTEMP_<TABLE_NAME>;-- Commit transaction
COMMIT;
In the above query, replace <TABLE_NAME> with the name of the table for which you want to deduplicate data. Note that DB.SCHEMA has not been added in the above SQL, considering you can set it while executing the query from the Snowflake console.
2. Ingest data to new schema and backfill
This method lets you safely set up a new Snowflake Streaming connection with a new namespace without impacting the existing Snowflake connection.
After the validations, you can disable the old Snowflake batch destination and backfill the corresponding table data while handling duplicates.
Impact on downstream reporting and modeling
If you are using this approach for migration (implementing a new schema where your data lands), downstream modeling and reporting will be impacted — you will need to update them to point to the new schema.
Set up a Snowflake Streaming destination with a new schema (configured using the Namespace setting). For example, if your Snowflake batch destination namespace is MY_PROD_DATA, you can choose MY_PROD_DATA_TEST_STREAMING as the new schema name.
Note that:
Make sure to consider all relevant advanced settings configured in the Snowflake batch destination like JSON columns, Skip Tracks Table, etc.
The Skip Users Table setting available in the Snowflake batch destination is not supported for Snowflake Streaming.
Follow these steps for all sources connected to the Snowflake batch destination that you want to migrate to Snowflake Streaming.
Connect the source to the Snowflake Streaming destination. Do not disconnect this source from the Snowflake batch destination.
Validate successful event delivery from the Events tab in the Snowflake Streaming destination page.
Note that there are chances of a change in the data type of some columns — this is because the column’s data type is inferred from the first event and it evolves if you changed the data type manually in the tables created from the Snowflake batch destination. If the old data types were correct, you can update them accordingly for the new tables in your new schema.
RudderStack recommends connecting all sources to the Snowflake Streaming destination. This is because multiple sources might ingest data to the same table. Also, there is a chance that multiple sources might generate the same event name.
Migrating all sources will make the backfilling process easier by considering all tables.
Once you connect all sources to the new Snowflake Streaming destination and validate schemas of all tables, go to the Syncs tab of the Snowflake batch destination and click Sync Now to flush any data to be synced.
After the sync completes, disconnect all the sources and disable the Snowflake batch destination.
Backfilling process
You can backfill the data by following these steps:
Insert all data from the Snowflake batch destination schema to the respective tables in the Snowflake Streaming destination schema.
Remove duplicates by running the following query for each table:
-- Set your timestamp range
SETT_start='2024-01-01 00:00:00';SETT_end='2024-12-31 23:59:59';-- Start transaction
BEGIN;-- Step 1: Create temp table with latest row for each duplicate ID in range
CREATEORREPLACETEMPTABLETEMP_<TABLE_NAME>ASSELECT*FROM<TABLE_NAME>WHERETIMESTAMPBETWEEN$T_startAND$T_endQUALIFYROW_NUMBER()OVER(PARTITIONBYIDORDERBYTIMESTAMPDESC)=1ANDIDIN(SELECTIDFROM<TABLE_NAME>WHERETIMESTAMPBETWEEN$T_startAND$T_endGROUPBYIDHAVINGCOUNT(*)>1);-- Step 2: Delete all rows for those duplicate IDs in the range from source table.
DELETEFROM<TABLE_NAME>WHEREIDIN(SELECTIDFROMTEMP_<TABLE_NAME>)ANDTIMESTAMPBETWEEN$T_startAND$T_end;-- Step 3: Insert back the unique rows into source table
INSERTINTO<TABLE_NAME>SELECT*FROMTEMP_<TABLE_NAME>;-- Commit transaction
COMMIT;
Replace <TABLE_NAME> in the above query with the name of the table for which you want to deduplicate data.
Case 2: Namespace empty in Snowflake destination
If the Namespace setting is not configured in the Snowflake batch destination, then each source connected to the destination creates its own schema using the source name.
In this scenario, you will need to create a new Snowflake Streaming destination with the expected schema name (Namespace) for each source connected to the Snowflake batch destination.
You can get the schema name from the warehouse directly or from the Syncs tab of your Snowflake batch destination.
RudderStack provides the following two options for this migration process:
1: Ingest data to same schema and disable Snowflake destination
RudderStack recommends using the same schema for the Snowflake Streaming destination as Snowflake allows concurrent writes on tables — this way, your downstream reporting and modeling will be unaffected.
In this option, you will need to:
Pre-validate a new connection using Snowflake Streaming.
Migrate all sources connected to the Snowflake batch destination to the new Snowflake Streaming destination.
For some time, both the Snowflake batch destination and Snowflake Streaming destination will ingest data to same tables.
Turn off the Snowflake batch destination.
Clean up the duplicate entries.
Pre-validation
Set up a Snowflake Streaming destination with the same temporary schema (configured using the Namespace setting) as the schema for the old connection (derived from the source name). You can add a _test_streaming suffix to the schema name as a pre-validation step.
Note that:
A new temporary schema is only used for validation — you will need to delete it after the validation is complete.
Make sure to consider all relevant advanced settings configured in the Snowflake batch destination like JSON columns, Skip Tracks Table, etc.
The Skip Users Table setting available in the Snowflake batch destination is not supported for Snowflake Streaming.
Verify that the data ingestion is working correctly and data is populated in the new tables in the schema corresponding to source name.
As some data types can be different, RudderStack recommends comparing the columns and data types for all tables in the Snowflake Streaming schema with the Snowflake batch destination schema.
Disconnect the source and delete the test Snowflake Streaming destination.
Delete the new schema and tables created in the warehouse.
Migration
After testing the Snowflake Streaming destination with a similar setup as the Snowflake batch destination, follow these steps for migration:
Set up a Snowflake Streaming destination with the exact configuration as the Snowflake batch destination, including the advanced settings. Make sure to set the Namespace setting as the schema for the old connection (derived from the source name).
Connect the source to Snowflake Streaming destination. Note the time T_start (in UTC) when you started this action — this will come in handy while running the deduplication queries later.
Validate that data ingestion for all sources is working as expected for the Snowflake Streaming destination.
This process can take a few hours — during this time, both the Snowflake batch destination and Snowflake Streaming destination will ingest the same data.
Go to your Snowflake batch destination and change the Sync Frequency to 1 day.
Go to the Syncs tab of the Snowflake batch destination and click Sync Now. Wait for any syncs in progress to complete. Then, take a note of the time T_end (in UTC) — this will come in handy while running the deduplication queries later.
Run the following deduplication script for each table:
-- Set your timestamp range
SETT_start='2024-01-01 00:00:00';SETT_end='2024-12-31 23:59:59';-- Start transaction
BEGIN;-- Step 1: Create temp table with latest row for each duplicate ID in range
CREATEORREPLACETEMPTABLETEMP_<TABLE_NAME>ASSELECT*FROM<TABLE_NAME>WHERETIMESTAMPBETWEEN$T_startAND$T_endQUALIFYROW_NUMBER()OVER(PARTITIONBYIDORDERBYTIMESTAMPDESC)=1ANDIDIN(SELECTIDFROM<TABLE_NAME>WHERETIMESTAMPBETWEEN$T_startAND$T_endGROUPBYIDHAVINGCOUNT(*)>1);-- Step 2: Delete all rows for those duplicate IDs in the range from source table.
DELETEFROM<TABLE_NAME>WHEREIDIN(SELECTIDFROMTEMP_<TABLE_NAME>)ANDTIMESTAMPBETWEEN$T_startAND$T_end;-- Step 3: Insert back the unique rows into source table
INSERTINTO<TABLE_NAME>SELECT*FROMTEMP_<TABLE_NAME>;-- Commit transaction
COMMIT;
In the above query, replace <TABLE_NAME> with the name of the table for which you want to deduplicate data. Note that DB.SCHEMA has not been added in the above SQL, considering you can set it while executing the query from the Snowflake console.
2. Ingest data to new schema and backfill
This method lets you safely set up a new Snowflake Streaming connection for a source to start writing data to tables in new schema. You can do this by setting a different namespace in the Snowflake Streaming streaming destination.
Impact on downstream reporting and modeling
If you are using this approach for migration (implementing a new schema where your data lands), downstream modeling and reporting will be impacted — you will need to update them to point to the new schema.
Set up a Snowflake Streaming destination with a new schema (configured using the Namespace setting). For example, if the schema derived from the source name is MY_PROD_DATA, then you can choose MY_PROD_DATA_STREAMING as the new schema name.
Note that:
Make sure to consider all relevant advanced settings configured in the Snowflake batch destination like JSON columns, Skip Tracks Table, etc.
The Skip Users Table setting available in the Snowflake batch destination is not supported for Snowflake Streaming.
Follow these steps for all sources connected to the Snowflake batch destination that you want to migrate to Snowflake Streaming:
Connect the source to the Snowflake Streaming destination. Do not disconnect this source from the Snowflake batch destination.
Validate successful event delivery from the Events tab in the Snowflake Streaming destination page.
Verify the columns and data types for all tables with the tables created from the Snowflake batch destination.
RudderStack recommends connecting all sources to the Snowflake Streaming destination. This is because multiple sources might ingest data to the same table. Also, there is a chance that multiple sources might generate the same event name.
Migrating all sources will make the backfilling process easier by considering all tables.
Once you connect all sources to the new Snowflake Streaming destination and validate schemas of all tables, go to your Snowflake batch destination and change the Sync Frequency to 1 day.
Go to the Syncs tab of the Snowflake batch destination and click Sync Now to flush any data to be synced.
After the sync completes, disconnect all the sources and disable the Snowflake batch destination.
Backfilling process
You can backfill the data by following these steps:
Insert all data from the Snowflake batch destination schema to the respective tables in the Snowflake Streaming destination schema.
Remove duplicates by running the following query for each table:
-- Set your timestamp range
SETT_start='2024-01-01 00:00:00';SETT_end='2024-12-31 23:59:59';-- Start transaction
BEGIN;-- Step 1: Create temp table with latest row for each duplicate ID in range
CREATEORREPLACETEMPTABLETEMP_<TABLE_NAME>ASSELECT*FROM<TABLE_NAME>WHERETIMESTAMPBETWEEN$T_startAND$T_endQUALIFYROW_NUMBER()OVER(PARTITIONBYIDORDERBYTIMESTAMPDESC)=1ANDIDIN(SELECTIDFROM<TABLE_NAME>WHERETIMESTAMPBETWEEN$T_startAND$T_endGROUPBYIDHAVINGCOUNT(*)>1);-- Step 2: Delete all rows for those duplicate IDs in the range from source table.
DELETEFROM<TABLE_NAME>WHEREIDIN(SELECTIDFROMTEMP_<TABLE_NAME>)ANDTIMESTAMPBETWEEN$T_startAND$T_end;-- Step 3: Insert back the unique rows into source table
INSERTINTO<TABLE_NAME>SELECT*FROMTEMP_<TABLE_NAME>;-- Commit transaction
COMMIT;
Replace <TABLE_NAME> in the above query with the name of the table for which you want to deduplicate data.
Choose the best migration strategy
RudderStack provides the following approaches for both the manual migration scenarios discussed above and the best approach depends on your use case:
Ingest data to the same schema and deduplicate: This approach is ideal if you want to avoid schema changes and minimize disruptions to the existing workflows and downstream modeling.
Ingest data to a new schema and backfill: This approach is ideal for customers planning for schema optimizations or prioritizing data freshness and clean separation.
FAQ
How does RudderStack configure the schema name before loading the data in the warehouse?
RudderStack configures the schema name based on the values mentioned in the below table. The table columns are defined as follows:
Sync: Indicates whether RudderStack performs the first data sync after the source is set up or the subsequent syncs.
Namespace: The Namespace field set by the user while configuring the warehouse destination in the RudderStack dashboard.
Warehouse.<destType>.customDataset Prefix: The RSERVER_WAREHOUSE_(DEST_TYPE)_CUSTOM_DATA_SET_PREFIX parameter in the config.yaml file, in case the user has a RudderStack deployment locally/in their own environment.
Source name: Name of the source connected to the warehouse destination.
Sync
Namespace
customDataset Prefix
Source name
Schema name
Notes
First sync
AB
XY
S
AB
The namespace is given priority over all the other values.
First sync
Not set
XY
S
XY_S
RudderStack combines the customDataset prefix and the source name to set the schema name, if the namespace is absent.
First sync
Not set
Not set
S
S
RudderStack sets the source name as the schema name if the namespace and customDataset prefix are absent.
First sync
AB
Not set
S
AB
The namespace is given priority over the other values.
Second sync onwards
ABC
XYZ
SS
ABC
The namespace, source name and the customDataset prefix have all been modified. The new namespace is given priority and set as the schema name.
All the data from the second sync will now be stored in the new schema (ABC) and the original schema (AB) will be left as is.
Second sync onwards
Not set
XYZ
S
XYZ_S
The customDataset prefix name has been modified.
RudderStack combines the customDataset prefix and the source name to set the schema name.
Second sync onwards
Not set
XYZ
SS
XYZ_SS
The source name and customDataset prefix have been modified.
RudderStack combines them together to set the schema name.
Second sync onwards
ABC
Not set
SS
ABC
The namespace and source names have been modified.
The namespace is given priority and set as the schema name.
Second sync onwards
Not set
Not set
SS
S
The source name has been modified. However, it does not impact the schema name and it remains the same as in the first sync.
Key takeaways
The namespace set in the RudderStack dashboard always takes precedence when setting the schema name in the warehouse.
If the RSERVER_WAREHOUSE_(DEST_TYPE)_CUSTOM_DATA_SET_PREFIX parameter is set in the config.yaml file of your RudderStack deployment, RudderStack sets the schema name in the customDataset_sourcename format, as noted in this FAQ.
If the namespace and RSERVER_WAREHOUSE_(DEST_TYPE)_CUSTOM_DATA_SET_PREFIX parameter, both are absent, RudderStack sets the source name as the schema name.
Questions? We're here to help.
Join the RudderStack Slack community or email us for support
This site uses cookies to improve your experience while you navigate through the website. Out of
these
cookies, the cookies that are categorized as necessary are stored on your browser as they are as
essential
for the working of basic functionalities of the website. We also use third-party cookies that
help
us
analyze and understand how you use this website. These cookies will be stored in your browser
only
with
your
consent. You also have the option to opt-out of these cookies. But opting out of some of these
cookies
may
have an effect on your browsing experience.
Necessary
Always Enabled
Necessary cookies are absolutely essential for the website to function properly. This
category only includes cookies that ensures basic functionalities and security
features of the website. These cookies do not store any personal information.
This site uses cookies to improve your experience. If you want to
learn more about cookies and why we use them, visit our cookie
policy. We'll assume you're ok with this, but you can opt-out if you wish Cookie Settings.