Okta SSO Manual Setup
- enterprise
6 minute read
The Single Sign-On (SSO) feature is available in the Enterprise plan only.
This guide lists the steps to manually configure and enable Okta SSO for your organization.
Note that:
- RudderStack supports only the SAML 2.0 protocol for SSO.
- RudderStack does not support IdP-initiated authentication. To use Okta SSO for your organization, you need to log in through this link.
Configuring the RudderStack SSO App
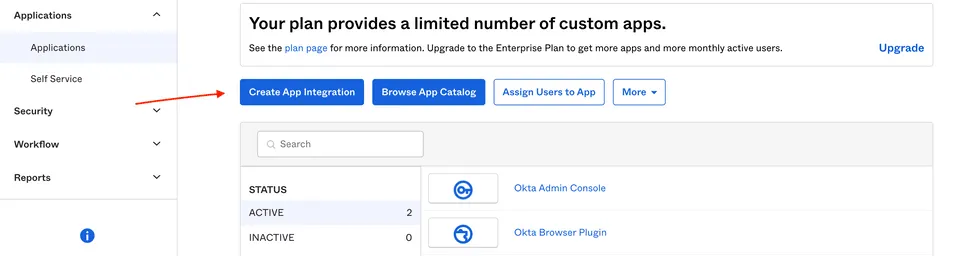
- Log in to your Okta application as an administrator. Then, go to the Applications page in the dashboard.
- Click the Create App Integration button to integrate Okta with RudderStack:
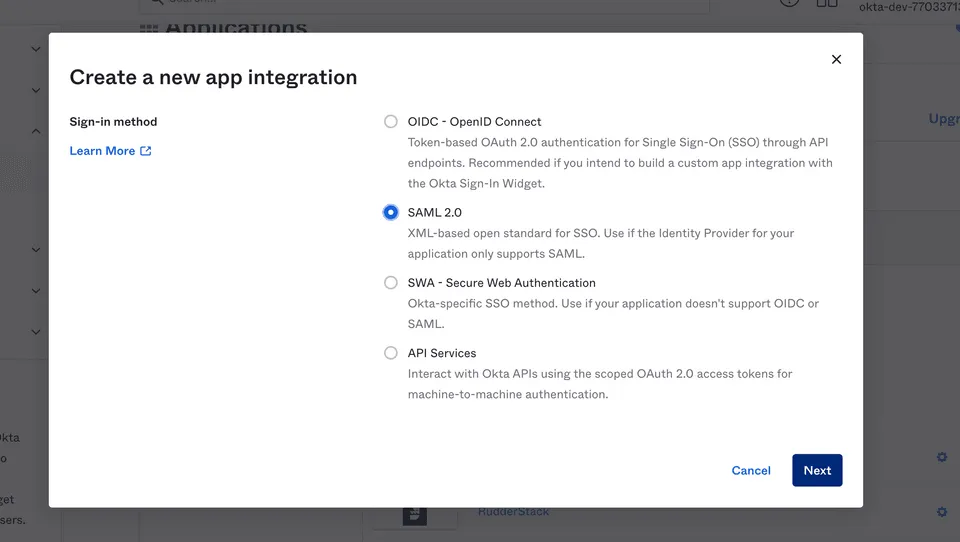
- Select SAML 2.0 sign-in method:
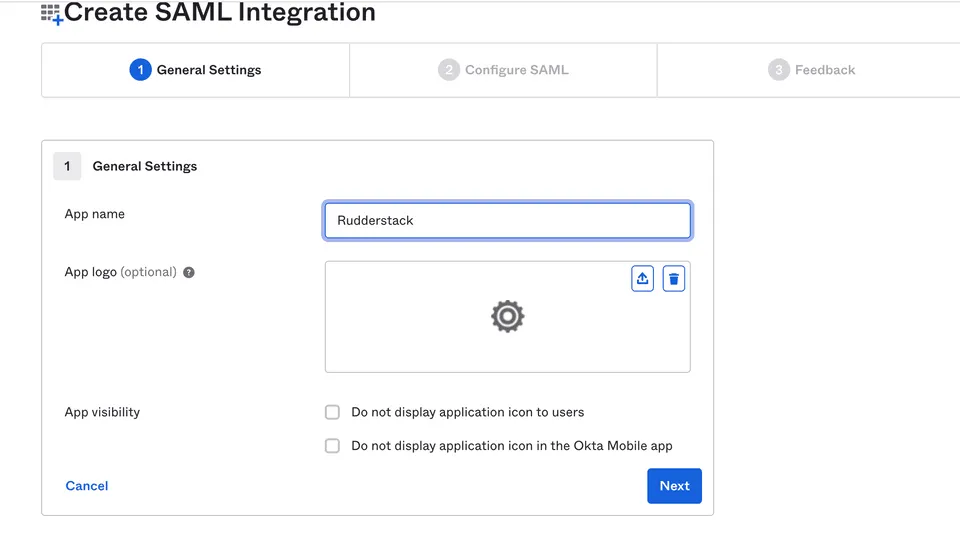
- Under General Settings, set the App name to RudderStack, as shown. Then, click Next.
SAML settings
Enter the following settings in the Configure SAML section:
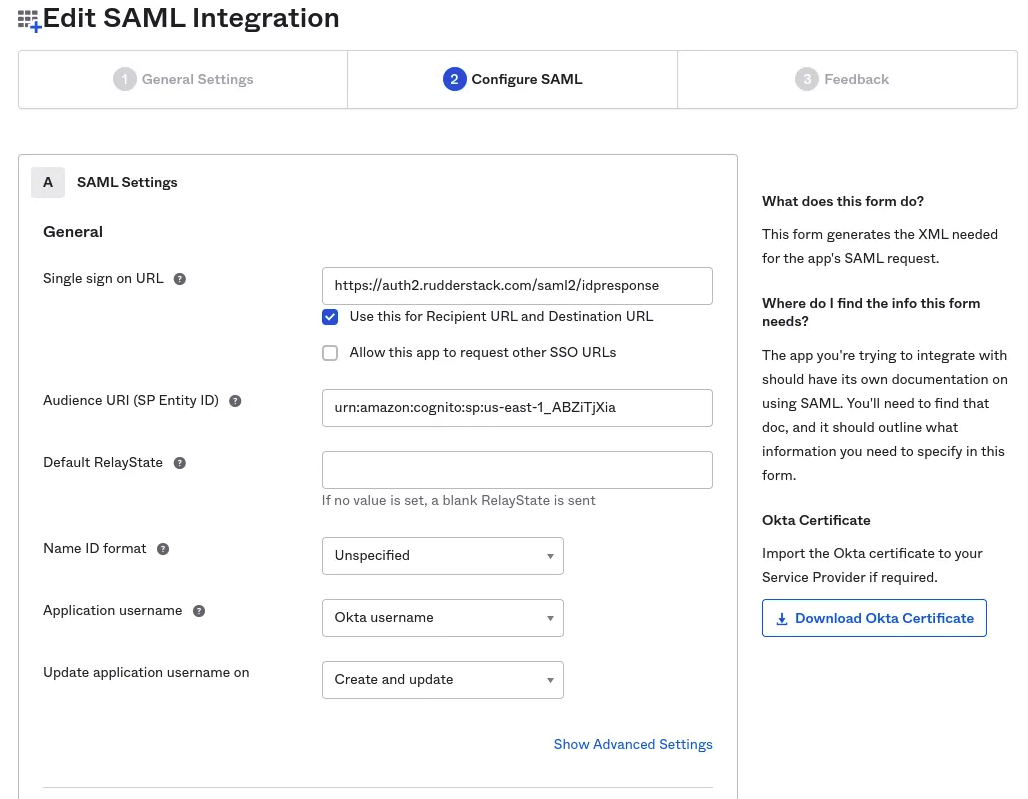
- Single sign on URL: Set this to
https://auth2.rudderstack.com/saml2/idpresponse.
Make sure you also enable the Use this for Recipient URL and Destination URL option under this setting.
- Audience URI (SP Entity ID): Set this to
urn:amazon:cognito:sp:us-east-1_ABZiTjXia. - Default RelayState: Leave this field blank.
- Name ID format: Select Unspecified from the dropdown, which defaults to email.
- Application username: Select Okta username from the dropdown.
- Update application username on: Select Create and update from the dropdown.
Attribute Statements settings
In the Attribute Statements section, you need to enter the following settings:
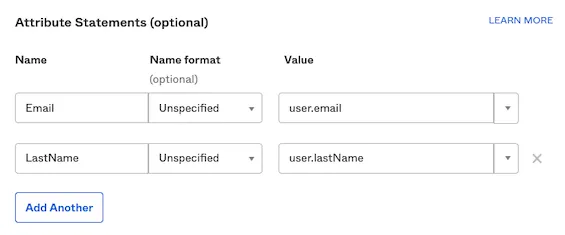
| Name | Name format (optional) | Default value | Comments |
|---|---|---|---|
| Unspecified | user.email | Set the value corresponding to your organization’s user email. | |
| LastName | Unspecified | user.lastName | Although user.lastName is recommended, you can provide any other value here. |
As long as the attributes you set match the Email and LastName fields, your SSO app will work without any issues.
In the next page, select the I’m an Okta customer adding an internal app option and click Finish.
The RudderStack Single Sign-On app is now created and you will be directed to the app’s page.
Enabling SSO
The RudderStack SSO app supports dynamic configuration.
In the Sign On section of the RudderStack SSO app, right click and copy the URL associated with Identity Provider metadata under the View Setup Instructions button, as shown in the below image.
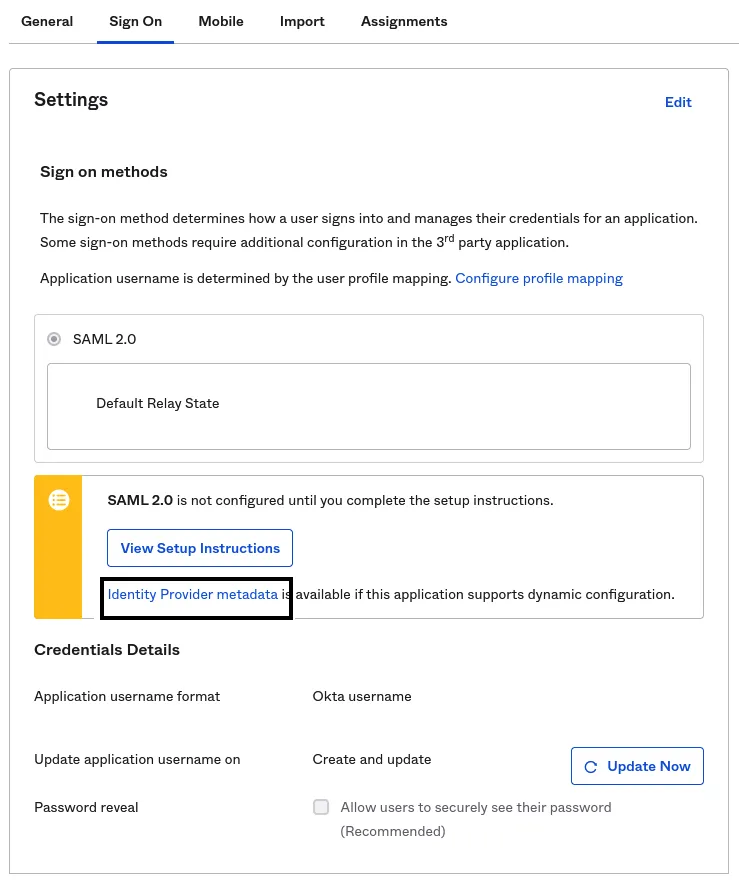
Before sharing the Identity Provider metadata URL, verify that the IdP metadata declares both HTTP-Redirect and HTTP-POST SAML bindings.
RudderStack uses AWS Cognito, which sends the initial login request with HTTP-Redirect, so metadata that advertises only HTTP-POST will be rejected.
Share this URL with the RudderStack team to enable SSO for your organization.
The Identity Provider metadata URL ends with/metadata.
While sharing the metadata URL, also let the RudderStack team know:
- Which workspace you would like to set as the default workspace for your organization. New users who sign in through SSO for the first time will automatically land in this workspace.
- Whether you want RudderStack to also create a personal organization for each new SSO user. This is off by default.
You can also opt out of setting up a default workspace altogether if you don’t want your SSO users to get automatic access to a shared workspace.
SCIM configuration steps
This section lists the steps to configure SCIM provisioning in Okta.
Prerequisites
Before setting up SCIM provisioning, make sure to generate an organization-level Service Access Token in the RudderStack workspace for which you want to enable SCIM.
Make sure to create an organization-level Service Access Token. Otherwise, your SCIM provisioning tasks will fail.
Token permissions for legacy RBAC system
If you are on the legacy Permissions Management (RBAC) system, generate an Organization-level Service Access Token.
SCIM configuration
- Log in to Okta as an administrator.
- In the sidebar, go to Applications > Applications and select your SSO app.
- Go to the General tab, click Edit and check the Enable SCIM provisioning option:
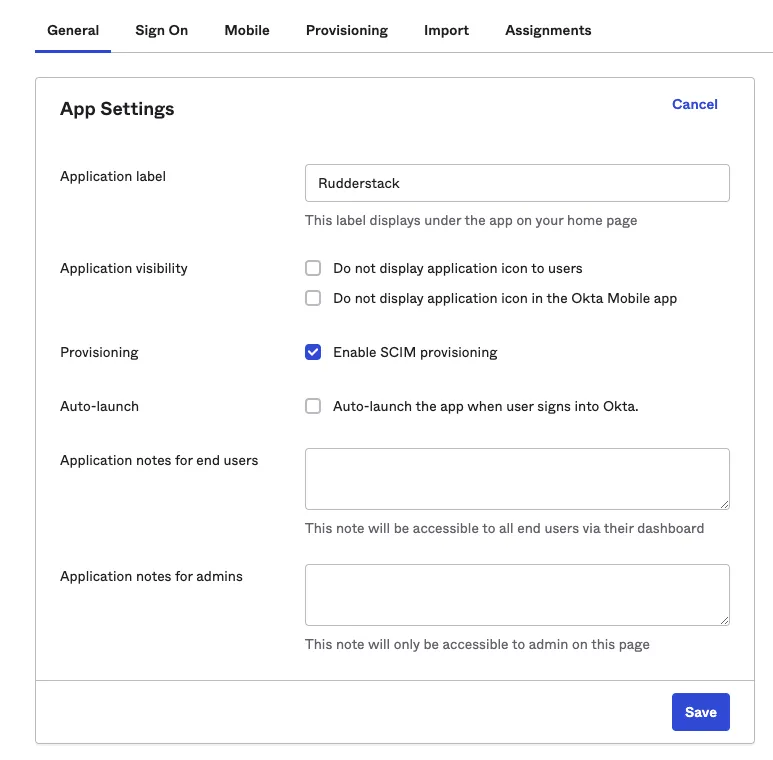
- A new tab called Provisioning will now be visible in the app settings. Go to Integration, click Edit and enter the following details:
| Setting | Value |
|---|---|
| SCIM connector base URL | https://api.rudderstack.com/scim/v2 |
| Unique identifier field for users | userName |
| Supported provisioning actions | Check the following settings:
|
| Authentication Mode | HTTP Header |
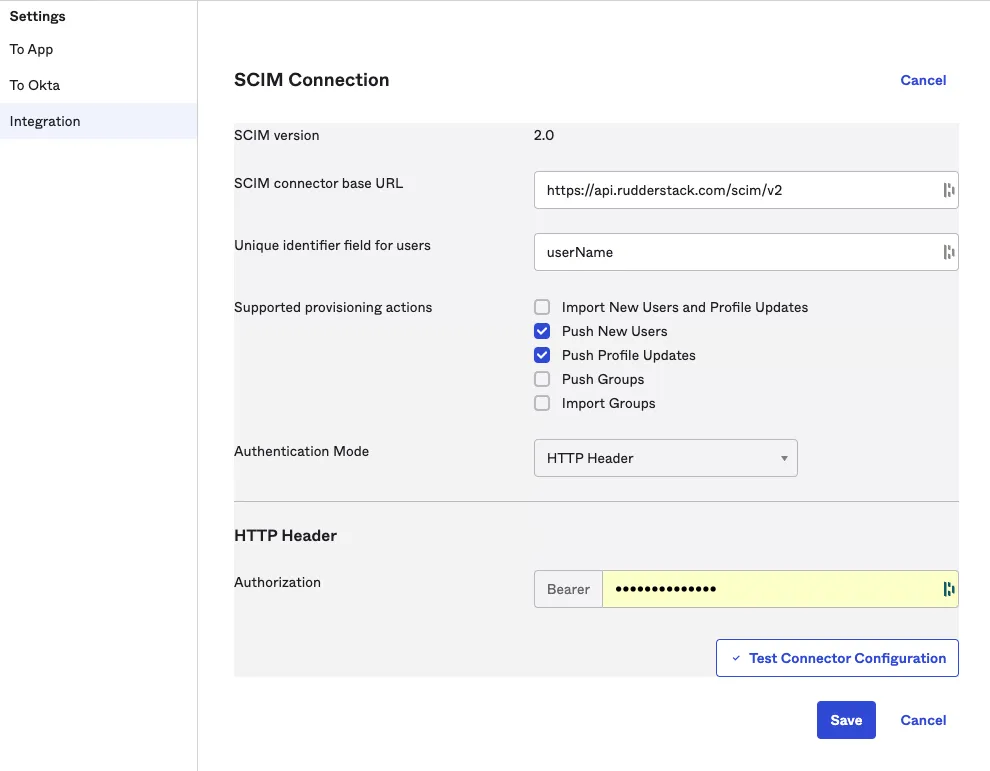
- Under HTTP Header, paste your Service Access Token obtained above.
- Click Save. Okta will send a test request to verify the configuration.
- Once the verification is complete, you will be able to see two new options, To App and To Okta, in the Settings sidebar:
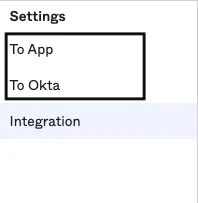
- Go to the To App settings and click Edit. Then, enable the following Provisioning to App settings:
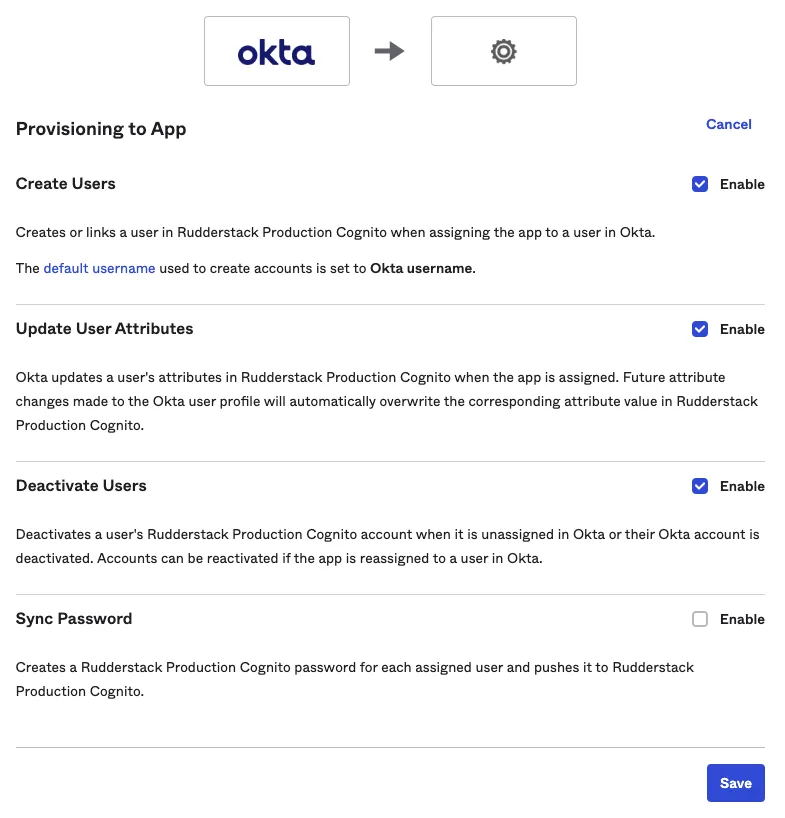
- Scroll down to the attribute mappings section and click Show Unmapped Attributes.
- Unmap all attributes one by one by clicking the X icon, except the following mandatory attributes:
- Display name
When Okta sends a request to create a user, it assumes that the update has failed if the response does not contain the details of the mapped attributes. Hence, you must unmap all attributes except Display name and Email.
- For Display name and Email, click the edit icon and set the Apply on field to Create and update.

The Value fields for Display name and Email may vary depending on how you have set up your Okta app.
- Click Save to finish the configuration.
- Go back to your app settings, click the Sign On tab and click Edit.
- Under Credentials Details, set Application username format to Email:
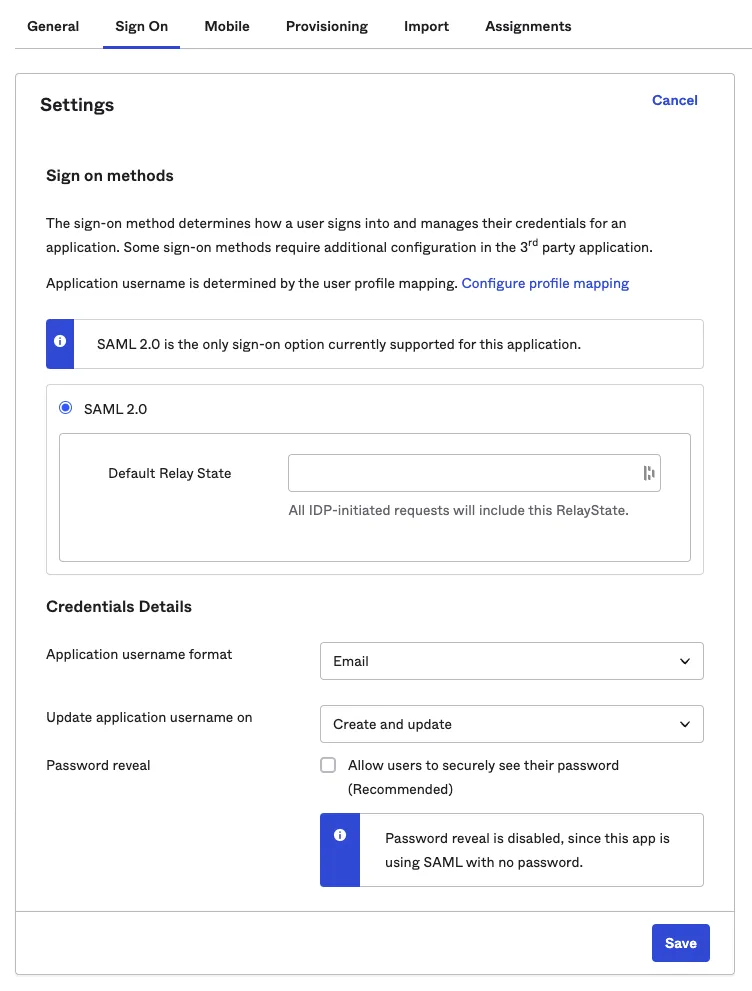
- Finally, click Save.
RudderStack currently does not support some SCIM features like importing users or groups, removing users, or snycing passwords. Refer to the Known issues section for more information.
Debugging
There are times when an SSO login might fail for some users due to some reason. In such cases, the RudderStack team requires a HAR (HTTP Archive) file to inspect the requests and identify any SSO-related issues.
A HAR file is a log of exported network requests from the user’s browser. See the HAR Analyzer guide for steps on generating this file depending on your browser.
Once you generate the HAR file, share it with the RudderStack team to troubleshoot the issue.
Note the following before capturing your HAR file:
- Start from
https://app.rudderstack.com/ssowith a clean session, preferably in incognito mode of your browser.- Complete the SSO flow until the step where you face an error.
- Your HAR file might contain sensitive data - make sure to redact it using a text editor before sharing it with the team.
The following sections contain solutions for some common errors you might encounter while setting up SSO:
Invalid samlResponse or relayState from identity provider
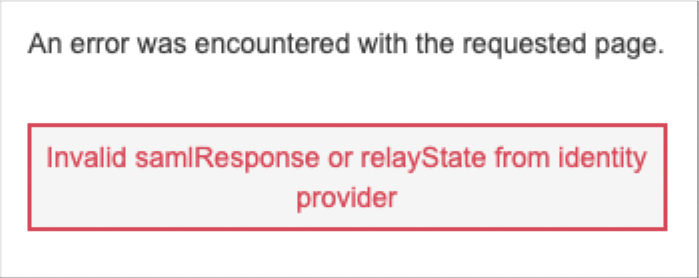
The above error indicates you tried the IdP-initiated authentication flow. As stated above, this integration supports only Service Provider (SP)-initiated SSO flow.
RudderStack recommends initiating the SSO authentication by following all the above SSO configuration steps correctly.
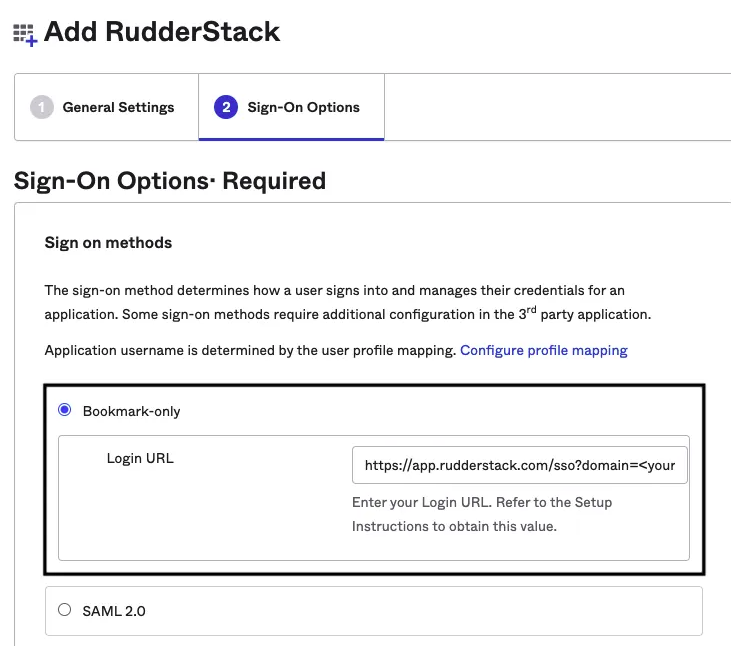
As an alternative, you can simulate the IdP-initiation authentication flow by using the Okta Bookmark app and setting the Login URL to https://app.rudderstack.com/sso?domain=<your_website>, where <your_website> is your organization’s web domain.
Required String parameter ‘RelayState’ is not present
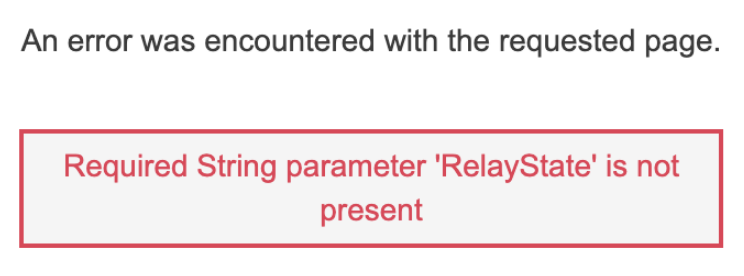
The above error indicates that you did not set up your SSO app correctly. Make sure to:
- Set the Audience URI (SP Entity ID) field to
urn:amazon:cognito:sp:us-east-1_ABZiTjXia. - Configure the other SAML settings correctly.
