How to integrate RudderStack with a Gatsby website
8 minute read
You can quickly and easily get RudderStack up and running in your Gatsby application by using RudderStack’s Gatsby plugin. It makes it easy to integrate your Gatsby website with the RudderStack API and easily track events.
Key features of this plugin
Use multiple write keys (one for production environment, another optional one for development)
Disable page view tracking (just in case you want to add it later manually)
Always up-to-date and maintained by the RudderStack team
Installing the plugin
To install the plugin, run the following command with the package manager of your choice:
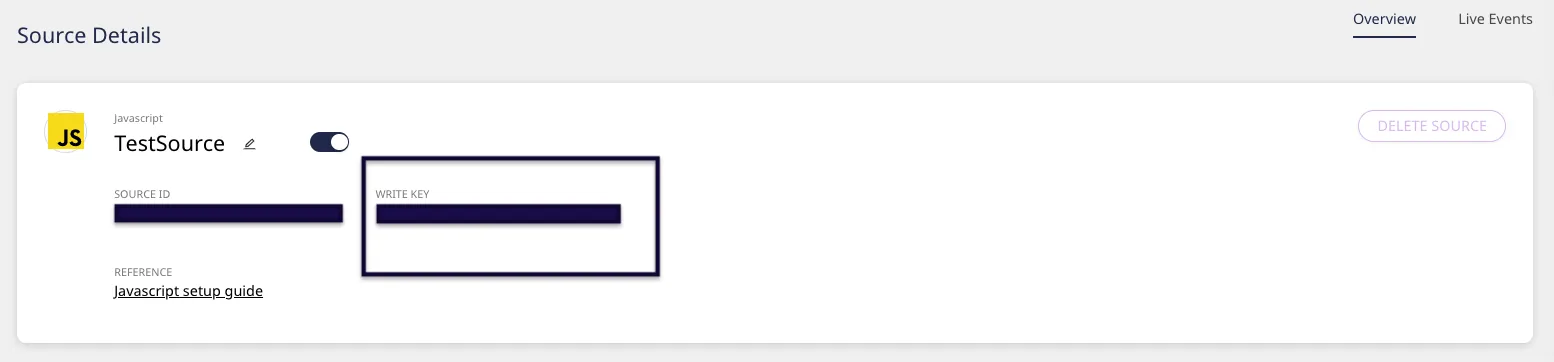
In your gatsby-config.js file you first need to add your write key from your account. You can find this in your RudderStack dashboard.
Configuration options
plugins:[{resolve:`gatsby-plugin-rudderstack`,options:{// your rudderstack write key for your production environment
// when process.env.NODE_ENV === 'production'
// required; non-empty string
//NOTE: Do not commit this to git. Process from env.
prodKey:`RUDDERSTACK_PRODUCTION_WRITE_KEY`,// if you have a development env for your rudderstack account, paste that key here
// when process.env.NODE_ENV === 'development'
// optional; non-empty string
//NOTE: Do not commit this to git. Process from env.
devKey:`RUDDERSTACK_DEV_WRITE_KEY`,// boolean (defaults to false) on whether you want
// to include analytics.page() automatically
// if false, see below on how to track pageviews manually
trackPage:false,// number (defaults to 50); time to wait after a route update before it should
// track the page change, to implement this, make sure your `trackPage` property is set to `true`
trackPageDelay:50,// If you need to proxy events through a custom data plane,
// add a `dataPlaneUrl` property
// RudderStack docs:
// - https://rudderstack.com/docs/sources/event-streams/sdks/rudderstack-javascript-sdk/#31-load
dataPlaneUrl:`https://override-rudderstack-endpoint`,// Add a `controlPlaneUrl` property if you are self-hosting the Control Plane
// RudderStack docs:
// - https://rudderstack.com/docs/sources/event-streams/sdks/rudderstack-javascript-sdk/#311-self-hosted-control-plane
controlPlaneUrl:`https://override-control-plane-url`,// boolean (defaults to false); whether to delay loading (add SDK script and load the SDK) of RudderStack JS SDK.
// This feature will force RudderStack to load _after_ either a page routing change
// or user scroll, whichever comes first. This delay time is controlled by
// `delayLoadTime` setting. This feature is used to help improve your website's
// TTI (for SEO, UX, etc). See links below for more info.
// NOTE: But if you are using server-side routing and enable this feature,
// RudderStack will never load (because although client-side routing does not do
// a full page refresh, server-side routing does, thereby preventing RudderStack
// from ever loading).
// See here for more context:
// GIF: https://github.com/benjaminhoffman/gatsby-plugin-segment/pull/19#issuecomment-559569483
// TTI: https://github.com/GoogleChrome/lighthouse/blob/master/docs/scoring.md#performance
// Problem/solution: https://marketingexamples.com/seo/performance
delayLoad:false,// number (default to 1000); time to wait after scroll or route change
// To be used when `delayLoad` is set to `true`
delayLoadTime:1000,// Whether to completely skip calling `analytics.load()`.
// ADVANCED FEATURE: only use if you are calling `analytics.load()` manually
// elsewhere in your code or are using a library
// that will call it for you.
// Useful for only loading the tracking script once a user has opted in to being tracked, for example.
// *Another use case is if you want to add callbacks to the methods at load time.
manualLoad:false,// Can be used to override where the SDK should be loaded from. This is useful
// if you want to serve the SDK from a custom domain other than RudderStack to tackle ad-blockers
// By default, the plugin will use the latest JS SDK from RudderStack's CDN
sdkURL:`https://subdomain.yourdomain.com/v1.1/rudder-analytics.min.js`,// string ('async' or 'defer'); whether to load the RudderStack SDK async or defer. Anything else
// will load normally.
// 'async' will load the SDK as <script async></script>
// 'defer' will load the SDK as <script defer></script>
loadType:'default',// Options to the `load` API
// Note: The above `controlPlaneUrl` overrides the `configUrl` field in this object
// You can find the loadOptions for JS SDK here:
// https://www.rudderstack.com/docs/sources/event-streams/sdks/rudderstack-javascript-sdk/load-js-sdk/#loading-options
loadOptions:{...}}}];
Step 2: Identify your users with the identify() method:
The identify() method allows you to link users and their actions to a specific user ID.
A sample example of how the identify() method works in Gatsby is as shown:
In the above example, the method tracks the event ‘test track event GA3’, and information such as the revenue, currency, and anonymousId. You can use this method to track various other success metrics for your website, such as user signups, item purchases, article bookmarks, and much more.
To override contextual information, for ex: anonymizing IP and other contextual fields like page properties, the following template can be used. Similarly, you can override the auto-generated anonymousId with the provided ID. For this, follow the snippet below:
If you want to track pageviews automatically, set trackPage to true in your gatsby-config.js file. What we mean by automatically is that whenever there is a route change, RudderStack leverages Gatsby’s onRouteUpdate API in the gatsby-browser.js file (link) to invoke window.rudderanalytics.page() on each route change.
However, if you want to pass in properties along with the pageview call (it is common to see some users pass in some user or account data with each page call), then you’ll have to set trackPage: false and call it yourself in your gatsby-browser.js file, as shown below:
You’ve now successfully installed rudder-analytics.js tracking. You can enable and use any event destination to send your event data via RudderStack.
Step 4: Check ready state
There are cases when you may want to tap into the features provided by end destination SDKs to enhance tracking and other functionalities.
RudderStack’s JavaScript SDK exposes a ready API with a callback parameter, that fires when the SDK is done initializing itself and other third-party native SDK destinations. For example:
window.rudderanalytics.ready(()=>{console.log("we are all set!!!")})
For detailed technical documentation and troubleshooting guide on the RudderStack’s JavaScript SDK, see JavaScript SDK.
Using the Query string API
RudderStack’s Query string API allows you to trigger track, identify calls using query parameters.
If you pass the following parameters in the URL, then it will trigger the corresponding SDK API call. For example:
You may use the below parameters as a querystring parameter and trigger the corresponding call:
Parameter
Description
ajs_uid
Makes a rudderanalytics.identify() call with userId having the value of the parameter value.
ajs_aid
Makes a rudderanalytics.setAnonymousId() call with anonymousId having the value of the parameter value.
ajs_event
Makes a rudderanalytics.track() call with event name as parameter value.
ajs_prop_
If ajs_event is passed as querystring, value of this parameter will populate the properties of the corresponding event in the track call.
ajs_trait_
If ajs_uid is provided as querystring, value of this parameter will populate the traits of the identify call made.
Adding callbacks to standard methods
You can also define callbacks to the common methods of the rudderanalytics object.
Currently, the functionality is supported for syncPixel method which is called in the SDK when making sync calls in integrations for relevant destinations. For example, you can load rudderanalytics with callbacks in your Gatsby browser file as shown below:
In order for this to work well, you must also set the manualLoad option to true in your Gatsby configuration, and load RudderStack in the browser’s Gatsby file manually.
In the above example, we defined a syncPixelCallback on the rudderanalytics object before the call to load the SDK. This will lead to calling of this registered callback with the parameter {destination: <destination_name>} whenever a sync call is made from the SDK for relevant integrations like Lotame.
The callback can be supplied in options parameter like below as well:
// Define the callbacks directly on the load method like:
rudderanalytics.load(YOUR_WRITE_KEY,DATA_PLANE_URL,{clientSuppliedCallbacks:{syncPixelCallback:()=>{console.log("sync done!")},},})
This site uses cookies to improve your experience while you navigate through the website. Out of
these
cookies, the cookies that are categorized as necessary are stored on your browser as they are as
essential
for the working of basic functionalities of the website. We also use third-party cookies that
help
us
analyze and understand how you use this website. These cookies will be stored in your browser
only
with
your
consent. You also have the option to opt-out of these cookies. But opting out of some of these
cookies
may
have an effect on your browsing experience.
Necessary
Always Enabled
Necessary cookies are absolutely essential for the website to function properly. This
category only includes cookies that ensures basic functionalities and security
features of the website. These cookies do not store any personal information.
This site uses cookies to improve your experience. If you want to
learn more about cookies and why we use them, visit our cookie
policy. We'll assume you're ok with this, but you can opt-out if you wish Cookie Settings.