Send Events via Custom Domains
3 minute read
This guide covers the steps to use your own domain instead of the RudderStack domains for sending events to the RudderStack backend (data plane).
Setup overview
Usually, all tracked events are sent to RudderStack via your data plane URL. To have events routed through your own domain, you need to set up a proxy and then use it as the data plane URL while initializing the SDK.
Create a new distribution by following these steps:
- Log in to your AWS console.
- Click Services and go to Network & Content Delivery > CloudFront.
- Click Create a CloudFront distribution.
The following table gives a high-level overview of the required cache policy, origin request policy, and response headers policy for routing the events through your own domain:
| Cache policy | Origin request policy | Response headers policy (optional) |
|---|---|---|
CachingDisabled | Origin request policy settings | CORS-With-Preflight |
Step 1: Configure distribution
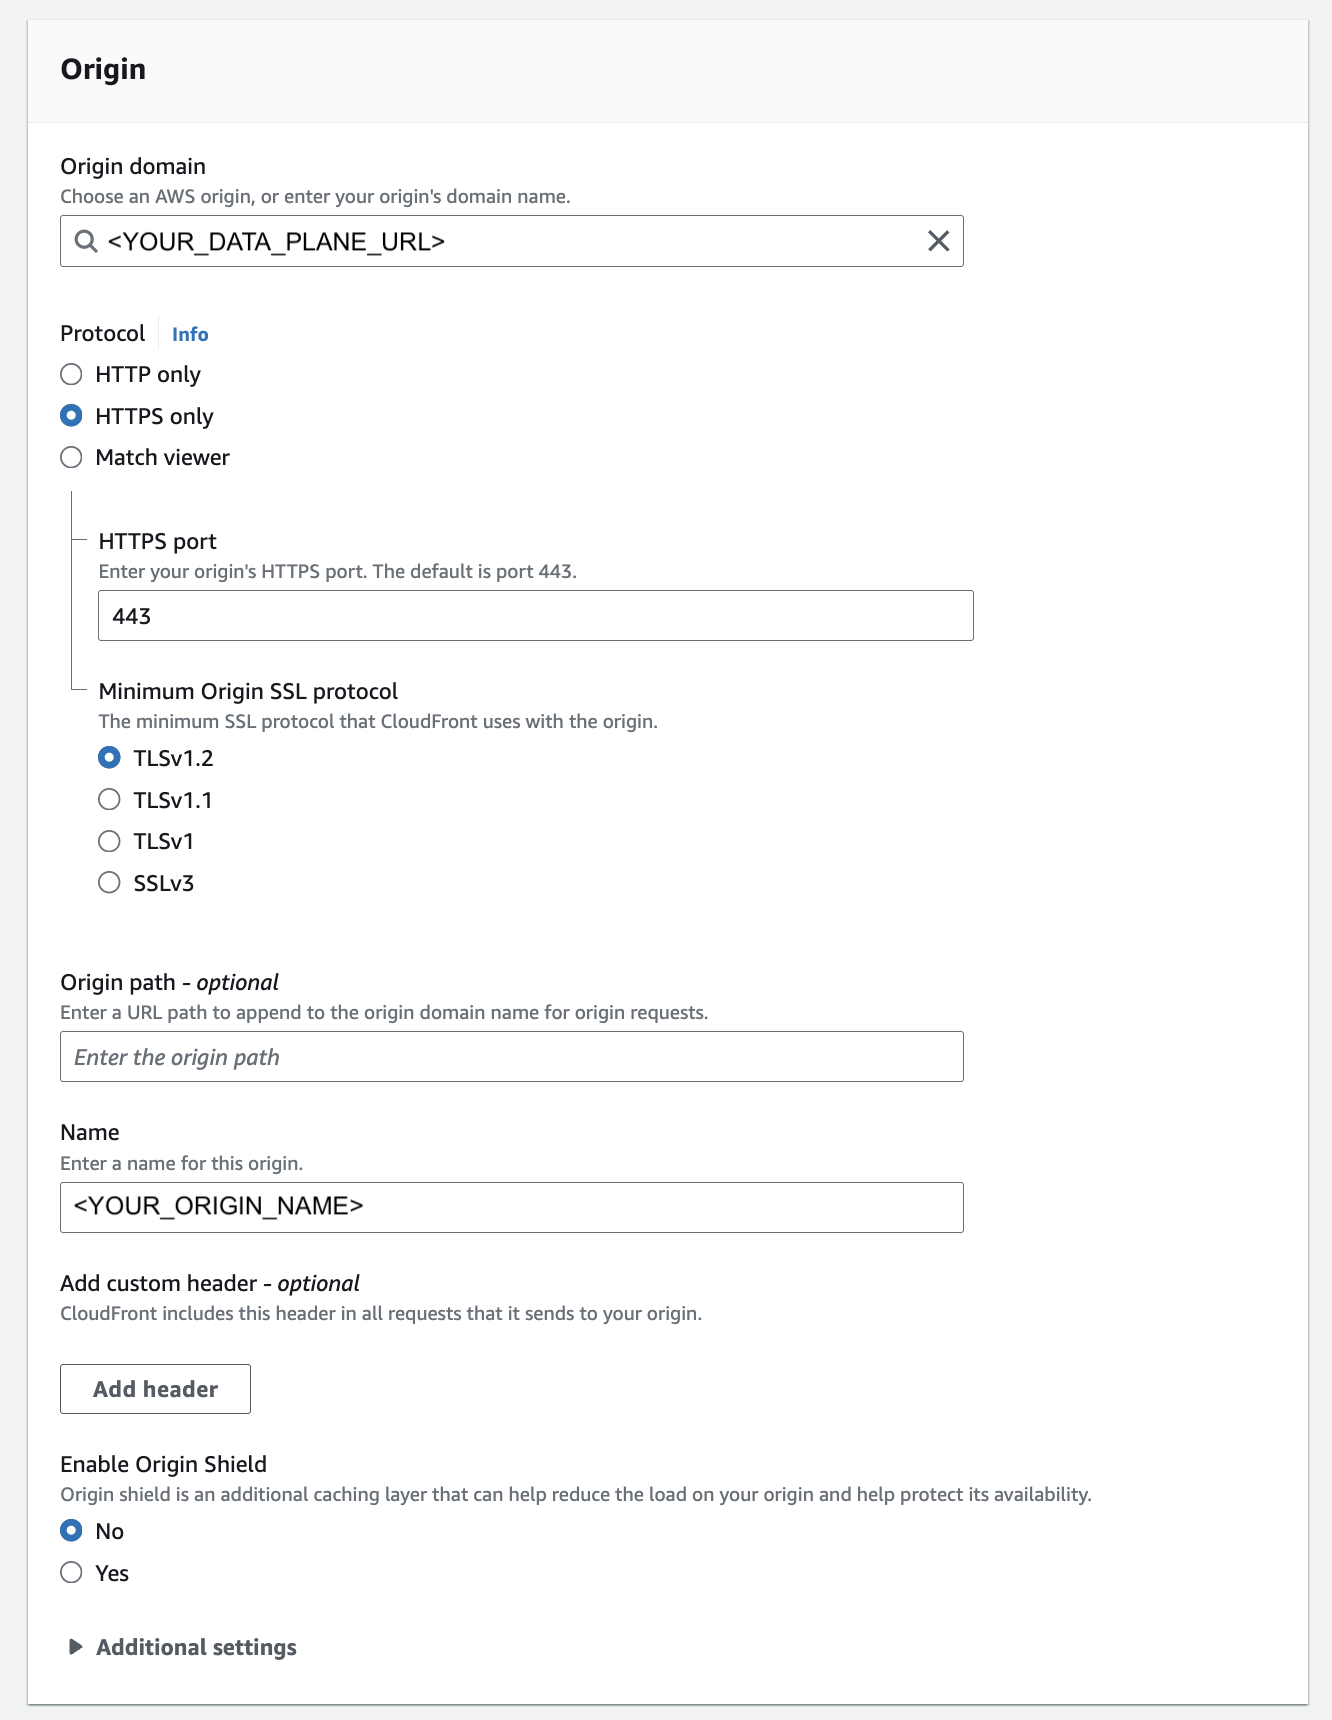
The following sections highlight the required distribution settings:
Origin
| Field | Setting |
|---|---|
| Origin domain | DATA_PLANE_URL |
| Protocol | HTTPS Only |
| HTTPS port | 443 |
| Minimum origin SSL protocol | TLSv1.2 |
| Name | <YOUR_ORIGIN_NAME> |
| Enable Origin Shield | No |
Default cache behavior settings
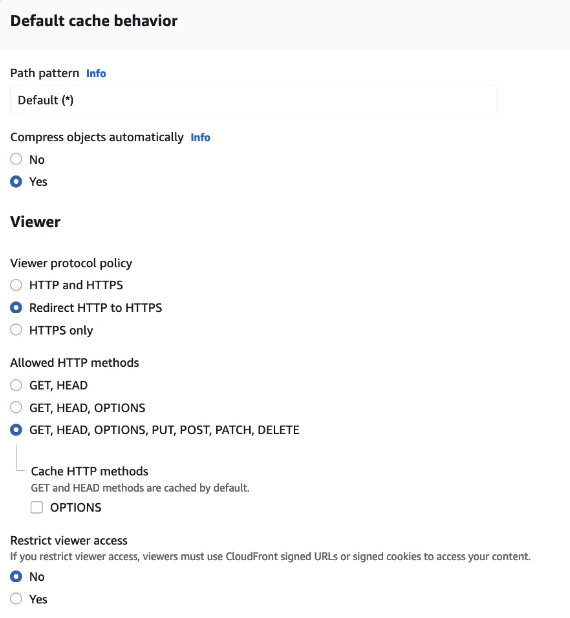
| Field | Setting |
|---|---|
| Compress objects automatically | Yes |
| Viewer protocol policy | Redirect HTTP to HTTPS |
| Allowed HTTP methods | GET, HEAD, OPTIONS, PUT, POST, PATCH, DELETE |
| Restrict viewer access | No |
Cache key and origin requests
Select Cache policy and origin request policy (recommended) and configure the following settings:
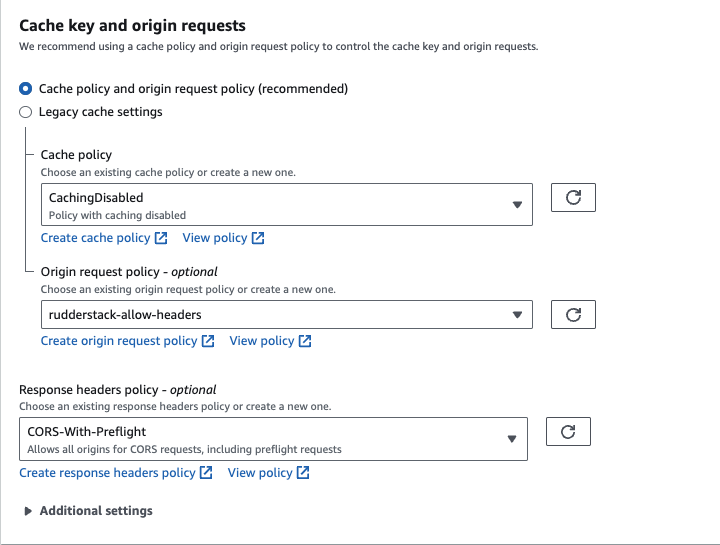
| Field | Setting |
|---|---|
| Cache policy | CachingDisabled |
| Origin request policy | See Origin request policy settings. |
| Response headers policy | CORS-With-Preflight |
Origin request policy settings
Create a new origin request policy with the following settings:
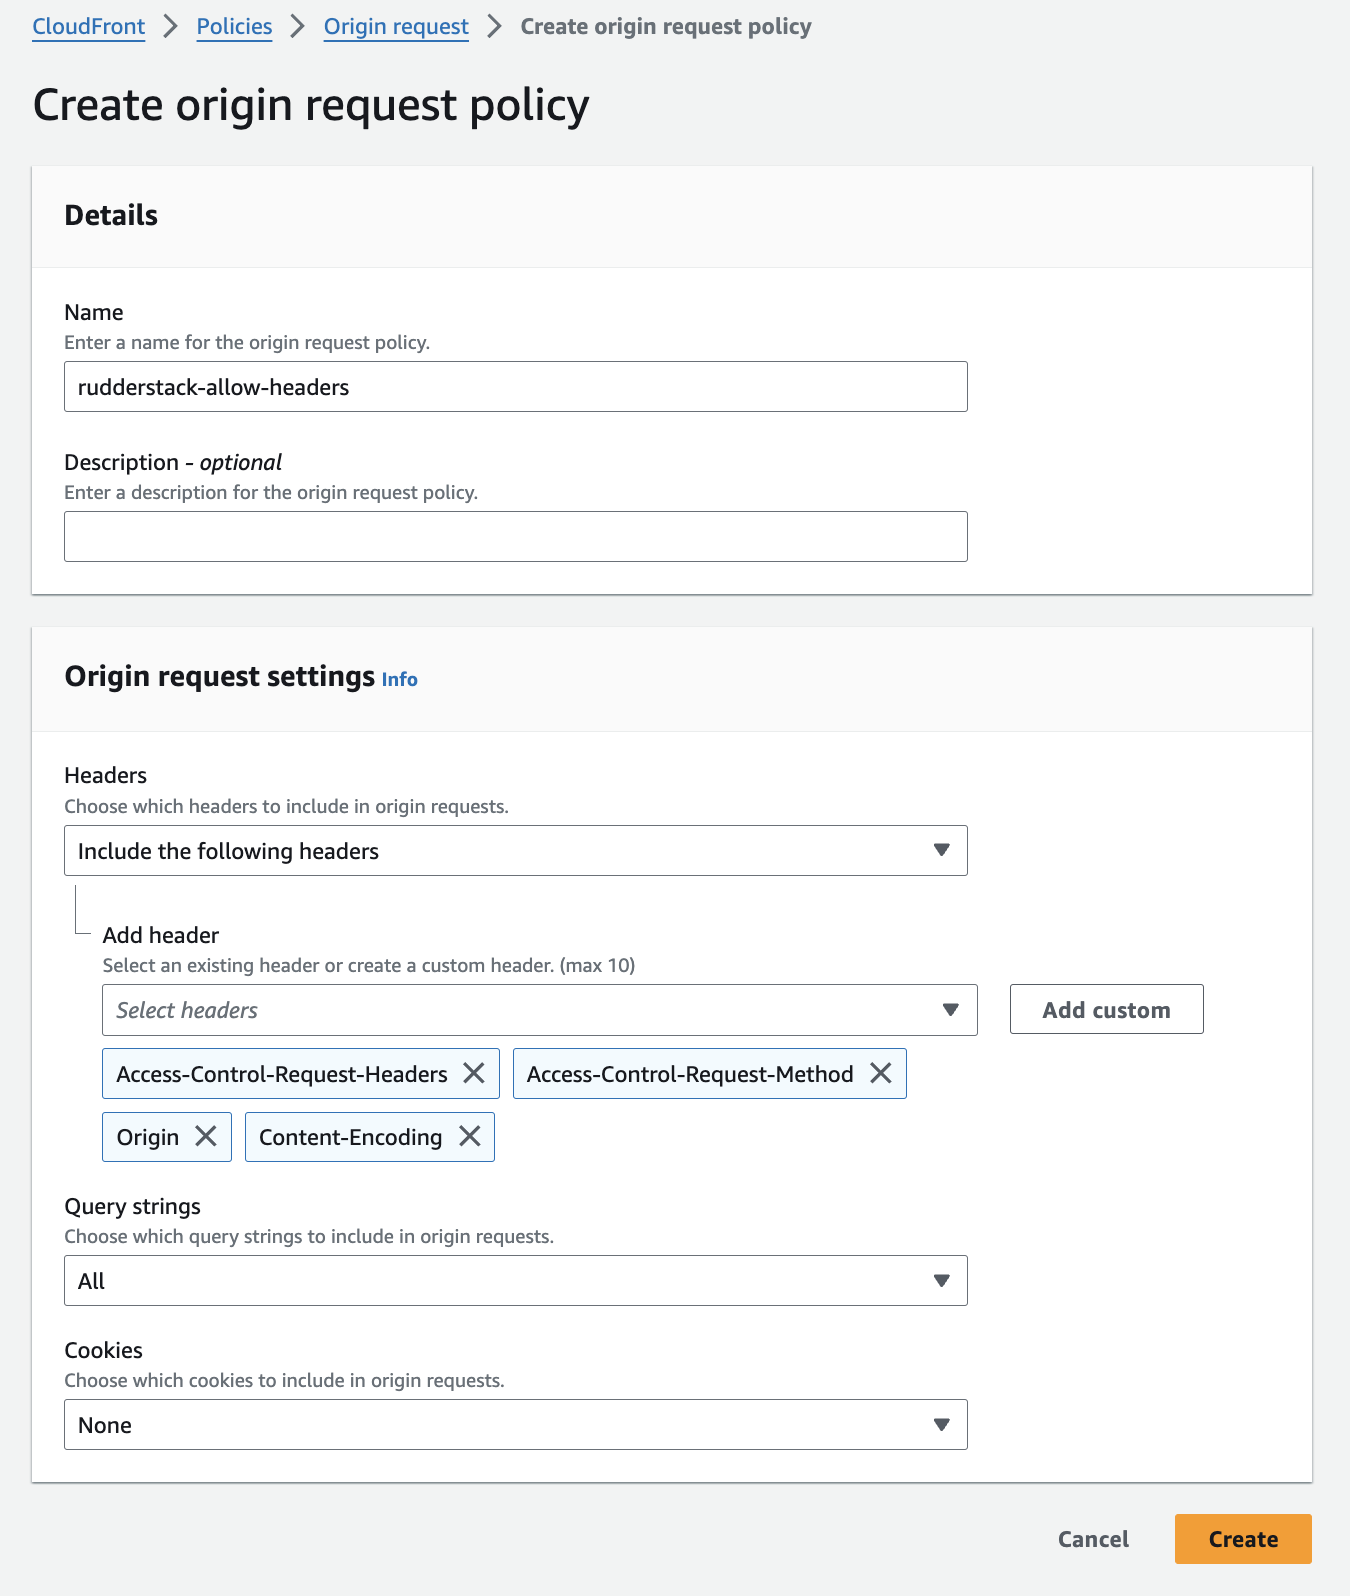
| Field | Setting |
|---|---|
| Name | rudderstack-allow-headers |
| Headers | Include the following headers |
| Add header |
|
| Query strings | All |
| Cookies | None |
Additional distribution settings
The following table summarizes the settings:
| Field | Setting |
|---|---|
| Price class | Use all edge locations(best performance) |
| Alternate domain name(CNAME) | <YOUR_CUSTOM_DOMAIN> |
| SSL Certificate | Add your custom SSL Certificate. See Use custom SSL certificates for more information. |
| Supported HTTP versions | HTTP/2 |
| Standard logging | Off |
| IPv6 | On |
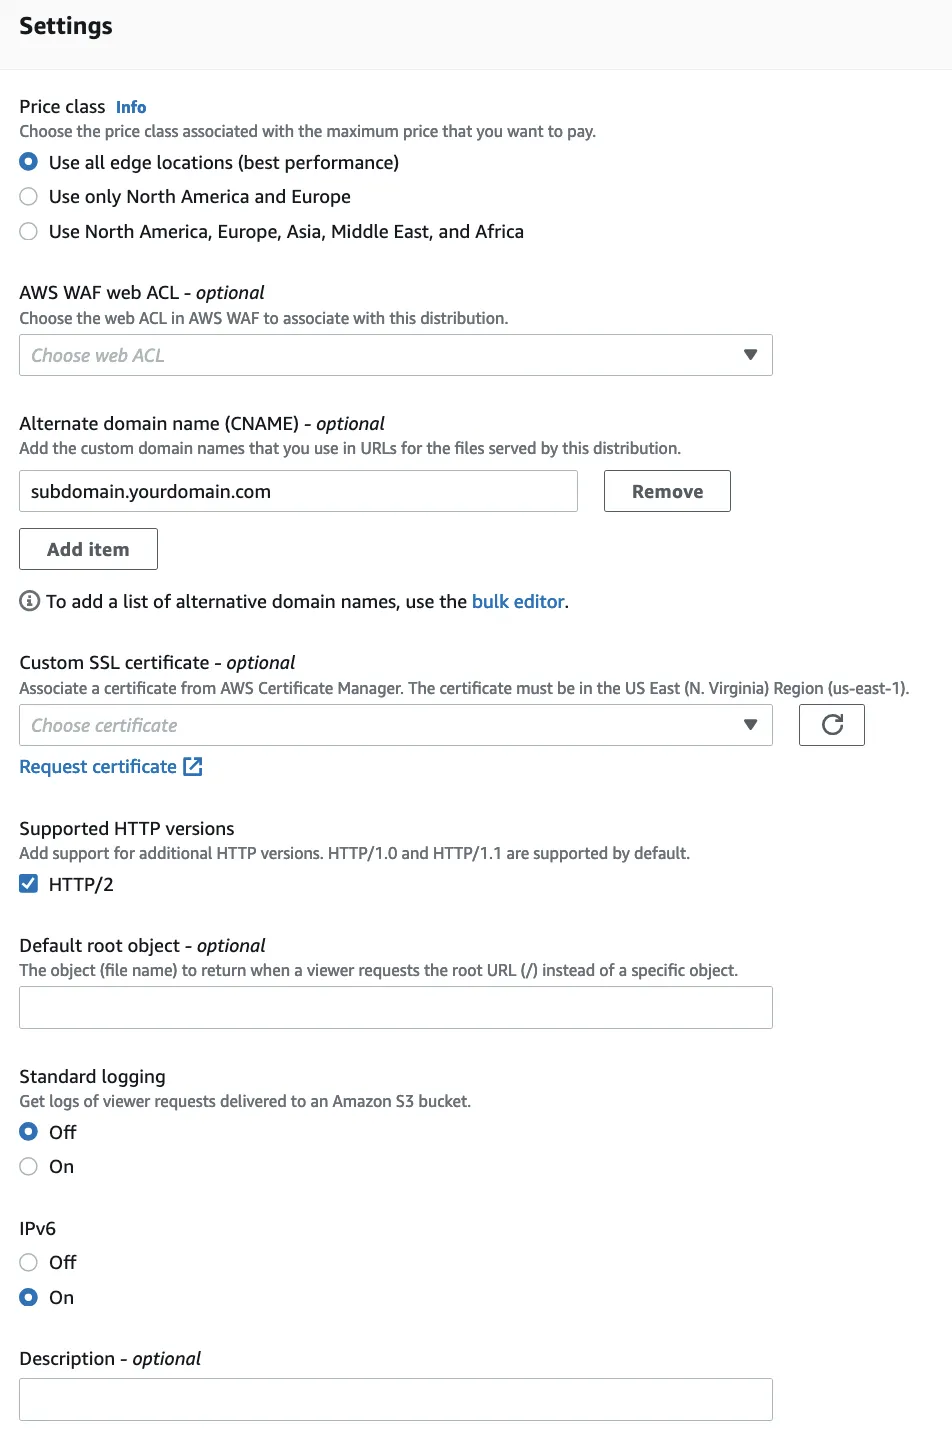
Step 2: Deploy distribution
Click Create distribution and wait for CloudFront to be deployed:

Add CNAME Record to DNS
Once your distribution is deployed, create a CNAME record for the subdomain you wish to use along with the distribution URL.
| Name | Value |
|---|---|
| Subdomain you wish to use (used in the creation of the distribution). Note: This will vary based on your DNS provider but will typically be just the subdomain. For example: for cdn.yourdomain.com you would use cdn. | The CDN URL for the created distribution. Example: <prefix>.cloudfront.net |

Step 3: Send events
Once the setup and DNS propagation is completed, you can use the newly created URL as the data plane URL when initializing the SDK:
Before:
rudderanalytics.load(
  WRITE_KEY ,
  DATA_PLANE_URL
)
After:
rudderanalytics.load(
  WRITE_KEY,
  "https://<YOUR_CUSTOM_DOMAIN>"
)
Make sure that the events are routed through your own domain and not the
rudderstack.comdomain in the network tab of your browser console.See JavaScript SDK FAQ for more information.
Use custom SSL certificates
To use a custom domain for your use case, you can request or import an SSL certificate with your CDN provider. Note that this is an optional setting.
To use the AWS Certificate Manager with CloudFront, choose the relevant ACM/IAM certificate in the Custom SSL certificate field:

You can choose your subdomain or use a wildcard domain*.yourdomain.comto set up multiple subdomains.
The AWS Certificate Manager will guide you through the verification by email or DNS TXT records. You will be able to choose your own domain for SSL certificates once verified.
Custom request header for GCP external load balancer
If you’re setting up a custom domain using the GCP External HTTPS Load Balancer, make sure to add a custom request header in your backend service configuration:
| Header | Value |
|---|---|
Host | cdn.rudderlabs.com |
