Configure cloud-specific buckets for your event backups.
3 minute read
Depending on your data retention policy, RudderStack stores the raw events ingested by RudderStack, including gateway dumps for successfully-ingested events.
Note that:
RudderStack deletes the events from the bucket upon successful delivery.
RudderStack does not persist any of the customer data.
Follow the steps in this guide if you want RudderStack to back up the events in your own cloud-specific bucket.
Bucket configuration settings
If you are using RudderStack Open Source and want to use your own bucket to store the events, you need to enable and set certain variables in your RudderStack backend.
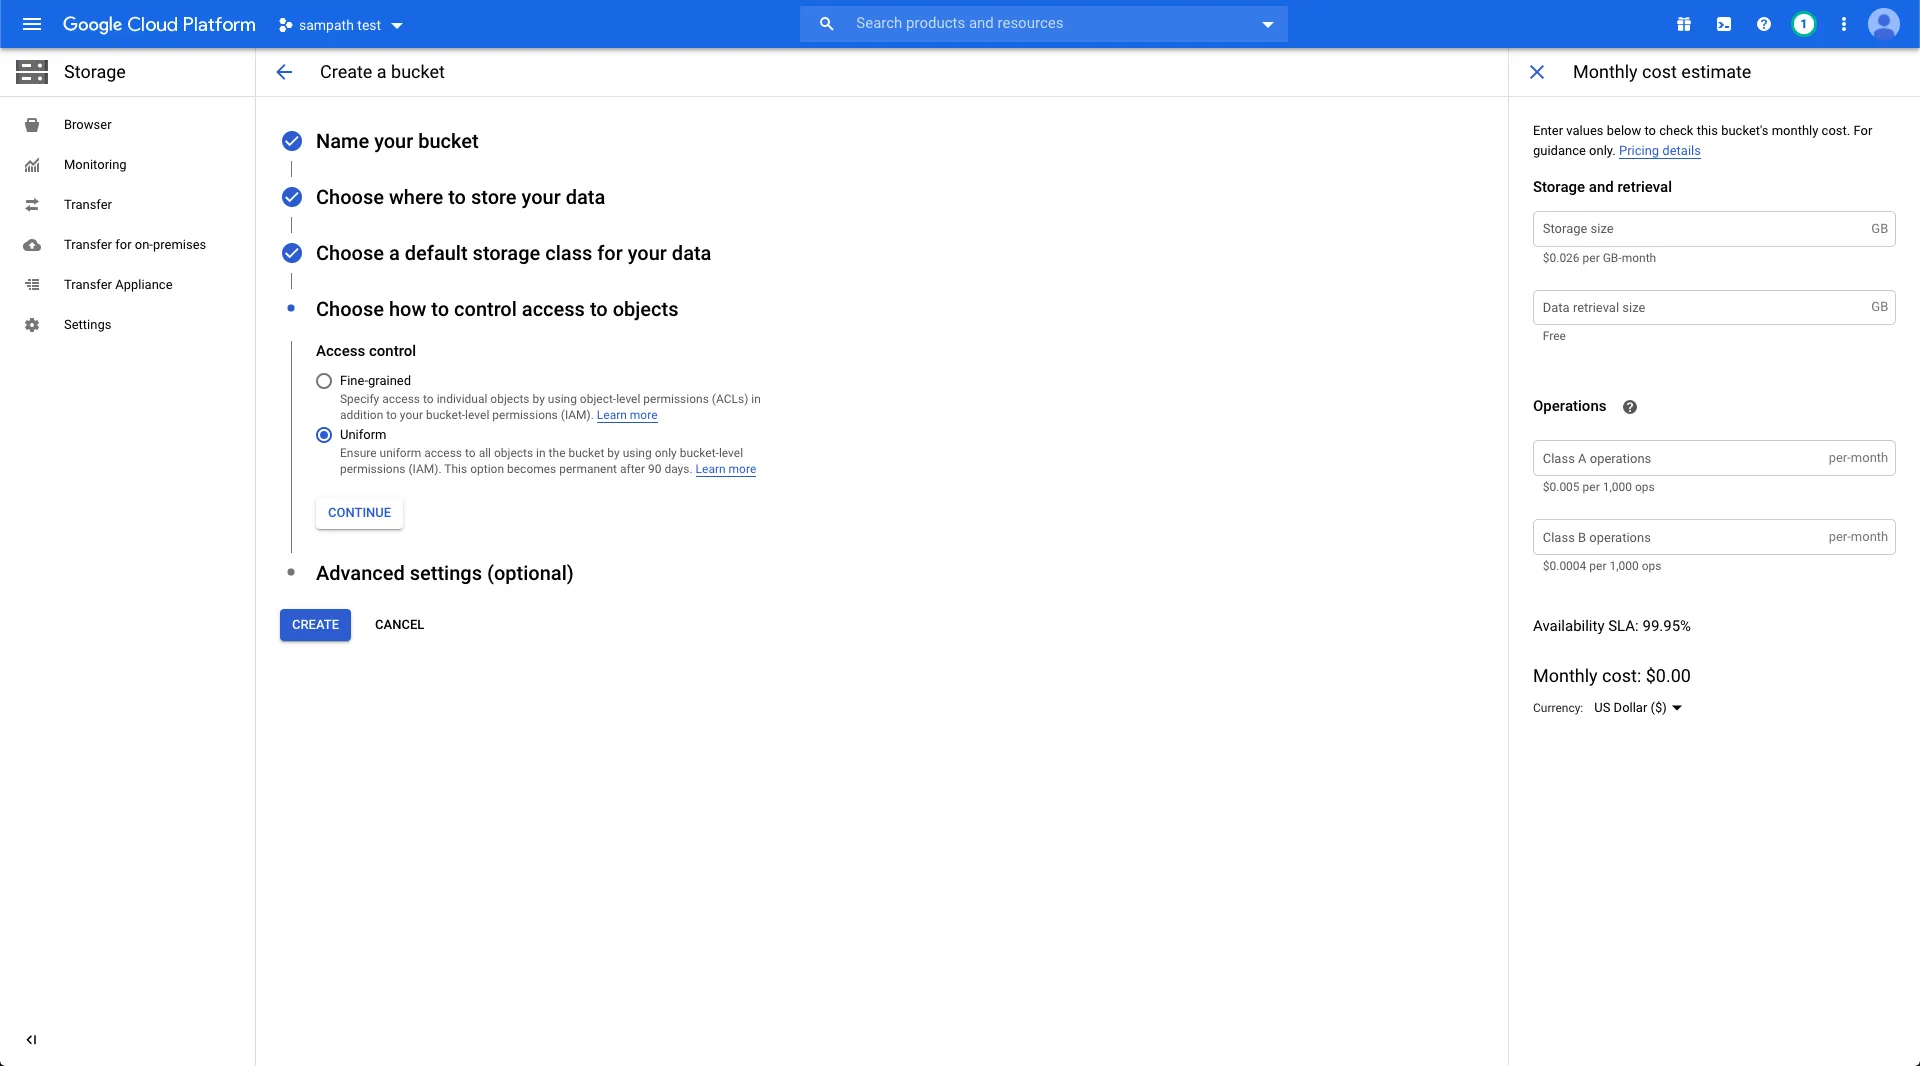
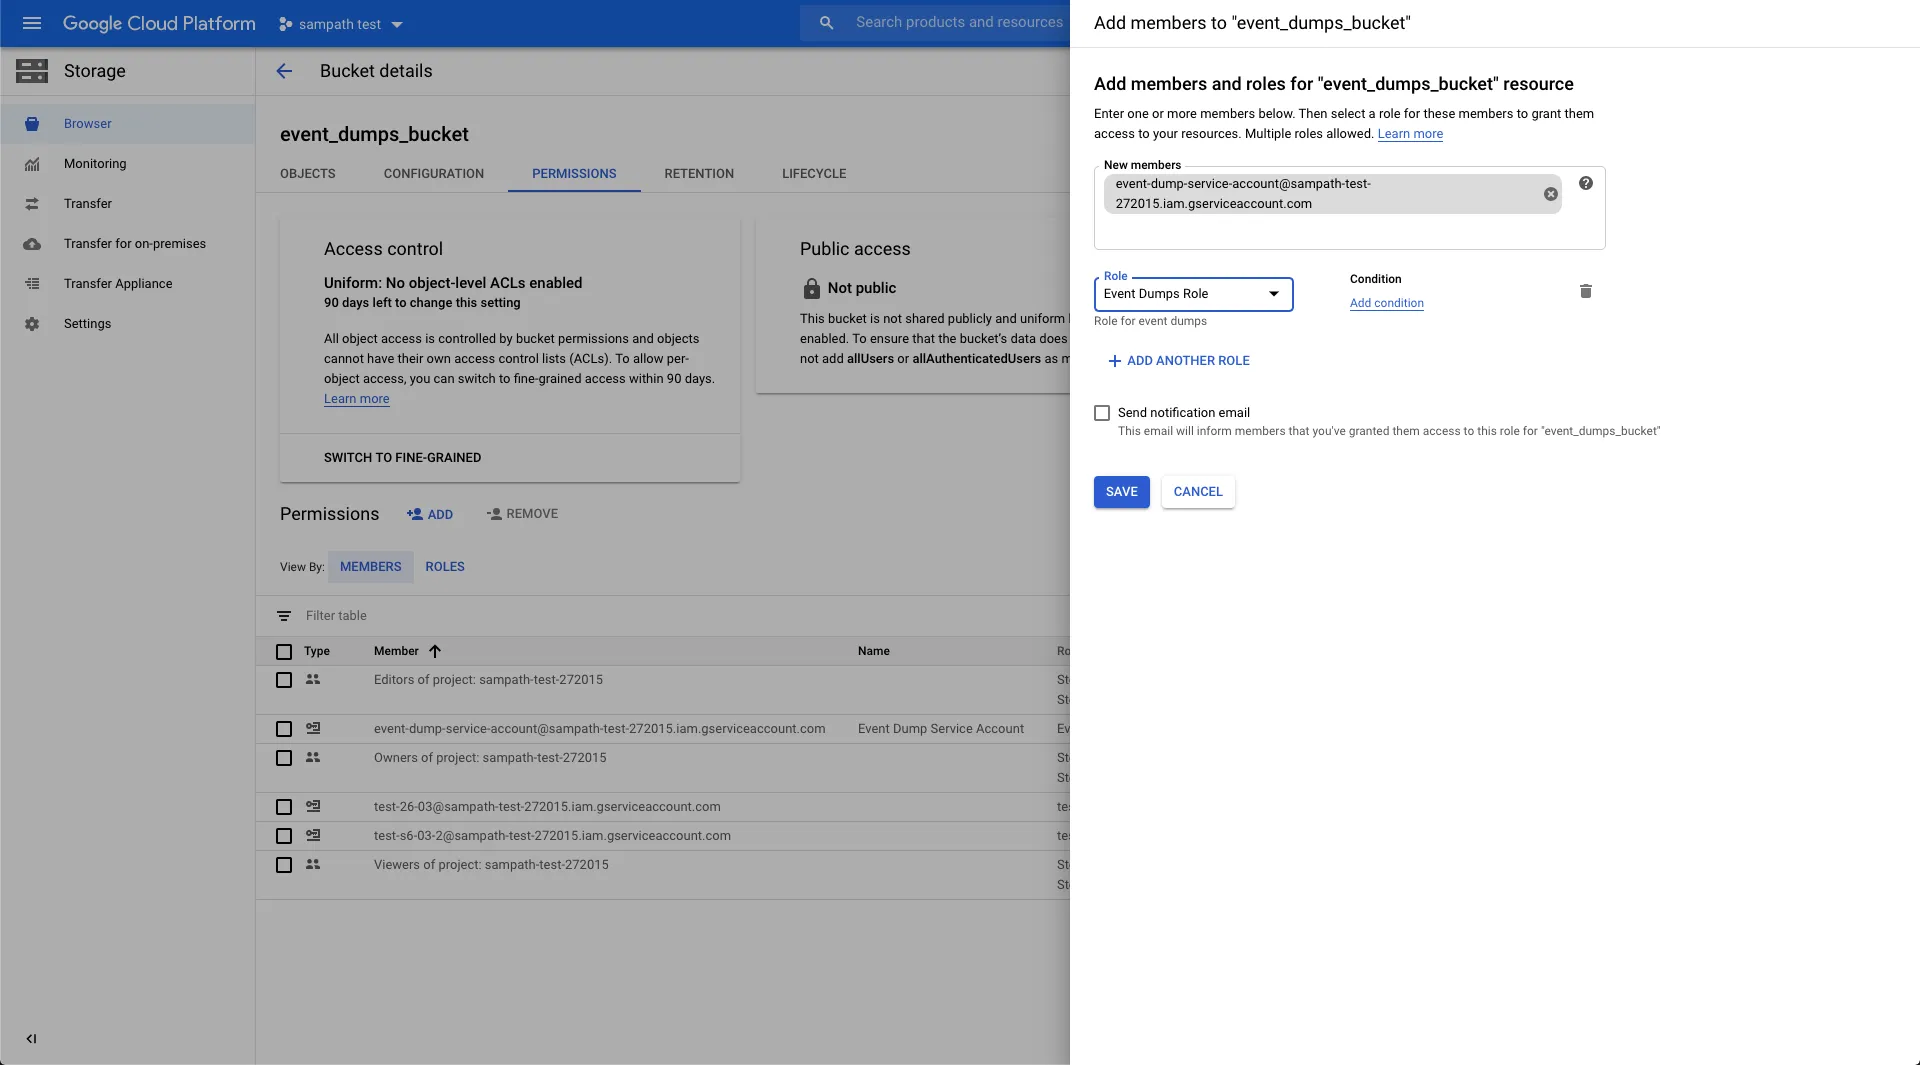
Specify your GCS bucket name for the variable JOBS_BACKUP_BUCKET.
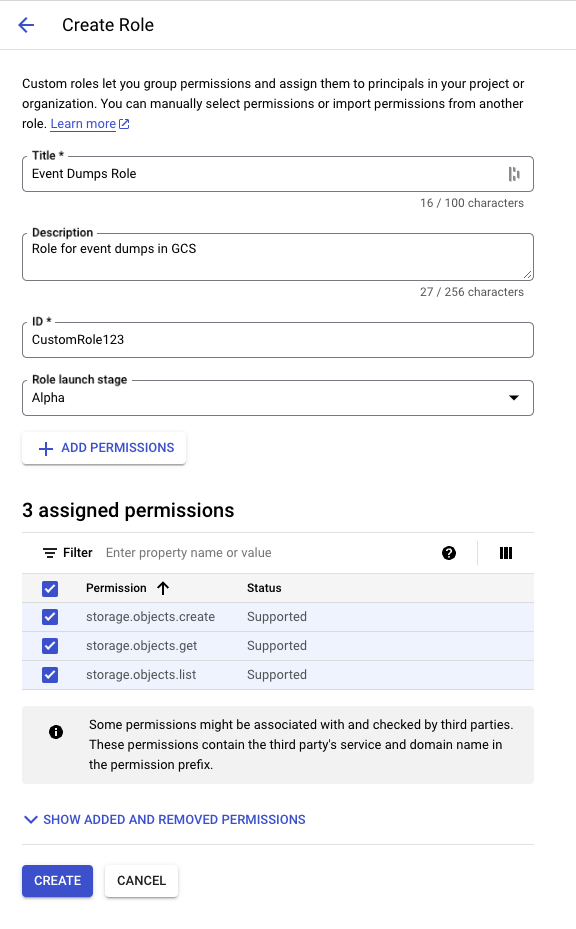
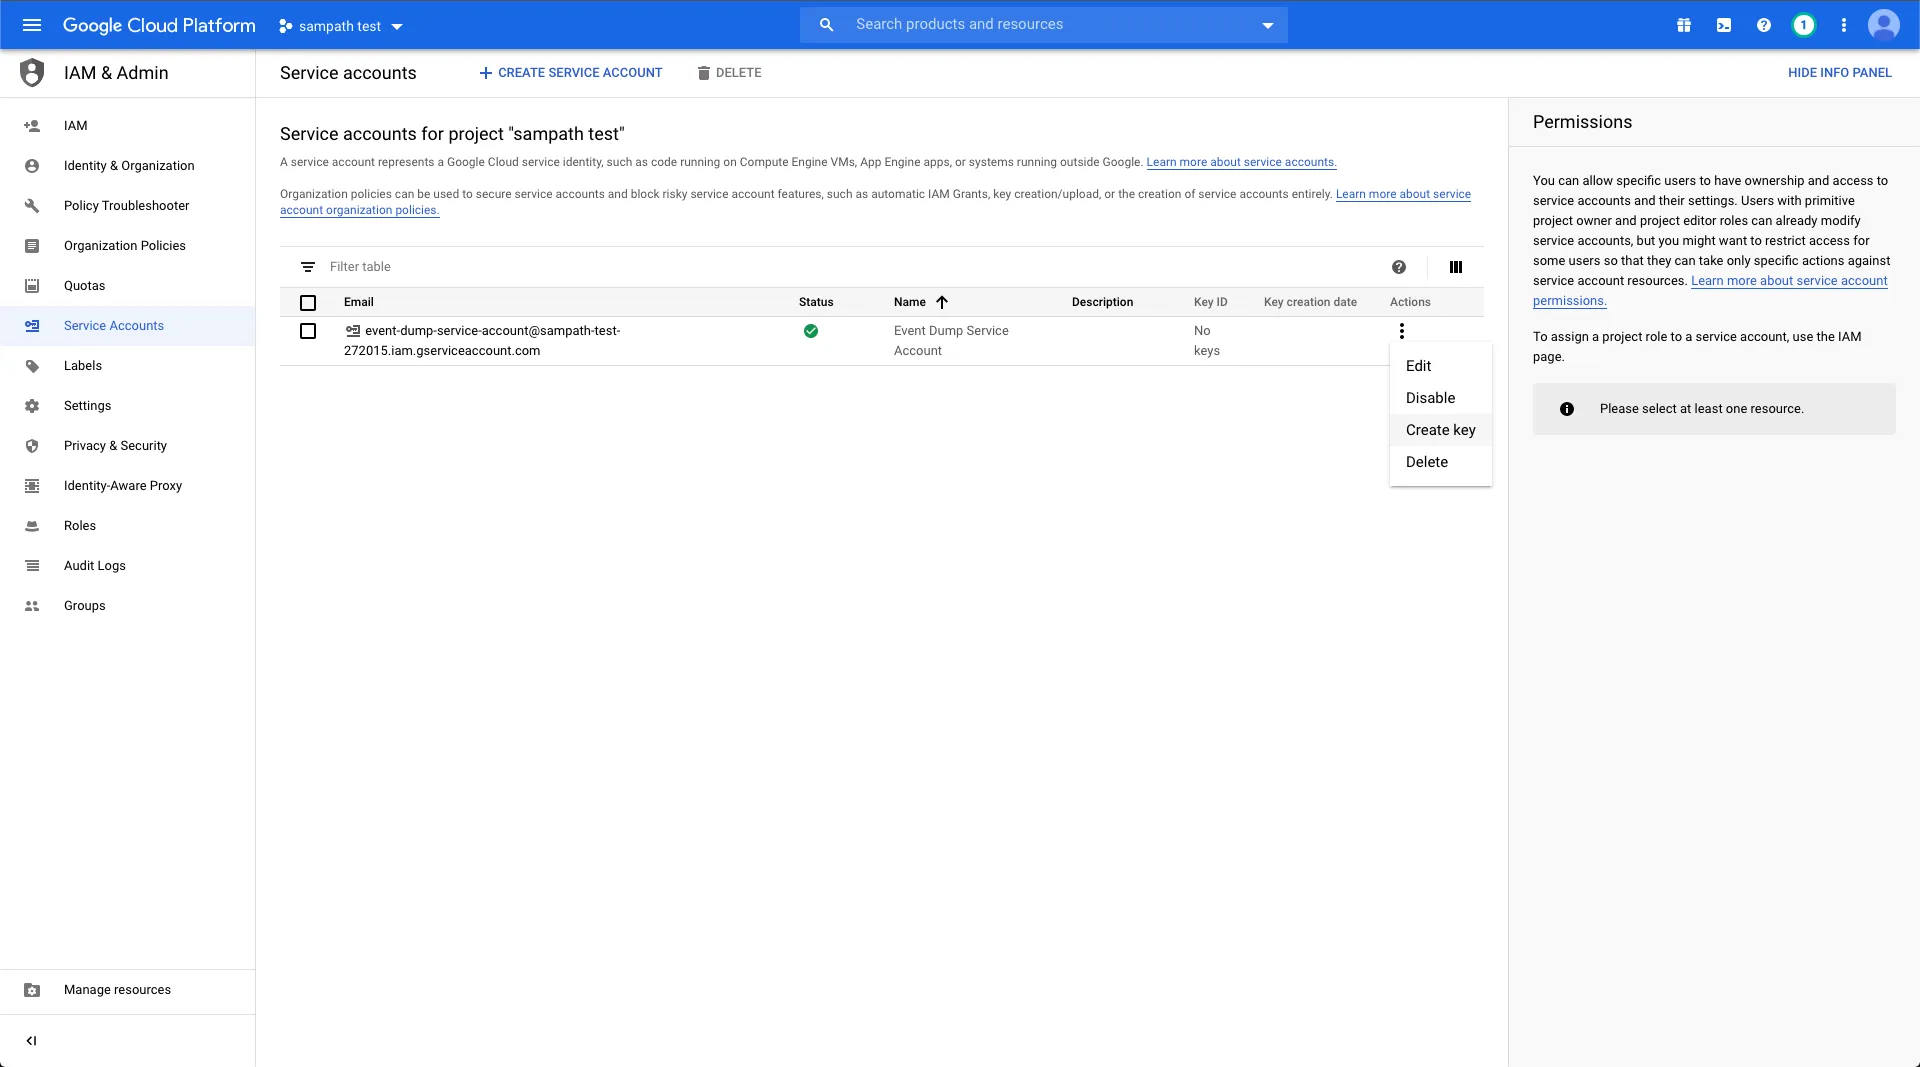
Specify the location of the downloaded JSON file containing the required permissions for the variable GOOGLE_APPLICATION_CREDENTIALS. You can obtain the JSON file by referring to the Permissions for GCS section below.
If you’re a RudderStack Growth or Enterprise plan user, you can share the downloaded JSON containing the required permissions with the RudderStack team. The team will use this service account JSON file to authenticate RudderStack and dump the events into your GCS bucket.
Kubernetes setup
Similar to the Docker setup, you can configure your bucket settings by changing the values in the values.yaml file.
Permissions for Amazon S3
Follow these steps to use your own S3 bucket for RudderStack to store the events:
This site uses cookies to improve your experience while you navigate through the website. Out of
these
cookies, the cookies that are categorized as necessary are stored on your browser as they are as
essential
for the working of basic functionalities of the website. We also use third-party cookies that
help
us
analyze and understand how you use this website. These cookies will be stored in your browser
only
with
your
consent. You also have the option to opt-out of these cookies. But opting out of some of these
cookies
may
have an effect on your browsing experience.
Necessary
Always Enabled
Necessary cookies are absolutely essential for the website to function properly. This
category only includes cookies that ensures basic functionalities and security
features of the website. These cookies do not store any personal information.
This site uses cookies to improve your experience. If you want to
learn more about cookies and why we use them, visit our cookie
policy. We'll assume you're ok with this, but you can opt-out if you wish Cookie Settings.