MySQL Reverse ETL Source
6 minute read
MySQL is a popular open source relational DBMS.
RudderStack supports MySQL as a data source from which you can ingest data and route it to your desired downstream destinations.
This source is compatible with MySQL v8.0.0 and above.
Grant permissions
Before you set up MySQL as a source, you must grant certain permissions on your MySQL database for RudderStack to access data from it.
Run the SQL queries listed in the following sections in the exact order to grant these permissions:
Step 1: Create user
Create a new user RUDDER with a password <password> in MySQL:
CREATE USER RUDDER IDENTIFIED BY '<password>';Set a strong and unique password for creating the user in MySQL.
Step 2: Create RudderStack schema and grant permissions
- Create a dedicated schema
_rudderstack.
CREATE SCHEMA _rudderstack;The
_rudderstackschema stores Reverse ETL sync state, snapshots, and related tables. Do not change this name.See
_rudderstackSchema Reference for more details.
- Grant full access to the schema
_rudderstackfor the userRUDDER.
GRANT ALL PRIVILEGES ON _rudderstack.* TO RUDDER;Step 3: Grant permissions on schema and table
- Grant access to the user
RUDDERto read data from tables in<YOUR_SCHEMA>:
GRANT SELECT ON <YOUR_SCHEMA>.* TO RUDDER;Set up MySQL source in RudderStack
- Log in to your RudderStack dashboard.
- On the Connections page, click Add source.
- Under Sources, click Reverse ETL and select MySQL.
Configure warehouse credentials
You can choose to proceed with your existing warehouse credentials if you have configured them in the RudderStack dashboard previously. Otherwise, click Add new credentials to add new credentials for your warehouse.
- Host: Enter the host name of your MySQL instance.
- Port: Enter the port number associated with the MySQL database instance.
- Database: Enter the database name in your MySQL instance from where RudderStack ingests the data.
- User: Enter the user name of your MySQL instance.
- Password: Enter the password for the above user.
- SSL Mode: Select the SSL mode from false or skip-verify depending on how RudderStack should connect to your MySQL instance.
Click the Verify button on the top right. RudderStack will then verify and validate your credentials. Once verified, click Continue to proceed.
Specify name and source type
- Source name: Assign a name to uniquely identify the source in the RudderStack dashboard.
- Select your source type: RudderStack lets you set up a Reverse ETL source from a warehouse Table or Model.
| Source type | Description |
|---|---|
| Table | Use an existing warehouse table as a data source. See Use warehouse table as source for detailed setup. |
| Model | Use custom SQL queries to fetch specific warehouse data and send them to your destinations. See Use model as source for detailed setup. |
Use warehouse table as source
Under Select your source type, choose Table and specify the below fields:
- Schema: Select the warehouse schema from the dropdown.
- Table: Choose the required table from which RudderStack syncs the data.
- Primary key: Select the column from the above table that uniquely identifies your records in the warehouse.
RudderStack uses the primary key column for diffing in case of incremental syncs. You can generate it by:
- Generating your table with a primary key, OR
- Creating a table view
You can use a composite key in cases where one column cannot be considered as a primary key. For example, you can a declare a composite key of
user_idandtimestampby creating a view on your warehouse table.
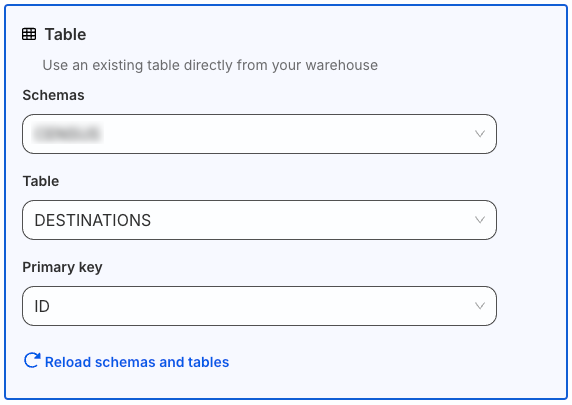
Finally, review and complete your source setup.
Use model as source
Under Select your source type, choose Model and click Continue.
To configure a model as source:
- Enter an optional description and specify the custom SQL query in Query section.
- Click Run Query to fetch the data preview.
- Select the Primary key to use a column that uniquely identifies your warehouse records.
You can set a primary key only after you run the SQL query successfully using the Run Query option.
RudderStack uses the primary key column for diffing in case of incremental syncs. You can generate it by:
- Generating your table with a primary key, OR
- Creating a table view
You can use a composite key in cases where one column cannot be considered as a primary key. For example, you can a declare a composite key of
user_idandtimestampin SQL query of the model.
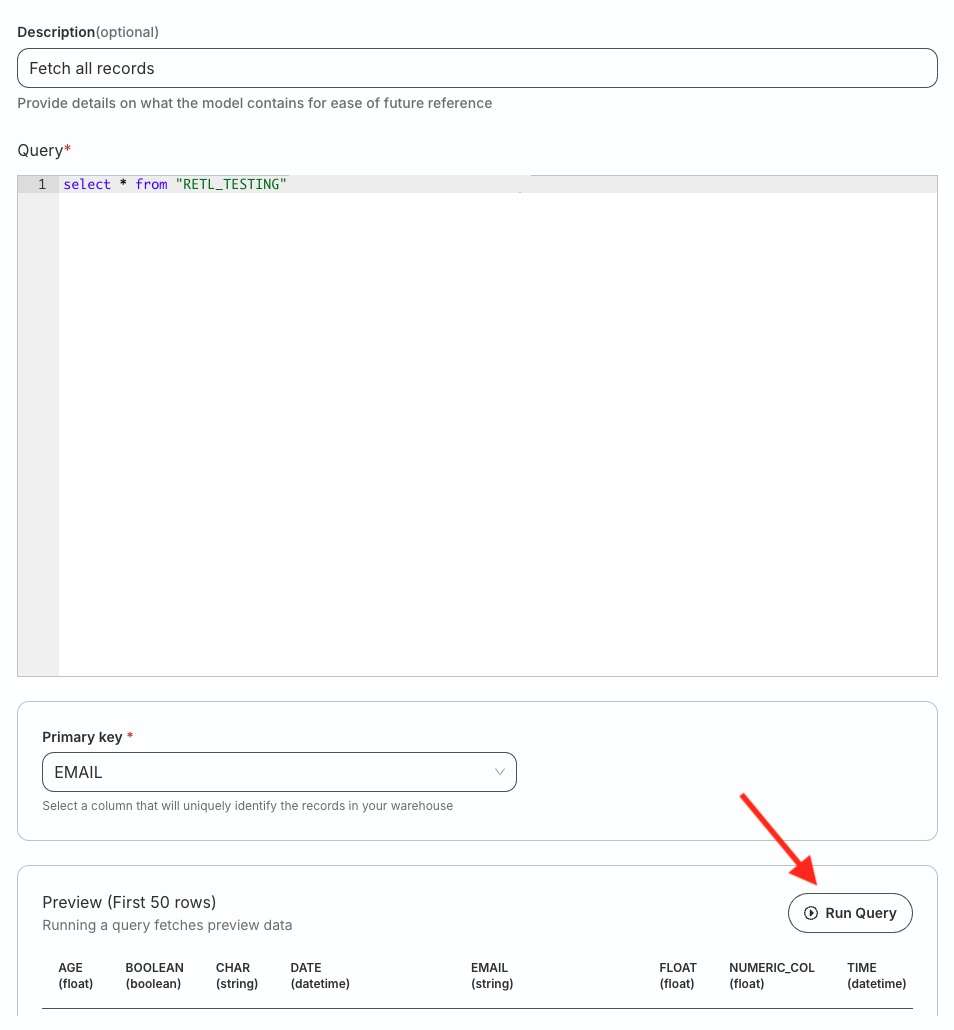
Finally, review and complete your source setup.
Review and complete setup
To make any changes to the warehouse credentials or source configuration, click the edit icon present next to those sections.
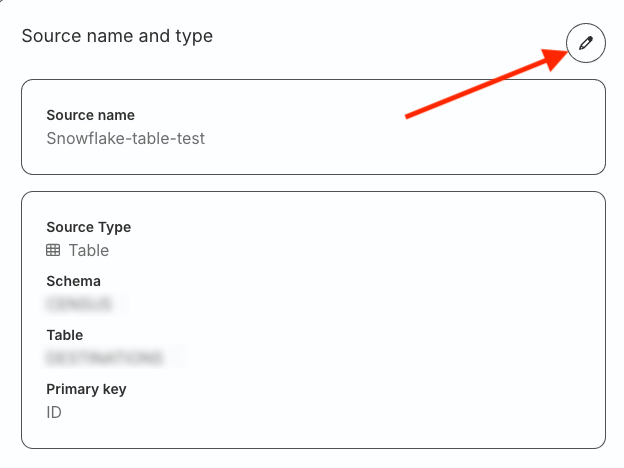
Review your configuration and click Create source to complete the setup.
Connect destination
To start using the newly-created source, you can connect it to:
- A new destination, or
- An existing destination that is not already connected to any other source.
To connect to a destination later, click Done on the top right:
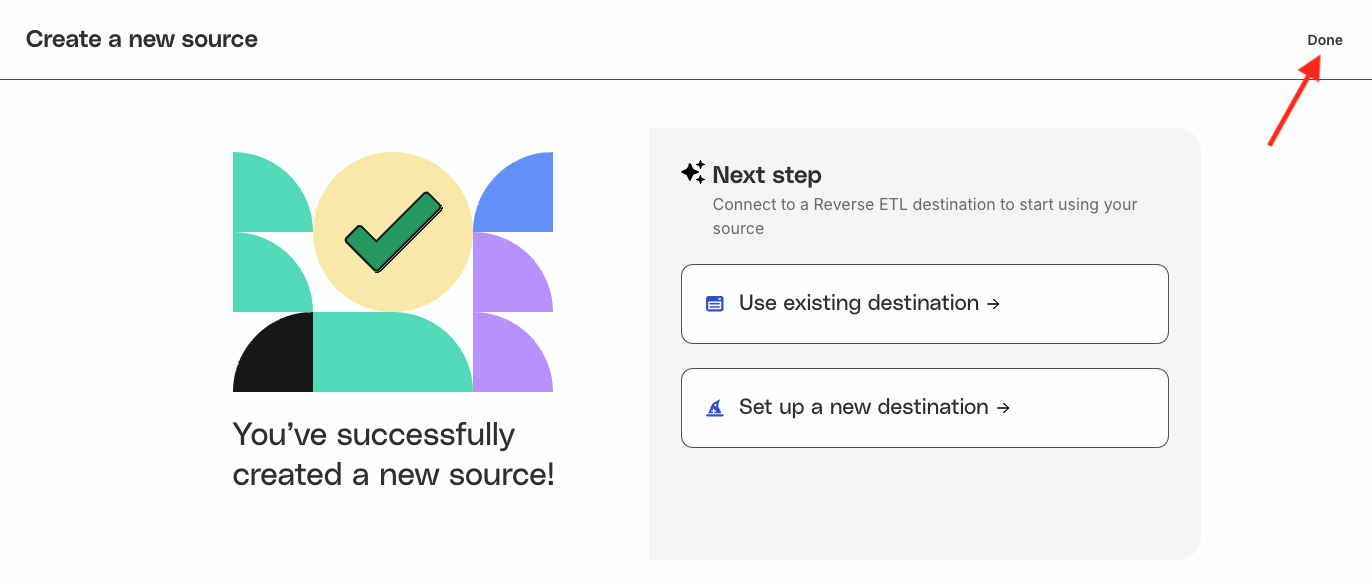
You will then be redirected to the Overview page of the source where you will see the option of connecting it to a new or existing destination.
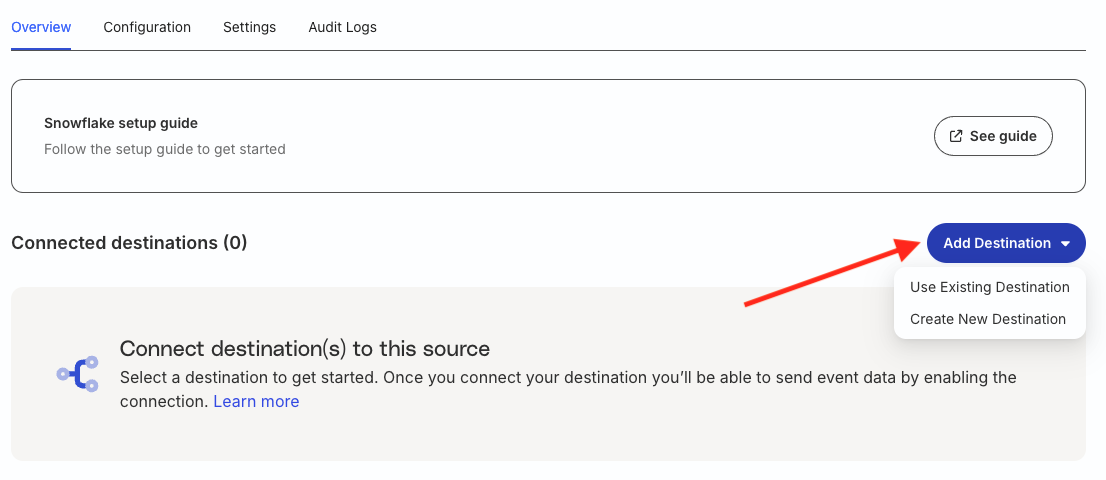
See Set up Reverse ETL Connection section for more information.
Update source configuration and settings
Go to the Configuration tab of your Reverse ETL source to update the configuration depending on your source type:
You cannot change the source type on this page.
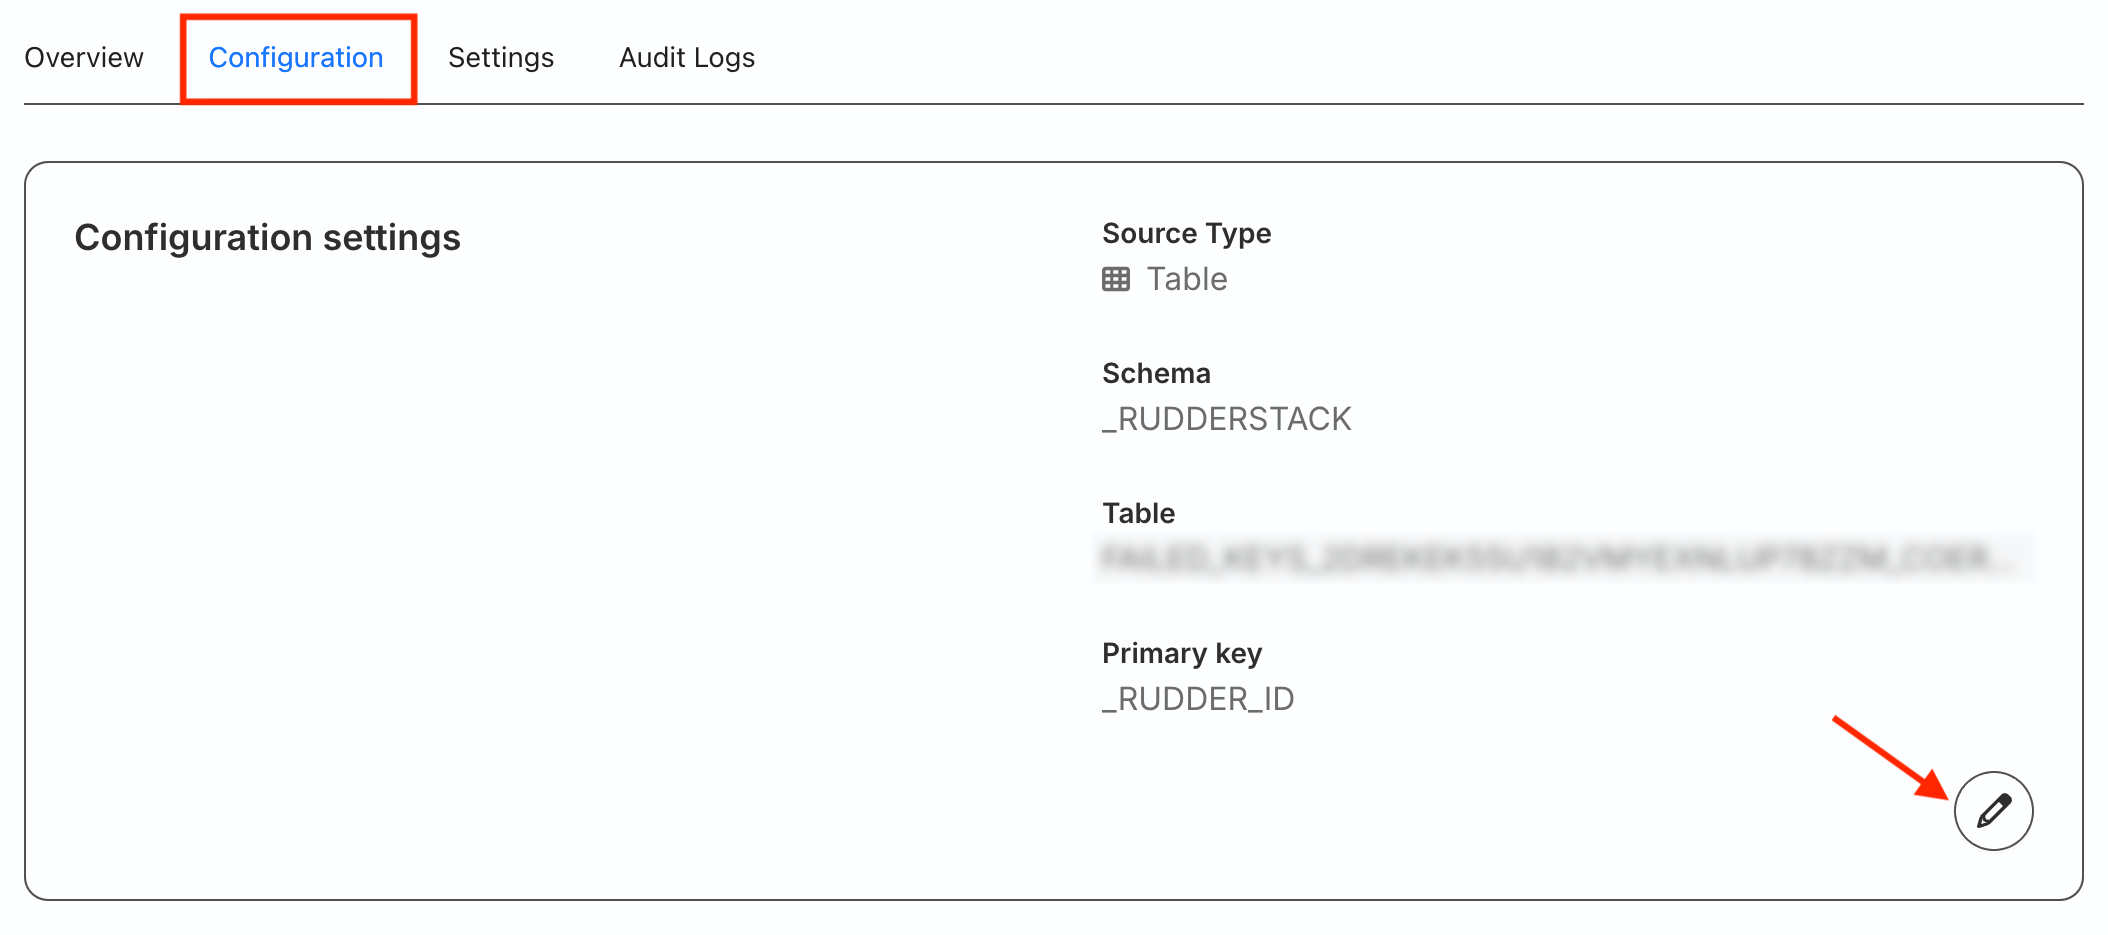
The below table lists the options you can update:
| Source type | Configurable options |
|---|---|
| Table | Schema, Table, Primary key |
| Model | Note: You can set the primary key only after the SQL query runs successfully. |
After updating the configuration, the next sync will be a full sync.
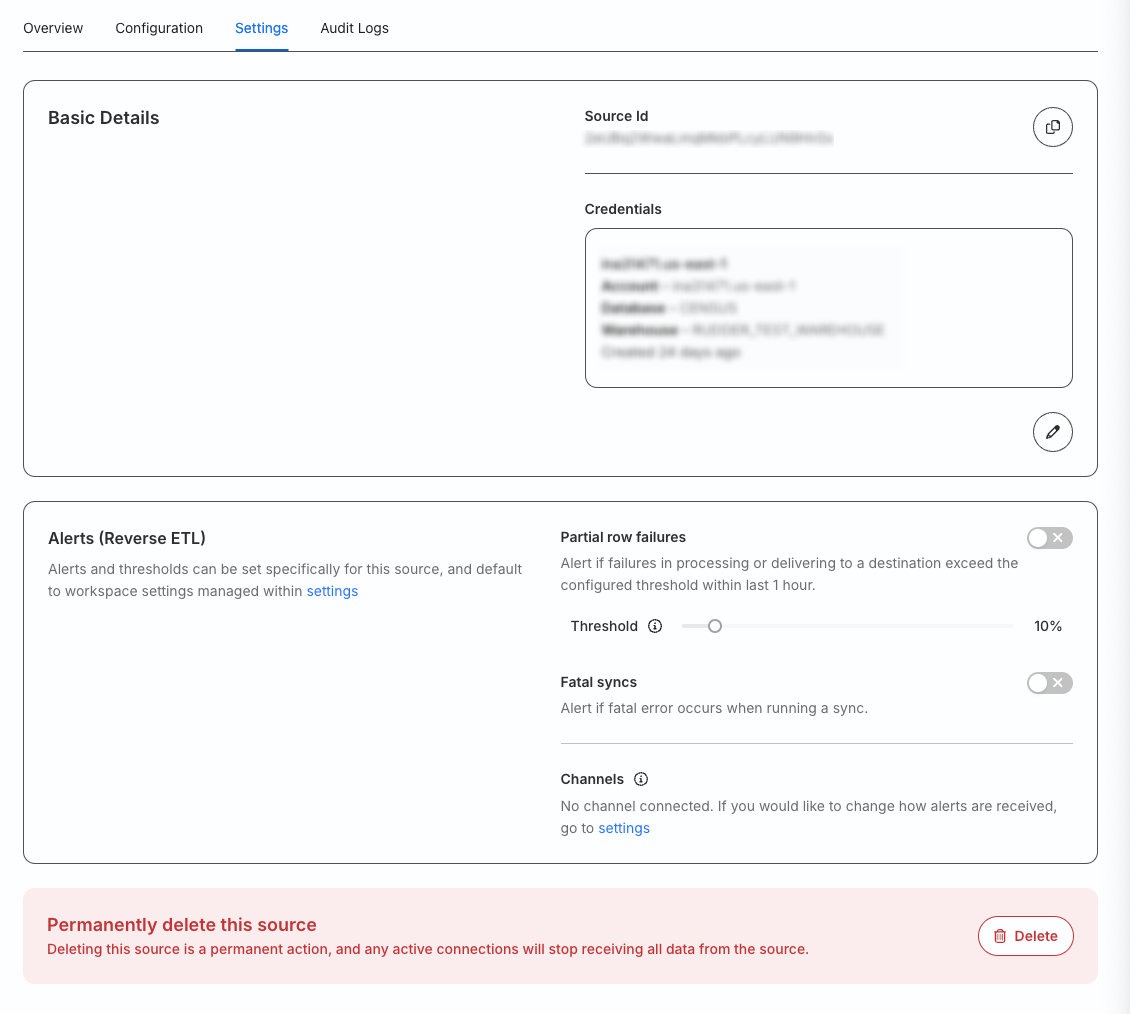
Go to the Settings tab to:
- Get your source ID.
- Change your warehouse credentials.
- Set up custom alerts for your Reverse ETL source.
- Delete the source permanently.
You cannot delete a source that is connected to any destination.
FAQ
What do the three validations under Verifying Credentials imply?
When setting up a Reverse ETL source, you will see the following three validations under the Verifying Credentials option once you proceed after entering the warehouse credentials:
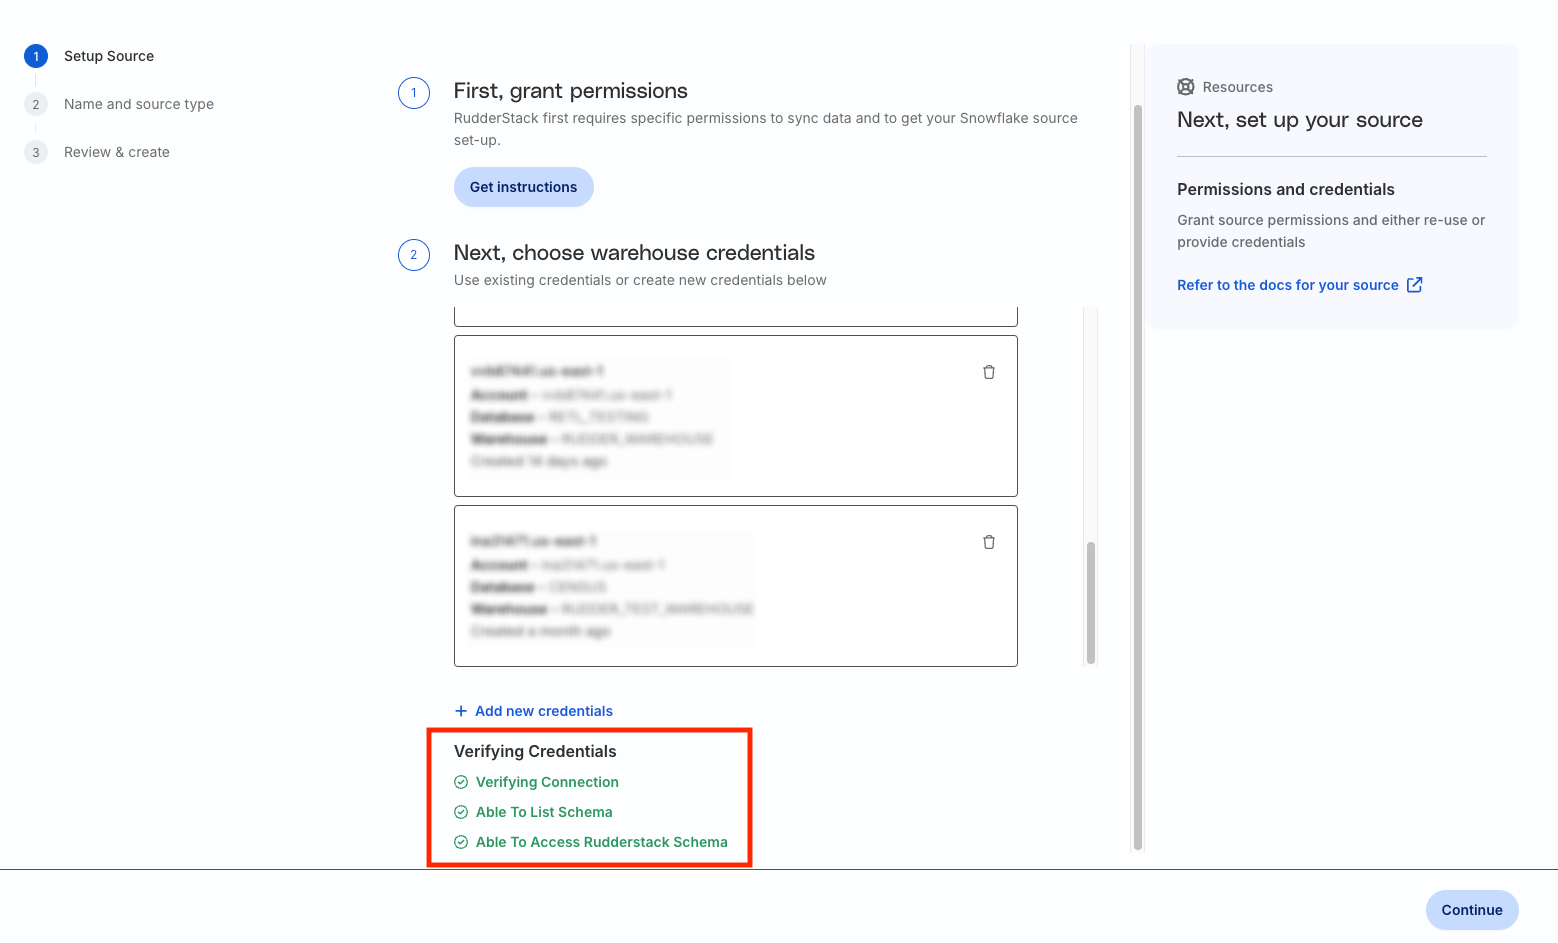
These options are explained below:
- Verifying Connection: This option indicates that RudderStack is trying to connect to the warehouse with the provided warehouse credentials.
If this option gives an error, it means that one or more fields specified in the warehouse credentials are incorrect. Verify your credentials in this case.
- Able to List Schema: This option checks if RudderStack is able to fetch all schema details by using the provided credentials.
- Able to Access RudderStack Schema: This option implies that RudderStack is able to access the
_rudderstackschema you have created by running all commands in the User Permissions section.
If this option gives an error, verify if you have successfully created the_rudderstackschema and given RudderStack the required permissions to access it.
