Amazon S3 Reverse ETL Source
7 minute read
AWS has closed new customer access to Amazon S3 Select, effective July 25, 2024. The Amazon S3 Reverse ETL source depends on S3 Select to read your Parquet files, so this affects new source setups.
You cannot set up a new S3 Reverse ETL source if:
- You have not assigned S3 Select permissions to your S3 bucket role before July 25, 2024.
- You have not set up an S3 source in RudderStack before.
There is no workaround for new sources. Existing S3 sources with S3 Select access are unaffected and will continue to sync normally.
If your data already resides in a supported warehouse (Snowflake, Google BigQuery, Amazon Redshift, or Databricks), use it as a Reverse ETL source instead. For help in assessing your options, contact RudderStack Support.
Amazon S3 is a cloud-based object storage service that lets businesses securely store their data at scale.
RudderStack supports S3 as a data source from which you can ingest data and route it to your desired downstream destinations.
Set up S3 source in RudderStack
- Log in to your RudderStack dashboard.
- On the Connections page, click Add source.
- Under Sources, click Reverse ETL and select Amazon S3.
Connection credentials
Configure the following settings to authenticate RudderStack to access your S3 account:
Connection Mode: RudderStack provides the following options to connect to S3:
- Cross-Account Role (recommended): This option lets you connect to S3 through an IAM access role. To do so, you need to first create an IAM role for RudderStack with the required permissions to access your S3 account. See Creating the RudderStack IAM Role for S3 for the detailed steps.
- Access Key: This option lets you connect to S3 using your AWS access key ID and secret access key.
RudderStack recommends using the Cross-Account Role method for connecting to S3 as the Access Key method is deprecated and will be discontinued soon.
- Account Name: Specify a name that will be used to identify the connection account.
You will see the below settings depending on the Connection Mode selected above:
- Role ARN: Specify the ARN after creating the RudderStack IAM role.
- AWS Access Key ID: Specify your AWS access key ID.
- AWS Secret Access Key: Enter the corresponding secret access key.
S3 permissions
The minimum required permissions for S3 are listed below:
"Action": [
  "s3:GetObject",
  "s3:ListBucket"
],
Before proceeding, RudderStack verifies if the specified credentials are correct and alerts in case of any errors or permissions issues.
Specify name, bucket, and prefix
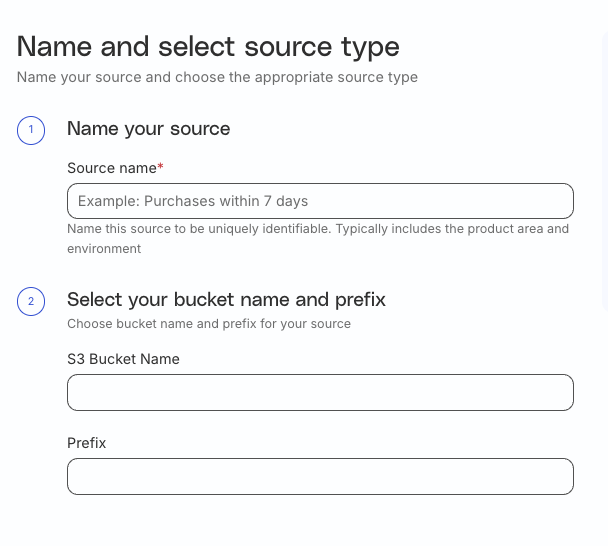
- Source name: Assign a name to uniquely identify the source in the RudderStack dashboard.
- S3 Bucket Name: Enter the S3 bucket name.
- Prefix: Prefix refers to the path within your S3 bucket from where RudderStack imports the data. For example, if Prefix is set to
RUDDER, then RudderStack imports the data stored in the location<your_s3_bucket>/RUDDER.
Note that:
- Your S3 bucket should only consist of Apache Parquet files as RudderStack supports and can extract only Parquet files.
- The first row of the Parquet file should not have a
nullvalue (empty strings are allowed) for any column. It helps RudderStack to determine the correct schema of the file.- RudderStack also considers all the nested folders present within the bucket.
Review and complete setup
To make any changes to the warehouse credentials or source configuration, click the edit icon present next to those sections.
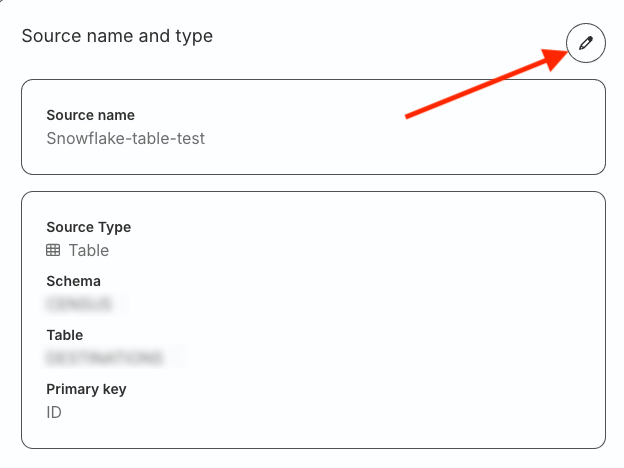
Review your configuration and click Create source to complete the setup.
Update source configuration and settings
Go to the Configuration tab of your S3 source to update the configuration settings. Here, you can update the S3 bucket name and prefix.
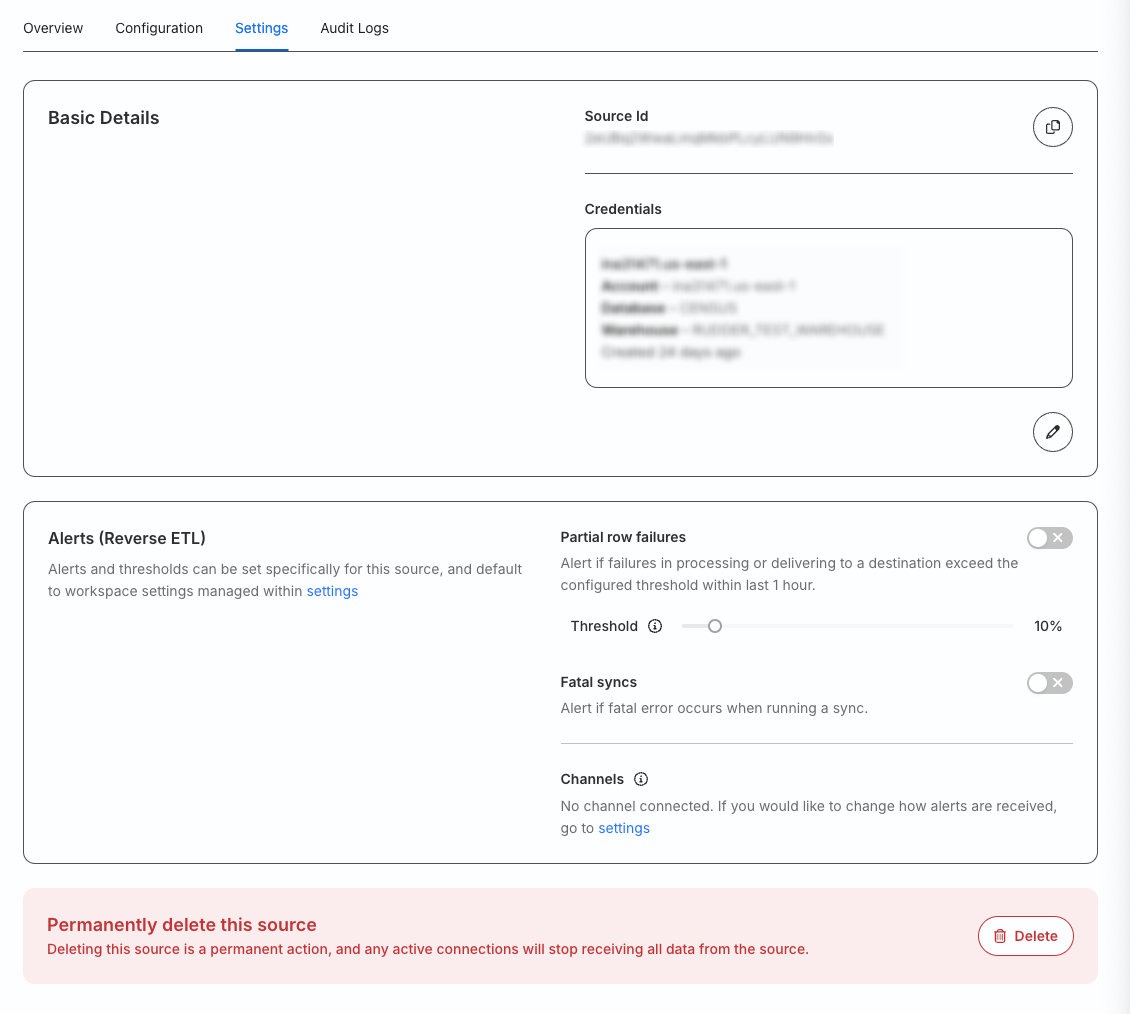
Go to the Settings tab to:
- Get your source ID.
- Change your warehouse credentials.
- Set up custom alerts for your Reverse ETL source.
- Delete the source permanently.
You cannot delete a source that is connected to any destination.
Sync considerations
Note the following while syncing data from your S3 source:
- RudderStack retrieves and syncs all the files present in the specified S3 bucket during the first sync.
- For subsequent syncs, RudderStack syncs only the new or updated files in the S3 bucket and ignores the files that have not changed since the last sync.
- RudderStack always syncs the entire file. To add or update data, create a new file in the S3 bucket to ensure that it is included in the next sync. RudderStack does not perform diffing at the record level, nor does it check for any invalid records.
- RudderStack does not retry syncs after any failures.
- If you cancel or stop a sync, RudderStack stops the operation immediately. In the next sync, it continues up from the last successfully synced record to avoid any duplication.
File handling
- Updated files: If you update an existing file present in the bucket before the next sync, RudderStack considers it as a new record and syncs accordingly. However, RudderStack does not track the changes made in that file - the entire record is synced again.
- Changes to a file during sync: If a file is updated or deleted while RudderStack is in the process of syncing it, the sync might not capture the changes. RudderStack handles the updates/deletes in the next sync.
Create RudderStack IAM role
Follow the steps in this section to create a RudderStack IAM role and obtain the role ARN.
Create policy
To create a managed policy defining the permissions for the RudderStack IAM role, follow these steps:
- Sign in to your AWS Management Console and open the IAM console.
- In the left navigation pane, click Policies followed by Create policy.
- In the JSON tab, paste the following policy:
{
  "Version": "2012-10-17",
  "Statement": [{
      "Effect": "Allow",
      "Action": "s3:ListAllMyBuckets",
      "Resource": "*"
    },
    {
      "Effect": "Allow",
      "Action": [
        "s3:GetObject",
        "s3:ListBucket"
      ],
      "Resource": "*"
    }
  ]
}- Click Review policy. On the Review page, enter
read-write-app-bucket.
Create IAM role
- In the left navigation pane, click Roles and go to Create role.
- Under Trusted entity type, select AWS account:
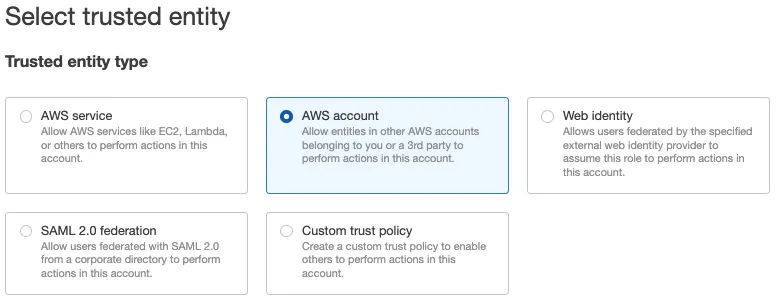
- Select Another AWS account and under Account ID, enter
422074288268, the account ID associated with RudderStack. - Under Options check Require external ID and enter your workspace ID as the External ID.
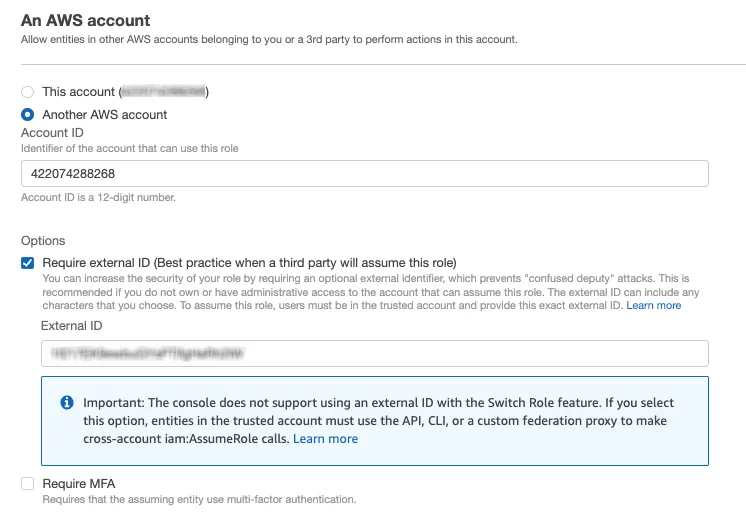
- Review all settings carefully and click Next to proceed.
- In the Permissions window, select the check box next to the policy you created in the Create policy section above.
- Review all settings carefully and click Next to proceed.
- Enter a unique name for your role. Note that this name is case-insensitive. For example, you cannot create a role named
RUDDERSTACKifrudderstackalready exists.
You cannot edit the name of the role after it has been created.
- Optional: Enter the description for this role.
- Click Create role to complete the setup.
- Finally, copy the ARN of this newly created role and paste it in the Role ARN field in the dashboard settings.
See the AWS IAM tutorial for more information on delegating access across AWS account using IAM roles.
Troubleshooting
Failing syncs with large row groups
Note that the Reverse ETL syncs will fail if your files contain large row groups with sizes more than 512 MB. This is because S3 cannot process Parquet files with row groups larger than 512 MB.
Make sure that:
- The maximum record length in the input or result is 1 MB.
- The maximum uncompressed row group size is 512 MB.
See the S3 documentation for more information on these limits.
FAQ
Where can I obtain the AWS Access Key ID and the AWS Secret Access Key?
- Sign in to your AWS Management Console as the root user.
- From the upper right corner, click your account and go to Security Credentials. You can find your access key ID listed here. You can also create a new access key by clicking the Create access key button:
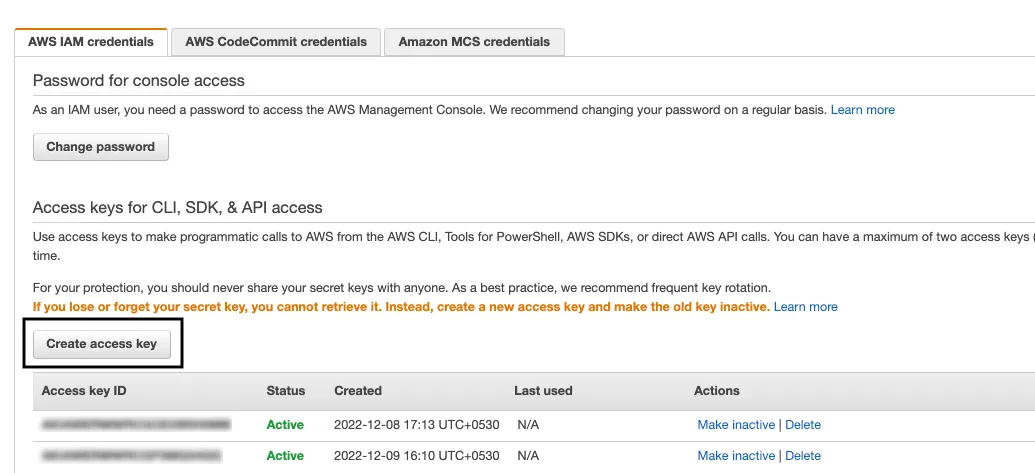
See the AWS documentation for more information on these credentials.
See S3 permissions for more information on the actions must be attached to your access keys required for setting up the S3 source.
