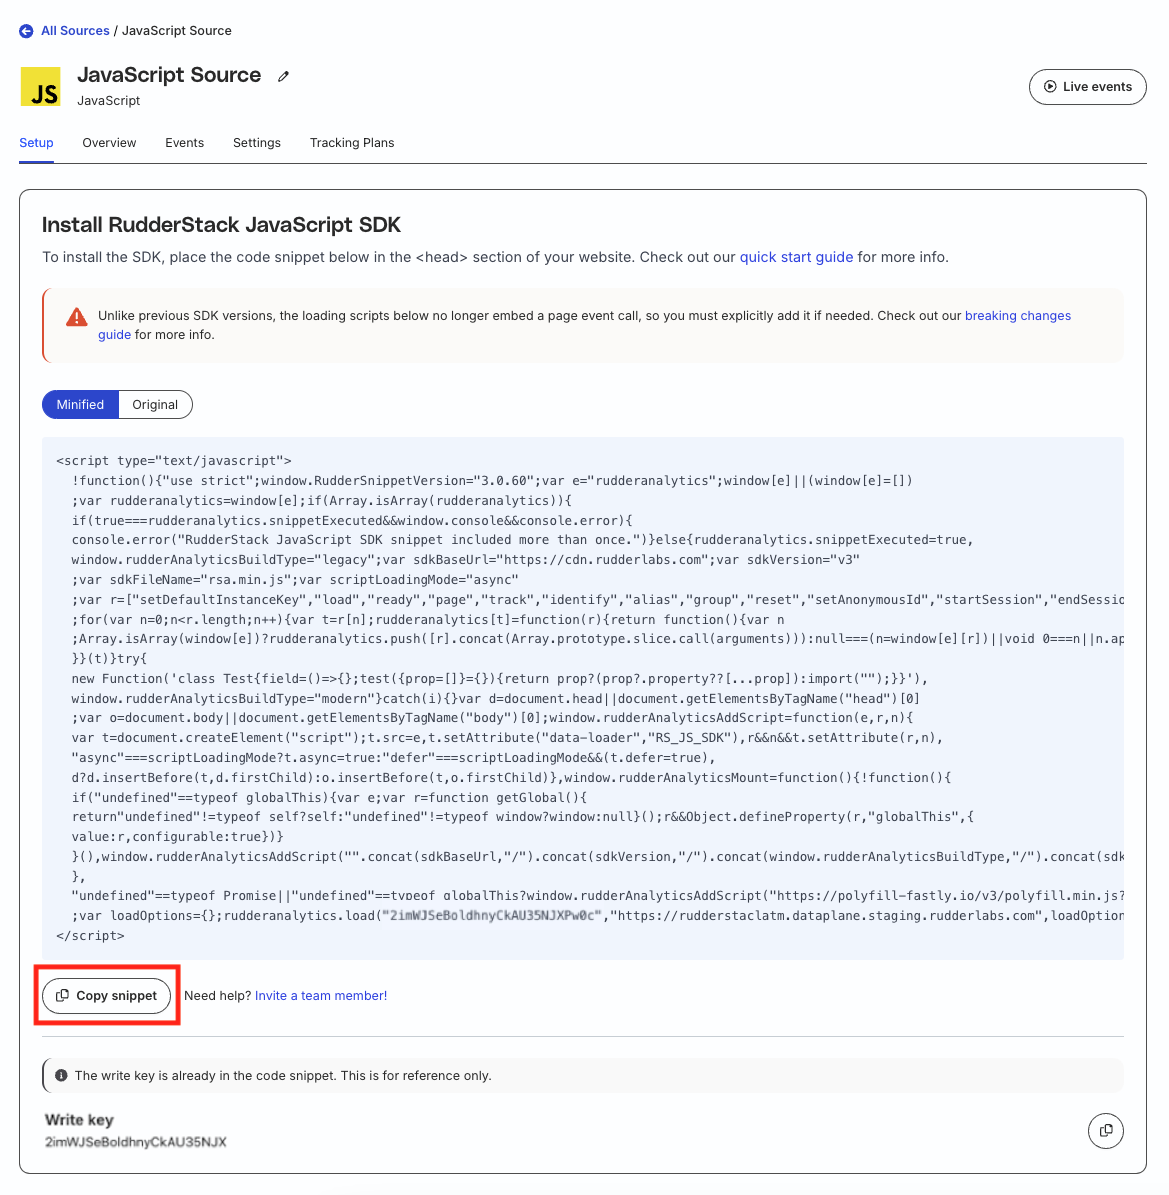
Set up a JavaScript source in the RudderStack dashboard. You’ll need the Write Key and Data Plane URL from the source settings page.
Step 1: Install the JavaScript SDK
You can install the SDK using the simple CDN method (recommended for getting started quickly) or via NPM if you’re using a package manager in your project. Choose the method that best suits your setup.
Most code snippets in this guide assume the SDK is available globally as rudderanalytics, which is the default when using the CDN installation method. If you use NPM, ensure you import or access your initialized rudderAnalytics object correctly in the subsequent steps.
Option 1: Install using CDN (Recommended)
This is the simplest way to get started. The SDK will load asynchronously without blocking your page content.
import{RudderAnalytics}from'@rudderstack/analytics-js';construdderAnalytics=newRudderAnalytics();// Load the SDK with your Write Key and Data Plane URL
rudderAnalytics.load('YOUR_WRITE_KEY','YOUR_DATA_PLANE_URL',{});// Export for use in other parts of your app
export{rudderAnalytics};
For CommonJS (CJS) using require:
varRudderAnalytics=require("@rudderstack/analytics-js");construdderAnalytics=newRudderAnalytics();// Load the SDK with your Write Key and Data Plane URL
rudderAnalytics.load('YOUR_WRITE_KEY','YOUR_DATA_PLANE_URL',{});// Export for use in other parts of your app
exports.rudderAnalytics=rudderAnalytics;
Use the exported rudderAnalytics object consistently throughout your project for subsequent calls.
To record which page the user is currently viewing, use the page call. You can add specific details about the page, although the SDK automatically captures information like the page URL and title.
If you are migrating from an older version of the SDK (before v1.1), note that there is no automatic page call embedded in the loading scripts anymore. You will need to add the page call manually.
// Basic page call (SDK captures URL, path, title automatically)
rudderanalytics.page();// Page call with custom name, category, and properties
rudderanalytics.page("Cart",// Category (optional)
"Cart Viewed",// Name (optional)
{// Properties (optional)
path:"/best-seller/1",referrer:"https://www.google.com/",search:"estore bestseller",title:"EStore Best Sellers",url:"https://www.estore.com/best-seller/1"},()=>{// Callback (optional)
console.log("Page event successfully submitted.");});
The SDK automatically captures fields like path, referrer, search, title, and url. You only need to provide them in the page call if you want to override the automatically captured values.
Need to track views in a Single-Page Application (SPA)?
If your website is a Single-Page Application (built with frameworks like React, Angular, Vue, etc.), the page doesn’t fully reload when the user navigates between views.
You need to manually call rudderanalytics.page() every time the route changes within your application. How you do this depends on your specific framework’s router.
To associate events with a specific user, use the identify call. Provide a unique userId and any traits you know about them, like name or email.
rudderanalytics.identify("user-12345",// Unique User ID
{// User Traits (optional)
firstName:"Alex",lastName:"Keener",email:"alex@example.com",phone:"+1-202-555-0146"},()=>{// Callback (optional)
console.log("Identify event successfully submitted.");});
Calling identify links subsequent events to this user ID. If you don’t provide a userId, RudderStack automatically assigns an anonymousId to track the user before they are known. See User Identification for more details.
Step 4: Track user actions
To record specific actions users take on your site, use the track call. Give the event a name and include any relevant properties.
// Example: Tracking a completed order
rudderanalytics.track("Order Completed",// Event Name
{// Event Properties (optional)
revenue:39.95,currency:"USD",productId:"product-xyz",quantity:1},()=>{// Callback (optional)
console.log("Track event successfully submitted.");});// Example: Tracking a button click
rudderanalytics.track("Signup Button Clicked",{location:"Homepage Hero"});
You’ve now successfully installed the SDK and sent your first events! You can use the track method to record various user interactions important for your business, such as signups, purchases, form submissions, or video plays.
Questions? We're here to help.
Join the RudderStack Slack community or email us for support
This site uses cookies to improve your experience while you navigate through the website. Out of
these
cookies, the cookies that are categorized as necessary are stored on your browser as they are as
essential
for the working of basic functionalities of the website. We also use third-party cookies that
help
us
analyze and understand how you use this website. These cookies will be stored in your browser
only
with
your
consent. You also have the option to opt-out of these cookies. But opting out of some of these
cookies
may
have an effect on your browsing experience.
Necessary
Always Enabled
Necessary cookies are absolutely essential for the website to function properly. This
category only includes cookies that ensures basic functionalities and security
features of the website. These cookies do not store any personal information.
This site uses cookies to improve your experience. If you want to
learn more about cookies and why we use them, visit our cookie
policy. We'll assume you're ok with this, but you can opt-out if you wish Cookie Settings.