RudderTyper v1 Quickstart
- free
- growth
- enterprise
5 minute read
RudderTyper v1 (npm) is in maintenance mode and will not receive any new features.
For TypeScript, Kotlin, and Swift support, use RudderTyper v2.
Get started
The following sections will help you set up and use RudderTyper to generate your first client.
Prerequisites
- Make sure your Node version is v20.x or above
- Clone the RudderTyper repository in your preferred location
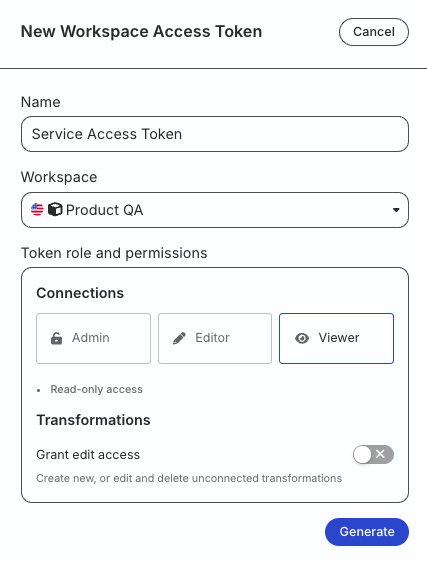
- Generate a workspace-level Service Access Token in your RudderStack workspace
The workspace-level Service Access Token has Read permissions by default. You do not need to assign any resource permissions while generating the token.
Token permissions for legacy RBAC system
If you are on the legacy Permissions Management (RBAC) system, your workspace-level Service Access Token should have Viewer permission.
See this documentation for more information on generating the token.
Quickstart
The following steps highlight the process of creating a ruddertyper.yml file and generate your first RudderTyper client with the specified configuration details:
- Run the following command to initialize RudderTyper:
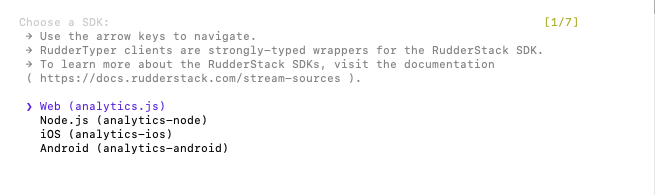
$ npx rudder-typer init # Or initialize or quickstart- Choose the SDK type for your RudderTyper client - you can use the up/down arrow key to navigate through the options.
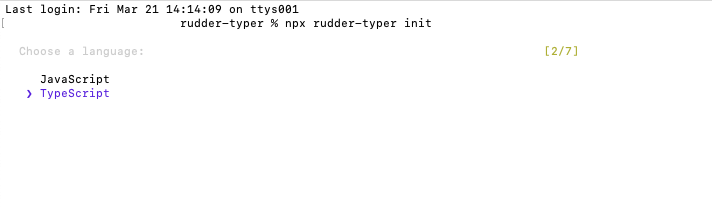
- Choose the appropriate language and continue. The following image shows the language options for the Web SDK:
Enter the workspace-level Service Access Token generated above. RudderTyper uses this token to fetch all the Tracking Plans present in your workspace.
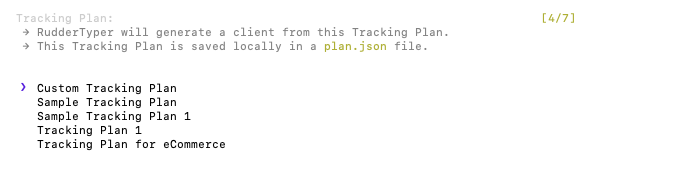
Choose the Tracking Plan for which RudderTyper generates the client - this plan is automatically saved locally in a
plan.jsonfile.
Choose the RudderTyper mode. You will see two options -
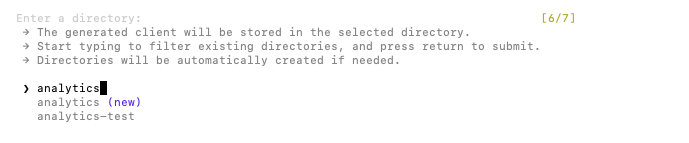
ProductionorDevelopment. See RudderTyper modes for more information on each mode.Specify the directory to store the generated RudderTyper client. You can choose an existing directory or create a new one, depending on your requirement.
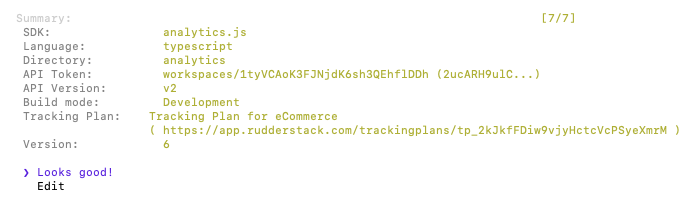
- Review the settings and select Looks good! to complete the process. You can select Edit to make any changes to the above steps.
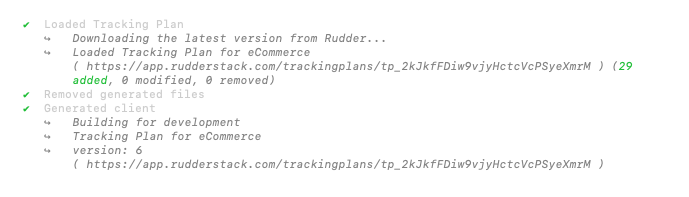
RudderTyper then generates the client based on your configuration settings and stores it in the specified directory. See Configuration reference for more information on the ruddertyper.yml file structure.
Troubleshooting
- If you get an error during the setup process, run the following commands to clear your cache and local storage:
npm cache clean --force
rm -r ~/.ruddertyper- If you get a “Your workspace does not have any Tracking Plans” error during the setup, verify that your RudderTyper client is on a stable version (v1.x).
Integrate RudderTyper client with SDK
This section includes the steps to integrate your RudderTyper-generated client with your app across different RudderStack SDKs.
- Import all files in the client generated by RudderTyper as a package in your project.
- Make the calls using the RudderTyper client, as shown:
// Import your auto-generated RudderTyper client:
import com.rudderstack.generated.*

  // Issue your first RudderTyper track call
  RudderTyperAnalytics.with(this).orderCompleted(
    OrderCompleted.Builder()
    .orderID("ck-f306fe0e-cc21-445a-9caa-08245a9aa52c")
    .total(39.99)
    .build()
);- Import your RudderTyper client into your project using XCode.
If you place the generated files into a folder within your project, import the project as a group, not as a folder reference.
- Make the calls using the RudderTyper client, as shown:
// Import your auto-generated RudderTyper client:
#import "RSRudderTyperAnalytics.h"

// Issue your first RudderTyper track call
[RSRudderTyperAnalytics orderCompletedWithOrderID: "ck-f306fe0e-cc21-445a-9caa-08245a9aa52c" total: @39.99];
There are two ways to get started with RudderTyper in your browser:
Using JavaScript SDK snippet
- Paste the JavaScript SDK snippet from the RudderStack dashboard in your HTML file.
- If you use TypeScript, add
@rudderstack/analytics-jsas a dev dependency:
npm install --save-dev @rudderstack/analytics-js- Run the below command to generate a bundle from the RudderTyper client:
npx browserify analytics/index.js --standalone rudderTyper > rudderTyperBundle.js- For the TypeScript analytics client, add the npm package
tsifyas a dependency and run the below command to generate the bundle:
npx browserify analytics/index.ts -p [ tsify ] --standalone rudderTyper > rudderTyperBundle.js- Import your RudderTyper client and send events.
<script>
  // Add the JavaScript SDK snippet from https://www.rudderstack.com/docs/sources/event-streams/sdks/rudderstack-javascript-sdk/quickstart/#step-1-install-the-javascript-sdk
</script>
<script src="./rudderTyperBundle.js"></script>
<script>
  rudderTyper.setRudderTyperOptions({
    analytics: rudderanalytics,
  });
  rudderTyper.orderCompleted({
    orderID: 'ck-f306fe0e-cc21-445a-9caa-08245a9aa52c',
    total: 39.99,
  });
</script>
See the sample application for more information.
Using NPM
Import the RudderTyper-generated client and make the calls if your framework supports them.
// Import RudderStack JS SDK and initialize it
import { RudderAnalytics } from '@rudderstack/analytics-js';
// Import your auto-generated RudderTyper client:
import { RudderTyperAnalytics } from './analytics/index';

const rudderAnalytics = new RudderAnalytics();
rudderAnalytics.load(WRITE_KEY, DATA_PLANE_URL, {});

// Pass in your @rudderstack/analytics-js instance to RudderTyper client
RudderTyperAnalytics.setRudderTyperOptions({
  analytics: rudderAnalytics,
});

// Issue your first RudderTyper track call
RudderTyperAnalytics.orderCompleted({
  orderID: 'ck-f306fe0e-cc21-445a-9caa-08245a9aa52c',
  total: 39.99,
});
Note that:
- Replace
WRITE_KEYandDATA_PLANE_URLin the above snippet with your source write key and data plane URL respectively. - Make sure to run
npx rudder-typerto regenerate your RudderTyper client every time you update the Tracking Plan.
See the sample application for more information.
Import the RudderTyper-generated client and start making calls, as shown:
// Import RudderStack Node.js SDK and initialize it
const RudderAnalytics = require('@rudderstack/rudder-sdk-node');

const client = new RudderAnalytics(WRITE_KEY, {
  dataPlaneUrl: DATA_PLANE_URL,
  // Other initialization options
});

const RudderTyperAnalytics = require('./analytics/index');
// Pass in your @rudderstack/rudder-sdk-node instance to RudderTyper.
RudderTyperAnalytics.setRudderTyperOptions({
  analytics: client,
});

// Issue your first RudderTyper track call
RudderTyperAnalytics.orderCompleted({
  orderID: 'ck-f306fe0e-cc21-445a-9caa-08245a9aa52c',
  total: 39.99,
});
See more
- RudderTyper v1: What v1 generates, and how validation works
- RudderTyper v1 Reference: Commands, modes, and
ruddertyper.yml - End-to-End Walkthrough: RudderTyper v2 with Rudder CLI: Generate bindings with Rudder CLI
