This guide lists the JSON mapping settings required to sync data from your warehouse sources to the specified destinations.
Mapping configuration
Sync mode: Select the sync mode from Upsert or Mirror that RudderStack uses to sync your data.
Use cursor column: This setting is visible only if you have set the Sync mode setting to Upsert. When toggled on, it lets you specify a cursor column for managing incremental syncs. See Cursor Column Support guide for more information on this setting.
Event Type: Select from the identify or track event type depending on how you want to send the event data to the downstream destinations.
RudderStack does not support track event type for Mirror mode.
If you select track, you also need to provide:
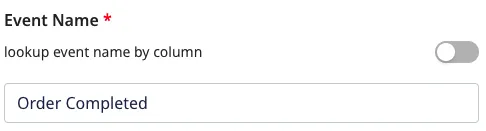
Event Name: Enter the event name which should be sent for all events to the downstream destinations:
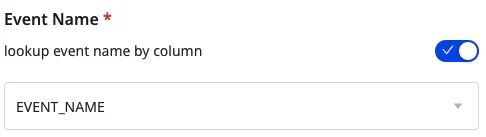
You can also send different event names by enabling the lookup event name by column setting and specifying the column name which should be used to set the event name in the Event Name field:
See Syncing Events for more information on sending event data as identify or track events.
Choose user identifier: Choose at least one user identifier from user_id and anonymous_id from the dropdown.
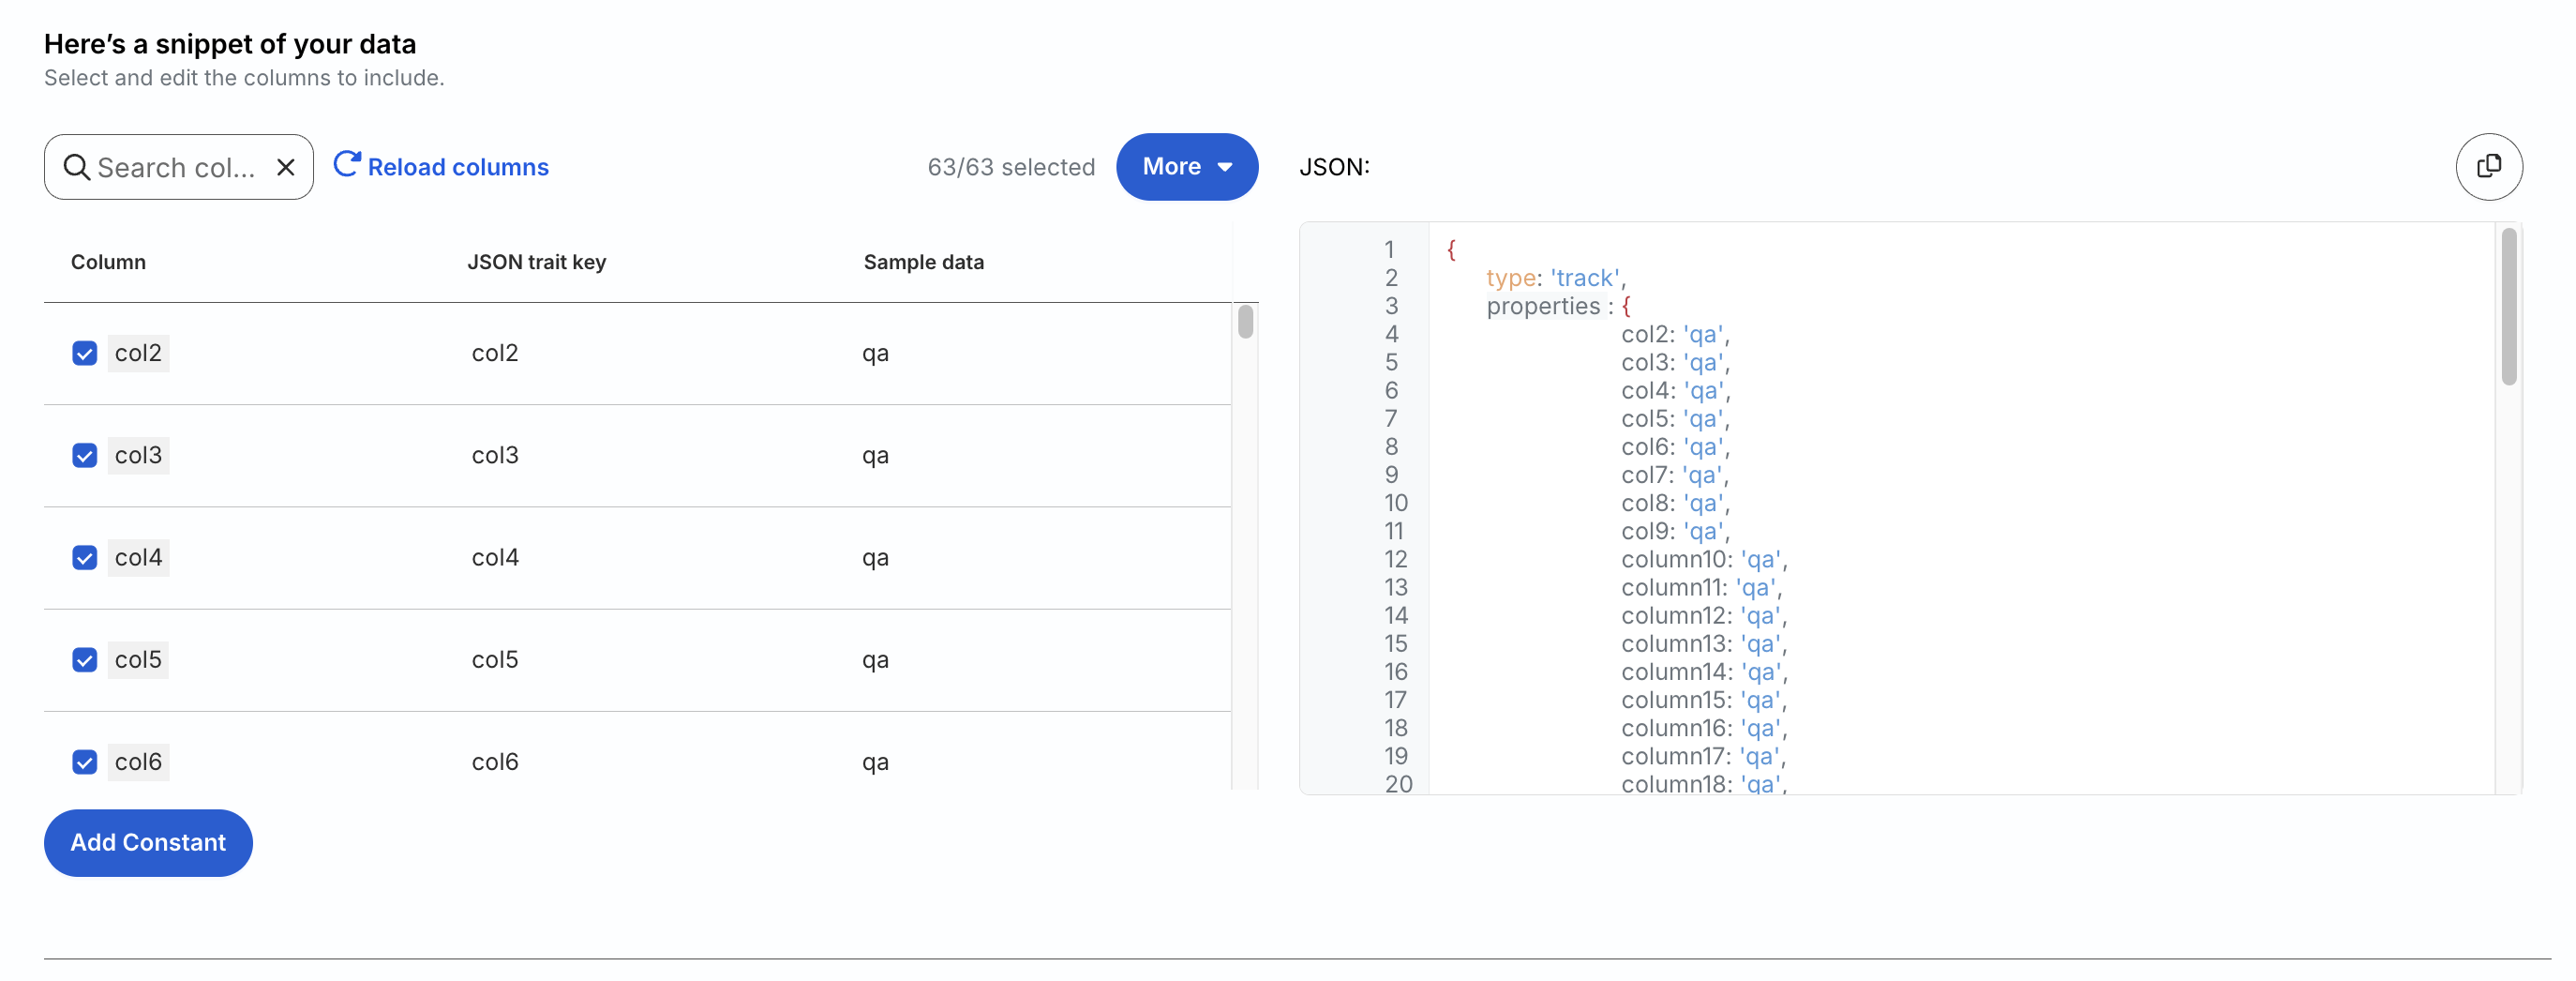
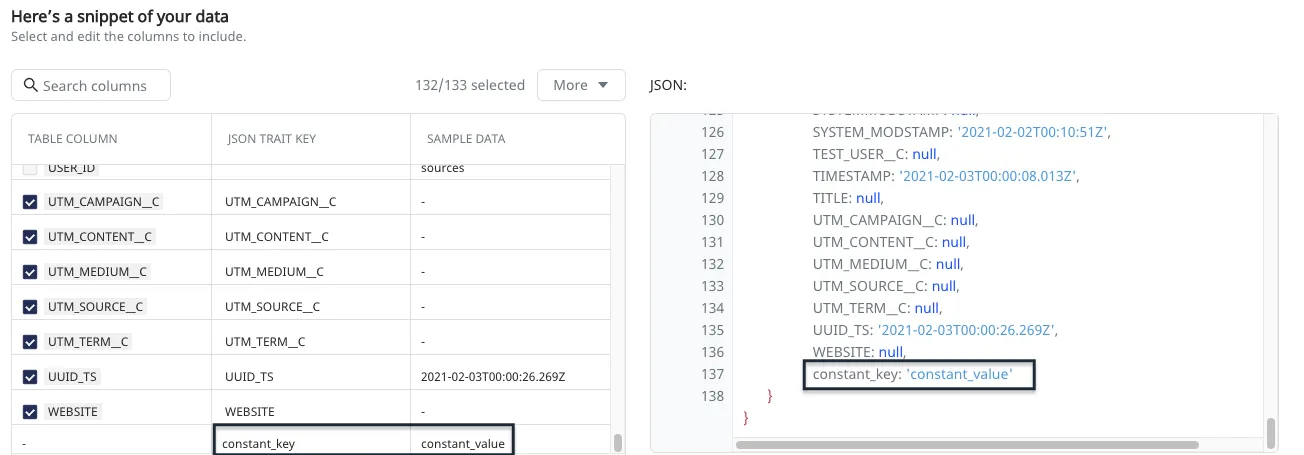
You can preview the data snippet which RudderStack sends to the destination. All the columns from the table are selected by default. However, you can choose to retain specific columns by searching and selecting or deselecting them.
You can also search the columns by a keyword and edit the JSON Trait Key column. RudderStack automatically generates the resulting preview on the right:
The resulting JSON payload carries the user_id and anonymous_id from the columns selected in the Choose user identifier section. Moreover, the traits are used from the columns selected in the Column section.
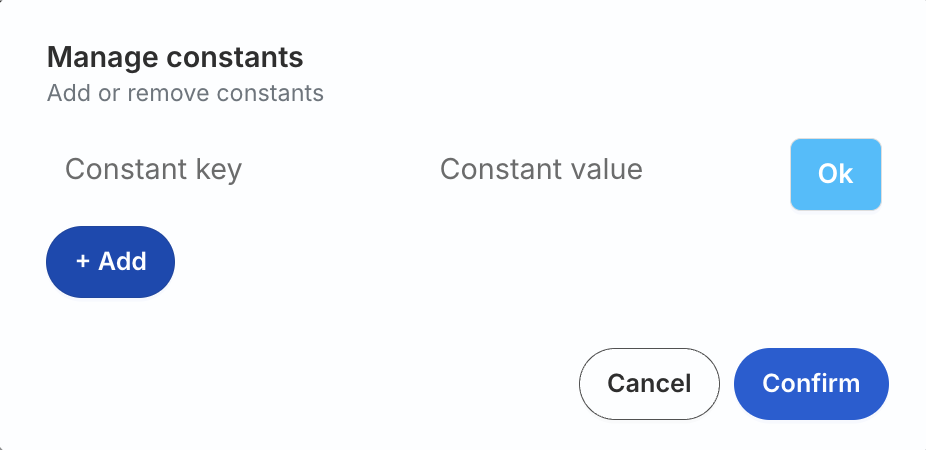
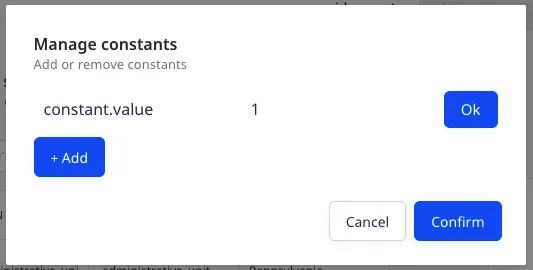
Add Constant
You can also use the Add Constant option to add a constant key-value pair which is always sent in the JSON payload:
The new constant will appear in the table and also in the JSON preview inside the traits, as shown:
You can also use the dot notation to define a constant, as shown:
Once you have finalized the configuration, click Save.
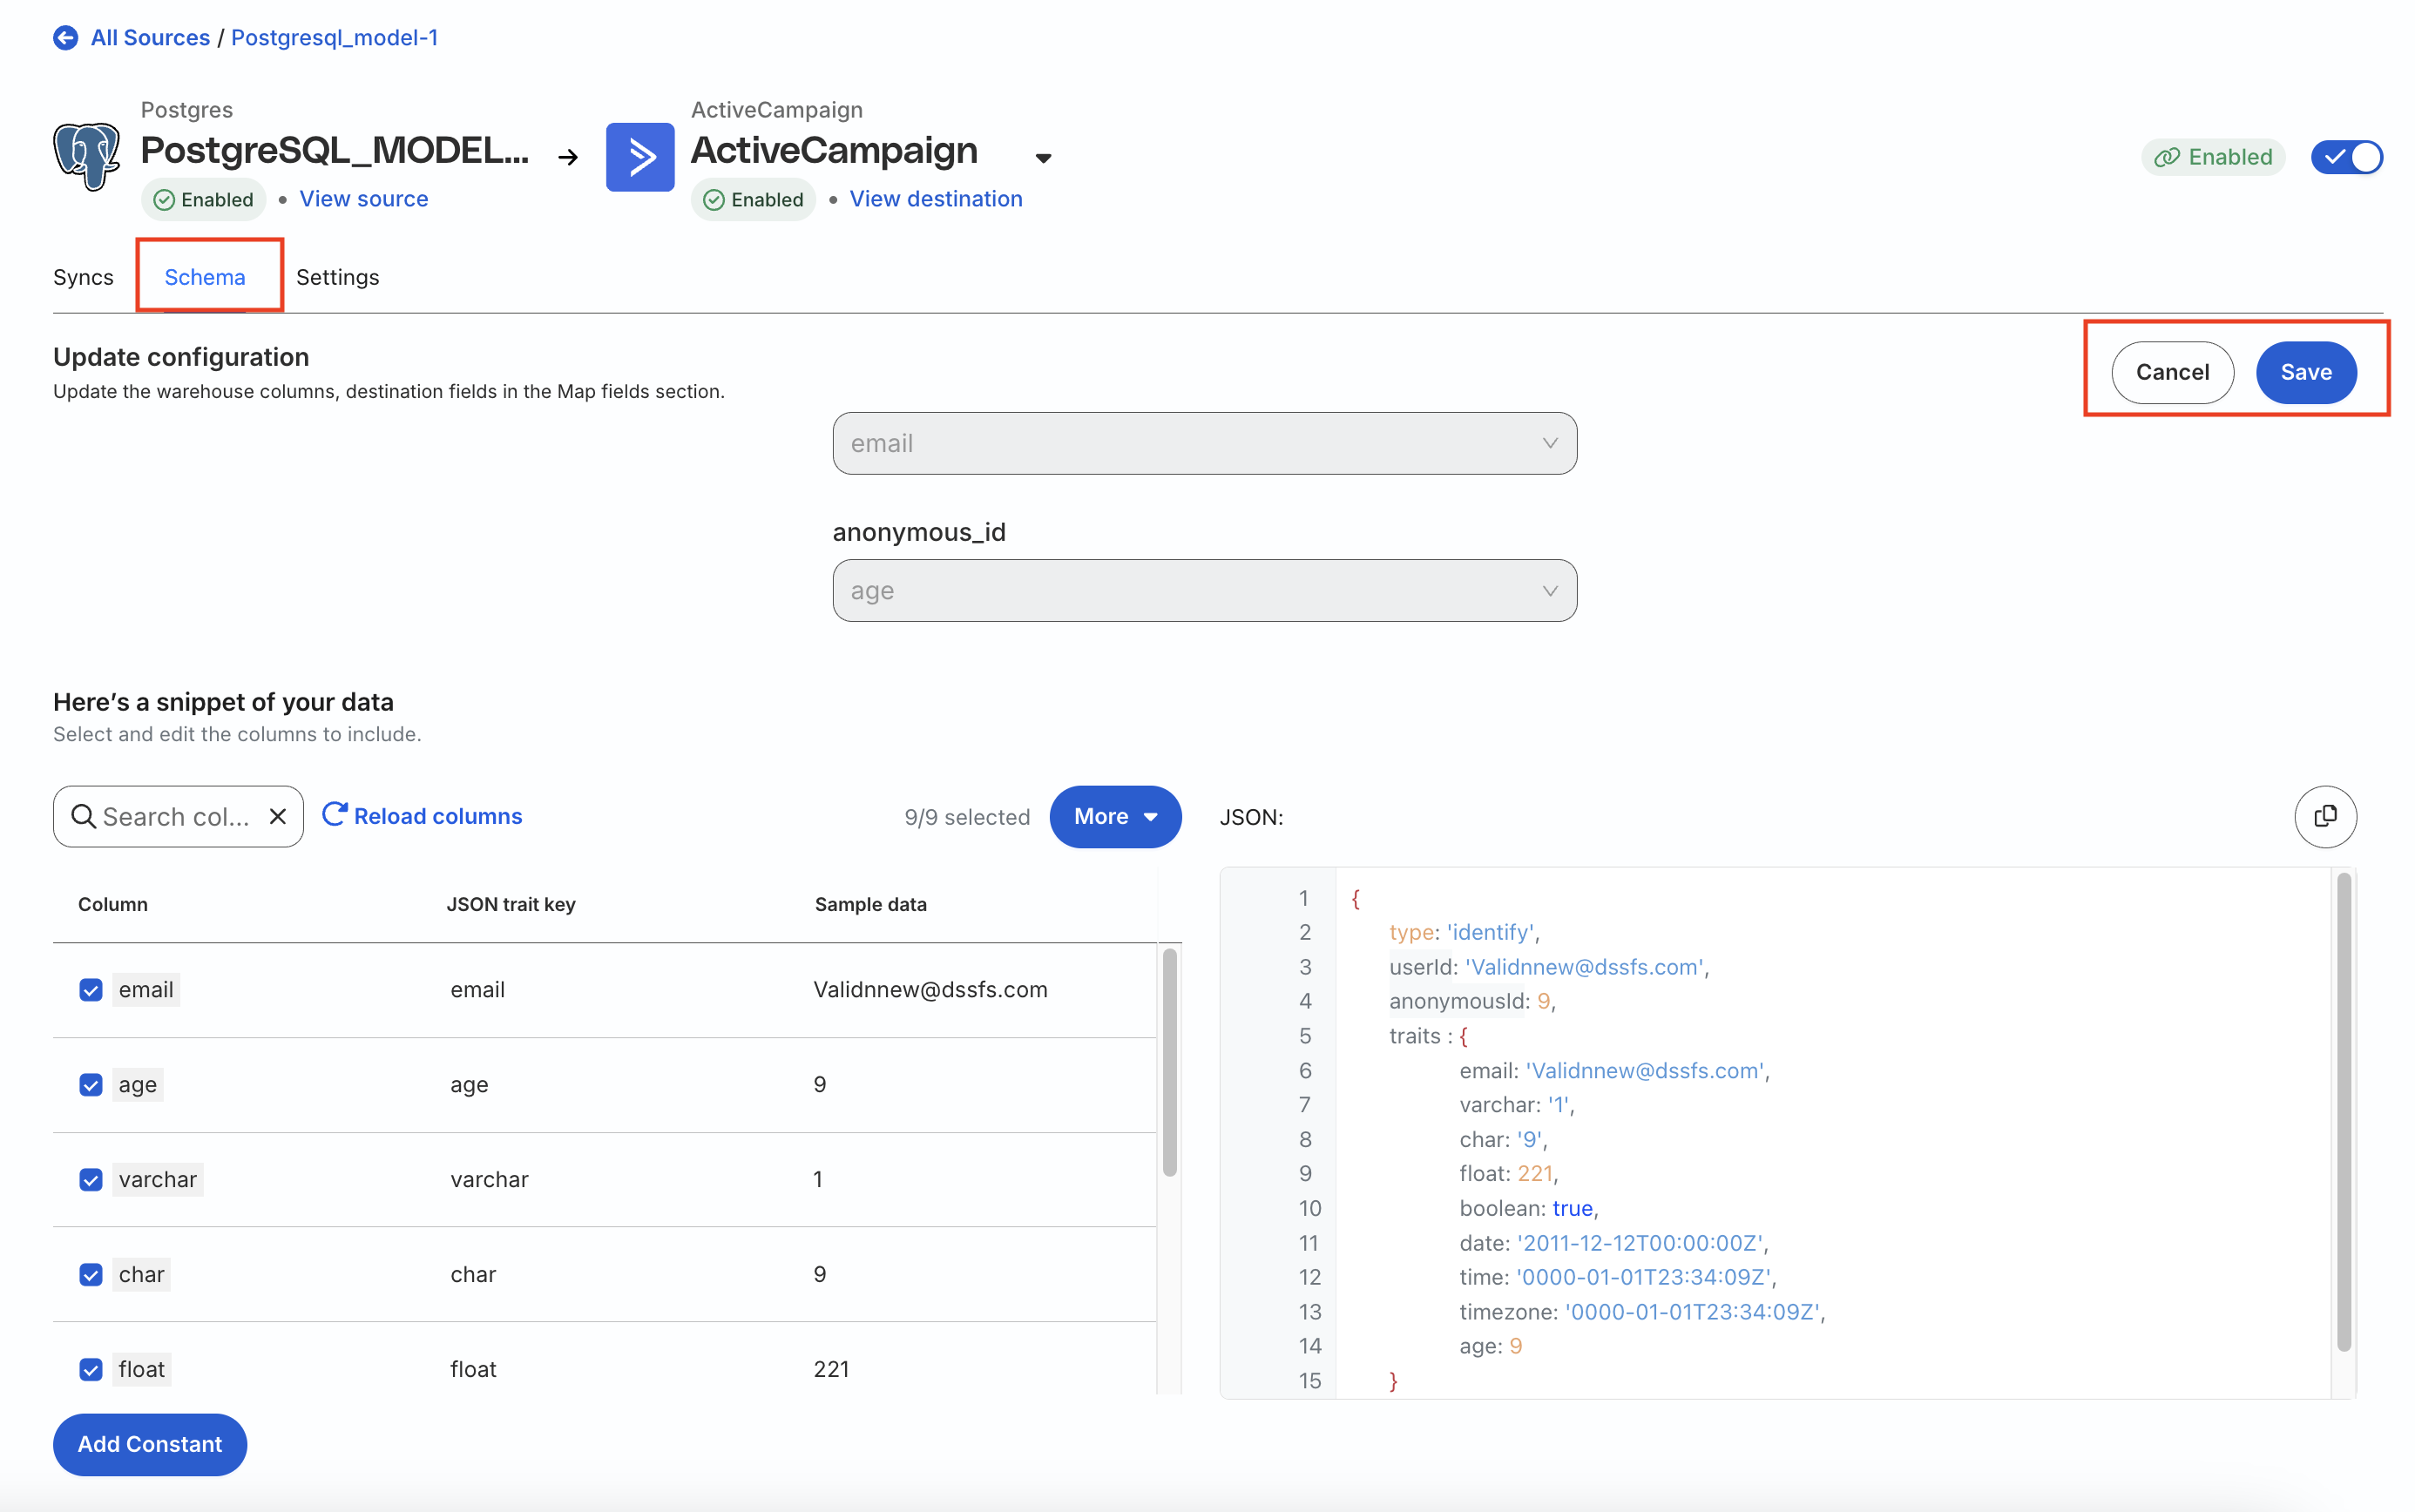
Update mapping configuration
Note the following:
You can update your mapping configuration irrespective of whether the connection is turned on or off.
While updating the mapping configuration, you cannot change the Sync mode, Event type, and User identifier fields. You will have to delete the destination and connect a new destination from scratch to do so.
Go to the Schema tab of your Reverse ETL connection page.
Update the mappings as required by selecting/deselecting the required fields.
Click Save to update the configuration.
Questions? We're here to help.
Join the RudderStack Slack community or email us for support
This site uses cookies to improve your experience while you navigate through the website. Out of
these
cookies, the cookies that are categorized as necessary are stored on your browser as they are as
essential
for the working of basic functionalities of the website. We also use third-party cookies that
help
us
analyze and understand how you use this website. These cookies will be stored in your browser
only
with
your
consent. You also have the option to opt-out of these cookies. But opting out of some of these
cookies
may
have an effect on your browsing experience.
Necessary
Always Enabled
Necessary cookies are absolutely essential for the website to function properly. This
category only includes cookies that ensures basic functionalities and security
features of the website. These cookies do not store any personal information.
This site uses cookies to improve your experience. If you want to
learn more about cookies and why we use them, visit our cookie
policy. We'll assume you're ok with this, but you can opt-out if you wish Cookie Settings.