Create detailed data segments from your warehouse to develop better marketing campaigns.
6 minute read
This guide introduces you to the concept of Audiences and shows how to use them with your Profiles project.
Overview
RudderStack’s Audiences feature lets you create target customer lists or a subset of users satisfying specific criteria, with easy-to-use filters on your warehouse tables. Once created, you can connect and activate these audiences in your RudderStack-supported destinations.
For example, you can create an audience and send that data to the downstream digital advertising destinations to:
Retarget all users from a specific city, state, or region to improve repeat sales.
Prompt active customers on your sports website to buy season tickets.
Run campaigns to grow product usage and retain users.
Marketing teams can leverage this feature to query and sync audiences without having to work with SQL and warehouses or rely on their data engineers.
Key features
The Profiles Audiences feature is built to help Marketing teams create and activate audiences independently without any technical bottlenecks. It also helps Data teams maintain control over data quality and definitions while empowering their Marketing team.
Some key features of the Profiles Audiences feature are listed below:
Visual audience builder
Create customer segments based on specific attributes like age, email, purchase history, etc.
Combine multiple audience filtering conditions using AND or OR logic
See real-time previews of of the audience that matches your criteria
Built on your data foundation
Works with foundational cohorts — pre-built customer segments created by your data team.
Uses clean, reliable data from your data warehouse.
Ensures everyone in your organization works from the same customer definitions.
Preview and verify
See sample customers who match your audience criteria
View total audience size
Verify your audience is correct before activating
Self-service for Marketing teams
No need to wait for data engineers to create segments
Easy to activate — send your audiences directly to marketing tools (email platforms, ad networks, etc.)
Save and reuse audiences for future campaigns
Share audiences with team members
Create a new audience
Before you create audiences
Make sure Cohorts are already set up in your Profiles project, as they act as the foundation to create audiences.
RudderStack provides a seamless UI to build audiences without any prior knowledge of SQL or how to store the data.
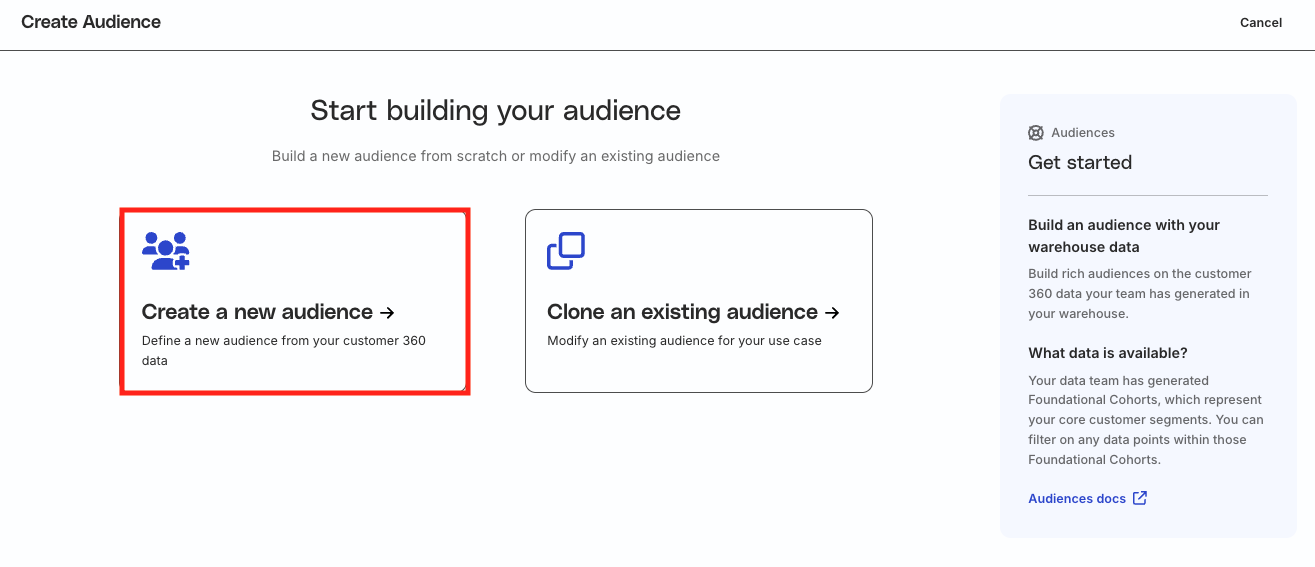
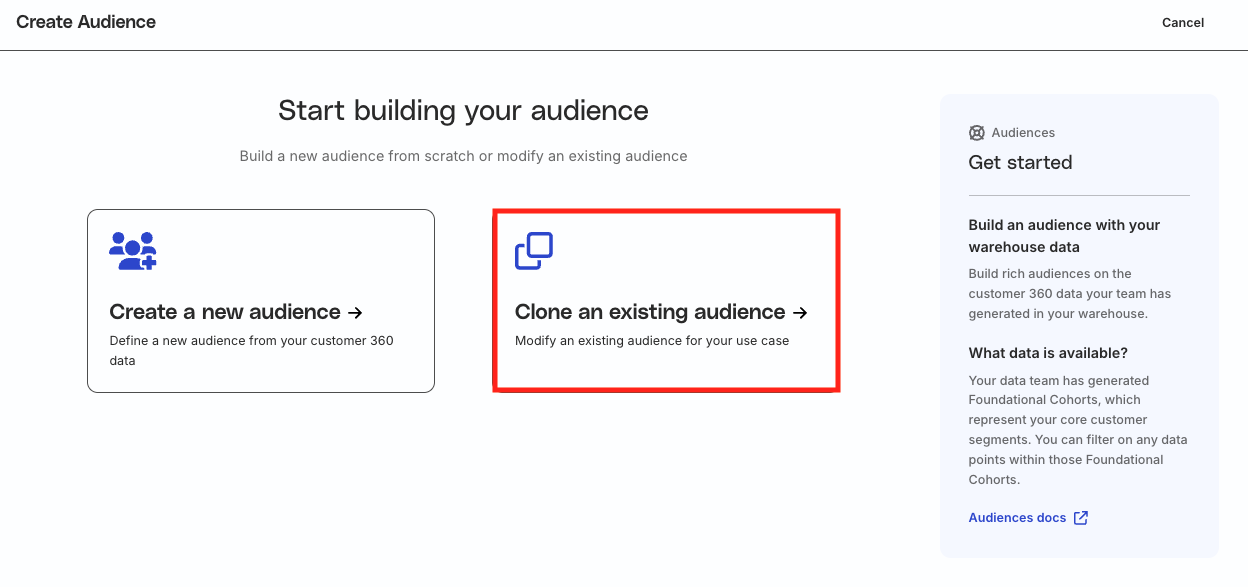
From the left navigation bar, go to Unify > Audiences and click the Create audience button on the top right corner.
Click Create a new audience.
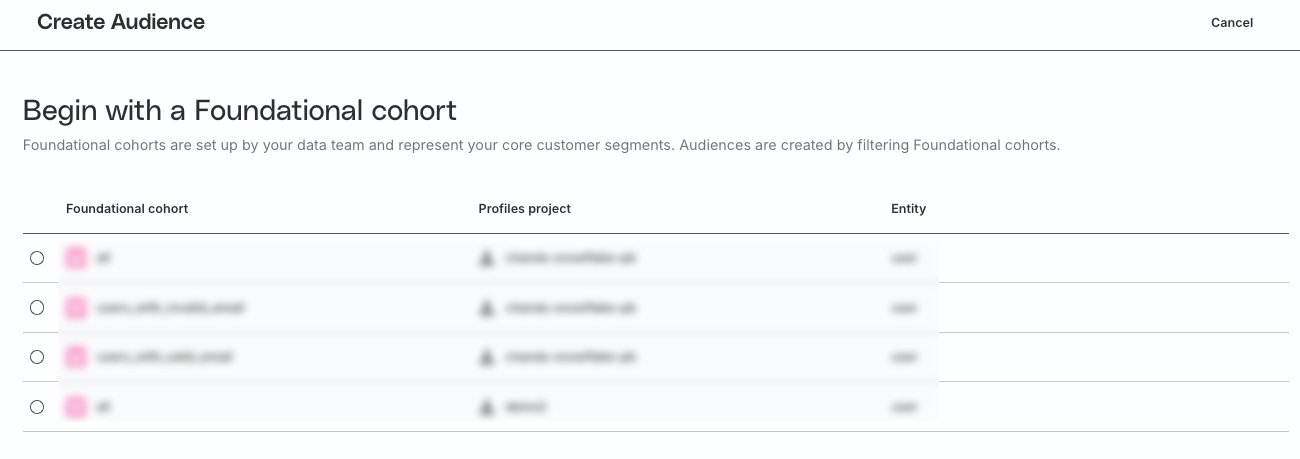
You will see a list of cohorts from your existing Profiles projects.
Foundational cohorts represent your core customer segments — they are set up within your Profiles project by the data team. You can create new audiences by filtering these cohorts.
Select the cohort on top of which you want to create the audience. Then, click Continue.
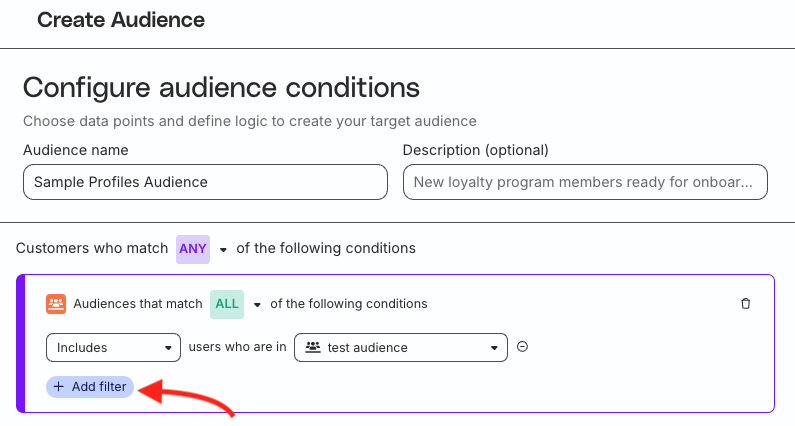
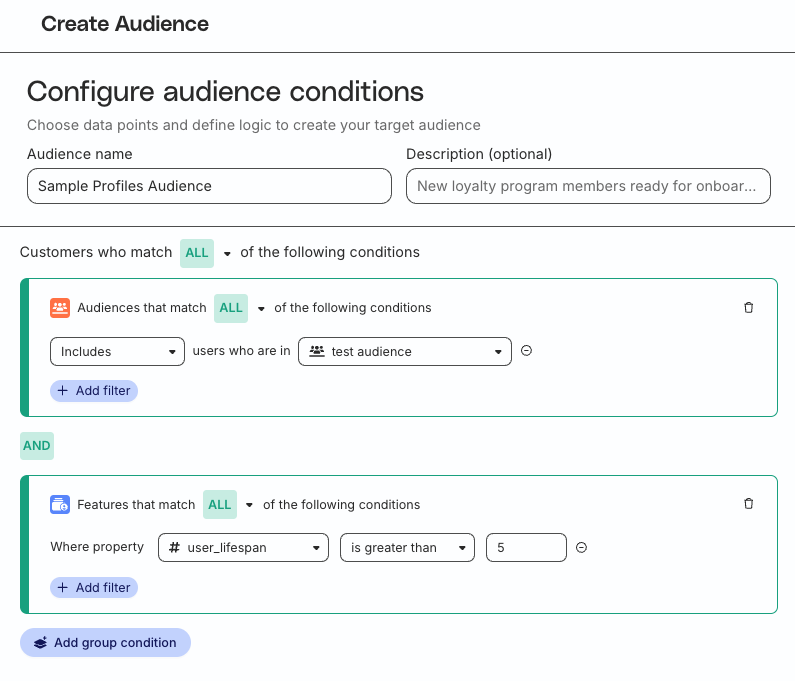
Configure audience conditions
Specify the Audience name and assign an optional Description for the audience.
Click Add group condition to start adding the filtering logic. You will see the following three filtering options:
You can select ALL or ANY to implement the AND or OR operator respectively between the different filtering conditions.
Option
Description
Audiences
Filter on membership in other audiences
Features
Filter by selecting specific data points and applying filtering logic
Events Coming soon
Filter by choosing specific events and applying filtering logic
Click Add filter to add multiple filters within a condition.
Click Add group condition to add multiple group filters.
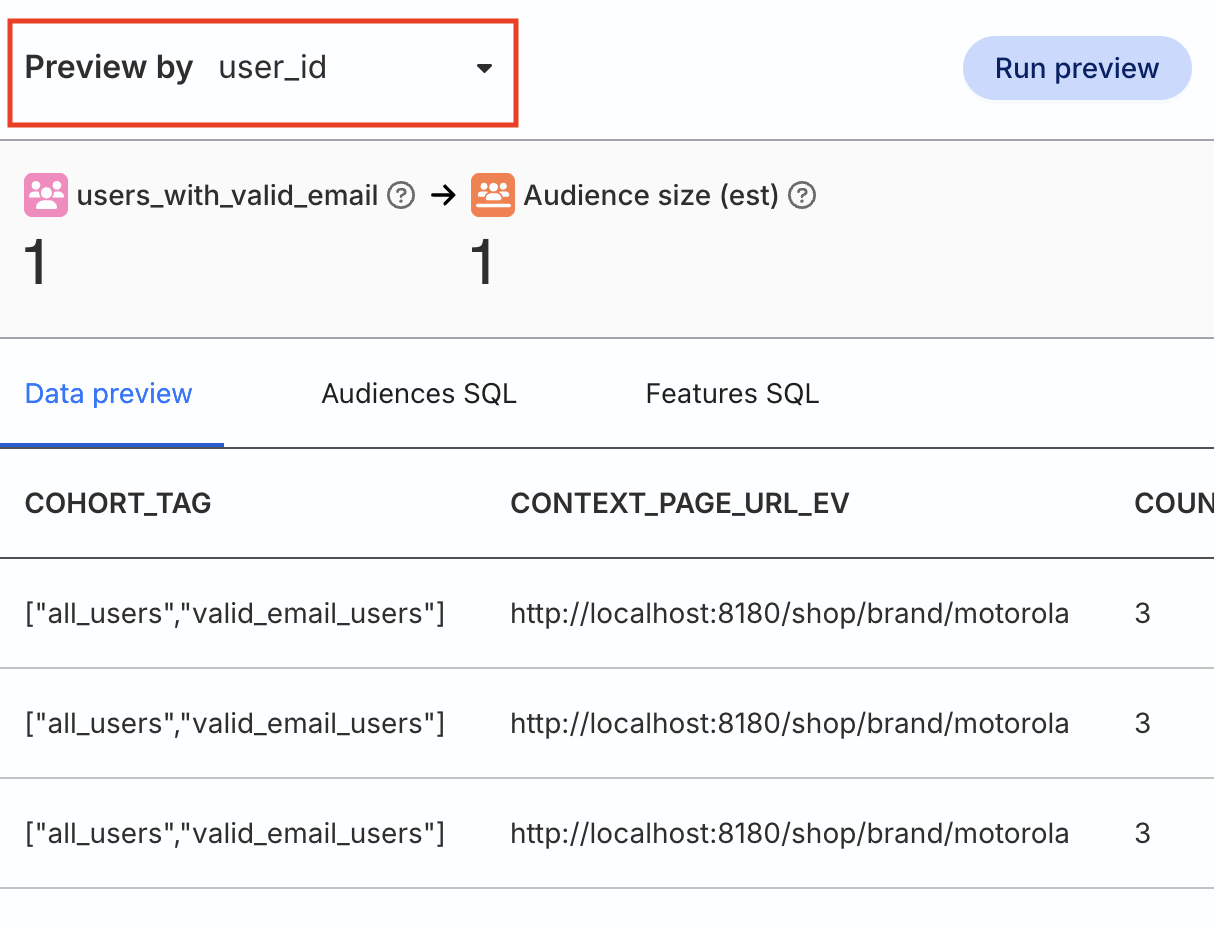
After setting the required filtering conditions, click Run Preview in the right sidebar to:
Preview the data by selecting a specific identifier (user_id, email, rudder_id, etc.)
View the corresponding Audiences SQL and Features SQL queries — these queries are helpful in case you need to share them with your data team for observability or troubleshooting.
Note that:
You can preview the data by selecting a specific identifier (user_id, email, rudder_id, etc.) — the audience is created using that ID as the primary identifier.
Fetching the preview data may take some time (even minutes) depending on the data size and query complexity.
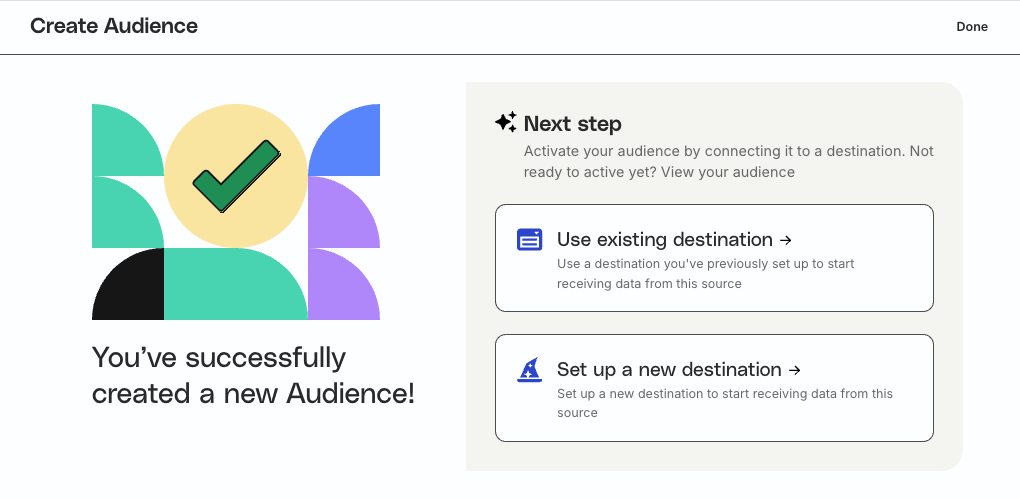
Click Create audience to create the audience.
Connect audience to destination
You can activate the audience by connecting it to:
Once you choose to connect to a new or existing destination, you will be prompted to select the identifier used to sync records to that destination. You will see all the identifiers present in your Profiles project in this list. Some examples are:
email
user_id
temp_id
anonymous_id
rudder_id
Which identifier should I use?
While most destinations accept email as an identifier, make sure to check the relevant destination’s documentation for specific requirements.
Click Confirm to proceed.
To connect the audience to a destination at a later stage, click Done on the top right corner.
Important considerations
Note the following while creating Profiles audiences:
To create an audience, you must have previously run the Profiles project at least once.
The audience definitions do not go stale — they get updated every time you run the Profiles project.
Do not delete or rename the foundational cohort as it will impact all the audiences created on top of it.
Manage audience
This section explains how to update your audience configuration and connections with downstream destinations.
Update audience conditions
Go to Unify > Audiences, select your audience, and go to the Configurations tab.
Click the Edit button to update the audience conditions.
This site uses cookies to improve your experience while you navigate through the website. Out of
these
cookies, the cookies that are categorized as necessary are stored on your browser as they are as
essential
for the working of basic functionalities of the website. We also use third-party cookies that
help
us
analyze and understand how you use this website. These cookies will be stored in your browser
only
with
your
consent. You also have the option to opt-out of these cookies. But opting out of some of these
cookies
may
have an effect on your browsing experience.
Necessary
Always Enabled
Necessary cookies are absolutely essential for the website to function properly. This
category only includes cookies that ensures basic functionalities and security
features of the website. These cookies do not store any personal information.
This site uses cookies to improve your experience. If you want to
learn more about cookies and why we use them, visit our cookie
policy. We'll assume you're ok with this, but you can opt-out if you wish Cookie Settings.