RudderTyper v1
- free
- growth
- enterprise
10 minute read
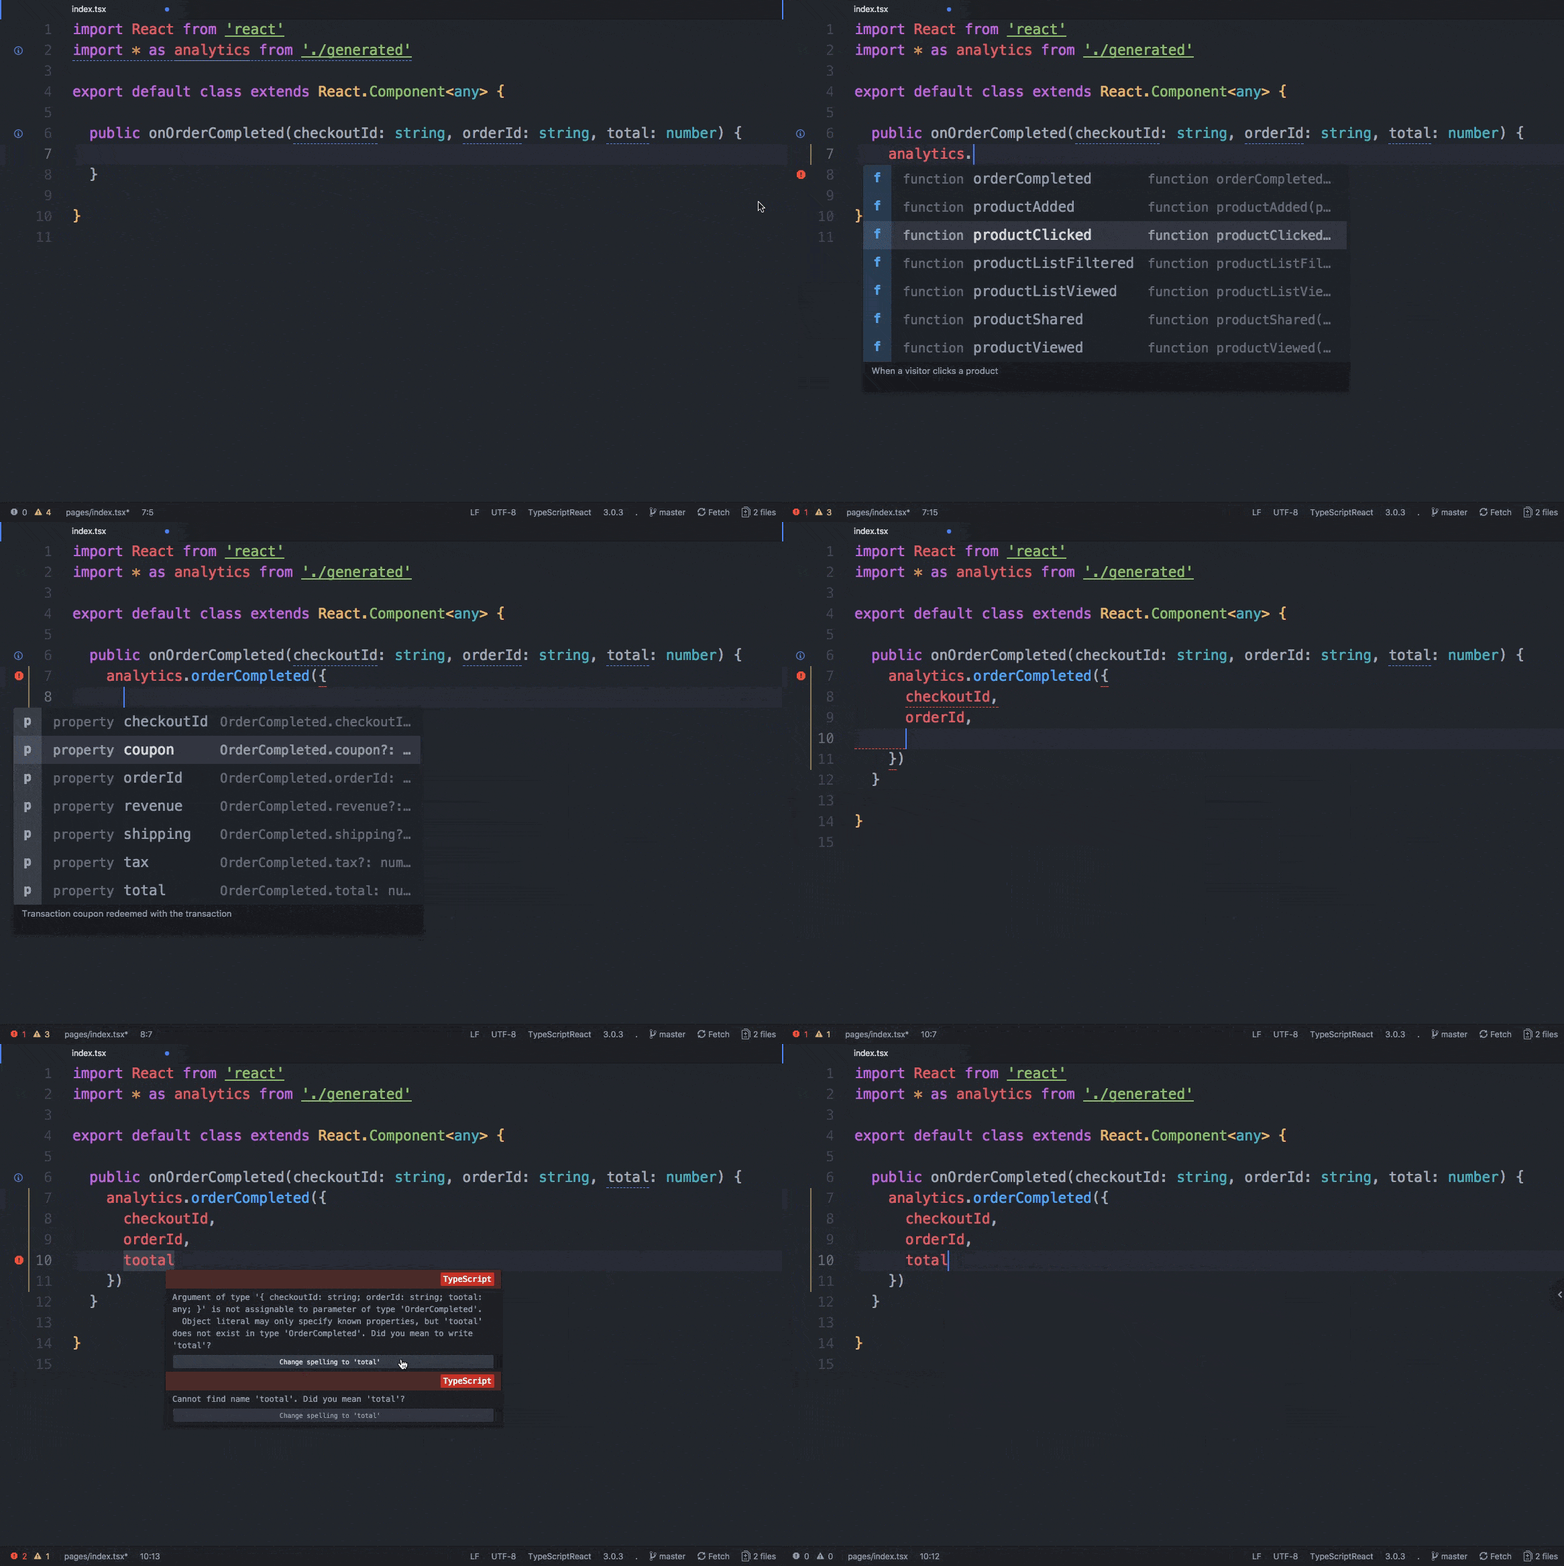
RudderTyper is a tool that lets you generate strongly-typed RudderStack analytics library wrappers based on your Tracking Plan. It uses an event from your specified Tracking Plan and generates an analytics call in the supported languages.
RudderTyper v1 (npm) is in maintenance mode and will not receive new features.
For Kotlin (Android/JVM) and Swift (iOS) support and the actively maintained version, see RudderTyper v2.

Overview
The following steps give a high-level overview of how RudderTyper works:
- RudderTyper generates type-safe SDK code from a Tracking Plan by parsing it to understand the events and data types.
- It then creates platform-specific classes and methods that match the Tracking Plan, ensuring that only valid events and properties are used.
- Finally, it integrates this code into the SDKs and provides compile-time checks to catch any errors and ensure consistency in the tracking implementation.
RudderTyper currently generates native clients for the following SDKs:
CLI integration
RudderStack also offers type-safe code generation through the Rudder CLI tool:
rudder-cli typer generate --tracking-plan-id <ID> --platform kotlin -o ./generatedThe CLI-based typer currently supports Kotlin for Android. For JavaScript, TypeScript, Java, and Objective-C, use the npm-based RudderTyper documented below.
See RudderTyper v2 for details.
Key features
- Displays compile-time errors and warns you about any missing required properties, data mismatch, and any issues in the JSON schema configured in your Tracking Plan.
- Lets you contextualize your analytics instrumentation and validate it with your event spec before deploying it to production.
- Lets you access and validate your event names, properties, types, etc.
Get started
The following sections will help you set up and use RudderTyper to generate your first client.
Prerequisites
- Make sure your Node version is v20.x or above
- Clone the RudderTyper repository in your preferred location
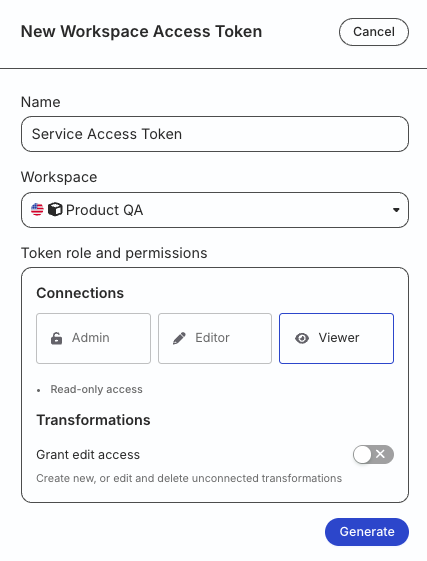
- Generate a workspace-level Service Access Token in your RudderStack workspace
The workspace-level Service Access Token has Read permissions by default. You do not need to assign any resource permissions while generating the token.
Token permissions for legacy RBAC system
If you are on the legacy Permissions Management (RBAC) system, your workspace-level Service Access Token should have Viewer permission.
See this documentation for more information on generating the token.
Quickstart
The following steps highlight the process of creating a ruddertyper.yml file and generate your first RudderTyper client with the specified configuration details:
- Run the following command to initialize RudderTyper:
$ npx rudder-typer init # Or initialize or quickstart- Choose the SDK type for your RudderTyper client - you can use the up/down arrow key to navigate through the options.
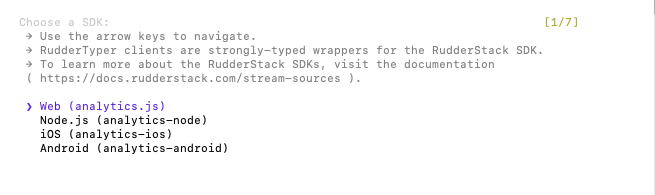
- Choose the appropriate language and continue. The following image shows the language options for the Web SDK:
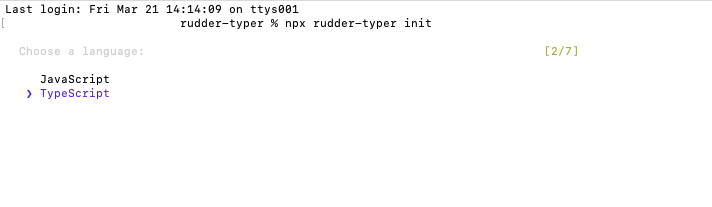
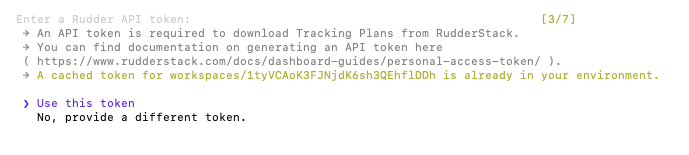
Enter the workspace-level Service Access Token generated above. RudderTyper uses this token to fetch all the Tracking Plans present in your workspace.
Choose the Tracking Plan for which RudderTyper generates the client - this plan is automatically saved locally in a
plan.jsonfile.
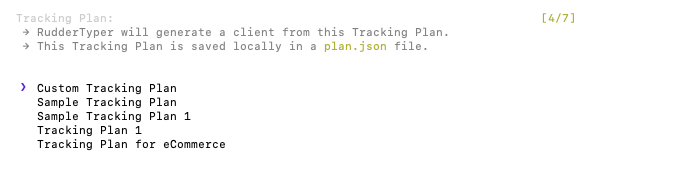
Choose the RudderTyper mode. You will see two options -
ProductionorDevelopment. See RudderTyper modes for more information on each mode.Specify the directory to store the generated RudderTyper client. You can choose an existing directory or create a new one, depending on your requirement.
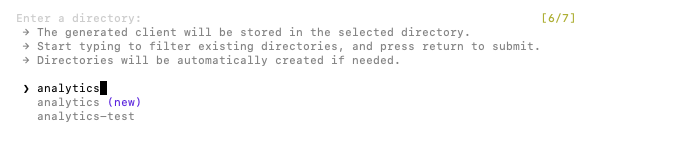
- Review the settings and select Looks good! to complete the process. You can select Edit to make any changes to the above steps.
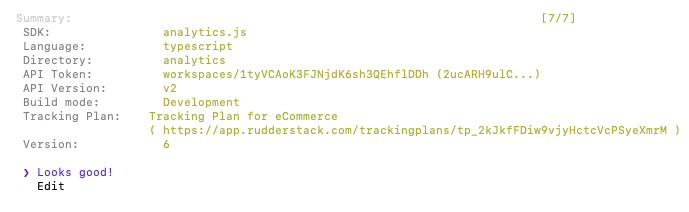
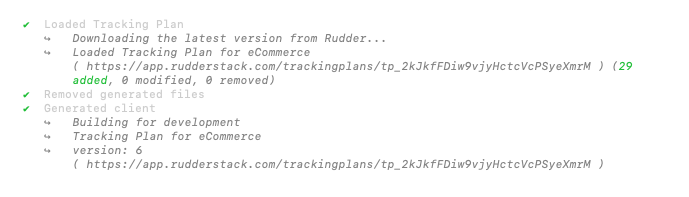
RudderTyper then generates the client based on your configuration settings and stores it in the specified directory. See Configuration reference for more information on the ruddertyper.yml file structure.
Troubleshooting
- If you get an error during the setup process, run the following commands to clear your cache and local storage:
npm cache clean --force
rm -r ~/.ruddertyper- If you get a “Your workspace does not have any Tracking Plans” error during the setup, verify that your RudderTyper client is on a stable version (v1.x).
Commands
| Command | Description |
|---|---|
Initialize$ npx rudder-typer init | Initializes RudderTyper with a quickstart guide to generate your RudderTyper client . |
Help$ npx rudder-typer help | Prints the help message describing different commands available with RudderTyper. |
Update plan$ npx rudder-typer update | u | * (default) | Syncs plan.json with RudderStack to pull the latest changes from your Tracking Plan and generates an updated development client. |
Build development client$ npx rudder-typer build | b | d | dev | development | Generates a development client from plan.json with runtime validation. |
Build production client$ npx rudder-typer prod | p | production | Generates a production client from plan.json without runtime validation . |
Print token configuration$ npx rudder-typer token | tokens | t | Prints the local RudderStack API token configuration. |
Print RudderTyper version$ npx rudder-typer version | Prints the RudderTyper CLI version. |
CLI arguments
Run the help command (npx rudder-typer help) to get the below list of CLI arguments that you can use with RudderTyper:
| Argument | Description |
|---|---|
config | Optional path to a ruddertyper.yml (or a directory with ruddertyper.yml). |
debug | Optional (hidden) flag to turn on/off debug mode. |
version / v | Prints the RudderTyper CLI version. |
help / h | Prints help on a command. |
RudderTyper modes
RudderTyper operates in two distinct modes: Development and Production mode. Each mode serves a specific purpose in the analytics implementation workflow. By utilizing the required mode, you can streamline the process of implementing and managing analytics with RudderTyper.
Development mode
This mode is designed to facilitate testing and validating your changes before the events go live.
This mode is suitable for local development and debugging and helps you:
- Validate the JSON schema to ensure correctness.
- Verify the tracking events against the defined Tracking Plan.
- Include additional validation logic to catch potential errors early.
Production mode
This mode is optimized for deployment and ensures seamless event tracking in live environments.
This mode is suitable for staging and production environments and helps you:
- Generate production-ready, optimized code.
- Adhere strictly to the validated schema to maintain consistency.
- Remove unnecessary validation and debugging logic for efficiency.
Configuration reference
RudderTyper stores its configuration in a ruddertyper.yml file in the root of your repository.
A sample configuration looks like the following:
# RudderStack RudderTyper configuration reference (https://github.com/rudderlabs/rudder-typer)
# Run `npx rudder-typer` to regenerate a client with the latest versions of these events.

scripts:
  # You can supply a RudderStack service access token using a `scripts.token` command. The output of `script.token` command should be a valid RudderStack API token.
  token: source .env; echo $RUDDERTYPER_TOKEN

  # You can supply the email address linked to your workspace using a `scripts.email` command.The output of `script.email` command should be an email address registered with your workspace.
  email: source .env; echo $EMAIL

  # You can format any of RudderTyper's auto-generated files using a `scripts.after` command.
  # See `Formatting Generated Files` below.
  after: ./node_modules/.bin/prettier --write analytics/plan.json

client:
  # The RudderStack SDK you are generating the client for
  # Valid values: analytics.js, analytics-node, analytics-ios, analytics-android.
  sdk: analytics.js

  # The target language for your RudderTyper client.
  # Valid values: javascript, typescript, objective-c, swift, java.
  language: typescript

  # JavaScript Transpilation Settings
  # Valid values: 'ES3','ES5','ES2015','ES2016','ES2017','ES2018','ES2019','ESNext','Latest'
  scriptTarget: "ES5"

  # Valid values: 'CommonJS','AMD','UMD','System','ES2015','ESNext'
  moduleTarget: "ESNext"

trackingPlans:
  # The RudderStack Tracking Plan that you are generating a client for.
  # Provide your workspace slug and Tracking Plan id
  # You also need to supply a path to a directory to save your RudderTyper client.
  - id: <TRACKING_PLAN_ID>
    workspaceSlug: rudderstack-demo
    path: ./analytics

    # Valid values: v1 (old Tracking Plan), v2 (new Tracking Plan format)
    APIVersion: v2
Note the following:
- Store
tokenandemailin a.envfile created in the same directory asruddertyper.ymlto ensure the scripts automatically use these values. A sample.envfile is shown below:
RUDDERTYPER_TOKEN=<SERVICE_ACCESS_TOKEN>
EMAIL=<EMAIL_ADDRESS>- You can get the
idfield by going to the Tracking Plan in the RudderStack dashboard. For example,https://app.rudderstack.com/trackingPlans/<TRACKING_PLAN_ID>.
Integrate RudderTyper client with SDK
This section includes the steps to integrate your RudderTyper-generated client with your app across different RudderStack SDKs.
- Import all files in the client generated by RudderTyper as a package in your project.
- Make the calls using the RudderTyper client, as shown:
// Import your auto-generated RudderTyper client:
import com.rudderstack.generated.*

  // Issue your first RudderTyper track call
  RudderTyperAnalytics.with(this).orderCompleted(
    OrderCompleted.Builder()
    .orderID("ck-f306fe0e-cc21-445a-9caa-08245a9aa52c")
    .total(39.99)
    .build()
);- Import your RudderTyper client into your project using XCode.
If you place the generated files into a folder within your project, import the project as a group, not as a folder reference.
- Make the calls using the RudderTyper client, as shown:
// Import your auto-generated RudderTyper client:
#import "RSRudderTyperAnalytics.h"

// Issue your first RudderTyper track call
[RSRudderTyperAnalytics orderCompletedWithOrderID: "ck-f306fe0e-cc21-445a-9caa-08245a9aa52c" total: @39.99];
There are two ways to get started with RudderTyper in your browser:
Using JavaScript SDK snippet
- Paste the JavaScript SDK snippet from the RudderStack dashboard in your HTML file.
- If you use TypeScript, add
@rudderstack/analytics-jsas a dev dependency:
npm install --save-dev @rudderstack/analytics-js- Run the below command to generate a bundle from the RudderTyper client:
npx browserify analytics/index.js --standalone rudderTyper > rudderTyperBundle.js- For the TypeScript analytics client, add the npm package
tsifyas a dependency and run the below command to generate the bundle:
npx browserify analytics/index.ts -p [ tsify ] --standalone rudderTyper > rudderTyperBundle.js- Import your RudderTyper client and send events.
<script>
  // Add the JavaScript SDK snippet from https://www.rudderstack.com/docs/sources/event-streams/sdks/rudderstack-javascript-sdk/quickstart/#using-cdn
</script>
<script src="./rudderTyperBundle.js"></script>
<script>
  rudderTyper.setRudderTyperOptions({
    analytics: rudderanalytics,
  });
  rudderTyper.orderCompleted({
    orderID: 'ck-f306fe0e-cc21-445a-9caa-08245a9aa52c',
    total: 39.99,
  });
</script>
See the sample application for more information.
Using NPM
Import the RudderTyper-generated client and make the calls if your framework supports them.
// Import RudderStack JS SDK and initialize it
import { RudderAnalytics } from '@rudderstack/analytics-js';
// Import your auto-generated RudderTyper client:
import { RudderTyperAnalytics } from './analytics/index';

const rudderAnalytics = new RudderAnalytics();
rudderAnalytics.load(WRITE_KEY, DATA_PLANE_URL, {});

// Pass in your @rudderstack/analytics-js instance to RudderTyper client
RudderTyperAnalytics.setRudderTyperOptions({
  analytics: rudderAnalytics,
});

// Issue your first RudderTyper track call
RudderTyperAnalytics.orderCompleted({
  orderID: 'ck-f306fe0e-cc21-445a-9caa-08245a9aa52c',
  total: 39.99,
});
Note that:
- Replace
WRITE_KEYandDATA_PLANE_URLin the above snippet with your source write key and data plane URL respectively. - Make sure to run
npx rudder-typerto regenerate your RudderTyper client every time you update the Tracking Plan.
See the sample application for more information.
Import the RudderTyper-generated client and start making calls, as shown:
// Import RudderStack Node.js SDK and initialize it
const RudderAnalytics = require('@rudderstack/rudder-sdk-node');

const client = new RudderAnalytics(WRITE_KEY, {
  dataPlaneUrl: DATA_PLANE_URL,
  // Other initialization options
});

const RudderTyperAnalytics = require('./analytics/index');
// Pass in your @rudderstack/rudder-sdk-node instance to RudderTyper.
RudderTyperAnalytics.setRudderTyperOptions({
  analytics: client,
});

// Issue your first RudderTyper track call
RudderTyperAnalytics.orderCompleted({
  orderID: 'ck-f306fe0e-cc21-445a-9caa-08245a9aa52c',
  total: 39.99,
});
How RudderTyper validates events based on Tracking Plan
Case 1: Source is connected to a Tracking Plan
| Scenario | Behavior |
|---|---|
| RudderTyper configured with the same Tracking Plan ID and version | RudderStack validates the events with the specified Tracking Plan and shows the violations accordingly. |
| RudderTyper configured with the same Tracking Plan ID but different version | RudderTyper validates the events and shows the violations based on the Tracking Plan version used to generate it, even if the Tracking Plan has undergone revisions since then. For example, if you generate RudderTyper with Tracking Plan version v5 and then revise the Tracking Plan version to v6, then RudderTyper validates events and shows violations based on Tracking Plan v5, not v6. |
| RudderTyper configured with a different Tracking Plan ID | RudderStack validates the events with the Tracking Plan connected to the source in the dashboard and shows the violations accordingly. |
Case 2: Source is not connected to a Tracking Plan
In this case, RudderStack does not proceed to the Tracking Plan validation stage. As a result, no violations are shown.
Contribute
- To submit a bug report or feature request, file an issue here.
- To build on a RudderTyper feature or propose support for a new language, see the contributor’s documentation.
References
- Download Node. You will also get the necessary commands to set up Node.js and verify your installation.
- Commands to build and run the RudderTyper client
- Yarn reference
FAQ
Can I use a different Service Access Token for authenticating RudderTyper?
Yes, you can.
- Follow steps 1 to 3 from the Quickstart section.
- In the Enter Rudder API token window, choose No, provide a different token.
Why am I seeing events validated against different Tracking Plan versions in the live events viewer?
Different events may be validated against different Tracking Plan versions because RudderStack validates each event against the specific version that was used to instrument it.
This behavior ensures that each event is validated against the exact rules it was designed to follow, and prevents false validation errors when Tracking Plans evolve over time.
See Tracking Plan observability for more details.
