How to Configure Snowflake Streaming to Iceberg Tables
- growth
- enterprise
7 minute read
This guide lists the steps to configure your Snowflake Streaming destination so that RudderStack delivers events into Snowflake-managed Iceberg tables backed by Parquet files in your cloud storage.
Setup overview
To configure Snowflake Streaming to Iceberg tables, you will:
- Prepare Snowflake and your cloud storage
- Configure RSA key-pair authentication
- Create a Snowflake external volume for Iceberg data
- Add and configure the Snowflake Streaming destination in RudderStack
- Enable Iceberg and verify the integration
See Snowflake Streaming-Iceberg Integration Architecture for more information on the integration and how it works.
Prerequisites
Before you start:
You must have a Snowflake account that supports Iceberg tables
You must have an
ACCOUNTADMINorSYSADMIN, or a role with equivalent privileges to create external volumesYou must have access to one of the following cloud storage providers:
- Amazon S3
- Google Cloud Storage (GCS)
- Azure Blob Storage
You must meet the core Snowflake Streaming destination prerequisites described in the Snowflake Streaming Destination guide
Snowflake Streaming to Iceberg tables only supports RSA key-pair authentication — password-based authentication is not supported.
1. Create an external volume for Iceberg data
You must create a Snowflake external volume that points to your cloud storage location. Snowflake stores both the Parquet data files and Iceberg metadata files in this volume.
The following sections explain how to create an external volume (represented by the placeholder my_external_volume) for various cloud providers.
Make sure to replace the placeholders with the actual values.
In Snowflake, run the following:
CREATE OR REPLACE EXTERNAL VOLUME my_iceberg_volume
  STORAGE_LOCATIONS = (
    (
      NAME = 'my_s3_location'
      STORAGE_PROVIDER = 'S3'
      STORAGE_BASE_URL = 's3://your-bucket-name/path/'
      STORAGE_AWS_ROLE_ARN = 'arn:aws:iam::123456789012:role/your-snowflake-role'
    )
  );
After you create the external volume, retrieve the IAM user and external ID that Snowflake uses:
DESCRIBE EXTERNAL VOLUME my_iceberg_volume;Update the AWS IAM role’s trust policy so that Snowflake can assume the role. Use the values from the DESCRIBE output:
{
  "Version": "2012-10-17",
  "Statement": [
    {
      "Effect": "Allow",
      "Principal": {
        "AWS": "<STORAGE_AWS_IAM_USER_ARN from DESCRIBE output>"
      },
      "Action": "sts:AssumeRole",
      "Condition": {
        "StringEquals": {
          "sts:ExternalId": "<STORAGE_AWS_EXTERNAL_ID from DESCRIBE output>"
        }
      }
    }
  ]
}
In Snowflake, run the following:
CREATE OR REPLACE EXTERNAL VOLUME my_iceberg_volume
  STORAGE_LOCATIONS = (
    (
      NAME = 'my_gcs_location'
      STORAGE_PROVIDER = 'GCS'
      STORAGE_BASE_URL = 'gcs://your-bucket-name/path/'
    )
  );
After you create the external volume, run the following:
DESCRIBE EXTERNAL VOLUME my_iceberg_volumeThen, note the Snowflake service account and grant it the storage.objectAdmin role on your bucket.
In Snowflake, run the following:
CREATE OR REPLACE EXTERNAL VOLUME my_iceberg_volume
  STORAGE_LOCATIONS = (
    (
      NAME = 'my_azure_location'
      STORAGE_PROVIDER = 'AZURE'
      STORAGE_BASE_URL = 'azure://your-account.blob.core.windows.net/your-container/path/'
      AZURE_TENANT_ID = 'your-tenant-id'
    )
  );
After you create the external volume:
- Run
DESCRIBE EXTERNAL VOLUME my_iceberg_volumeand copy the consent URL. - Open the consent URL in a browser and grant access in Azure AD.
- Assign the Storage Blob Data Contributor role to the Snowflake service principal on your container.
Verify the external volume
To verify that Snowflake can access your storage, run the following query:
SELECT SYSTEM$VERIFY_EXTERNAL_VOLUME('my_iceberg_volume');
-- Expected: {"success": true, ...}
Do not proceed until this verification succeeds.
2. Configure RSA key-pair authentication
Snowflake Streaming to Iceberg tables requires RSA key-pair authentication for the Snowflake user that RudderStack uses.
If you have already configured key-pair authentication for the Snowflake Streaming destination, you can reuse the same user and keys.
Generate an RSA key pair
On a secure machine, generate an encrypted private key and its corresponding public key:
# Generate private key (encrypted)
openssl genrsa 2048 | openssl pkcs8 -topk8 -inform PEM -out rsa_key.p8

# Generate public key
openssl rsa -in rsa_key.p8 -pubout -out rsa_key.pub
Register the public key with your Snowflake user
In Snowflake, associate the public key with the user that RudderStack uses:
ALTER USER my_rudderstack_user
  SET RSA_PUBLIC_KEY = '<contents of rsa_key.pub without header and footer>';
Store the rsa_key.p8 file securely. You will paste its contents into the Private Key field when you configure the destination in RudderStack.
If your private key is encrypted, you must also provide the Private Key Passphrase in the Snowflake Streaming destination settings. Authentication will fail if you omit the passphrase for an encrypted key.
3. Add Snowflake Streaming destination in RudderStack
- Create a new Snowflake Streaming destination in the RudderStack dashboard.
- Specify the connection settings for the Snowflake Streaming destination.
- Configure the Advanced settings and Consent settings as needed.
4. Enable Iceberg and specify the external volume
After you configure the basic connection settings, configure the following Iceberg settings:
| Setting | Description |
|---|---|
| Create Iceberg Tables | Turn on the toggle to enable Snowflake-managed Iceberg tables for this destination |
| External Volume Name | Specify the name of the external volume you created in Snowflake in Step 1 |
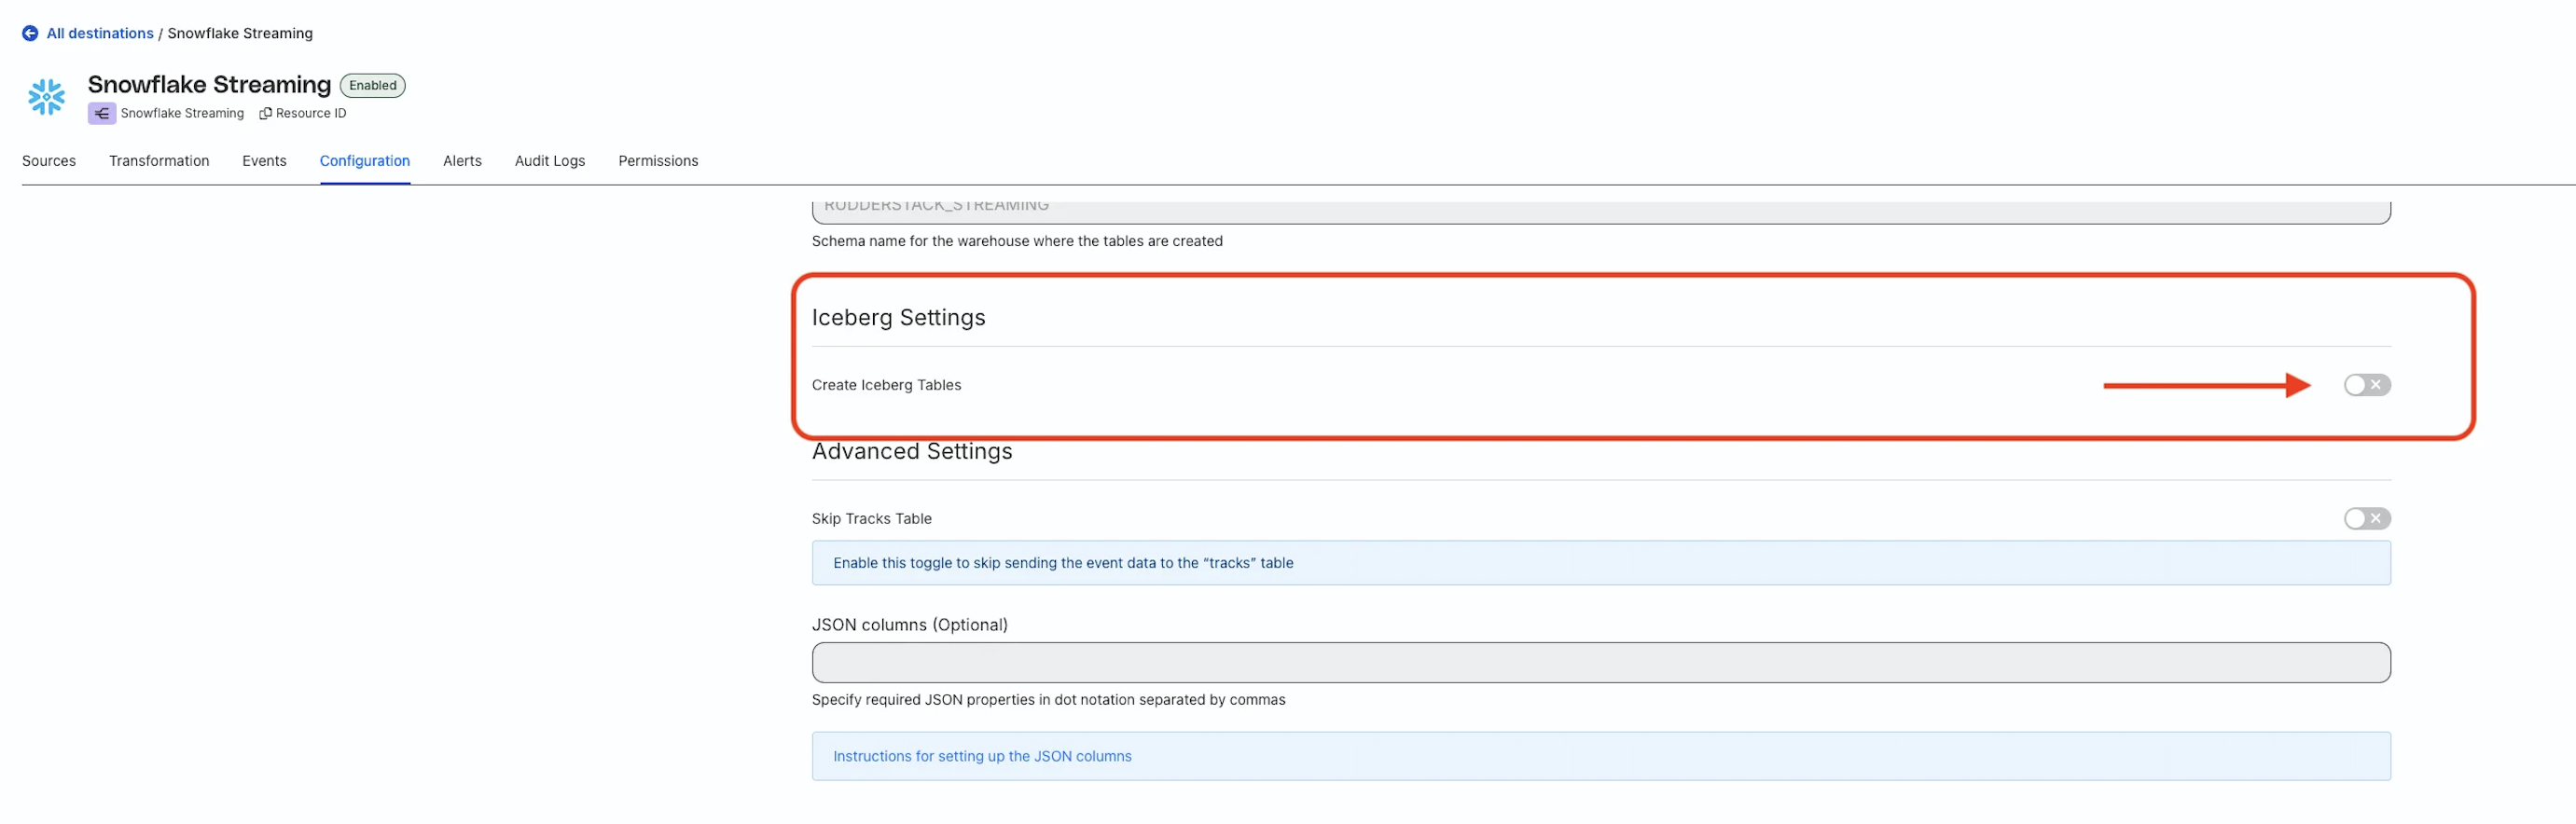
The Create Iceberg Tables and External Volume Name settings are immutable — you cannot change them after you create the destination.
To use a different external volume or to disable Iceberg, you will need to create a new Snowflake Streaming destination.
What happens when Iceberg is enabled
- RudderStack sends events to Snowflake through the Snowpipe Streaming API
- Snowflake buffers incoming rows and periodically flushes them as Parquet files into your external volume
- Snowflake maintains the Iceberg metadata and catalog, exposing the tables as standard Snowflake-managed Iceberg tables
You should expect approximately 30 seconds of end-to-end latency from when RudderStack receives an event to when you can query it in Snowflake.
Snowflake uses a default flush interval (for example, through
MAX_CLIENT_LAG) to balance file size and latency.
See the Snowflake Streaming-Iceberg Integration Architecture guide for more information on the integration workflow.
5. Activate and verify the integration
After completing the setup, enable the Snowflake Streaming destination to activate it and send test events from the connected source.
In Snowflake, verify that Iceberg tables are created in your target database and schema:
SHOW ICEBERG TABLES IN SCHEMA <YOUR_DATABASE>.<YOUR_SCHEMA>;Then, run a simple query to confirm that events are present:
SELECT * FROM <YOUR_DATABASE>.<YOUR_SCHEMA>.<YOUR_TABLE>
LIMIT 10;
Finally, check your cloud storage bucket (S3, GCS, or Azure Blob) under the path configured in your external volume to confirm that Parquet data files are being written.
Review the troubleshooting section if you run into issues.
Troubleshooting
| Issue | Solution |
|---|---|
| Iceberg tables are not created | If SHOW ICEBERG TABLES returns no results:
|
| External volume verification fails | If SYSTEM$VERIFY_EXTERNAL_VOLUME does not return "success": true:
|
| Authentication errors | If the Snowflake Streaming destination fails to connect:
|
| No data appears in cloud storage | If you see tables in Snowflake but no Parquet files in your bucket:
|
If the issue persists, contact RudderStack Support with details of your configuration, any error messages, and the output of DESCRIBE EXTERNAL VOLUME.
