Sync data from RudderStack to Amazon S3 Data Lake.
11 minute read
Amazon S3 is a popular object storage service used to store both structured and unstructured data. With S3 data lake, you can easily use the native AWS services for data processing, analytics, machine learning, and more.
For more information on how the events are mapped to the tables in S3 data lake tables, see the Warehouse Schema.
Find the open source transformer code for this destination in the GitHub repository.
Setup
Before you set up S3 data lake as a destination in RudderStack, make sure to set up your S3 bucket with the required permissions.
From your RudderStack dashboard, add a source. Then, from the list of destinations, select S3 Data Lake.
Assign a name to the destination and click Continue.
Connection settings
S3 Storage Bucket Name: Enter the name of the S3 bucket used to store the data before loading it into the S3 data lake.
Register schema on AWS Glue: Turn on this option to register the schema of your incoming data on AWS Glue’s data catalog. For more information on registering your schema in AWS Glue, see the AWS Glue documentation.
AWS Glue Region: If the Register schema on AWS Glue setting is turned on, enter your AWS Glue region. For example, for N.Virginia, the AWS Glue region would be us-east-1. For more information on getting your AWS Glue region and the associated service endpoints, see the AWS Glue documentation.
Make sure to grant the following permissions to your AWS Glue instance and the RudderStack IAM role (see Role Based Authentication setting below):
glue:CreateTable
glue:UpdateTable
glue:CreateDatabase
glue:GetTables
The following additional permissions are required to use AWS Glue partitions:
glue:BatchCreatePartition
glue:GetPartition
If you are using AWS Lake Formation for fine-grained access control on the data in your data lake, see AWS Lake Formation permissions for managing the AWS Glue resources on your Lake Formation model.
S3 Prefix: If specified, RudderStack creates a folder in the S3 bucket with this name and pushes all data within that folder. For example, s3://<bucket_name>/<prefix>/.
Namespace: If specified, all data for the destination will be pushed to the location s3://<bucketName>/<prefix>/rudder-datalake/<namespace>.
Note that:
If you don’t specify a namespace in the settings, it is set to the source name, by default. You cannot change the namespace later.
If Register schema on AWS Glue is turned on, RudderStack creates all table definitions in a database with the name set to this namespace.
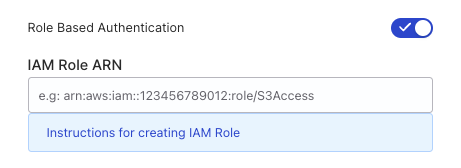
Role Based Authentication: Turn on this setting to use the RudderStack IAM role for authentication. For more information on creating an AWS IAM role for RudderStack, see Create RudderStack IAM role for AWS-based destinations.
IAM Role ARN: Enter the ARN of the IAM role.
It is highly recommended to turn on this setting as the access keys-based authentication method is now deprecated.
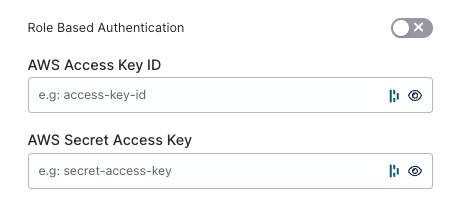
If Role-based Authentication is disabled, you need to enter the AWS Access Key ID and AWS Secret Access Key to authorize RudderStack to write to your S3 bucket.
In both the role-based and access key-based authentication methods, you need to set a policy specifying the required permissions for RudderStack to write to your S3 bucket. Refer to the Permissions section for more information.
Enable server-side encryption for S3: When you turn on this setting, RudderStack adds a header x-amz-server-side-encryption with the value AES256 to the PutObject request when sending the data to the S3 bucket. See Encryption with S3 managed keys for more information.
Clean up object storage files after successful sync: Turn on this toggle to delete the object storage files after the sync has completed successfully.
Sync Frequency: Specify how often RudderStack should sync the data to your S3 data lake.
Sync Starting At: This optional setting lets you specify the particular time of the day (in UTC) when you want RudderStack to sync the data.
Advanced settings
Skip User Table: This setting is toggled on by default and sends events exclusively to the identifies table while skipping the users table. This eliminates the need for a merge operation on the users table. If toggled off, RudderStack sends the events to both the identifies and users tables.
Skip Tracks Table: Toggle on this setting to skip sending events to the tracks table.
It is recommended to create a new bucket for storing events coming from RudderStack.
S3 Permissions
To send events to your S3 data lake successfully, you need to give RudderStack the necessary permissions to write to your bucket. You can choose any of the following approaches based on your company’s security policies and setup preferences:
Option 1: Use RudderStack IAM role
It is highly recommended to use this option for setting up the required S3 bucket permissions.
Use this approach if you are going to set up the S3 destination in RudderStack using Role Based Authentication.
Create an IAM user. Choose a policy that has write access to your bucket. Alternatively, you can create a new policy with the following permissions and attach it to the IAM user:
Replace <S3_BUCKET_NAME> with the actual bucket name.
Return to the IAM dashboard and go to Users under Access management. Then, click on the newly-created user.
Go to the Security credentials tab and scroll down to Access keys.
Click Create access key, select the use case as per your requirement, and click Next.
If required, set the Description tag value, and click Create access key.
Note and secure the Access key and Secret access key. Use these credentials to set up your S3 data lake destination in RudderStack.
Find data in S3 data lake
RudderStack converts your events into Apache Parquet files and stores them into the configured S3 bucket. Before storing the events, RudderStack groups them by the event name based on the UTC time they were received.
If you have the Register schema on AWS Glue setting toggled on, RudderStack creates all table definitions in a database with the name set to the Namespace specified in the dashboard settings.
Create table definitions using a crawler
Refer to this section only if you haven’t toggled on the Register Schema on AWS Glue setting while configuring the S3 data lake destination in RudderStack.
In the absence of AWS Glue, you can create a crawler to go through your data and create table definitions out of it. To do so, follow these steps:
Go to your AWS Glue console and select Crawler from the left pane.
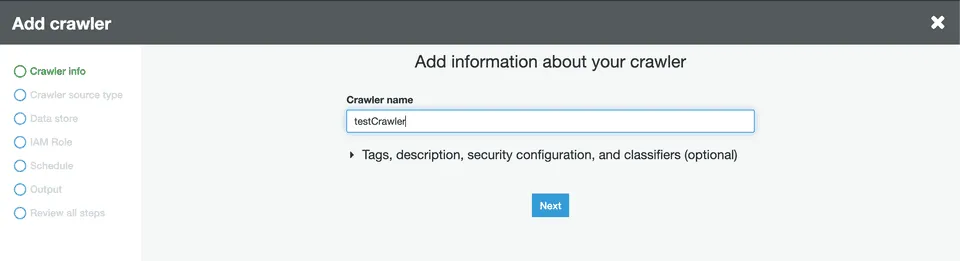
Select Add Crawler.
Specify a name for your crawler and click Next:
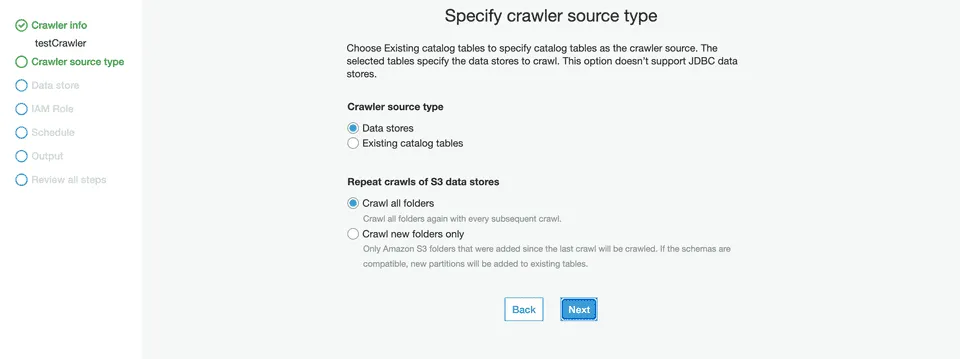
Next, under the Crawler source type section, choose Data stores.
Configure the Repeat crawls of S3 data stores based on your requirement.
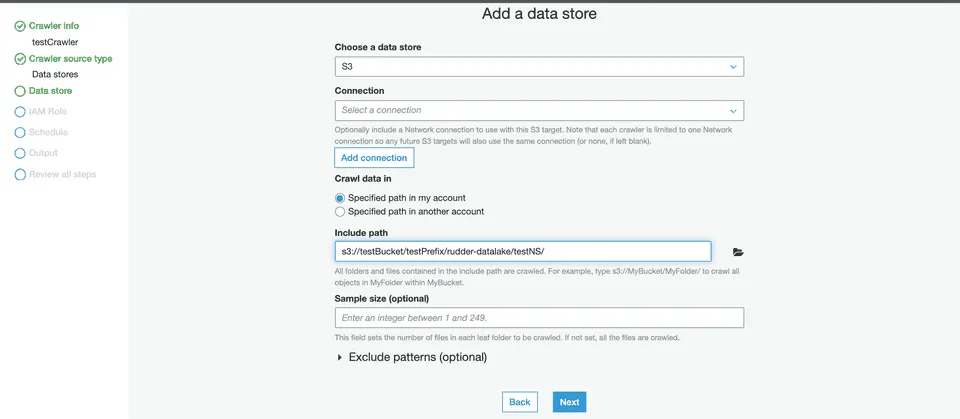
Then, under the Data store section, select S3 from the dropdown for the Choose a data store setting:
For the Crawl data in setting, choose Specified path in my account.
In the Include path setting, enter the S3 URI of your configured bucket followed by the suffix /<prefix>/rudder-datalake/<namespace>/.
If your S3 bucket name is testBucket and the configured prefix and namespace are testPrefix and testNameSpace respectively, then your path should be:
s3://testBucket/testPrefix/rudder-datalake/testNameSpace/
If you have not configured any prefix while setting up the S3 data lake destination in RudderStack, omit the prefix. The path would then be:
s3://testBucket/rudder-datalake/testNameSpace/.
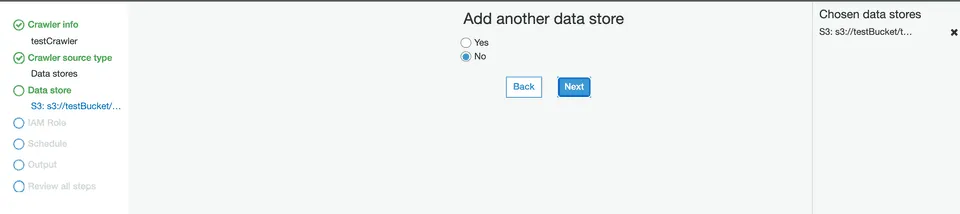
Then, under the Add another data store setting, select No:
In the IAM Role section, configure a suitable IAM role.
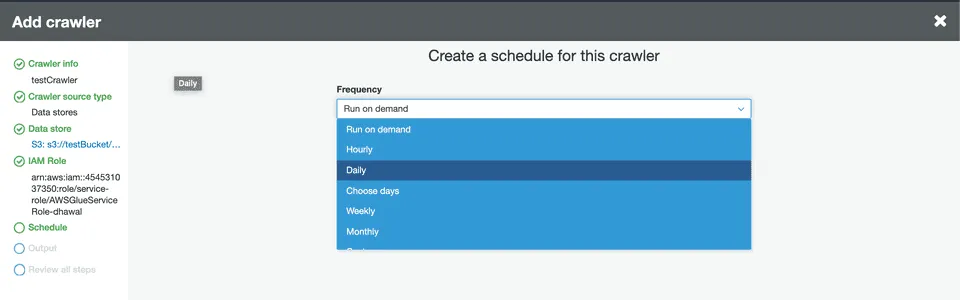
In the Schedule section, select the frequency of your crawler from the dropdown options:
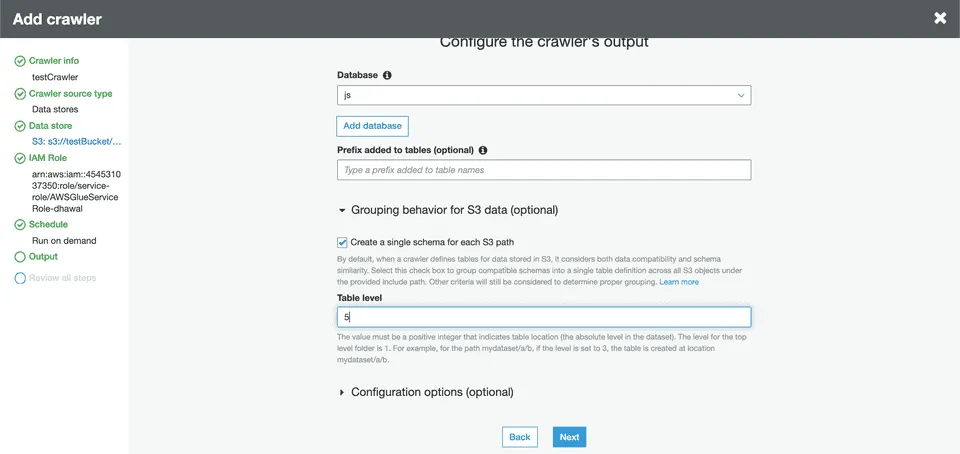
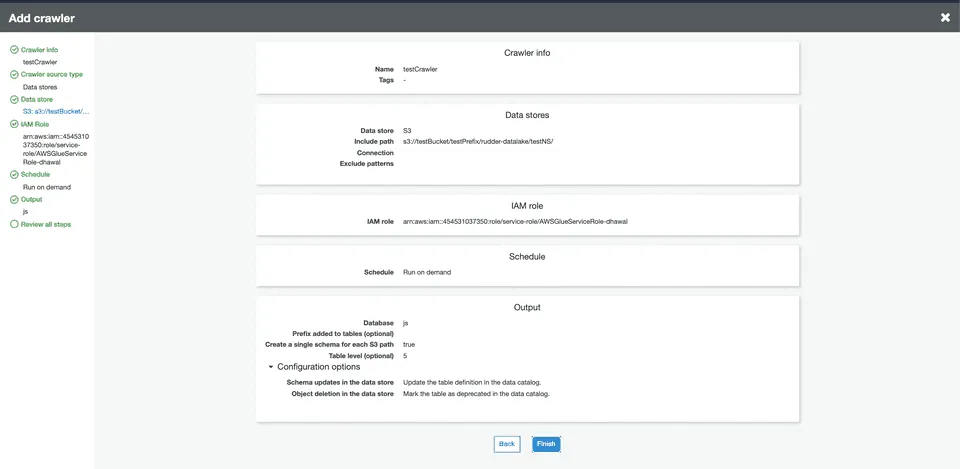
In the Output section, configure the database that stores all tables. Under the Grouping behavior for S3 data section, turn on the Create a single schema for each S3 path option:
Specify the Table level as 5 or 4 (refer to the tips below). This value indicates the absolute level of the table location in the bucket.
Since all tables are created in the path s3://testBucket/<prefix>/rudder-datalake/<namespace>/, make sure the table level is set to:
5: If a prefix is configured.
4: If a prefix is not configured.
The level for the top-level folder is 1. For example, for the path mydataset/a/b, if the level is set to 3, the table will be created at the location mydataset/a/b. Similarly, if the level is set to 2, the table will be created at the location mydataset/a.
Review your crawler configuration and click Finish to confirm.
Finally, click your crawler and run it. Wait for the process to finish - you should see some tables created in your configured database.
Query data using AWS Athena
You can query your S3 data using a tool like AWS Athena which lets you run SQL queries on S3.
Before querying your data on S3, make sure that you have sent some data to S3 and the sync is complete.
Follow these steps to start querying your data on s3:
Open your AWS Athena console. Then, go to the same AWS region which was used while configuring AWS Glue.
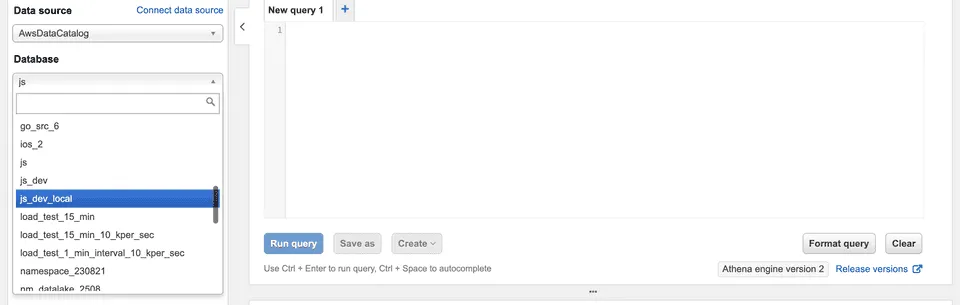
In the left pane, select AwsDataCatalog as your data source:
Select your configured namespace (or the database you specified while configuring the crawler) from the database dropdown menu.
By default, RudderStack sets the namespace to your source name if it is not explicitly specified in the destination settings.
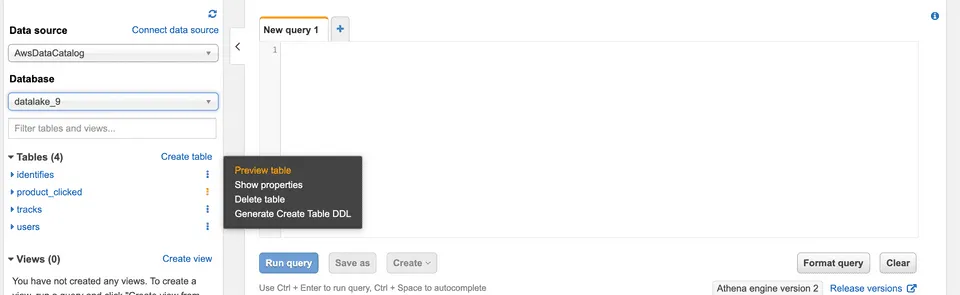
You should see some tables already created under the Tables section in the left pane.
You can preview the data by clicking on the three dots next to the table and selecting the Preview Data option. Alternatively, you can run your own SQL queries in the workspace on the right:
IPs to be allowlisted
To enable network access to RudderStack, allowlist the following RudderStack IPs depending on your region and RudderStack plan:
Plan
Region
US
EU
Free, Starter, and Growth
3.216.35.97
18.214.35.254
23.20.96.9
34.198.90.241
34.211.241.254
52.38.160.231
54.147.40.62
3.123.104.182
3.125.132.33
18.198.90.215
18.196.167.201
Enterprise
3.216.35.97
34.198.90.241
44.236.60.231
54.147.40.62
100.20.239.77
3.66.99.198
3.64.201.167
3.123.104.182
3.125.132.33
All the outbound traffic is routed through these RudderStack IPs.
AWS Lake Formation permissions
AWS Lake Formation lets you have fine-grained access control for the data in your lake. You can use the Lake Formation permissions model to manage your existing AWS Glue data catalog objects and data locations in Amazon S3.
To maintain backward compatibility with AWS Glue, Lake Formation has the Super permission for the IAMAllowedPrincipals group on all the existing AWS Glue data catalog resources.
The following sections contain the necessary permissions that you need to assign for the configured IAM roleif you have edited the default Lake Formation security settings so that:
The IAM role does not have the data lake administrator permissions, or
The IAMAllowedPrincipals group does not have the default permissions to create or access the Glue resources.
Make sure Register schema on AWS Glue is enabled in the RudderStack dashboard for these settings to take effect.
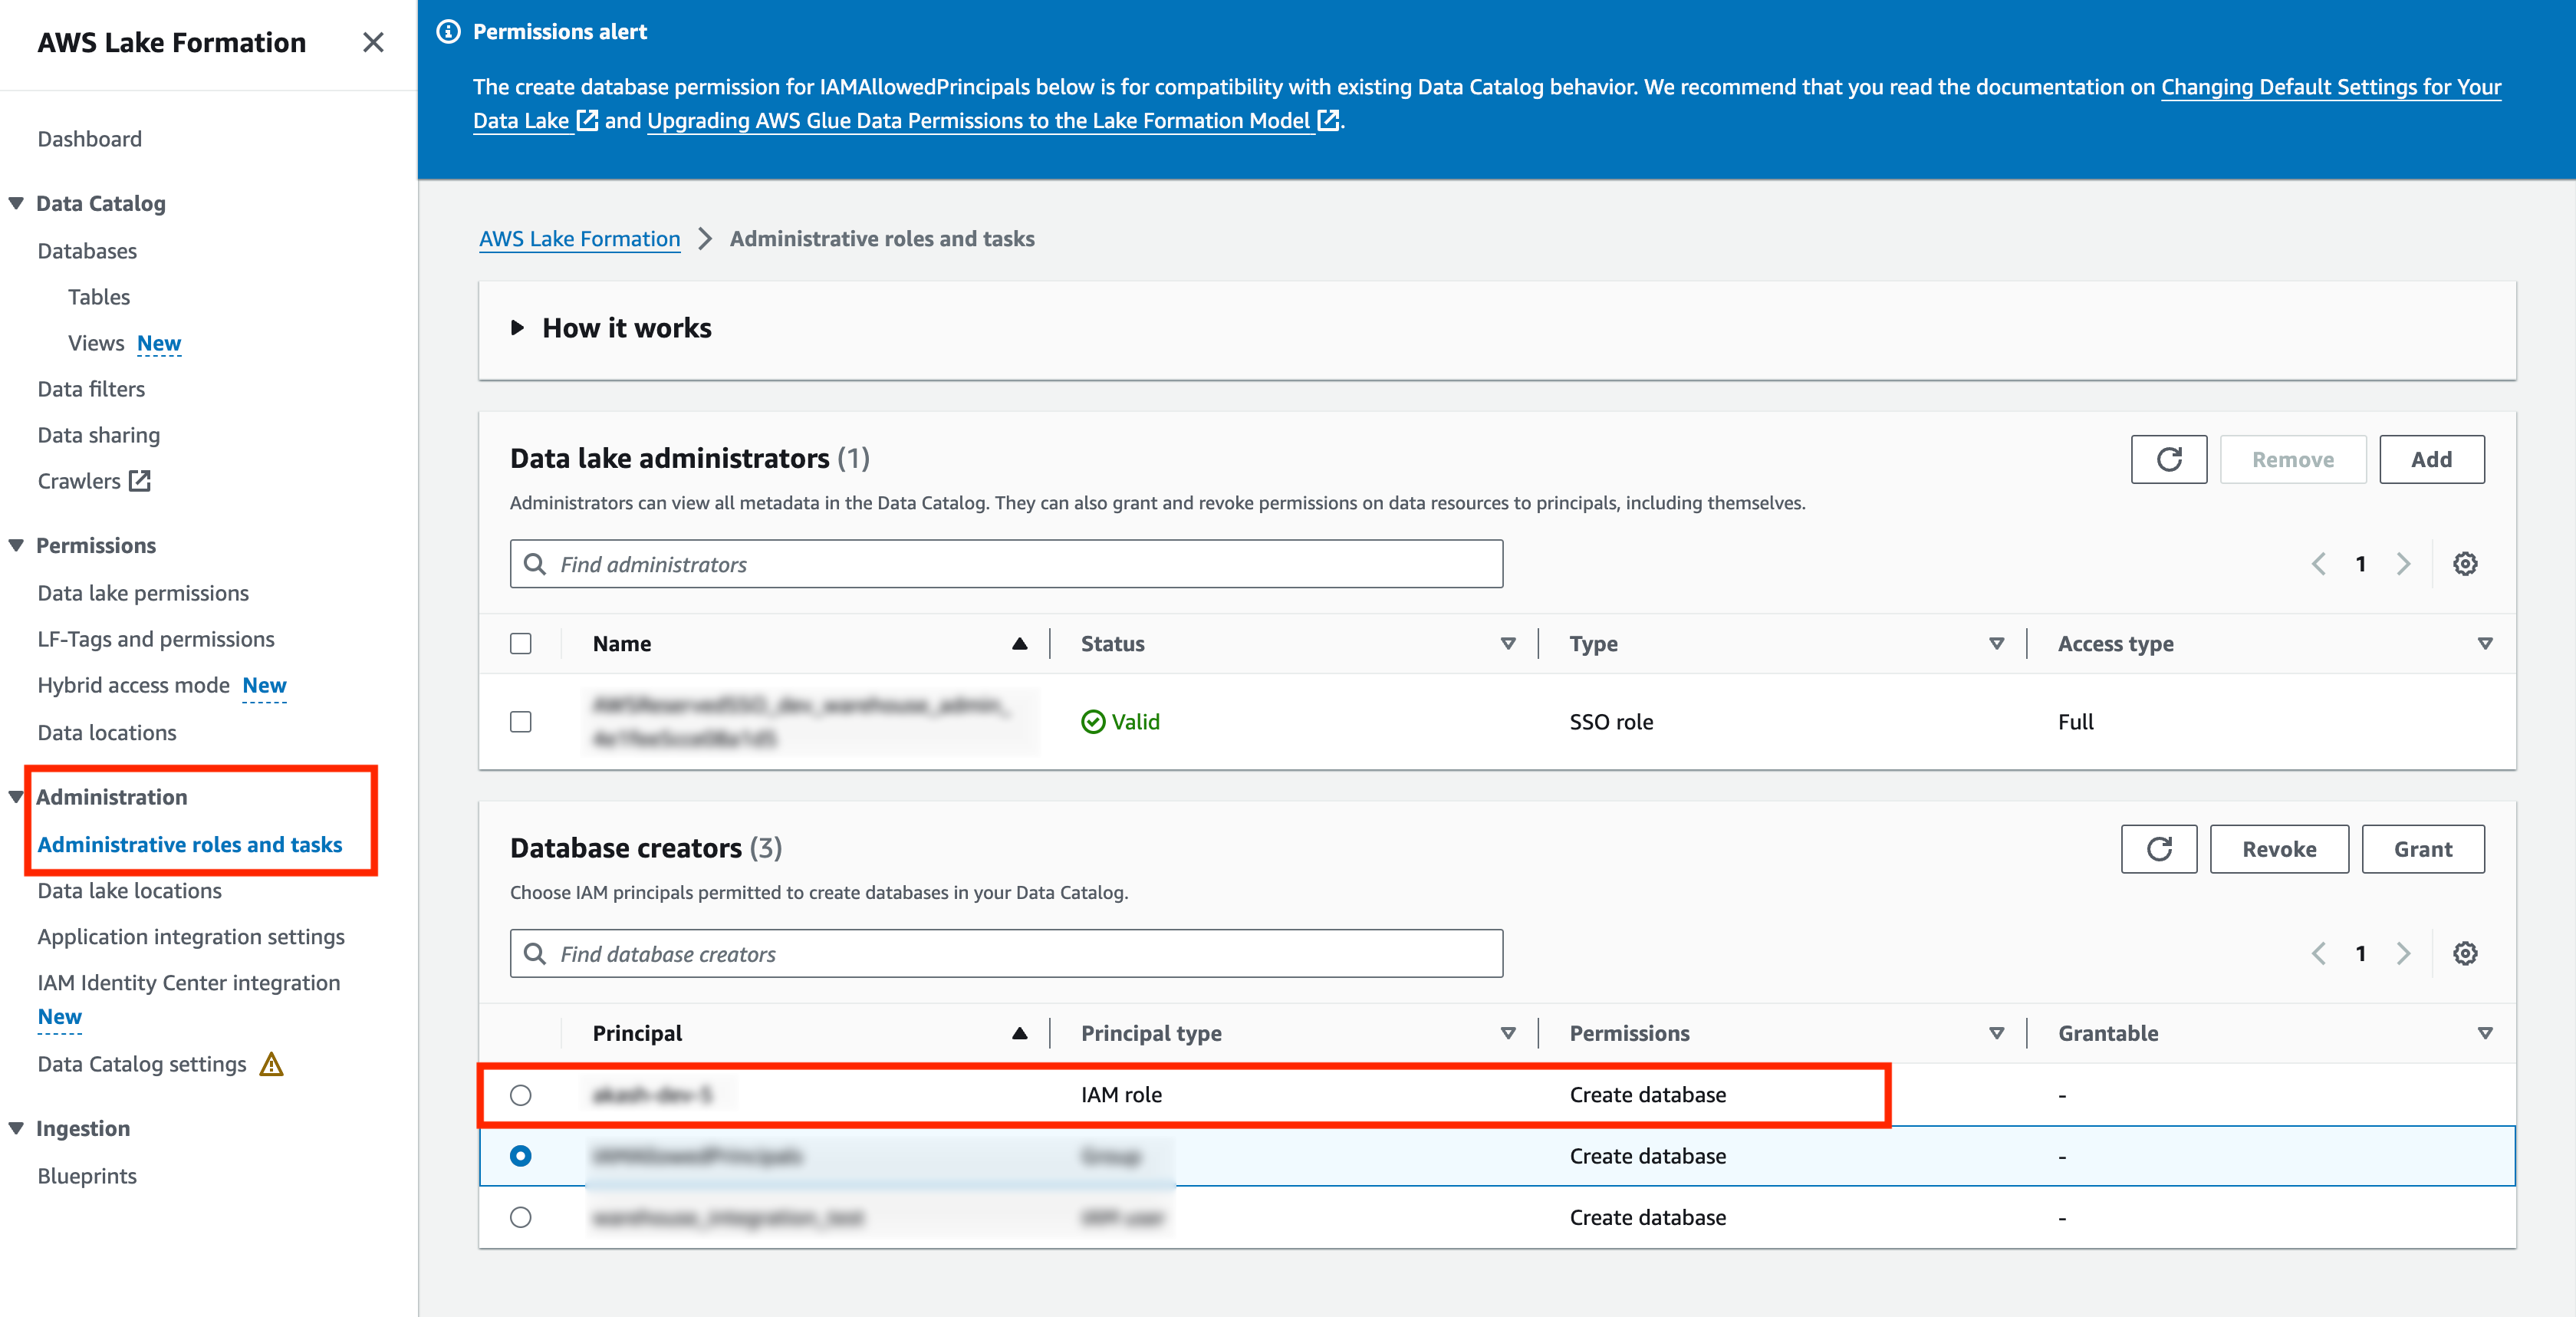
Under Administration, go to Administrative roles and tasks.
Under Database creators, add the configured IAM role.
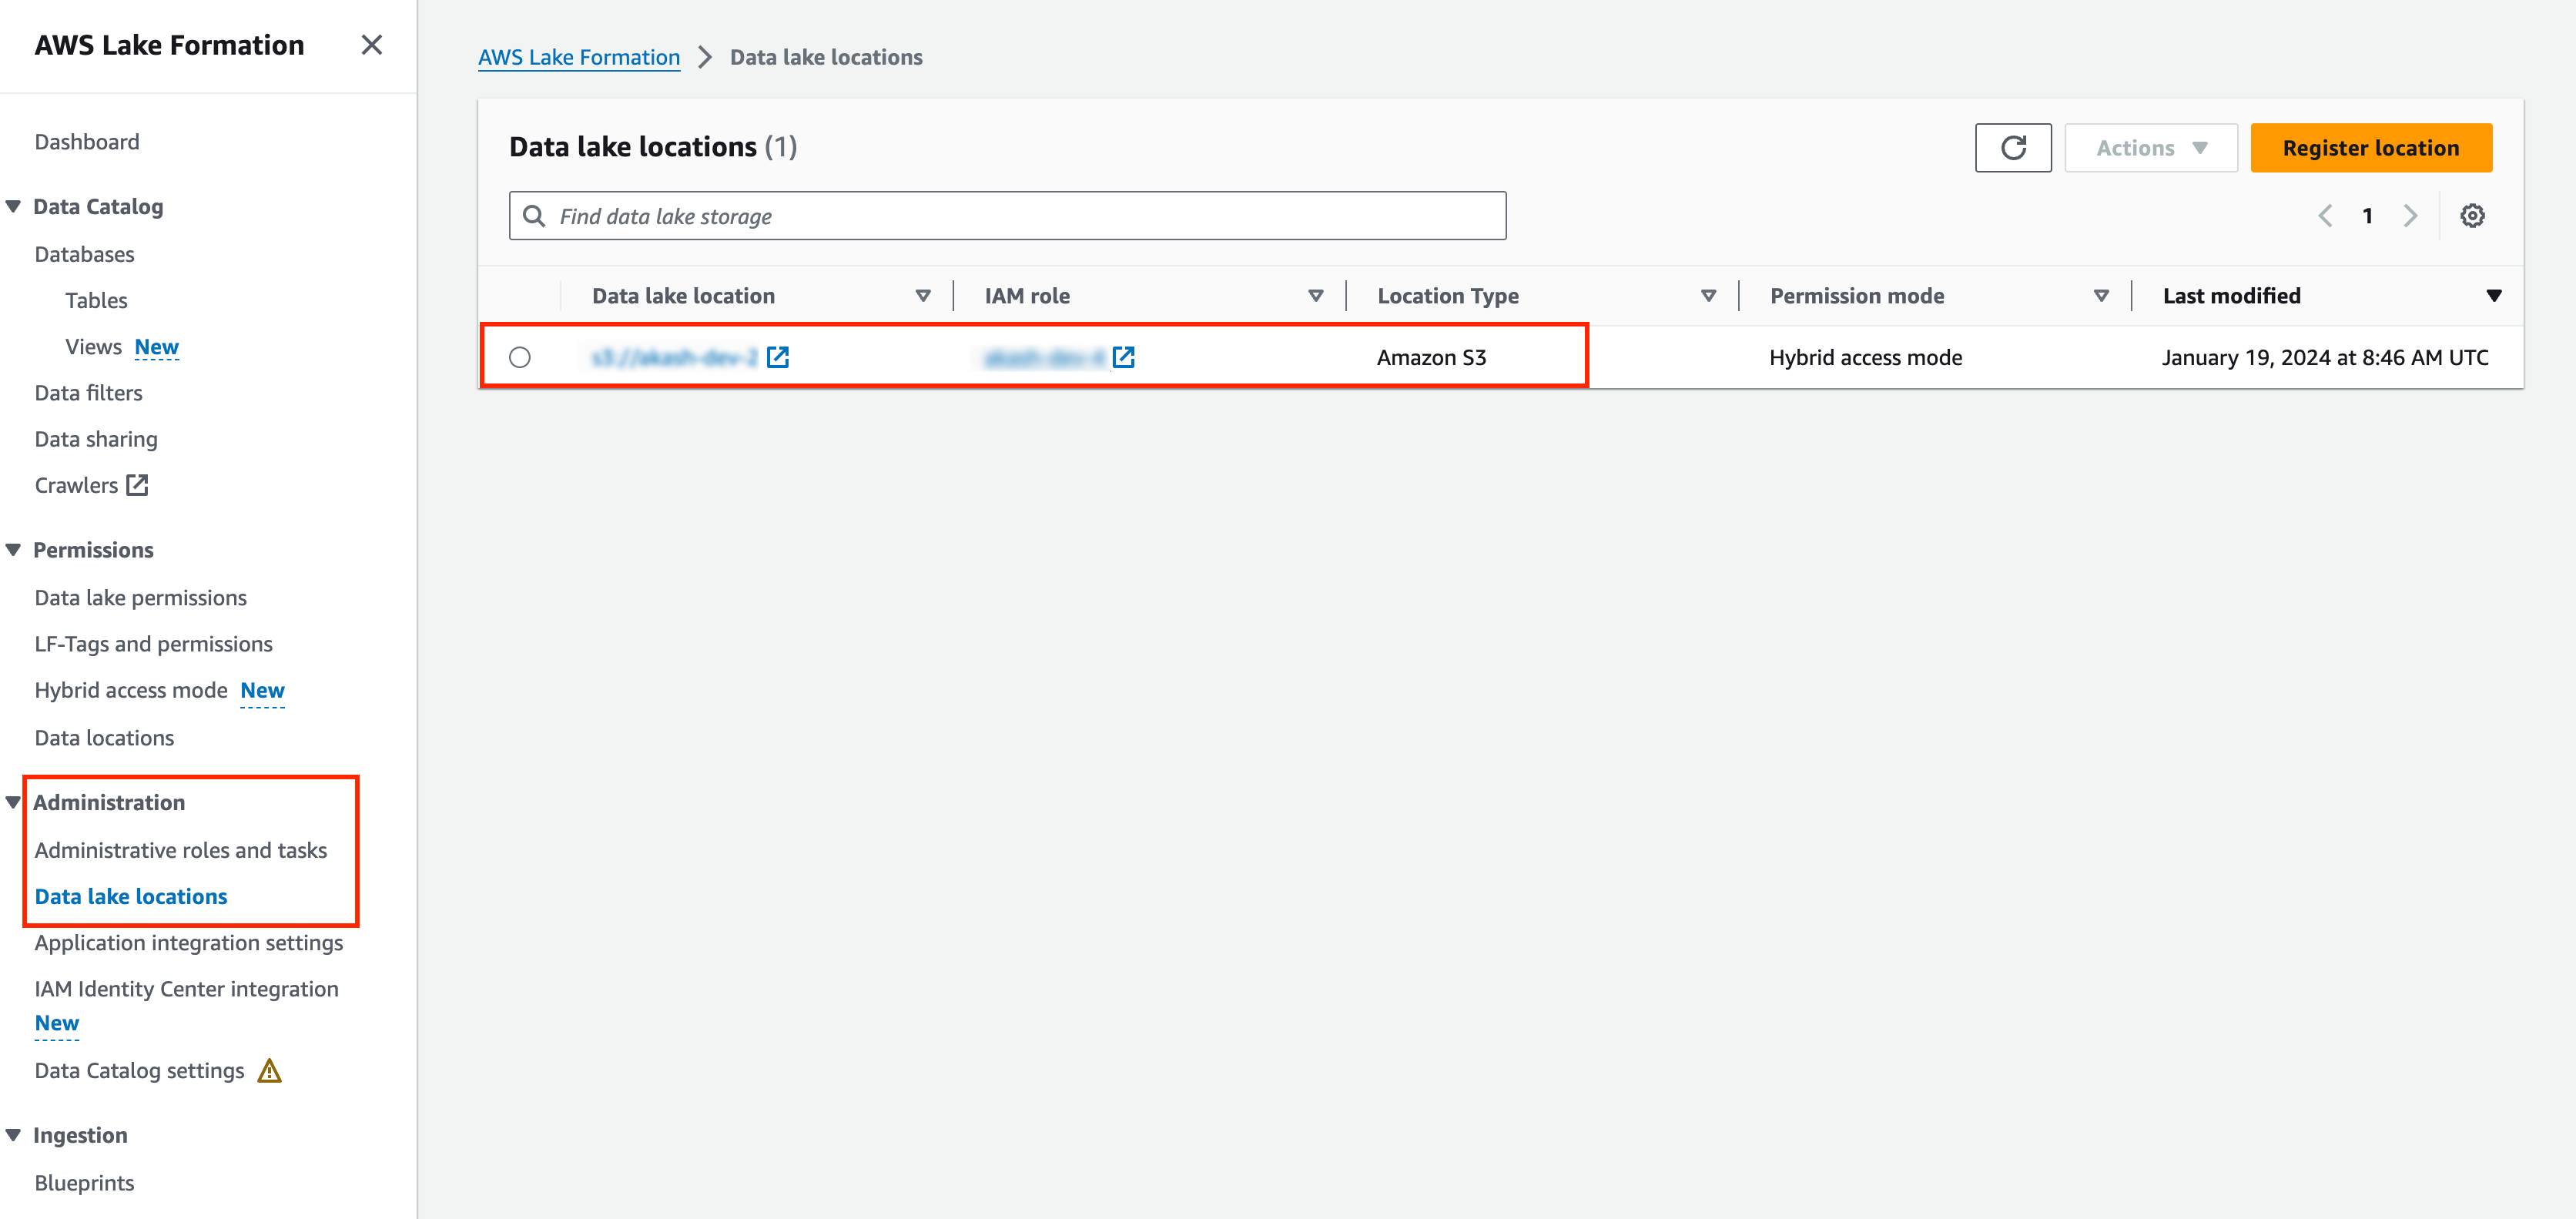
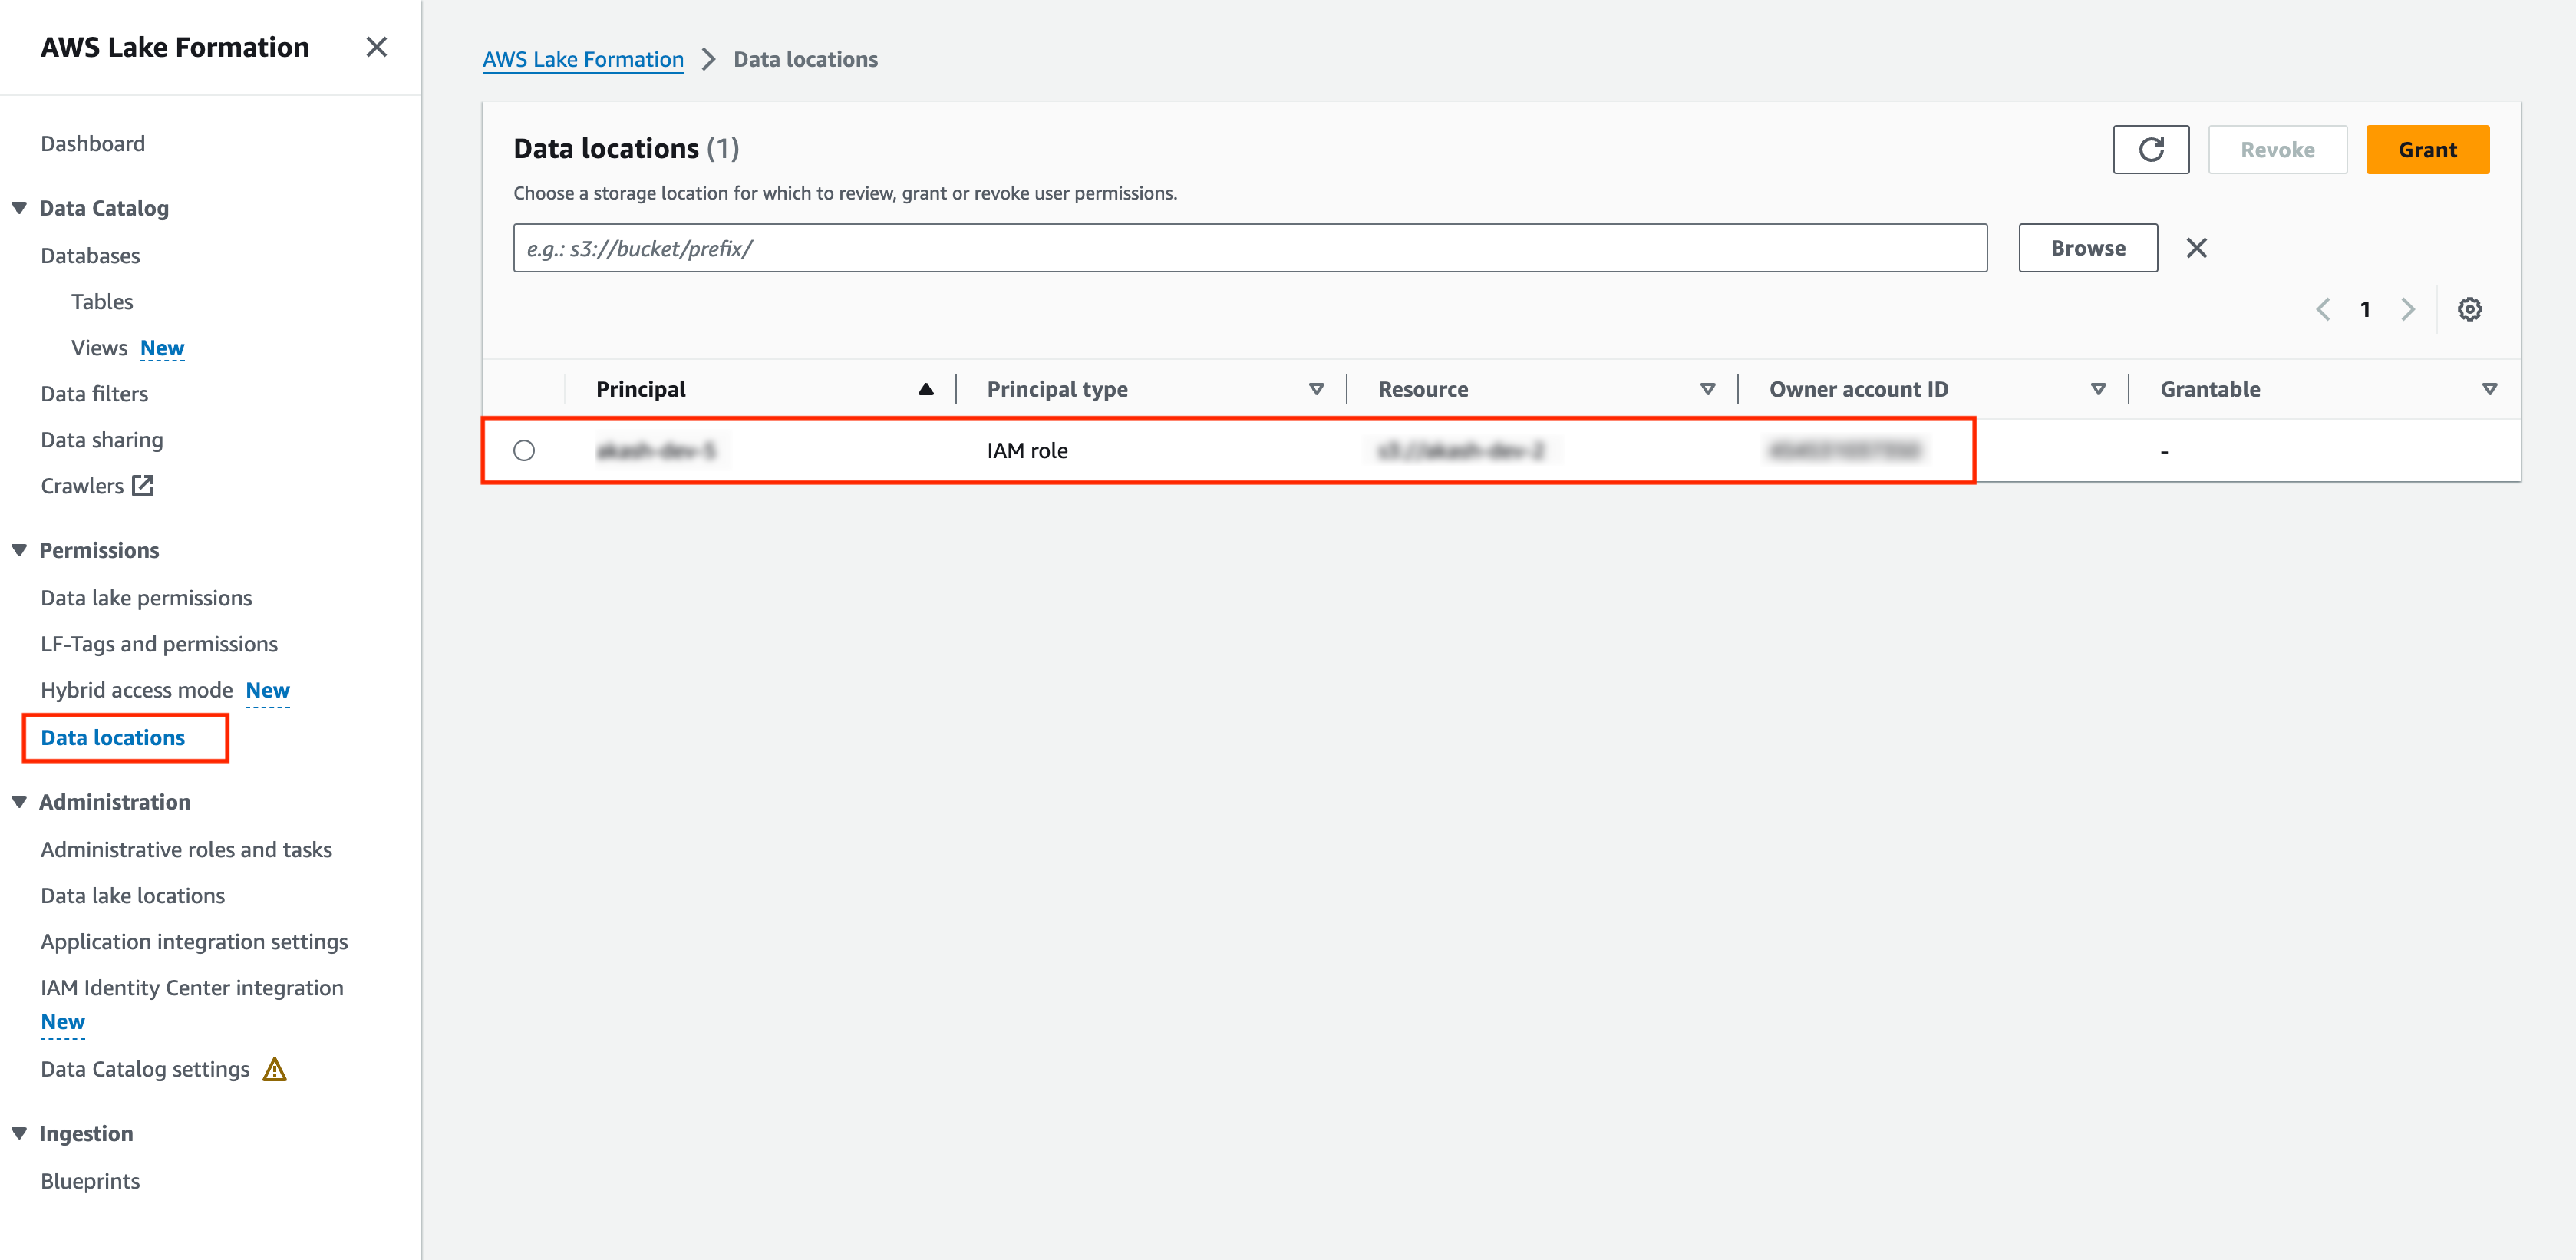
Data location permissions
Data location permissions in Lake Formation enable you to create and alter the data catalog resources that point to a specific S3 location. These permissions work in addition to the Lake Formation permissions to secure the data in your data lake.
This section assumes a data location is registered for your AWS Lake Formation.
The following table lists the possible permissions-related errors you might encounter while setting up the S3 data lake destination and their solutions:
Verification step
Error
Solution
Verifying Create Schema
AccessDeniedException: Insufficient Lake Formation permission(s): Required Create Database on Catalog
This site uses cookies to improve your experience while you navigate through the website. Out of
these
cookies, the cookies that are categorized as necessary are stored on your browser as they are as
essential
for the working of basic functionalities of the website. We also use third-party cookies that
help
us
analyze and understand how you use this website. These cookies will be stored in your browser
only
with
your
consent. You also have the option to opt-out of these cookies. But opting out of some of these
cookies
may
have an effect on your browsing experience.
Necessary
Always Enabled
Necessary cookies are absolutely essential for the website to function properly. This
category only includes cookies that ensures basic functionalities and security
features of the website. These cookies do not store any personal information.
This site uses cookies to improve your experience. If you want to
learn more about cookies and why we use them, visit our cookie
policy. We'll assume you're ok with this, but you can opt-out if you wish Cookie Settings.