Amazon Redshift is the world’s fastest cloud data warehouse. It allows you to handle large analytical workloads with best-in-class performance, speed, and efficiency.
See the Warehouse Schema guide for more information on how the events are mapped to the tables in Redshift.
Find the open source code for this destination in the GitHub repository.
Before adding Redshift as a destination in RudderStack, creating a new Redshift cluster depending on the instance type is recommended.
The following sections contain step-by-step instructions on setting up a Redshift cluster.
Choose Redshift instance type
Amazon Redshift provides the following two cluster types:
Dense Compute clusters maximize CPU usage, resulting in an increased query performance. However, there is a trade-off with respect to the storage.
Dense Storage clusters maximize storage for customers with hundreds of millions of rows of data. However, there is a trade-off in the CPU usage, resulting in a lower query performance.
See this Redshift guide for more information on the cluster and node types in Redshift.
Create new Redshift cluster
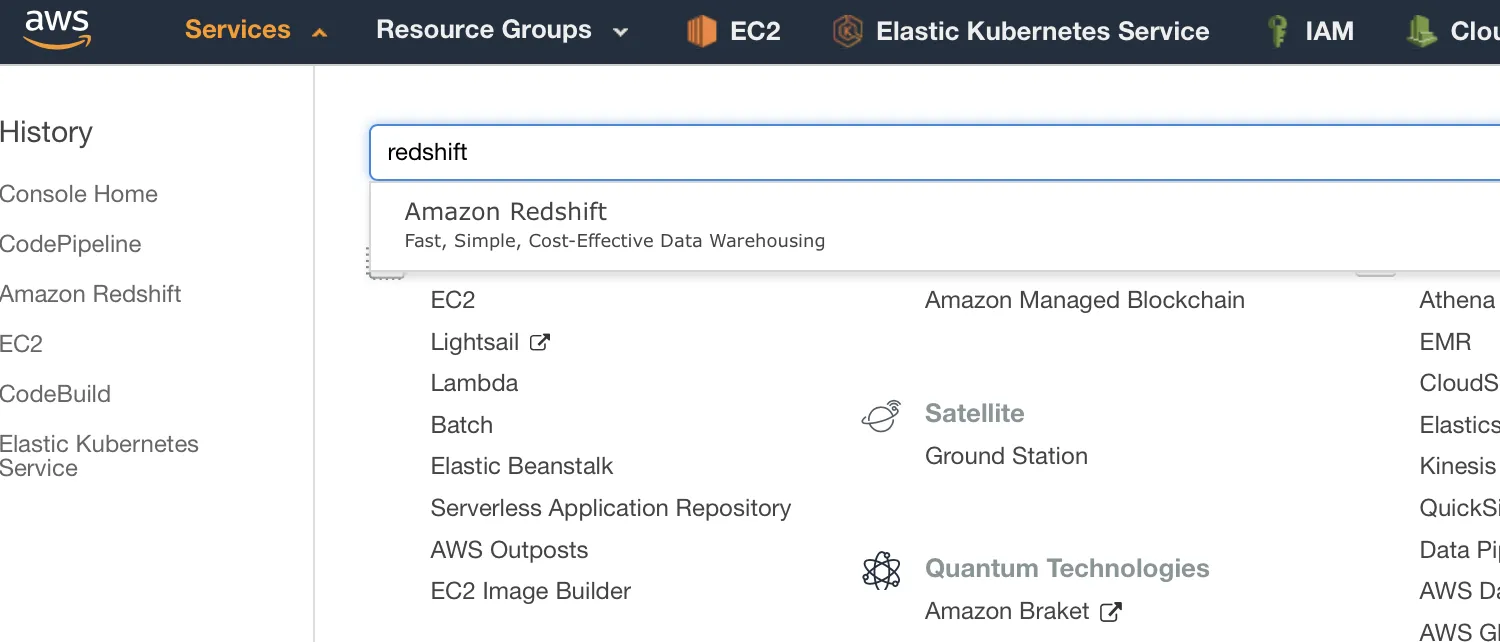
Open the Redshift console.
Click the Create Cluster option:
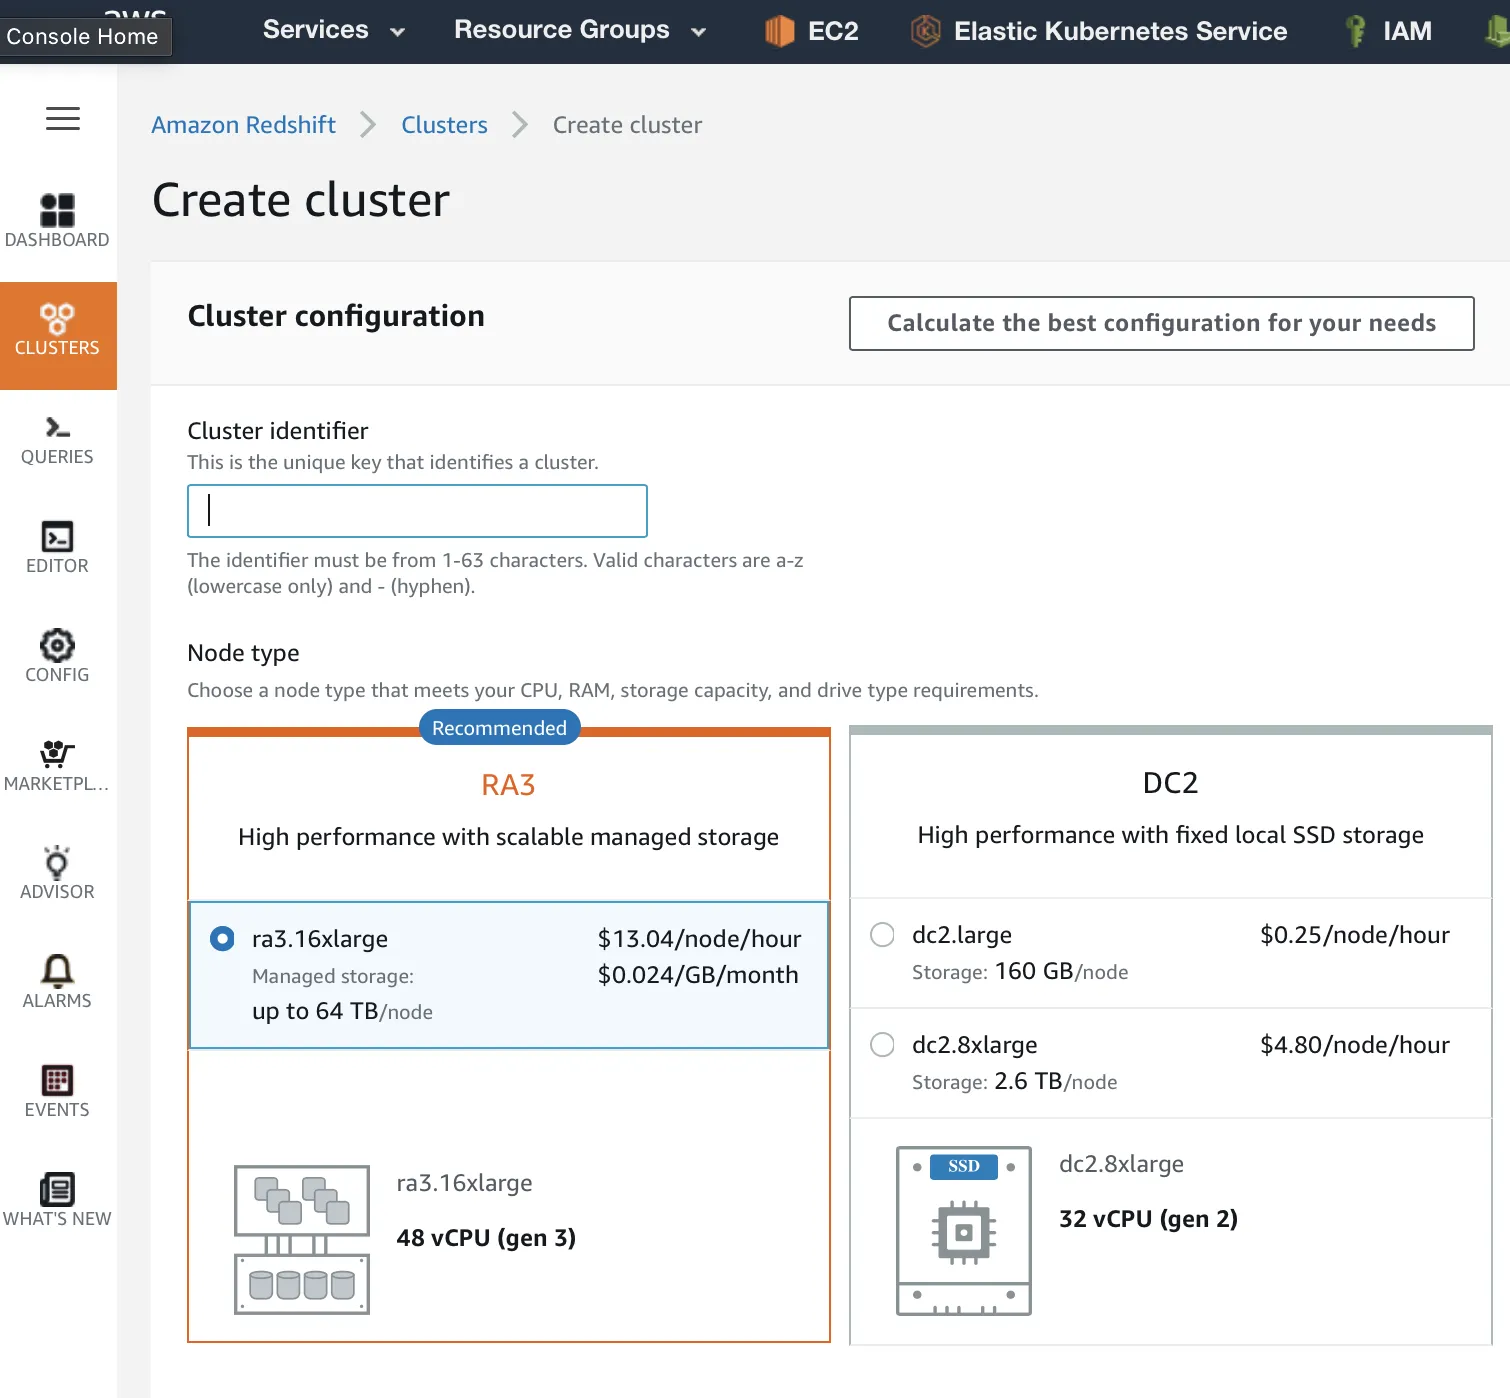
Enter the cluster details. First, fill in the Cluster identifier and choose the instance type:
Redshift cluster configuration settings
Enter the number of nodes for your cluster. This will primarily depend on the amount of data you expect to work with.
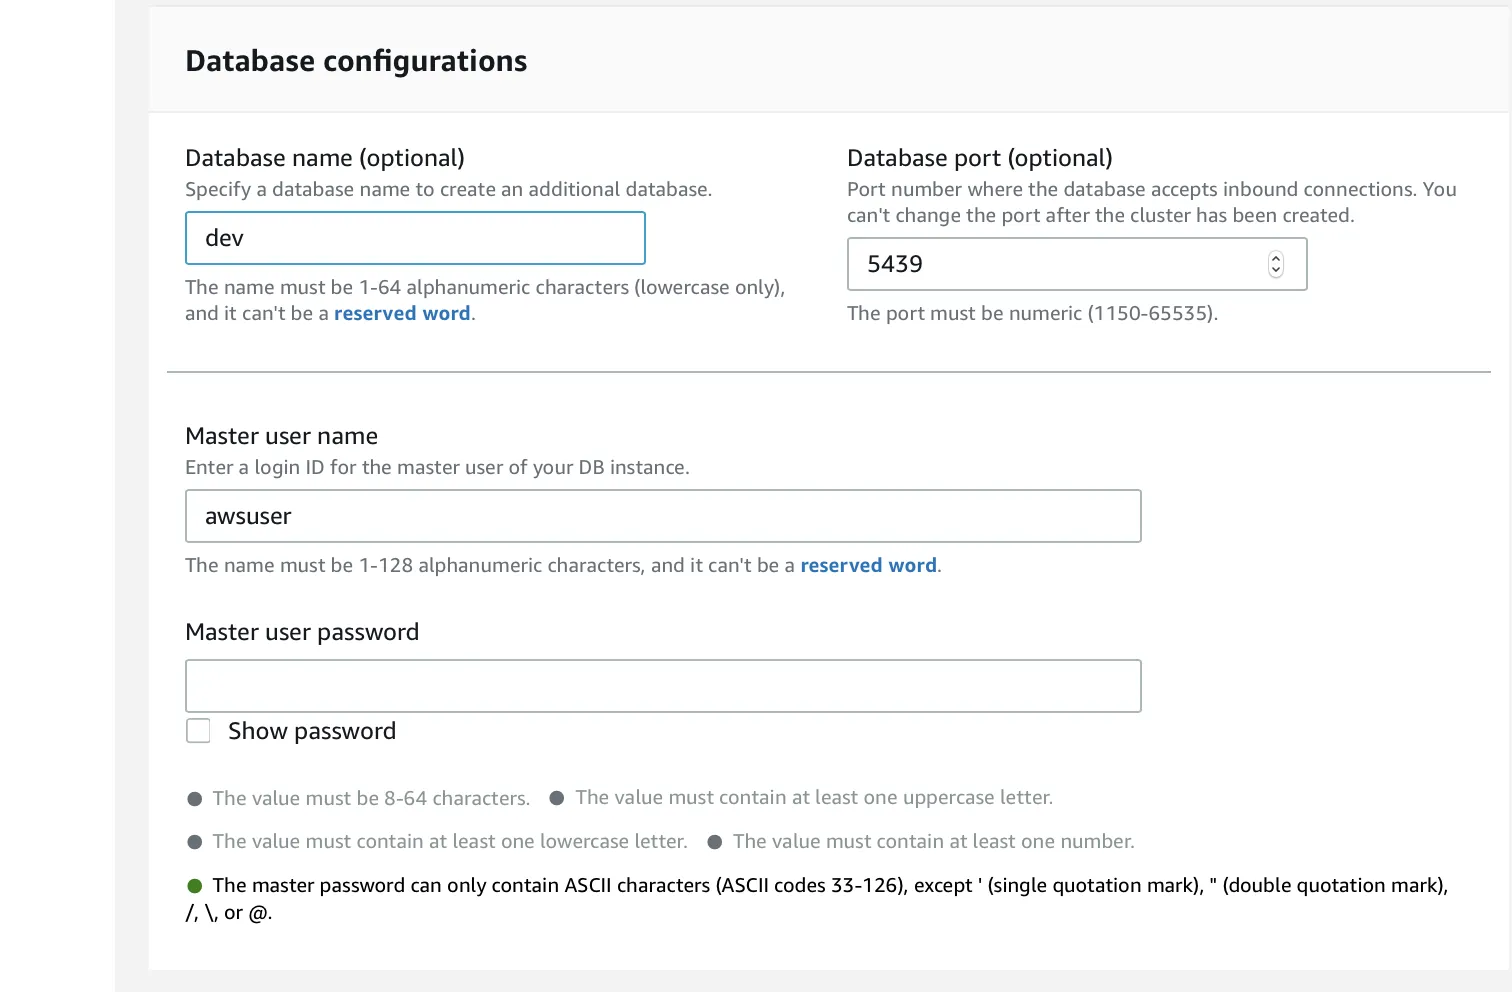
Enter the database name, and create the admin user with the name of your choice.
For security purposes, it is recommended that you choose a strong password.
Finish creating the cluster by allowing the default options for Additional Configurations.
As a part of this setup, you also need to edit the VPC network and configure the security settings. More information on these aspects in available in the following sections.
With the Redshift cluster now created and ready to use, the next sections cover the necessary steps to set up the necessary user permissions and set up Redshift as a destination in RudderStack.
Setting user permissions in Redshift
This section contains the steps to create a new user to access the Redshift cluster and create tables in it.
The username and password obtained while creating the Redshift cluster should be strictly used for administration purposes.
RudderStack recommends creating a new user to enable access to Redshift. This also helps you keep the queries separate as well as maintain an audit log.
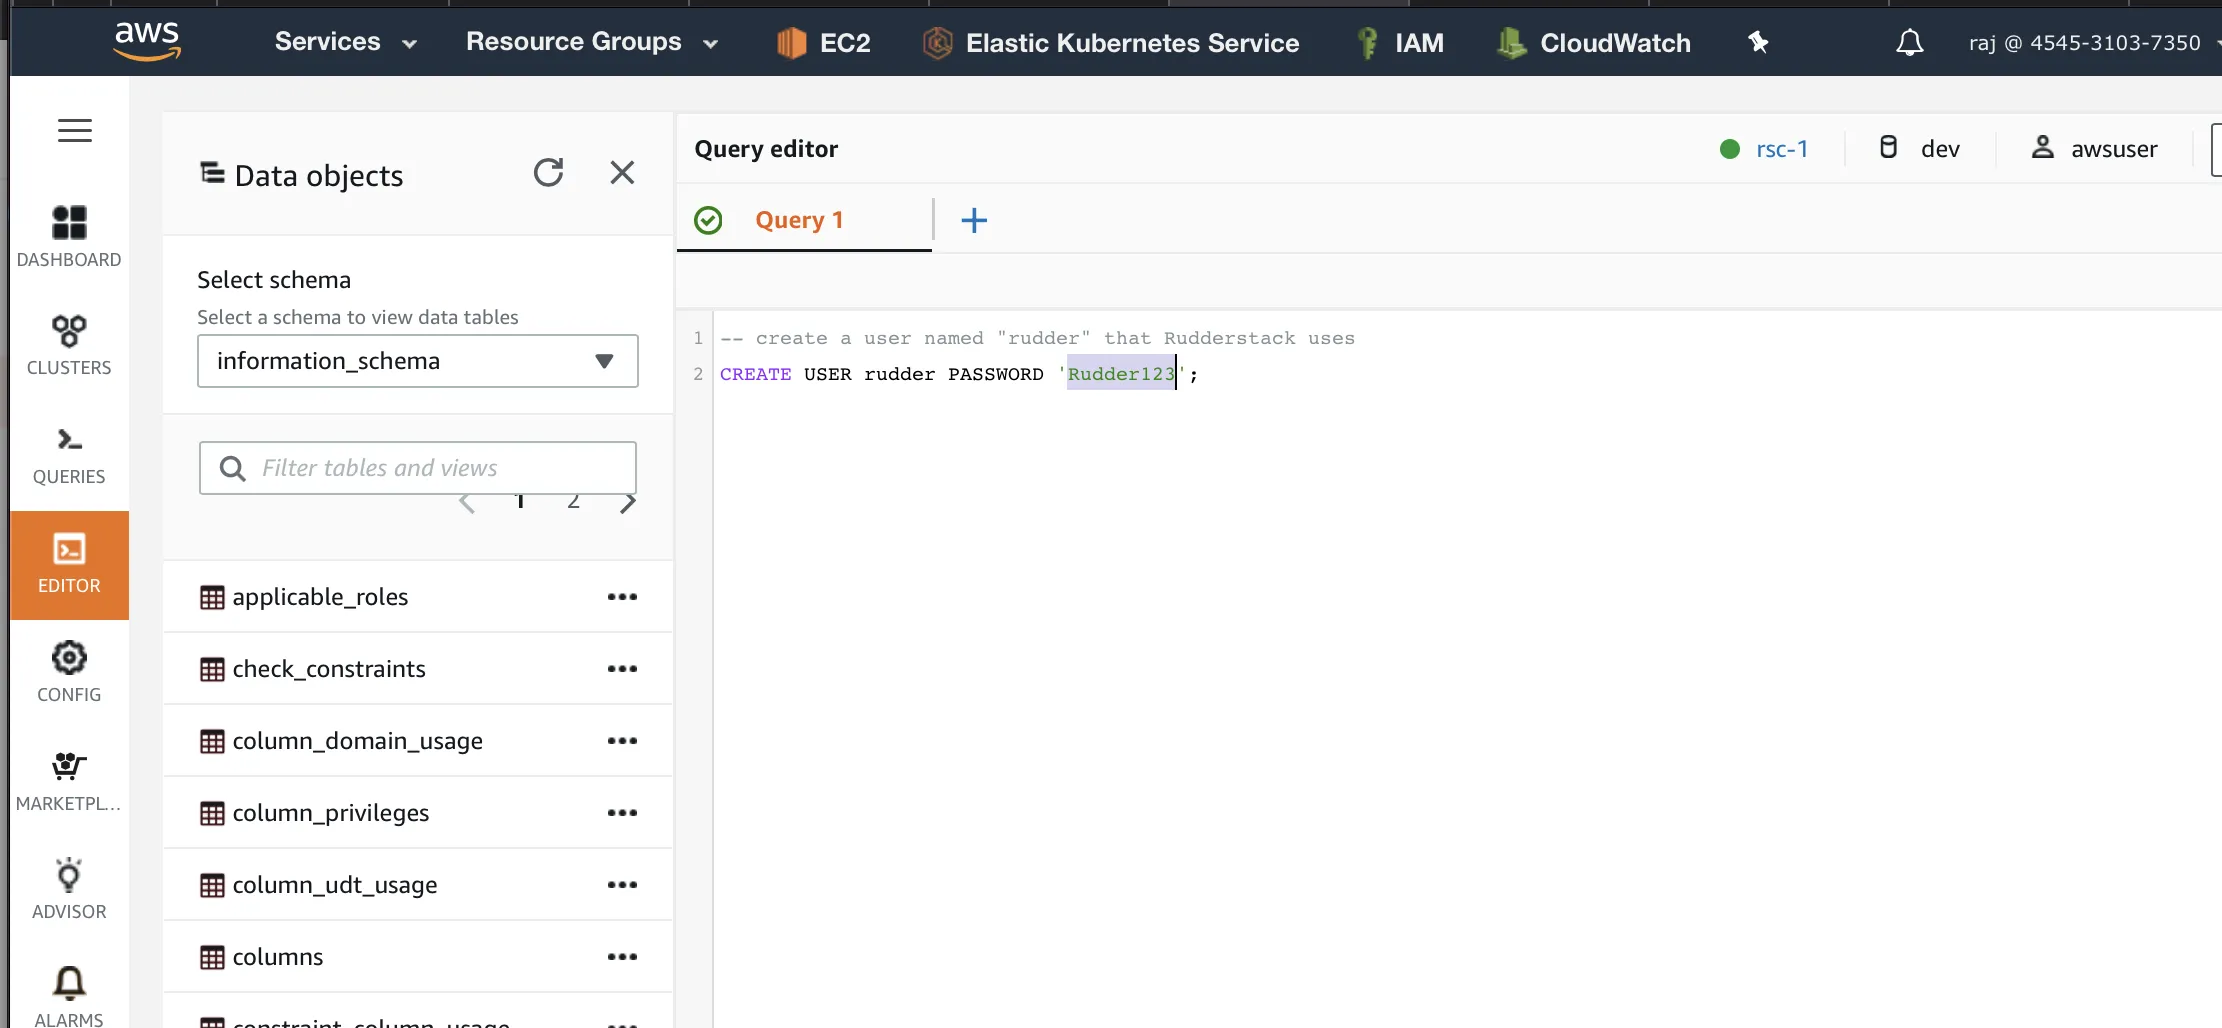
Click the Editor option in the left pane. You can run the queries to create a new user to access the Redshift cluster in the Query editor:
To opt for an IAM role-based authentication (recommended) while setting up the Redshift destination in RudderStack, you can create a user without a password and grant it access to the required database.
-- create new user with the Redshift IAM role name
CREATEUSER"IAMR:<role-name>"PASSWORDdisable;/-- grant user schema creation permissions on the database
GRANTCREATEONDATABASE'<YOUR_DATABASE>'TO"IAMR:<role-name>";
Replace <role_name> with the name of the Redshift IAM role. See Step 9 of Set up new IAM role for more information on obtaining the name.
-- create a new user named "rudder"
CREATEUSERrudderPASSWORDdisable;-- grant user schema creation permissions on the database
GRANTCREATEONDATABASE'<YOUR_DATABASE>'TOrudder;
Run the below queries to create a new user with a password (required if IAM role-based authentication is not toggled on) and grant access to the required database:
-- create a new user named "rudder"
CREATEUSERrudderPASSWORD'<YOUR_PASSWORD>';-- granting user schema creation permissions on the database
GRANTCREATEONDATABASE'<YOUR_DATABASE>'TOrudder;
Setting up network and security access
This section is listed for EC2-VPC. However, EC2-Classic works similarly.
IPs to be allowlisted
To enable network access to RudderStack, allowlist the following RudderStack IPs depending on your region and RudderStack plan:
Plan
Region
US
EU
IN
Free and Growth
3.216.35.97
18.214.35.254
23.20.96.9
34.198.90.241
34.211.241.254
52.38.160.231
54.147.40.62
3.123.104.182
3.125.132.33
18.198.90.215
18.196.167.201
Not applicable
Enterprise
3.216.35.97
34.198.90.241
44.236.60.231
54.147.40.62
100.20.239.77
3.66.99.198
3.64.201.167
3.123.104.182
3.125.132.33
3.7.235.227
13.200.113.188
35.154.198.69
3.6.122.214
All the outbound traffic is routed through these RudderStack IPs.
Adding a security group
Follow these steps to add a security group and assign it to your Redshift cluster:
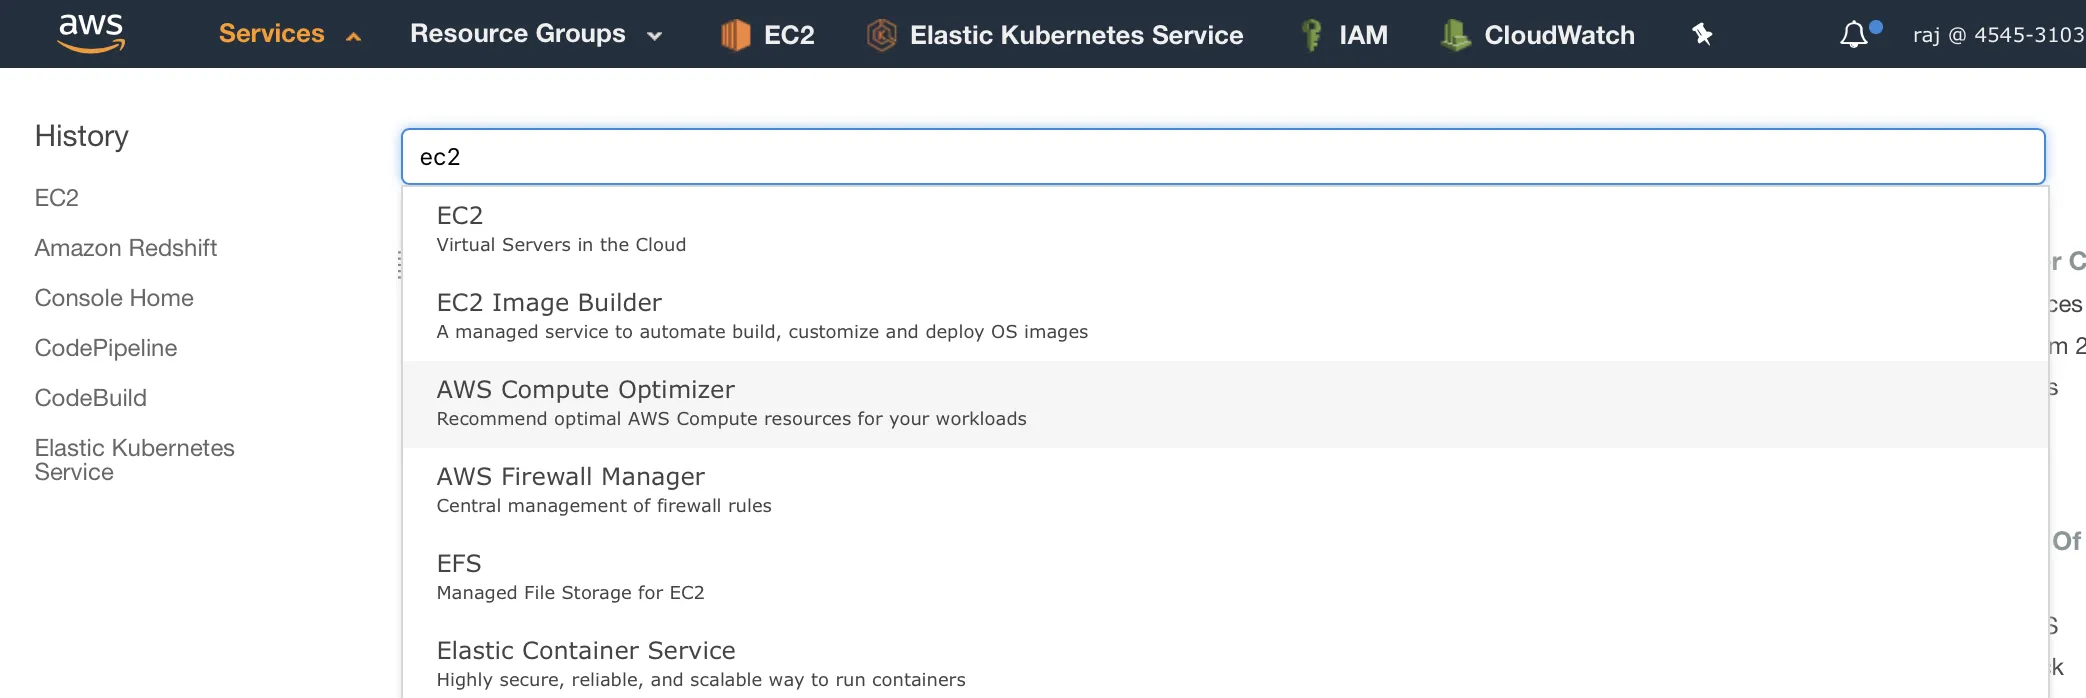
Go to EC2 from the services on your AWS console:
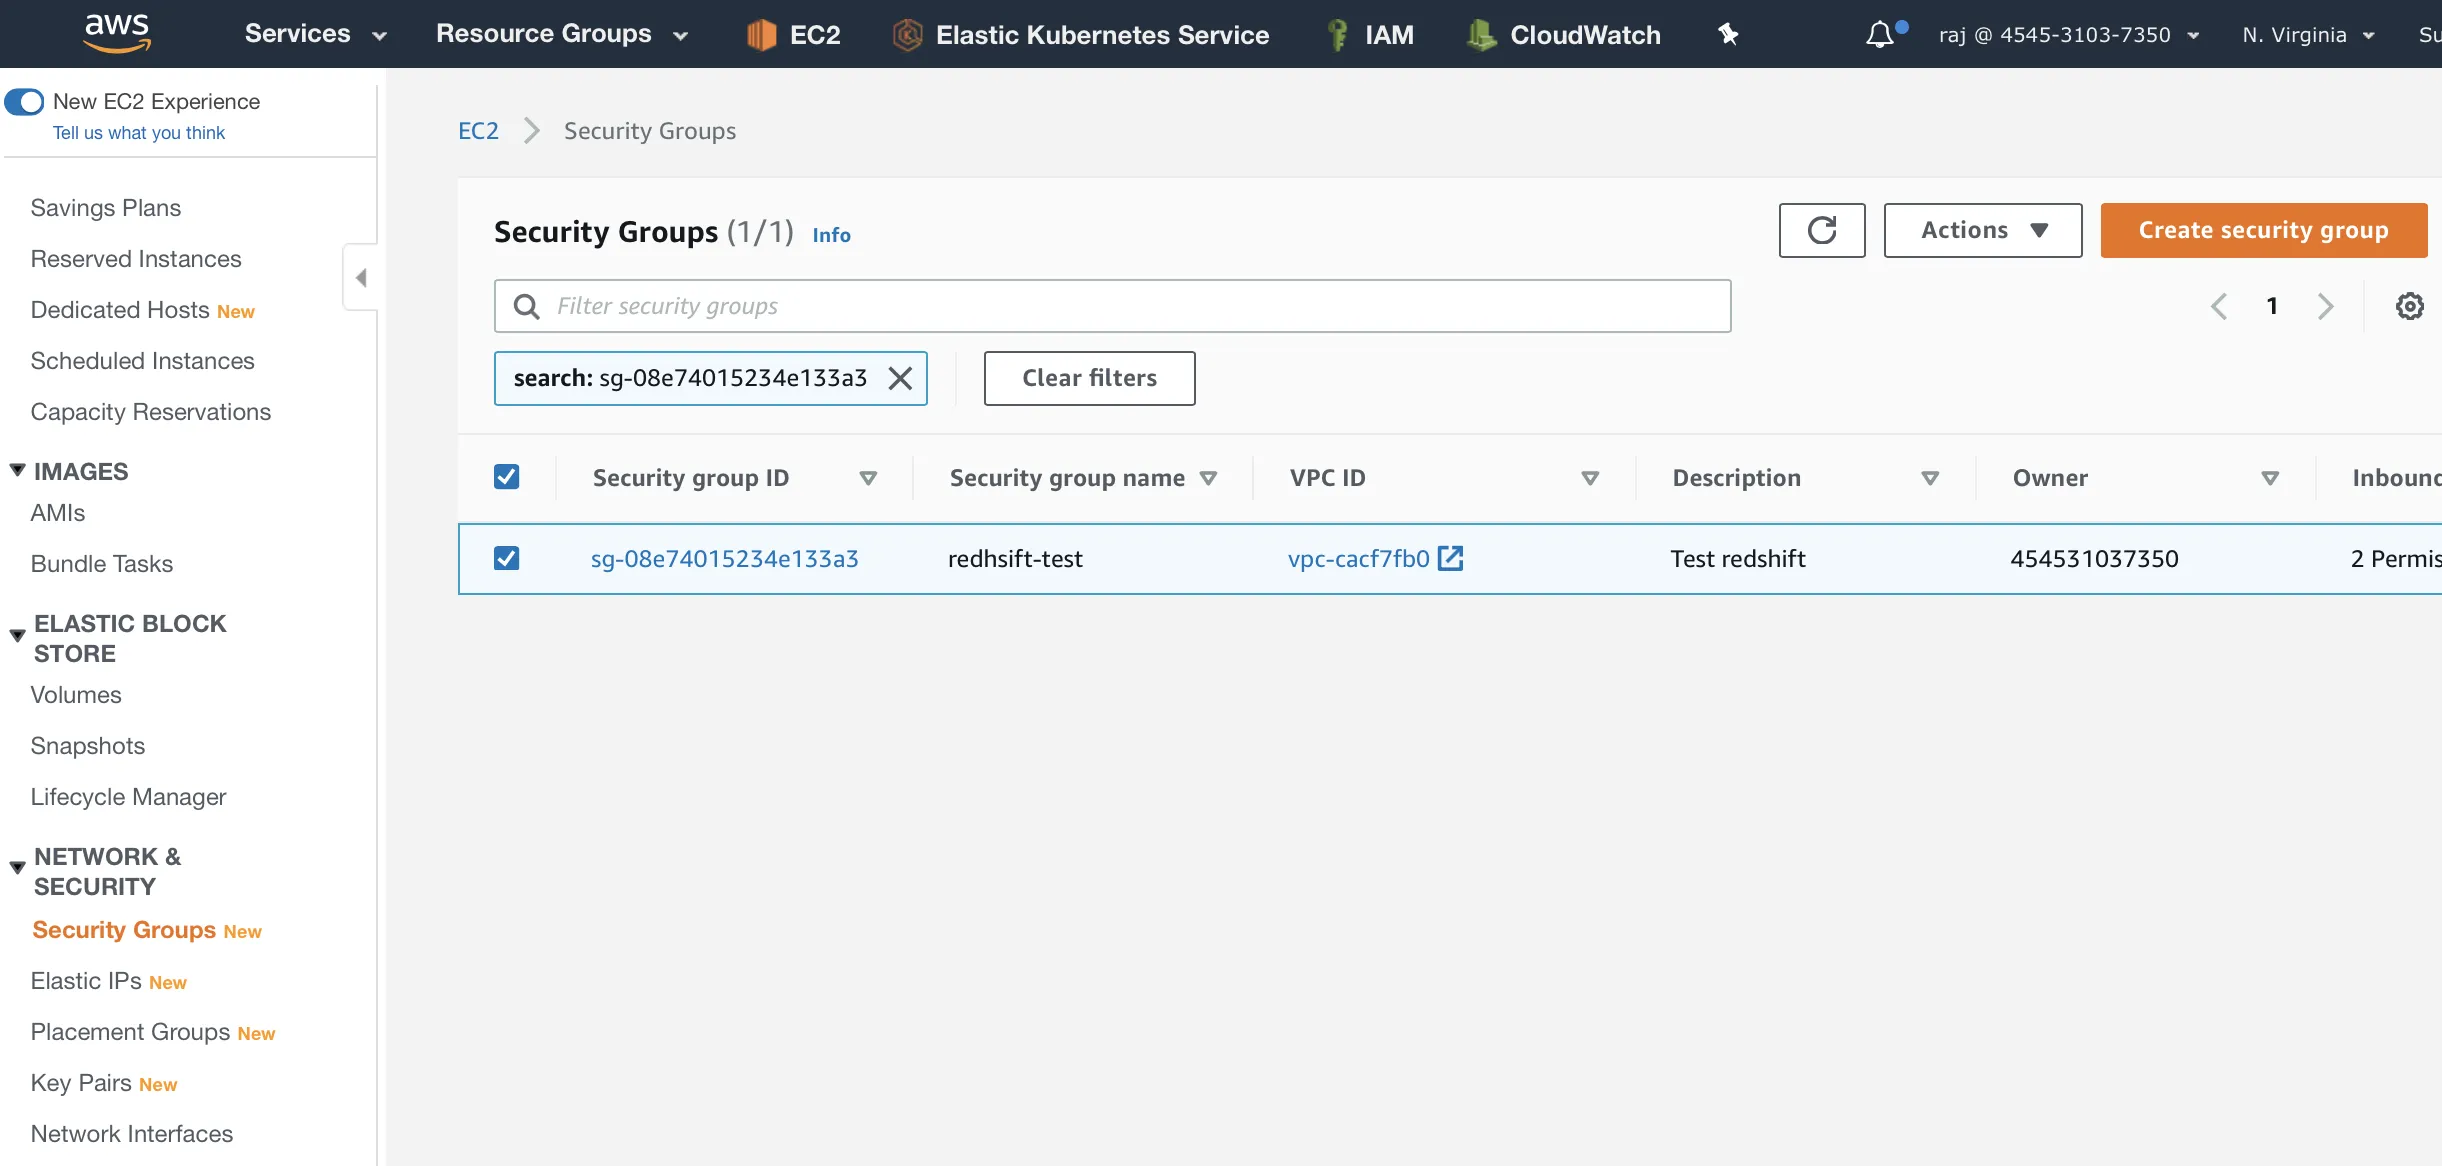
Go to Security Groups under Network & Security, followed by Create Security Group.
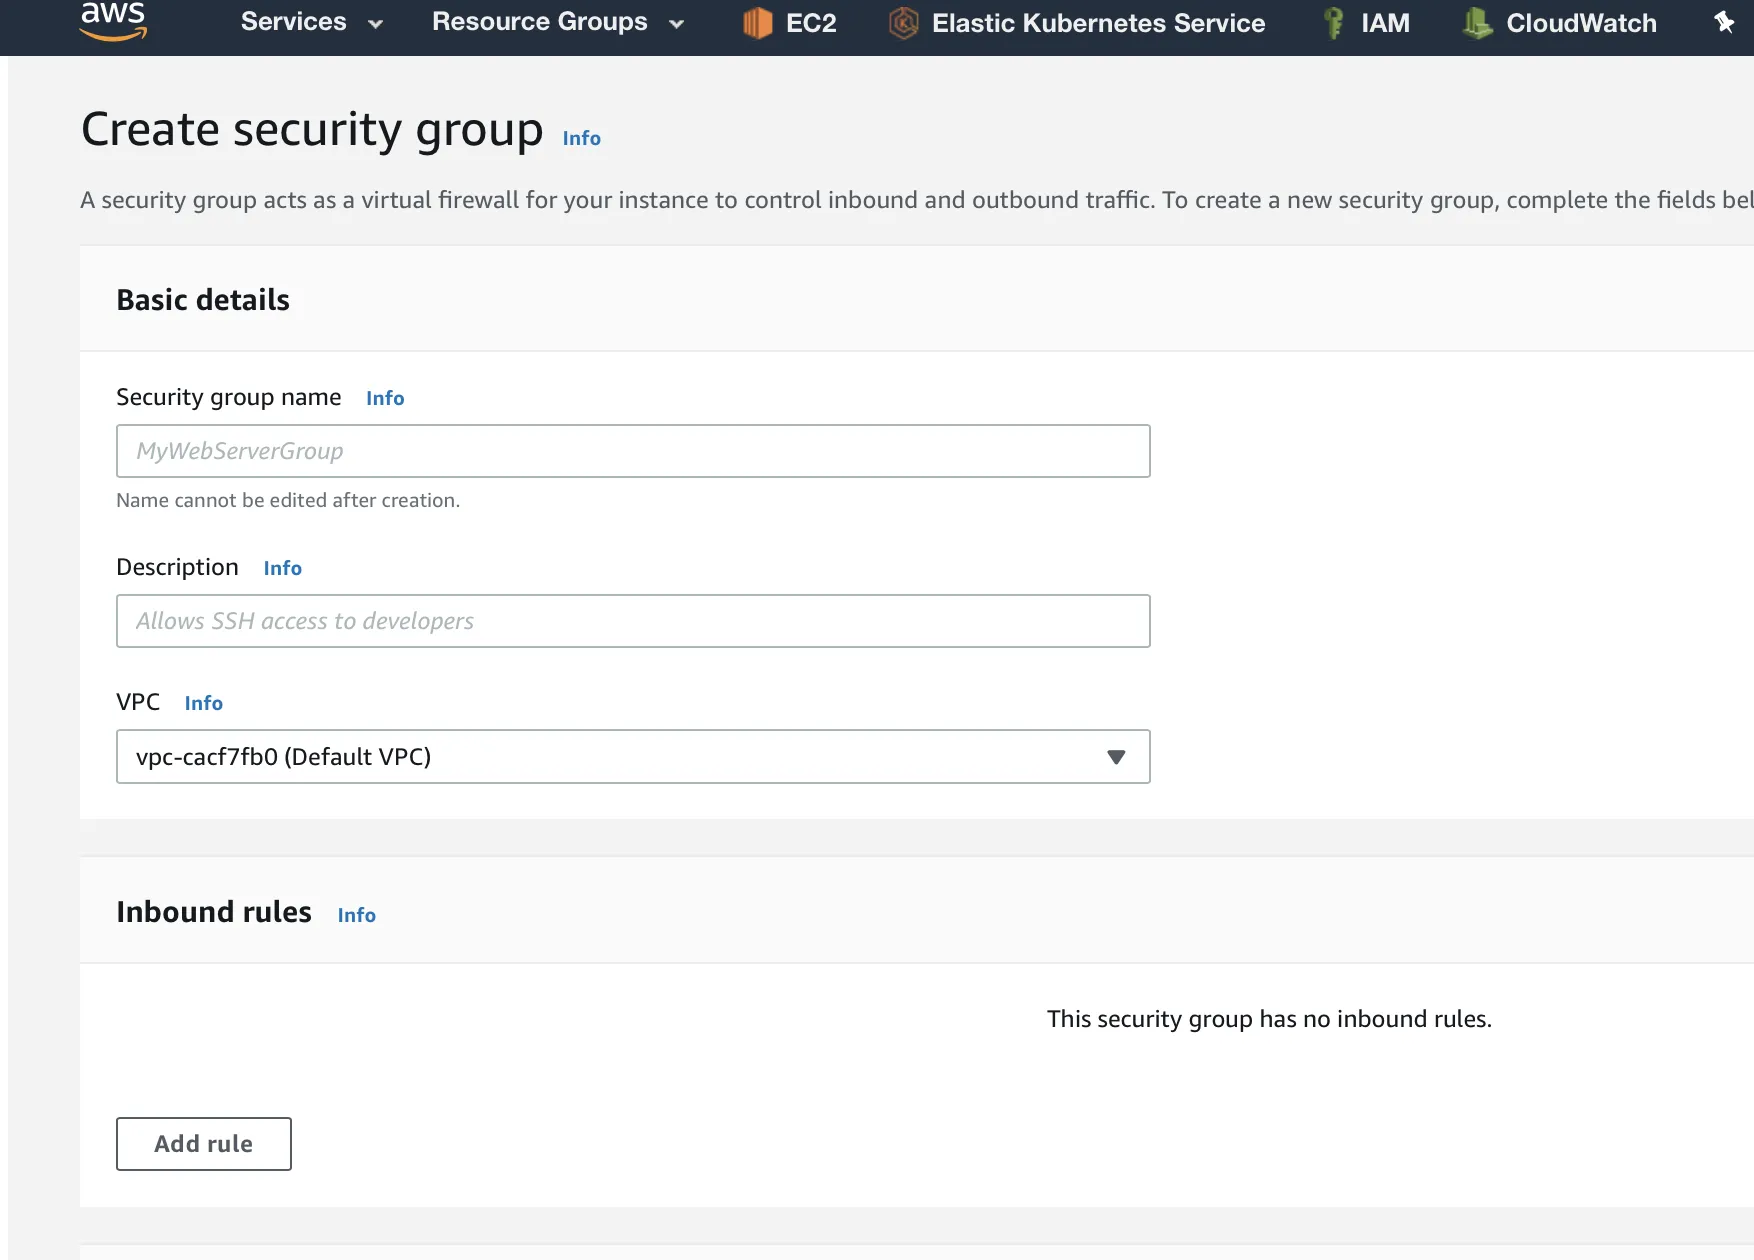
Enter the details of the security group. The Security group name will be used to select the group later.
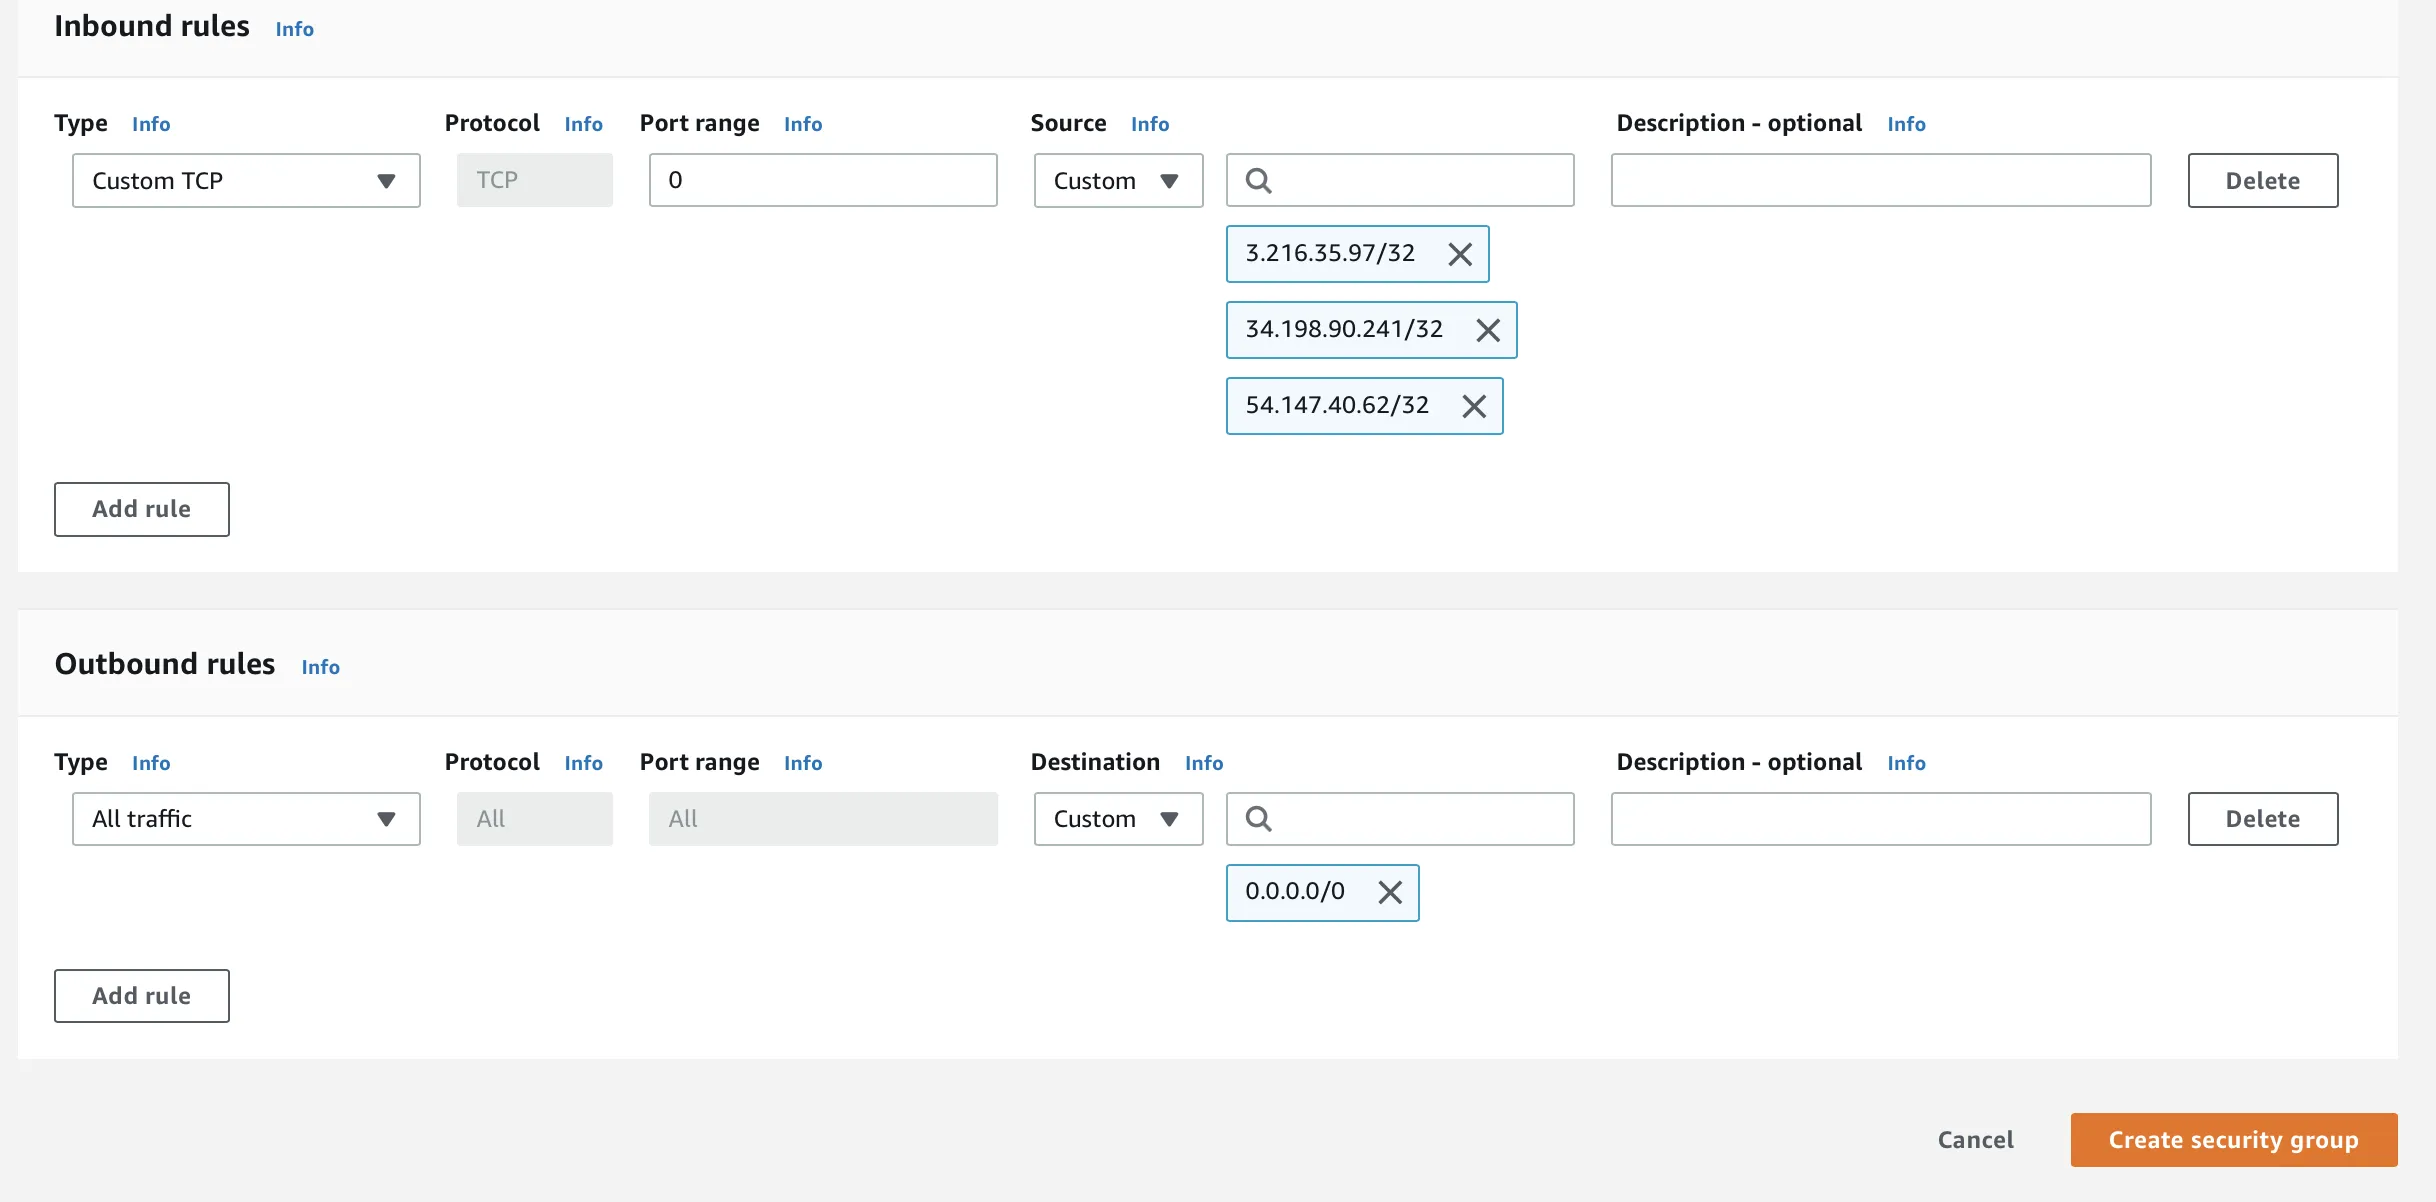
Add an Inbound rule with IPs listed above, and enter the Redshift port as 5439 in the Port range field:
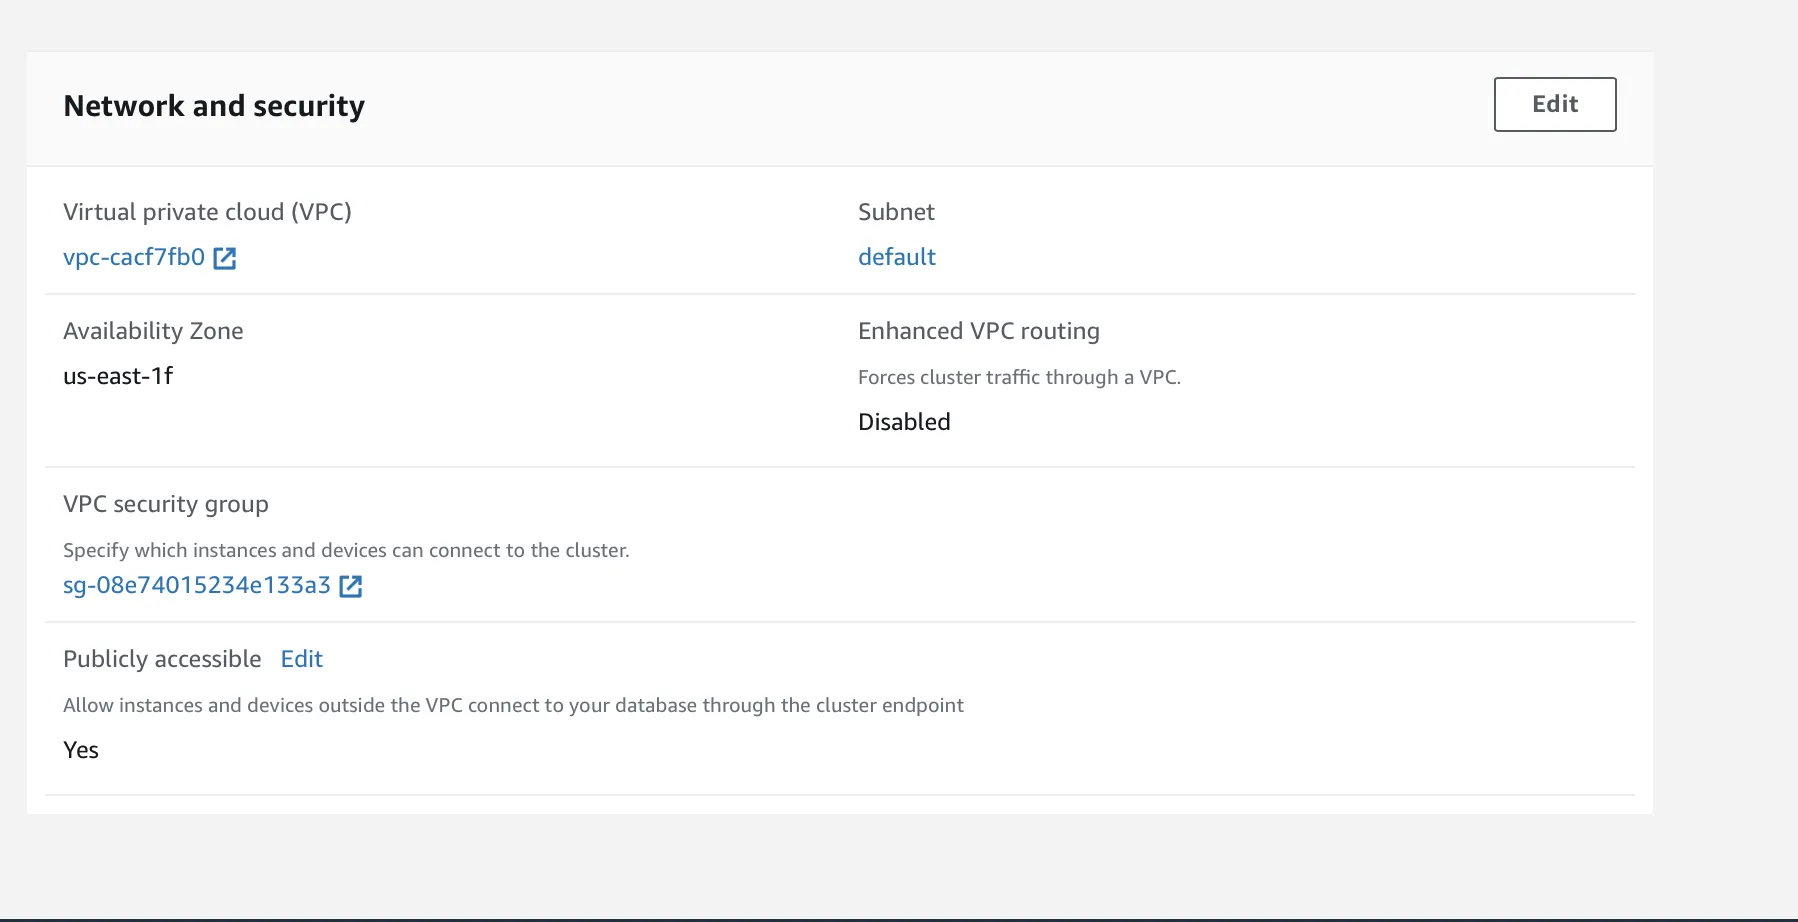
Next, go to the Redshift cluster and select Properties, where you can modify the network and security rules of the cluster.
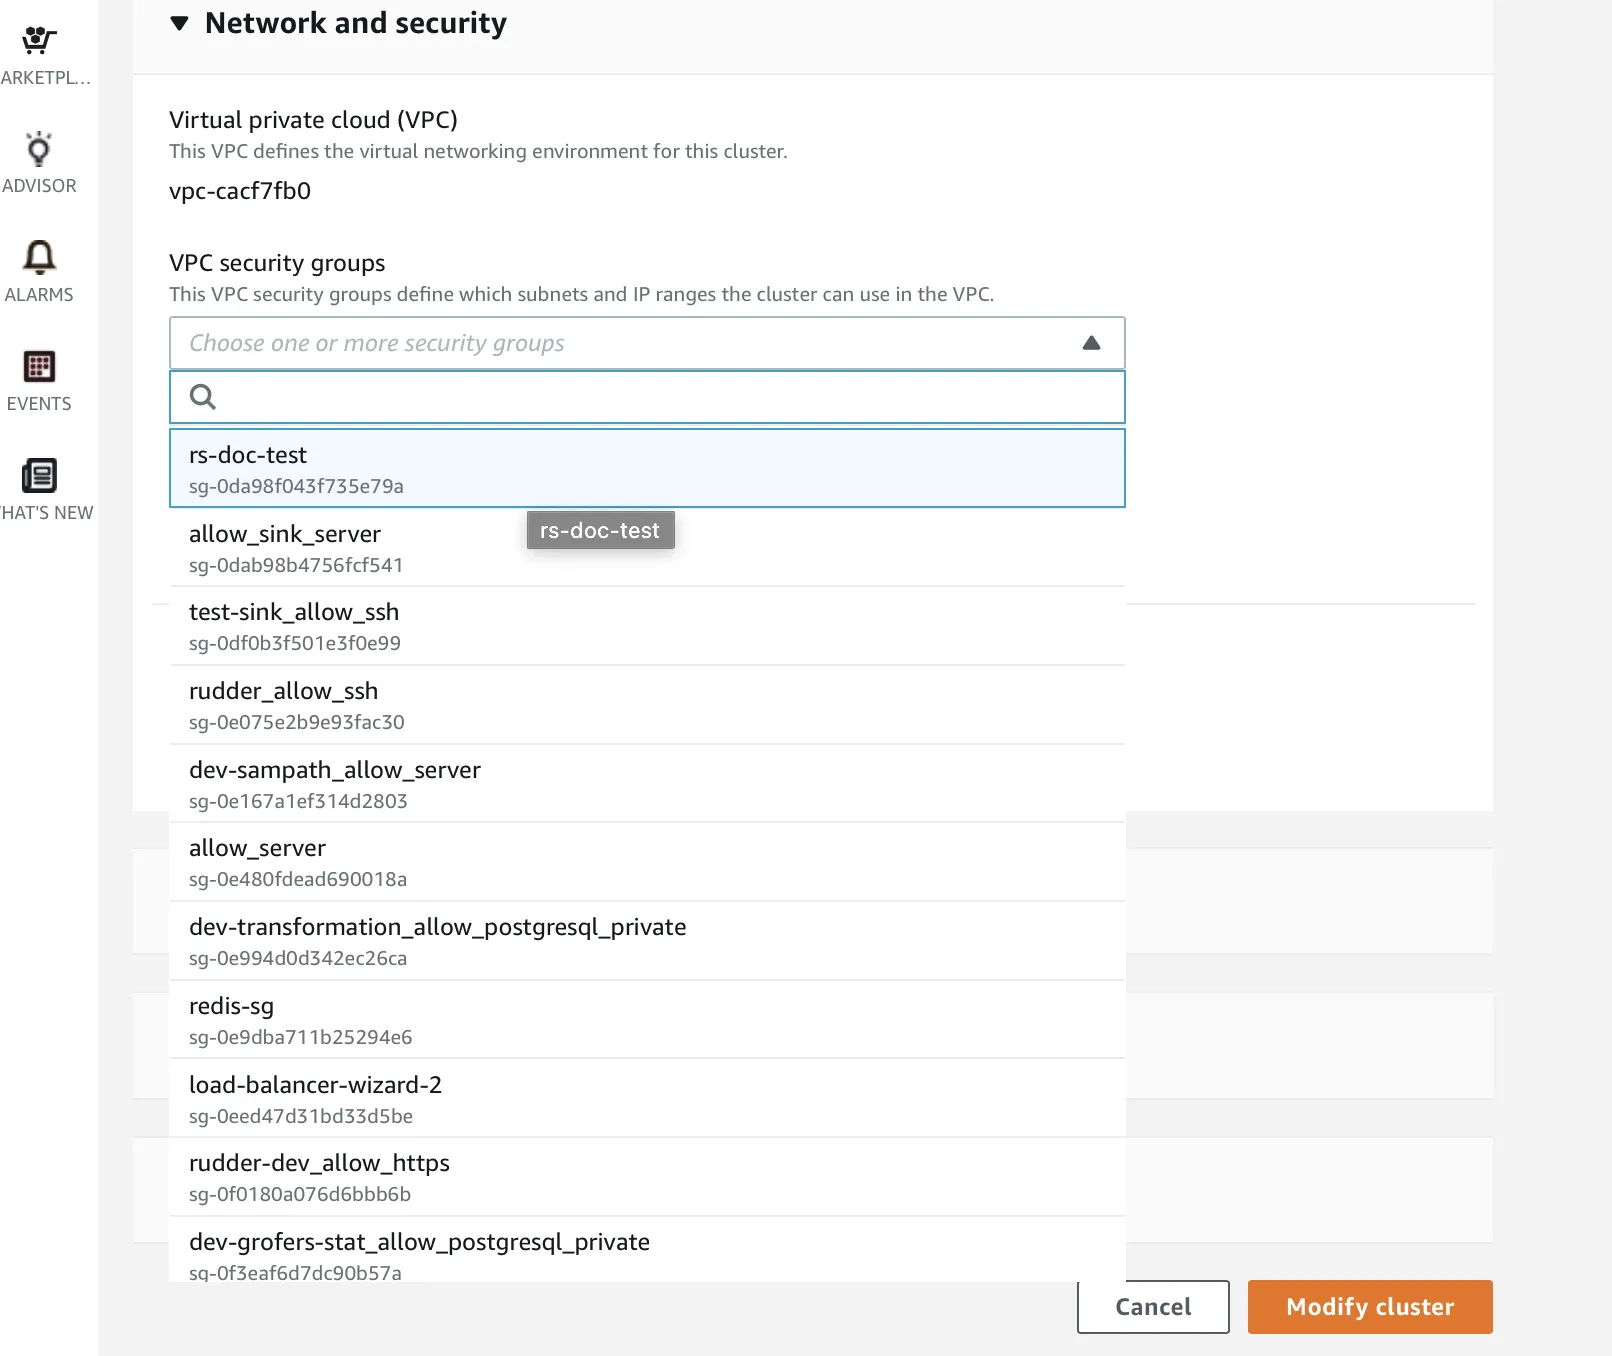
Edit the Network and security option and choose the VPC security group that you selected earlier.
Finally, click Modify cluster to finish the Network and Security setup.
The Redshift cluster needs to be publicly accessible. Refer to this Redshift guide for more information on how to set this property.
Configuring Redshift destination in RudderStack
To send event data to Redshift, you first need to add it as a destination in RudderStack and connect it to your data source. Once the destination is enabled, events will automatically start flowing to Redshift via RudderStack.
To configure Redshift as a destination in RudderStack, follow these steps:
In your RudderStack dashboard, set up the data source. Then, select Redshift from the list of destinations.
Assign a name to your destination and then click Continue.
Connection settings
Use IAM for authentication: Turn on this setting to use the RudderStack IAM role for authentication. For more information on creating a RudderStack IAM role for Redshift, see this guide.
You will see the following settings depending on whether Use IAM for authentication is toggled on or off:
Cluster ID: Enter your AWS cluster ID.
Cluster region: Enter your AWS cluster region.
Database: Enter the name of your Redshift database where RudderStack stores the data.
User: Enter the user name with the required read/write access to the above database. See Step 2 of Setting user permissions in Redshift for obtaining the value for the User field.
IAM role ARN: Enter the ARN of the RudderStack IAM role.
Namespace: Enter the schema name where RudderStack creates all the tables. If you don’t specify any namespace, RudderStack sets its value as the source name, by default.
You cannot change the namespace later.
Host: The host name of your Redshift service.
Port: The port number associated with the Redshift database instance.
Database: The database name in your Redshift instance where the data will be sent.
User: The name of the user with the required read/write access to the above database.
Namespace: Enter the schema name where RudderStack creates all the tables. If you don’t specify any namespace, RudderStack sets its value as the source name, by default.
You cannot change the namespace later.
Use Redshift Serverless: Turn on this setting to use Redshift Serverless. If turned on, you will see the following setting that replaces the Cluster ID setting listed above:
This feature is available only for the Enterprise plan users.
SSH tunneling is a method of transferring data over an encrypted SSH connection. You can use it to add encryption to your legacy applications and achieve compliance with regulations like HIPAA, PCI-DSS, etc., without having to modify the existing applications.
RudderStack lets you connect to your Redshift database securely over an SSH connection by configuring these settings:
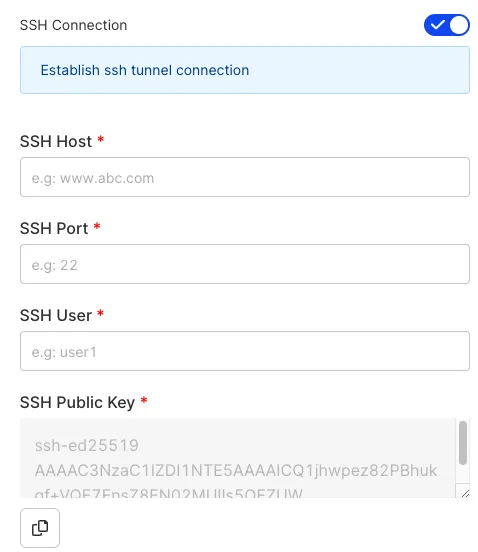
SSH Connection: Enable this setting to use the SSH connection while connecting to your Redshift database.
SSH Host: Enter the IP address of your bastion host.
SSH Port: Enter the port for the above host.
SSH User: Enter the username you use to access the bastion host.
SSH Public Key: Copy the public key provided in this field and add it to the authorized_keys file on your bastion host. Rudderstack will use the private key corresponding to this public key to establish the connection successully.
To enable the SSH connection for an existing Redshift destination, navigate to the destination’s Configuration tab, select Edit configuration and enable the SSH connection setting.
Sync settings
Sync Frequency: Specify how often RudderStack should sync the data to your Redshift database.
Sync Starting At: This optional setting lets you specify the particular time of the day (in UTC) when you want RudderStack to sync the data to the warehouse.
Exclude Window: This optional setting lets you set a time window when RudderStack will not sync the data to your database.
Configuring the object storage
RudderStack lets you configure the following object storage configuration settings while setting up your Redshift destination:
Use RudderStack-managed object storage: Turn on this setting to use RudderStack-managed buckets for object storage.
This option is applicable only for RudderStack-hosted data planes. For self-hosted data planes, you will have to specify your own object storage configuration settings.
If Use RudderStack-managed object storage is toggled off in the dashboard, you will see the following settings:
Prefix: If specified, RudderStack creates a folder in the S3 bucket with this name and pushes all data within that folder. For example, s3://<bucket_name>/<prefix>/.
Role based authentication: Turn on this toggle to use the RudderStack IAM role for authentication.
RudderStack recommends turning on this setting as the access keys-based authentication method is now deprecated.
You will see the following settings depending on whether Role based authentication is toggled on or off:
IAM Role ARN: Enter the ARN of the IAM role created by following this guide and using the S3 permissions.
AWS does not recommend access key credentials-based authentication.
AWS Access Key ID: Enter the AWS access key ID.
AWS Secret Access Key: Enter the secret access key to authorize RudderStack to write to your S3 bucket.
For more information on obtaining these credentials, set up an IAM user using the permissions listed here.
Enable server-side encryption for S3: Turn on this setting to enable server-side encryption for your S3 bucket.
Clean up object storage files after successful sync: Turn on this toggle to delete the object storage files after the sync has completed successfully.
Advanced settings
RudderStack provides the following advanced settings:
Warehouse Append: This setting is turned on by default - RudderStack appends your incoming Event Stream data to the existing data in your warehouse. Turning it off causes RudderStack to merge your incoming data into your warehouse to ensure 100% non-duplicate data.
The append operation helps to achieve faster data syncs while reducing warehouse costs. However, note that it may increase the number of duplicates in the warehouse, especially if the existing data is older than 7 days. A common scenario where duplication might occur is when the SDKs retry sending events in case of failures.
A merge strategy ensures deduplication but can lead to longer sync times and increased warehouse costs.
Skip Users Table: This setting is toggled on by default and sends events exclusively to the identifies table while skipping the users table. This eliminates the need for a merge operation on the users table. If toggled off, RudderStack sends the events to both the identifies and users tables.
Skip Tracks Table: Toggle on this setting to skip sending events to the tracks table.
JSON Columns: Lets you ingest semi-structured event data not defined by a fixed schema. You can specify the required JSON column paths in this setting in dot notation, separated by commas. This option applies to all incoming track events for this destination. See JSON Column Support for more information.
S3 permissions
As an alternative to providing AWS credentials for S3 access, set up permissions listed in this section to allow RudderStack to write to your S3 bucket.
RudderStack-hosted data plane
You need to edit your bucket policy to allow RudderStack to write to your bucket with the following JSON:
Create an IAM user with programmatic access keys and attach the above created IAM policy. Copy the ARN of this user.
Edit your bucket policy to allow the data plane to write to your bucket with the following JSON. Make sure you edit the account id and user ARN with your AWS Account ID and the above created user ARN:
Finally, add the programmatic access credentials to the environment of your data plane:
RUDDER_AWS_S3_COPY_USER_ACCESS_KEY_ID=<above created user access key>
RUDDER_AWS_S3_COPY_USER_ACCESS_KEY=<above created user access key secret>
Column compression encoding
Compression encoding specifies the type of compression applied to a column of data values as rows are added to a table.
If not specified, Redshift automatically assigns compression encoding. RudderStack explicitly sets the runlength encoding for Boolean columns.
FAQ
How are reserved words handled by RudderStack?
There are some limitations when it comes to using reserved words in a schema, table, or column names. If such words are used in event names, traits or properties, they will be prefixed with a _when RudderStack creates tables or columns for them in your schema.
Besides, integers are not allowed at the start of the schema or table name. Hence, such schema, column or table names will be prefixed with a _.
For instance, '25dollarpurchase’ will be changed to '_25dollarpurchase'.
For a more comprehensive FAQ list, refer to the Warehouse FAQ guide.
Questions? We're here to help.
Join the RudderStack Slack community or email us for support
This site uses cookies to improve your experience while you navigate through the website. Out of
these
cookies, the cookies that are categorized as necessary are stored on your browser as they are as
essential
for the working of basic functionalities of the website. We also use third-party cookies that
help
us
analyze and understand how you use this website. These cookies will be stored in your browser
only
with
your
consent. You also have the option to opt-out of these cookies. But opting out of some of these
cookies
may
have an effect on your browsing experience.
Necessary
Always Enabled
Necessary cookies are absolutely essential for the website to function properly. This
category only includes cookies that ensures basic functionalities and security
features of the website. These cookies do not store any personal information.
This site uses cookies to improve your experience. If you want to
learn more about cookies and why we use them, visit our cookie
policy. We'll assume you're ok with this, but you can opt-out if you wish Cookie Settings.