Mouseflow
6 minute read
Mouseflow is a behavioral analytics platform that gives you deeper insights into your users’ product journey.
RudderStack supports Mouseflow as a destination where you can send your event data seamlessly.
Connection compatibility
| Destination Information | |||
|---|---|---|---|
| |||


In the web device mode integration, that is, using JavaScript SDK as a source, RudderStack loads the Mouseflow native SDK from the
https://cdn.mouseflow.com/domain.Based on your website’s content security policy, you might need to allowlist this domain to load the Mouseflow SDK successfully.
Get started
Once you have confirmed that the source platform supports sending events to Mouseflow, follow these steps:
- From your RudderStack dashboard, add the source. Then, from the list of destinations, select Mouseflow.
- Assign a name to the destination and click Continue.
Connection settings
To successfully configure Mouseflow as a destination, you need to configure the following settings:
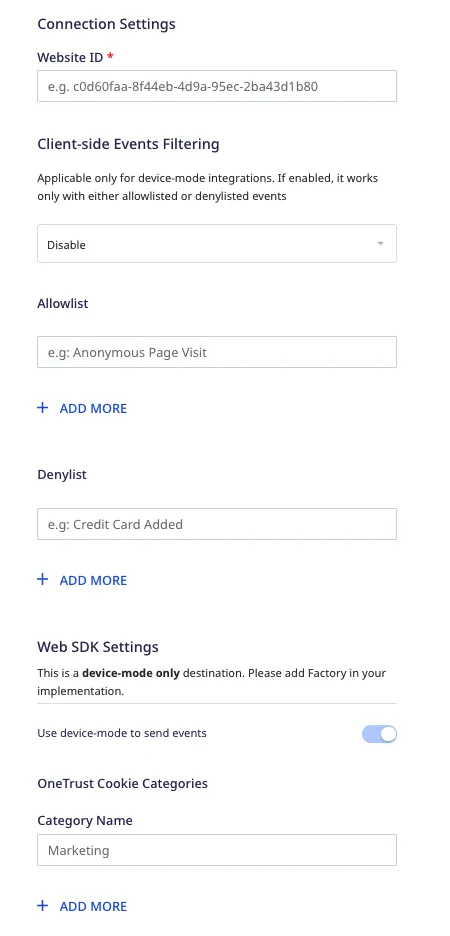
- Website ID: Enter your Mouseflow website ID.
For more information on obtaining your Mouseflow website ID, refer to the FAQ section below.
- Client-side Events Filtering: This setting lets you specify which events should be blocked or allowed to flow through to Mouseflow.
For more information on this setting, refer to the Client-side Events Filtering guide.
- Use device mode to send events: As this is a device mode-only destination, this setting is enabled by default and cannot be disabled.
- Consent management settings: Configure the consent management settings for the specified source by choosing the Consent management provider from the dropdown and entering the relevant consent category IDs. See Consent Management in RudderStack for more information on this feature.
Identify
The identify call lets you identify a visiting user and associate them to their actions. It also lets you record their traits like name, email address, etc. and send this information to Mouseflow.
A sample identify call is shown below:
rudderanalytics.identify("1hKOmRA4GRlm", {
  "email": "alex@example.com",
  "city": "New Orleans",
  "favouriteColor": "Red"
})
Supported mappings
RudderStack maps the following user traits to the corresponding Mouseflow properties:
| RudderStack property | Mouseflow property | Presence |
|---|---|---|
userId / traits.email / anonymousId | _userName | Required |
traits | setVariable | Optional |
Identifying a user
RudderStack sends the userId / email / anonymousId to Mouseflow as _userName via the identifying a user method:
mouseflow.identify(_userName)Setting custom variables
You can also send the user details present in the traits as key-value pair to Mouseflow. RudderStack passes them as custom variables to Mouseflow:
_mfq.push(["setVariable", _key, _value])The values in the key-value pairs passed as custom variables should be either strings or numbers. RudderStack will not pass the values with any other data type, for example, Boolean.
You can also set custom variables by passing them via the event’sintegrationsobject. Refer to the Setting custom variables via the section below for more information.
The following snippets highlight how the data in the sample identify call above is sent to Mouseflow:
// Sending userId
mouseflow.identify("1hKOmRA4GRlm");

// Sending user traits as custom variables
_mfq.push(["setVariable", "city", "New Orleans"]);
_mfq.push(["setVariable", "email", "alex@example.com"]);
_mfq.push(["setVariable", "favouriteColor", "Red"]);
Track
You can use the RudderStack track call to set tags or custom variables in Mouseflow.
A sample track call is as shown:
rudderanalytics.track("Product Clicked",{
	"price": 100,
	"quantity": 10,
})
Setting custom tags
RudderStack lets you set a custom tag to a user recording by using Mouseflow’s Tagging a recording method.
RudderStack automatically sets thetrackevent name as the custom tag.
The below table highlights the property mapping:
| RudderStack property | Mouseflow property | Presence |
|---|---|---|
event | _tag | Required |
A Mouseflow tag must always be of the String data type.
In the sample track call above, RudderStack sets Product Clicked as the custom tag by passing it to Mouseflow in the following way:
_mfq.push(["tag", "Product Clicked"]);Setting custom variables
RudderStack also lets you pass the track event properties as custom variables to Mouseflow in the form of key-value pairs.
The values in the key-value pairs should be either strings or numbers. RudderStack will not pass the values with any other data type, for example, Boolean.
In the sample track call above, RudderStack sets price and quantity as the custom variables:
_mfq.push(["setVariable", "price", "100"]);
_mfq.push(["setVariable", "quantity", "10"]);
You can also set custom variables by passing them via the event’sintegrationsobject. Refer to the Setting custom variables via the section below for more information.
Page
The page call lets you send the path of the web page viewed by the user to Mouseflow.
A sample page call is shown below:
rudderanalytics.page({
  path: "/test_browser.html",
});
RudderStack sends the page-related information like the path or the page URL to Mouseflow using the Adding a virtual pageview%3B-,Adding%20a%20virtual%20pageview,-_mfq.push) method:
_mfq.push(["newPageView", _virtualPath]);Supported mappings
You can customize the page-related details sent to Mouseflow by passing the values in the properties.path field. RudderStack then maps these details to the _virtualPath parameter before sending them to Mouseflow, as highlighted in the below table:
| RudderStack property | Mouseflow property | Presence |
|---|---|---|
properties.path / context.path | _virtualPath | Required |
The following snippet highlights how RudderStack sends the data in the sample page call above to Mouseflow:
_mfq.push(["newPageView", "/test_browser.html"]);Setting custom variables via the integrations object
RudderStack enables you to send custom variables to Mouseflow via the identify and track calls by passing them via the integrations object.
A sample identify call highlighting this feature is shown below:
rudderanalytics.identify(
  "1hKOmRA4GRlm", {
    name: "Test User",
    gender: "Male",
  }, {
    integrations: {
      All: true,
      Mouseflow: {
        customVariables: {
          conversionRate: "100",
          total: 4,
        },
      },
    },
  }
);
The corresponding Mouseflow dashboard view containing these custom variables is shown below:

RudderStack uses Mouseflow’s Setting a custom variable method to send the tags.
FAQ
Where can I find the website ID in Mouseflow?
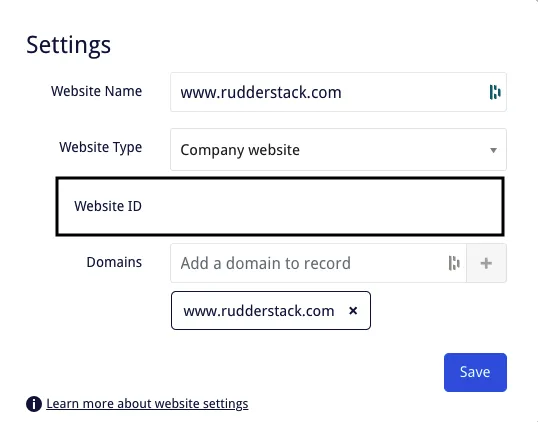
To get the website ID in Mouseflow, follow these steps:
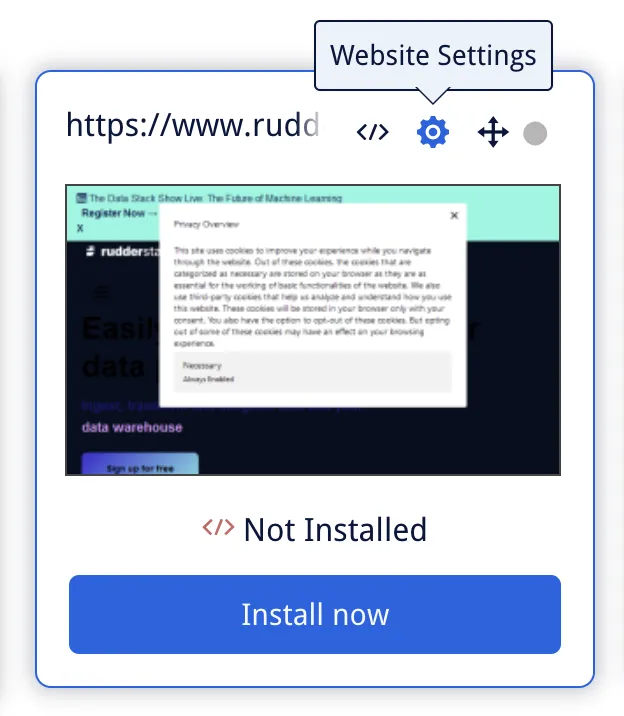
- Log into your Mouseflow dashboard.
- Click the Website Settings icon:
- You will find your website ID listed here.
Alternate method
You can also fetch the website ID by clicking on the Installation icon present in your website’s card:
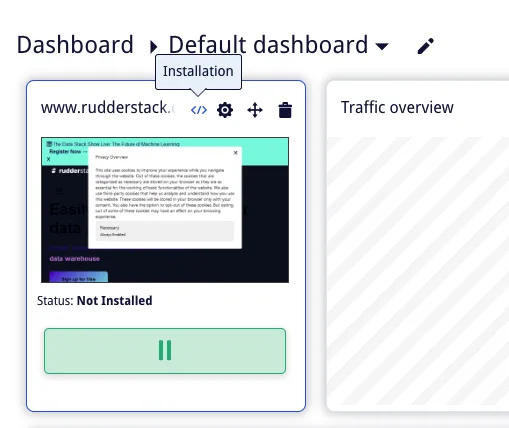
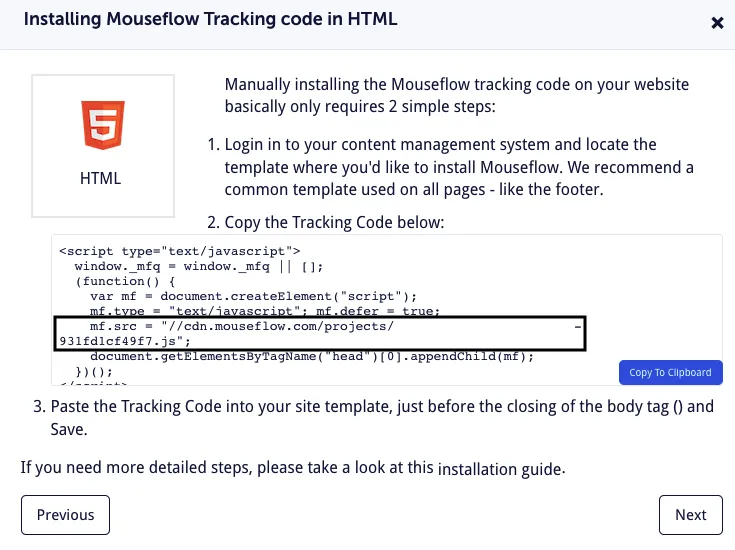
Then, choose your installation method from Google Tag Manager, Wordpress, and HTML.
- If you choose Google Tag Manager as your installation method, you can find the website ID as seen below:
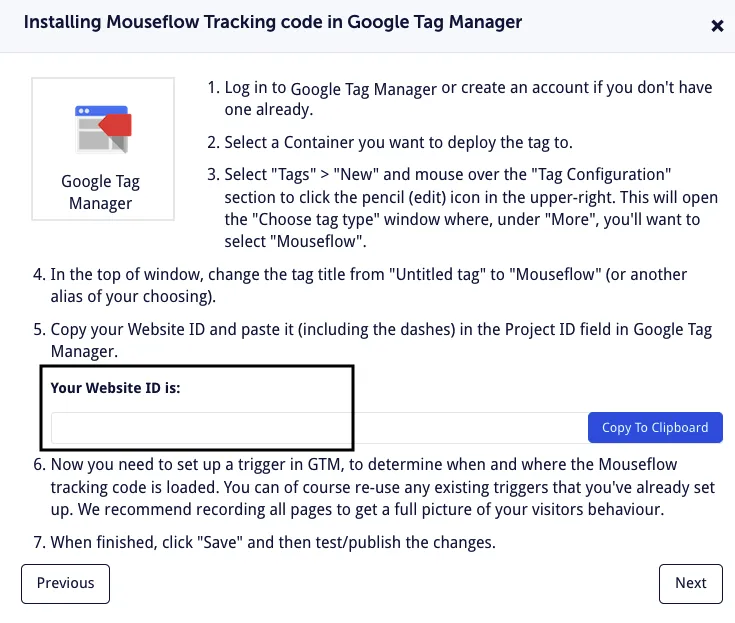
- If you choose Wordpress, you can find the website ID in the following line of the code snippet:
mf.src = "//cdn.mouseflow.com/projects/<website_id>.js"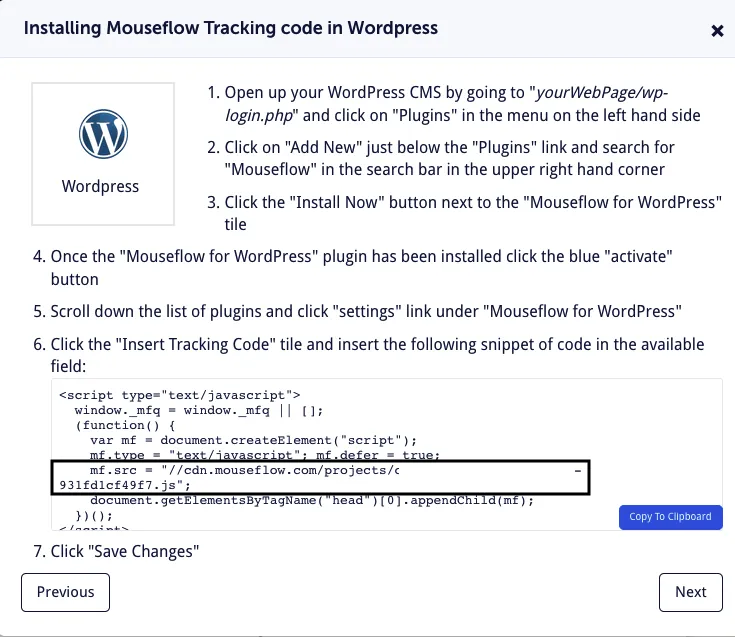
- If you choose HTML, you can find the website ID in the in the following line of the tracking code:
mf.src = "//cdn.mouseflow.com/projects/<website_id>.js"