Connect Reverse ETL Source to HubSpot
4 minute read
This guide takes you through the steps to connect a Reverse ETL source to the HubSpot destination. It also takes you through the required scopes, predefined identifiers, and creating the association between the object records.
The below steps assume that you have already set up a Reverse ETL source and configured the connection settings.
You can connect multiple Reverse ETL sources to the HubSpot destination.
Required scopes
If you’re connecting a Reverse ETL source to HubSpot that uses private app access token for authentication, make sure your access token has the following scopes:
crm.lists.read
crm.objects.contacts.read
crm.objects.contacts.write
crm.schemas.custom.read
crm.objects.custom.read
crm.objects.custom.write
crm.schemas.custom.write
crm.objects.companies.write
crm.schemas.contacts.read
crm.lists.write
crm.objects.companies.read
crm.objects.deals.read
crm.objects.deals.write
crm.schemas.companies.read
crm.schemas.companies.write
crm.schemas.contacts.write
crm.schemas.deals.read
crm.schemas.deals.write
crm.objects.owners.read
crm.objects.quotes.write
crm.objects.quotes.read
crm.schemas.quotes.read
crm.objects.line_items.read
crm.objects.line_items.write
crm.schemas.line_items.read
See the HubSpot documentation for more information on adding the above scopes.
Data mapping
Follow these steps to define the data mapping settings:
- From the dropdown, select the HubSpot Object where you want to sync the data.
- Select the object to associate with the above data.
- Specify the required association from the dropdown.
- Specify the Sync mode. This integration only supports Upsert mode currently.
- Optionally, toggle on the Use cursor column setting for your incremental sync. Then, select the required column from the dropdown. See Cursor Column Support for more information on this feature.
- Under Choose identifier, select the warehouse column that acts as a unique identifier to map your records. Then, select the corresponding HubSpot field from the dropdown.
- Click the Map with JSON button.
- Specify the Sync mode. This integration only supports Upsert mode currently.
- Optionally, toggle on the Use cursor column setting for your incremental sync. Then, select the required column from the dropdown. See Cursor Column Support for more information on this feature.
- Choose the Event Type - RudderStack supports sending data to HubSpot as Identify and Track events.
- If you select Track, you can optionally toggle on the Lookup event name by column setting and select the required warehouse column. RudderStack uses this column to perform the lookup. If this setting is not toggled on, specify the event name to be used for lookup.
- Choose the user identifiers (user_id and anonymous_id) from the dropdown.
Predefined identifiers
While connecting a Reverse ETL source with HubSpot using Visual Data Mapper, choose a warehouse column and HubSpot field to map your records in the Choose identifier section:
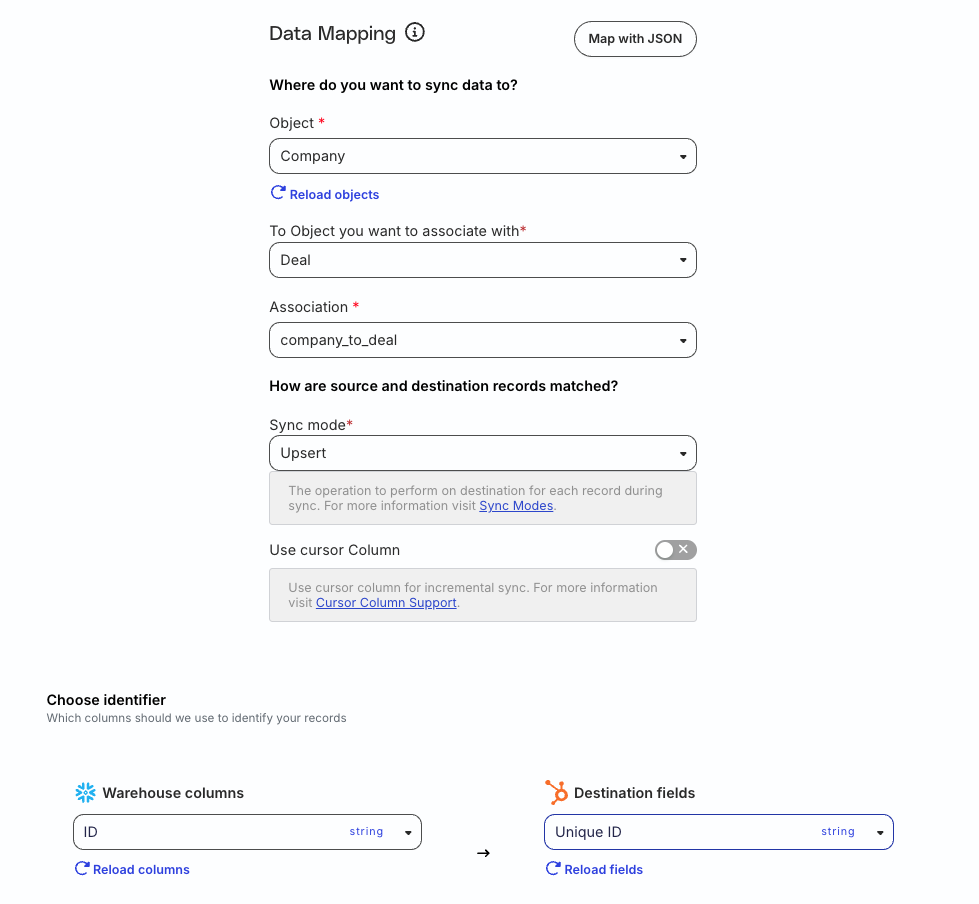
If you select a standard HubSpot Object, the Destination fields dropdown displays the predefined unique identifiers along with any other unique field of the object.
The following table lists the predefined identifiers corresponding to the standard HubSpot objects:
Note that:
- These fields are visible only when the Create associations between object records dashboard setting is toggled off.
- The values of unique identifiers are case-sensitive and should be sent exactly as they are present in HubSpot.
| Standard HubSpot object | Predefined unique identifiers |
|---|---|
| Company | Company Domain Name |
| Contact | |
| Deal | Deal Name |
| Line Item | Name |
| Quote | Quote number |
If you select a custom HubSpot Object, only the unique fields of the object are displayed in the Destination fields dropdown.
Create association between object records
Note that:
- You can create an association between the HubSpot object records while connecting your HubSpot destination to a Reverse ETL source using the Visual Data Mapper feature.
- You must create two separate connections in the RudderStack dashboard using the Reverse ETL sources and HubSpot destination as shown:
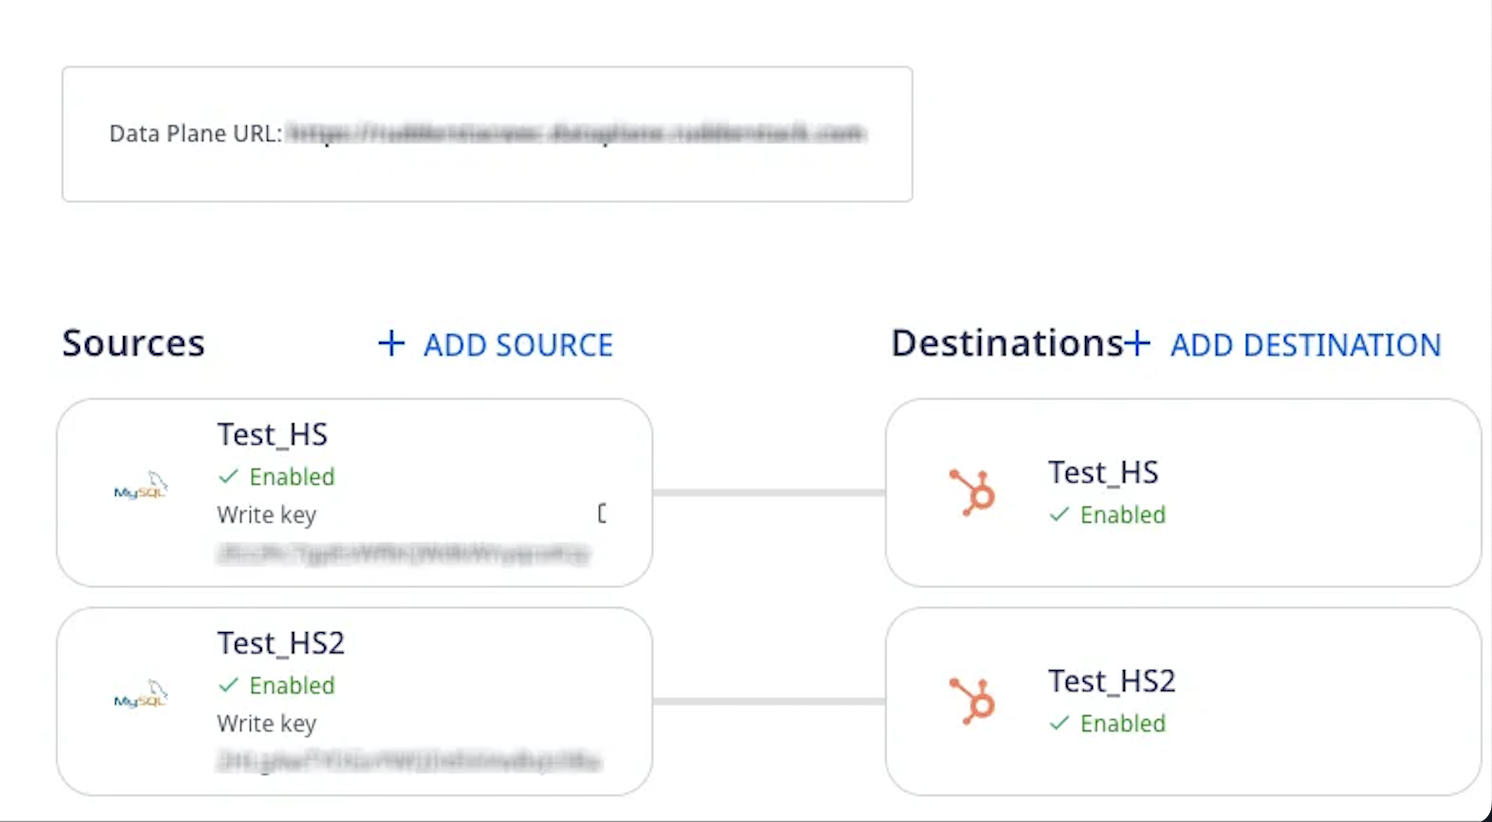
Workflow
- The first connection pushes data into the HubSpot object, for example, a company object.
- The second connection creates an association between the object records. For example, associating the company and contact objects.
Steps to create association
- Add a Reverse ETL source and connect the HubSpot destination to it. While configuring the destination, make sure to toggle on the Create associations between object record setting.
- In the Data mapping settings, select the Object where you want to sync the data.
- In the next dropdown, select the HubSpot object with which you want to associate the above-mentioned object.
- Based on the object selections, the relevant associations (from HubSpot account) are populated in the Association dropdown. Select the required association.
- Specify the Sync mode.
- In the Choose identifier section, select a warehouse column and HubSpot destination field to map your records. You can choose any destination field from the dropdown that acts as a unique identifier.
- Choose a warehouse column each for From Record ID and To Record ID fields which act as Hubspot’s unique ID to identify an object.
From Record ID and To Record ID are the column names of the two objects you want to associate.
For example, if you want to associate a company and a contact, the From Record ID should be a
Company Idand To Record ID should be aContact Id.
Similarly, you can create more such associations between the object records.
