Send your event data from RudderStack to Google Ads Remarketing Lists.
3 minute read
This guide will help you set up Google Ads Remarketing Lists as a destination in the RudderStack dashboard. It also lists the configuration settings required to correctly send data from the supported sources to Google Ads Remarketing Lists.
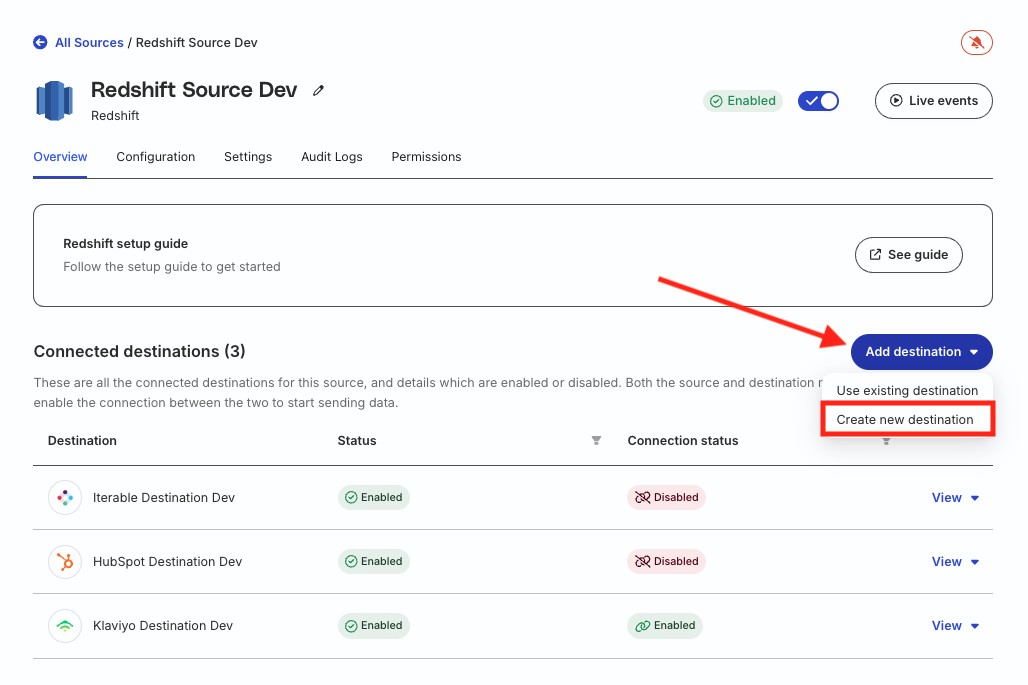
In the Overview tab, click Add destination > Create new destination.
From the list of destinations, search for Google Ads Remarketing Lists (Customer Match) and click Continue.
Connection settings
Setting
Description
Name
Specify a unique name to identify the destination in RudderStack.
oAuth settings
Click Create Account > Sign in with Google and give RudderStack the required permissions to access your Google Ads account.
Select the account and click Save.
Customer ID
Enter the Customer ID associated with your Google Ads account. You can find it by clicking on the Help option in your Google Ads dashboard.
See this guide for more information on obtaining the customer ID.
Subaccount
Turn on this setting if you are using a Google Ads subaccount.
Note: See this guide for more information on subaccounts in Campaign Manager 360.
Login customer ID
If Subaccount is toggled on, enter the customer ID of the parent account associated with the subaccount. This field is required only when you want to send data to a customer list of a subaccount.
From the dropdown, select the list type of data to upload.
Upload the CSV containing the user data. You can also download the template and upload the data.
Click UPLOAD AND CREATE.
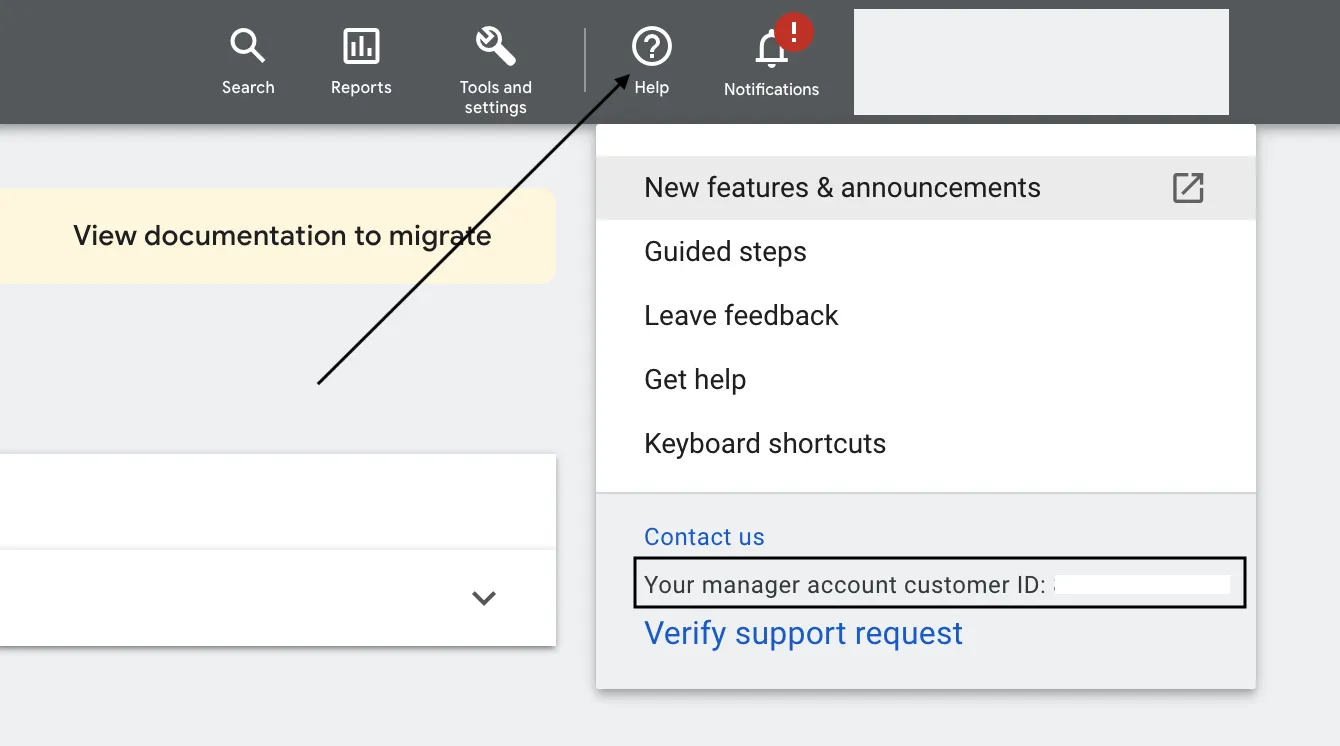
Where can I find my Google Ads customer ID?
To get the customer ID associated with your Google Ads account, click the Help option in your Google Ads dashboard. You will find the customer ID in the resulting pop-up:
Can I set up the Enhanced Conversions and Remarketing Lists destinations using the same Google Ads account?
Yes, you can. As both the integrations are Google Ads features, it is possible to use the same Google Ads account to configure both the Enhanced Conversions and Remarketing Lists destinations in RudderStack.
What are the account permissions required for the Google Ads Remarketing Lists integration?
Make sure the customer account used for OAuth verification adheres to Google’s Customer Match policy and has Standard or higher (Administrative) access level permissions.
For more information on the access level permissions, refer to this Google Ads support page.
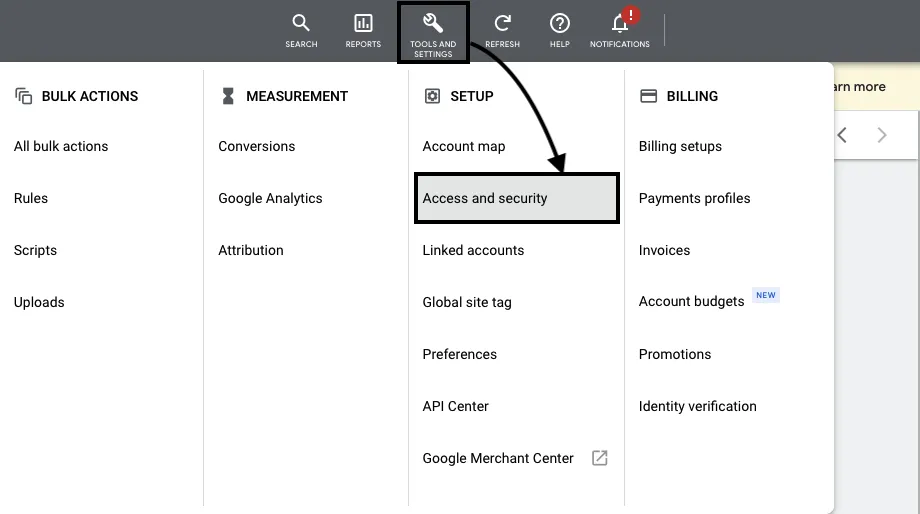
Follow these steps to set the access level:
Sign into to your Google Ads account and go to TOOLS AND SETTINGS > Access and security:
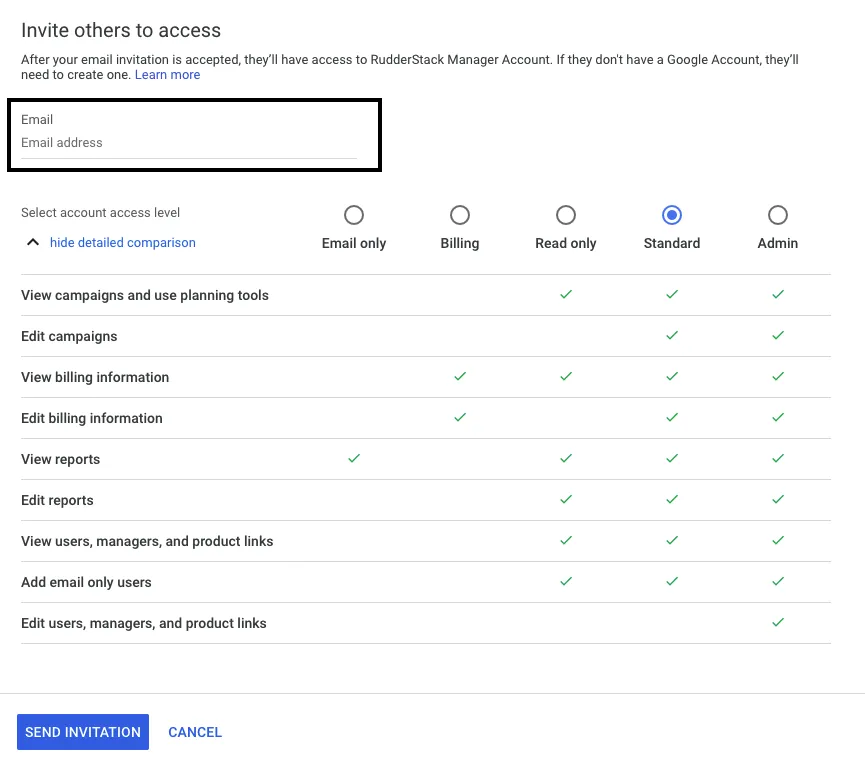
Enter the email address of the account. From the list of permissions, select Standard or Administrative. Then, click SEND INVITATION:
The account will have the required access-level permissions once they accept the invitation.
Why am I getting a 400 Bad Request error message while setting up the Google Ads Remarketing Lists destination?
If you get a 400 Bad Request error while configuring the destination, make sure your customer account is allowlisted and configured to have Standard or Administrative access levels in Google Ads.
See the above FAQ for steps on setting the access level permissions for the account.
This site uses cookies to improve your experience while you navigate through the website. Out of
these
cookies, the cookies that are categorized as necessary are stored on your browser as they are as
essential
for the working of basic functionalities of the website. We also use third-party cookies that
help
us
analyze and understand how you use this website. These cookies will be stored in your browser
only
with
your
consent. You also have the option to opt-out of these cookies. But opting out of some of these
cookies
may
have an effect on your browsing experience.
Necessary
Always Enabled
Necessary cookies are absolutely essential for the website to function properly. This
category only includes cookies that ensures basic functionalities and security
features of the website. These cookies do not store any personal information.
This site uses cookies to improve your experience. If you want to
learn more about cookies and why we use them, visit our cookie
policy. We'll assume you're ok with this, but you can opt-out if you wish Cookie Settings.