Autopilot Destination (Legacy)
4 minute read
Autopilot is a popular marketing automation platform that allows you to track and capture new leads, create detailed customer journeys, and boost customer retention.
This documentation is for the legacy Autopilot destination in RudderStack. Autopilot is now rebranded as Ortto.
Refer to this documentation only if you set up the Autopilot destination in RudderStack before the rebranding, or if you are leveraging the Autopilot REST API to send the data.
See the Ortto destination documentation for more information on using the new Ortto integration.
Connection compatibility
| Destination Information | |||
|---|---|---|---|
| |||


Setup
- In your RudderStack dashboard, set up a source.
- Go to the Overview tab of your source and select Add Destination > Create new destination.
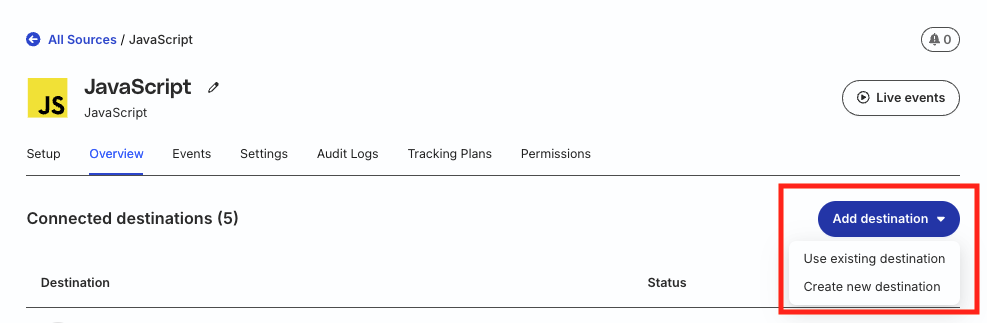
- Select Autopilot from the list of destinations. Then, click Continue.
Connection settings
| Setting | Description |
|---|---|
| Name | Assign a name to uniquely identify the destination in RudderStack. |
| API Key | Enter your Autopilot API key. |
| Trigger ID | Enter the Trigger ID from your Autopilot journey. RudderStack uses this ID in track calls to add contacts to a journey.See Autopilot REST API documentation for more information. |
| Consent management settings | Configure the consent management settings for the specified source by choosing the Consent management provider from the dropdown and entering the relevant consent category IDs. See Consent Management in RudderStack for more information on this feature. |
Identify
The identify call captures relevant details about the visiting user and creates or updates a contact in Autopilot.
A sample identify call is shown below:
rudderanalytics.identify("user_123", {
  email: "john@example.com",
  firstName: "John",
  lastName: "Doe",
  phone: "+1234567890",
  company: {
    name: "Acme Corp"
  },
  status: "active",
  LeadSource: "website",
  customField: "custom value"
});
Supported fields
RudderStack maps the following identify event traits to the standard Autopilot fields:
| RudderStack property | Autopilot field | Description |
|---|---|---|
traits.emailcontext.traits.email | Email | Contact’s email address |
traits.firstNametraits.firstname | FirstName | Contact’s first name |
traits.lastNametraits.lastname | LastName | Contact’s last name |
traits.phone | Phone | Contact’s phone number |
traits.company.name | Company | Contact’s company name |
traits.status | Status | Contact’s status |
traits.LeadSource | LeadSource | Source of the lead |
RudderStack sends additional traits as custom properties to Autopilot.
Track
You can use the track call to trigger journeys in Autopilot by adding contacts to specific triggers.
To send track events to Autopilot successfully, note that:
- The
trackevent must include an email address in eitherproperties.emailortraits.emailto identify the contact in Autopilot. - You must configure a valid Autopilot trigger ID in your destination settings.
Sample track event
rudderanalytics.track("Purchase Completed", {
  email: "john@example.com",
  productId: "prod_123",
  amount: 99.99,
  currency: "USD"
});
API endpoints
RudderStack uses the following API endpoints to send events to Autopilot:
| Use case | Endpoint |
|---|---|
| Contact management Applicable for Identify events | https://api2.autopilothq.com/v1/contact |
| Journey triggers Applicable for Track events | https://api2.autopilothq.com/v1/trigger/{triggerId}/contact/{email} |
Troubleshooting
This section lists some common issues you may encounter while using this integration and their solutions.
Track events failing with “Email is required” error
If you receive this error, make sure that your track events include an email address. You can provide the email in the following fields:
properties.emailtraits.emailcontext.traits.email
Invalid trigger ID error
If you encounter trigger ID errors:
- Verify that the trigger ID in your destination settings matches the trigger ID in your Autopilot dashboard.
- Ensure the trigger is active in Autopilot.
- Check that your API key has permission to access the trigger.
Contact not created or updated
If contacts aren’t being created or updated:
- Verify your API key is valid and has the correct permissions
- Check that the email field is properly formatted
- Ensure the contact data doesn’t exceed Autopilot’s field limits
FAQ
Where can I find the Autopilot API key?
- Log in to your Autopilot dashboard.
- Go to Settings > Autopilot API.
- Click Generate and copy the API key.
See the Autopilot documentation for more information.
