Connect Reverse ETL Source to Facebook Custom Audience
Configure a Reverse ETL source with your Facebook Custom Audience destination.
10 minute read
This guide takes you through the steps to connect a Reverse ETL source to your Facebook Custom Audience destination.
You can connect multiple Reverse ETL sources to the Facebook Custom Audience destination.
Setup
Set up and configure your Reverse ETL source.
In the Overview tab of the source page, click Add destination > Create new destination. You can also select an already-configured destination here.
From the list of destinations, select Facebook Custom Audience and click Continue.
Specify a unique name to identify this destination in RudderStack.
In the Event delivery account section, click Select to choose from an existing Facebook Ads account from the list. You can also click Add account and authenticate using a Facebook API access token:
Setting
Description
Account Name
Specify a unique Custom Audience account name
Access Token
Enter the access token of your business application set up for accessing the Facebook Marketing API
The Ad Account ID field is automatically populated based on the selected Facebook Ads account — select the relevant ID from the dropdown. Then, click Continue.
Mapping settings
This section lists the settings to correctly map data from your Reverse ETL source to the Facebook Custom Audience destination.
RudderStack supports syncing to the following two audience types:
In this section, you can create a new audience or use an existing one.
Create new audience: Use this option to create a new custom audience in Facebook. You can specify the name and description of the new Facebook audience.
If you select the Create new audience option, RudderStack creates a new audience in Facebook with the same Ad Account ID configured in the connection settings.
Use existing audience: Use this option if you have an existing custom audience. RudderStack automatically populates this field with the relevant audiences based on your specified connection settings.
Sync mode
RudderStack supports only Mirror mode for this integration.
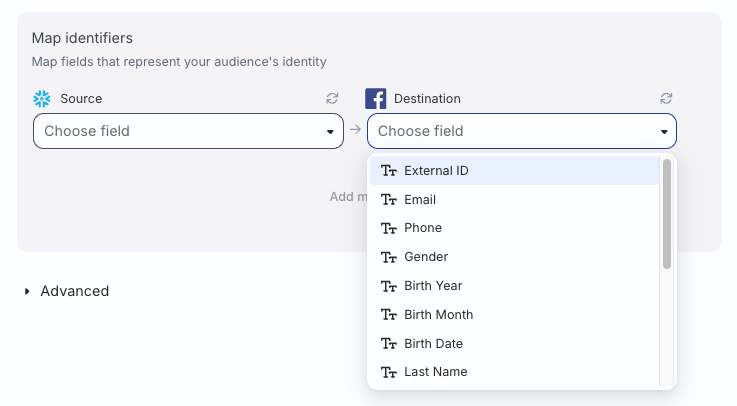
Map identifiers
In this section, you can map your warehouse columns to specific Custom Audience fields that represent your audience’s identity.
Advanced settings
Setting
Description
Automatically hash PII data
When set to Yes, RudderStack hash-encodes user data irrespective of whether the data is already hashed or not.
Note: Facebook expects the user data to be hash encoded using SHA256.
Select the relevant field from the dropdown that describes the origin of your data — this helps Facebook classify the user list and apply appropriate matching and privacy rules.
Specify identifier type
Choose the relevant identifier type from the dropdown that allows Facebook Ads to match users to their profiles.
Sync settings
RudderStack determines how and when to run a sync based on the sync schedule you set for your Reverse ETL connection.
Schedule type
Description
Basic
Run syncs at a given time interval and specified time (in UTC).
CRON
Run syncs based on a specified CRON expression (in UTC).
Manual
Run syncs manually.
Sync observability settings
Setting
Description
Retain sync logs
This setting is toggled on by default and instructs RudderStack to store the sync logs in your warehouse. You can also configure the below settings:
Setting
Description
Sync log retention
Specify the retention period of the sync logs in your warehouse.
If you set it to 1, then RudderStack deletes any sync log older than a day (in UTC time).
In the Select audience section, select Create new audience and specify the audience name and description.
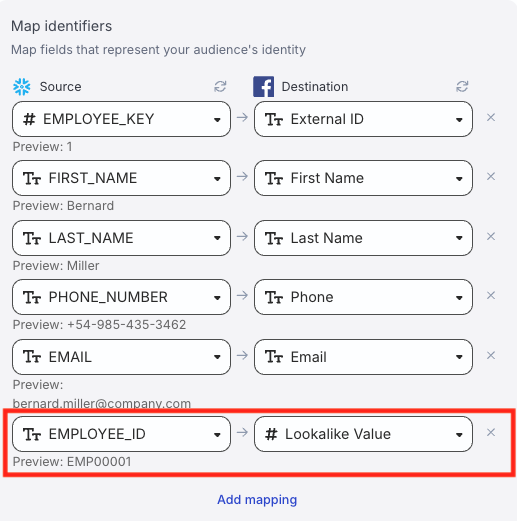
In the Choose identifier mappings window, map a relevant warehouse column to the Lookalike Value field.
Note that:
RudderStack will not create a value-based lookalike audience if you do not include the Lookalike Value in your identifier mappings — it will create a custom audience instead.
You can update the mapping for the Lookalike Value field after the audience is created.
Set up the other identifier mappings as per your requirement.
Continue with the rest of the setup.
Existing value-based lookalike audience
In the Select audience section, select Use existing audience and select the value-based lookalike audience from the dropdown.
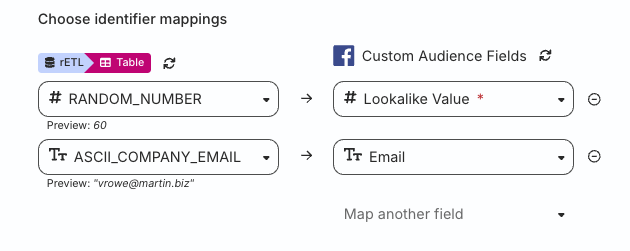
In the Choose identifier mappings window, map a relevant warehouse column to the Lookalike Value field.
You can update the mapping for the Lookalike Value field after the audience is created.
Set up the other identifier mappings as per your requirement.
Continue with the rest of the setup.
You cannot change the audience type from a value-based lookalike audience to a regular custom audience (and vice versa) after the audience is created.
Schema fields mapping
The following table details the schema fields mappings specified in the RudderStack dashboard:
Dashboard field name
Marketing API schema field (RudderStack-supported field name)
EMAIL
EMAIL
PHONE
PHONE
GENDER
GEN
MADID
MADID
EXTERN_ID
EXTERN_ID
DOB YEAR (YYYY)
DOBY
DOB MONTH (MM)
DOBM
DOB DATE (DD)
DOBD
LAST NAME
LN
FIRST NAME
FN
FIRST NAME INITIAL
FI
CITY
CT
US STATES
ST
ZIP
ZIP
COUNTRY
COUNTRY
Note that the MADID and EXTERN_ID fields are not hashed.
RudderStack modifies the schema names visible in the dashboard to ensure better readability. However, during the event call, the field names must be exactly the same as the schema names specified by Facebook Marketing API, as mentioned in the table above.
Data normalization
By default, RudderStack formats the data as prescribed by Facebook before sending it to the destination, as shown in the below table:
Schema field name
Example input
Formatted output (before hashing)
EMAIL
ABC@gmail.com
abc@gmail.com
PHONE
0@96346895
96346895
GEN
FEMALE
f
DOBD
2
02
DOBM
1
01
LN & FN
Abc,@
abc@
FI
Mr.
mr.
CT
HN#
hn
ST
? AL ?
al
ZIP
11502 @bc
11502@bc
COUNTRY
IN
in
If you enable the Normalize data formatting setting, RudderStack formats the user data as prescribed by the Facebook Marketing API.
After normalization, RudderStack validates each field before sending it to Facebook.
If a field is determined to be invalid, RudderStack does not send it to Facebook.
If all fields in a row are invalid, then the entire row is rejected and marked as failed
RudderStack first normalizes the data and then validates it, skipping any invalid rows. Then, it hashes the data before sending it to Facebook.
Data hashing
The Automatically hash PII data setting lets you hash your user data before sending it to Facebook. This setting is enabled by default.
Configure the setting to Yes if your incoming data is not pre-hashed
Configure this setting to No if your data is already hashed
Incorrect configuration of the Automatically hash PII data setting will result in failures.
If the Automatically hash PII data setting is configured to Yes and your data is pre-hashed, the event will fail.
If the Automatically hash PII data setting is configured to No and your data is not pre-hashed, the event will fail.
RudderStack rejects such events with a clear error message, for example:
Hashing is disabled but the value for field EMAIL appears to be unhashed. Either enable hashing or send pre-hashed data.
You will also see errors in the Events tab for cases that were previously marked as successful, but were effectively resulting in no matches, helping you quickly identify and fix any data quality or configuration issues.
FAQ
Where can I find the Custom Audience ID?
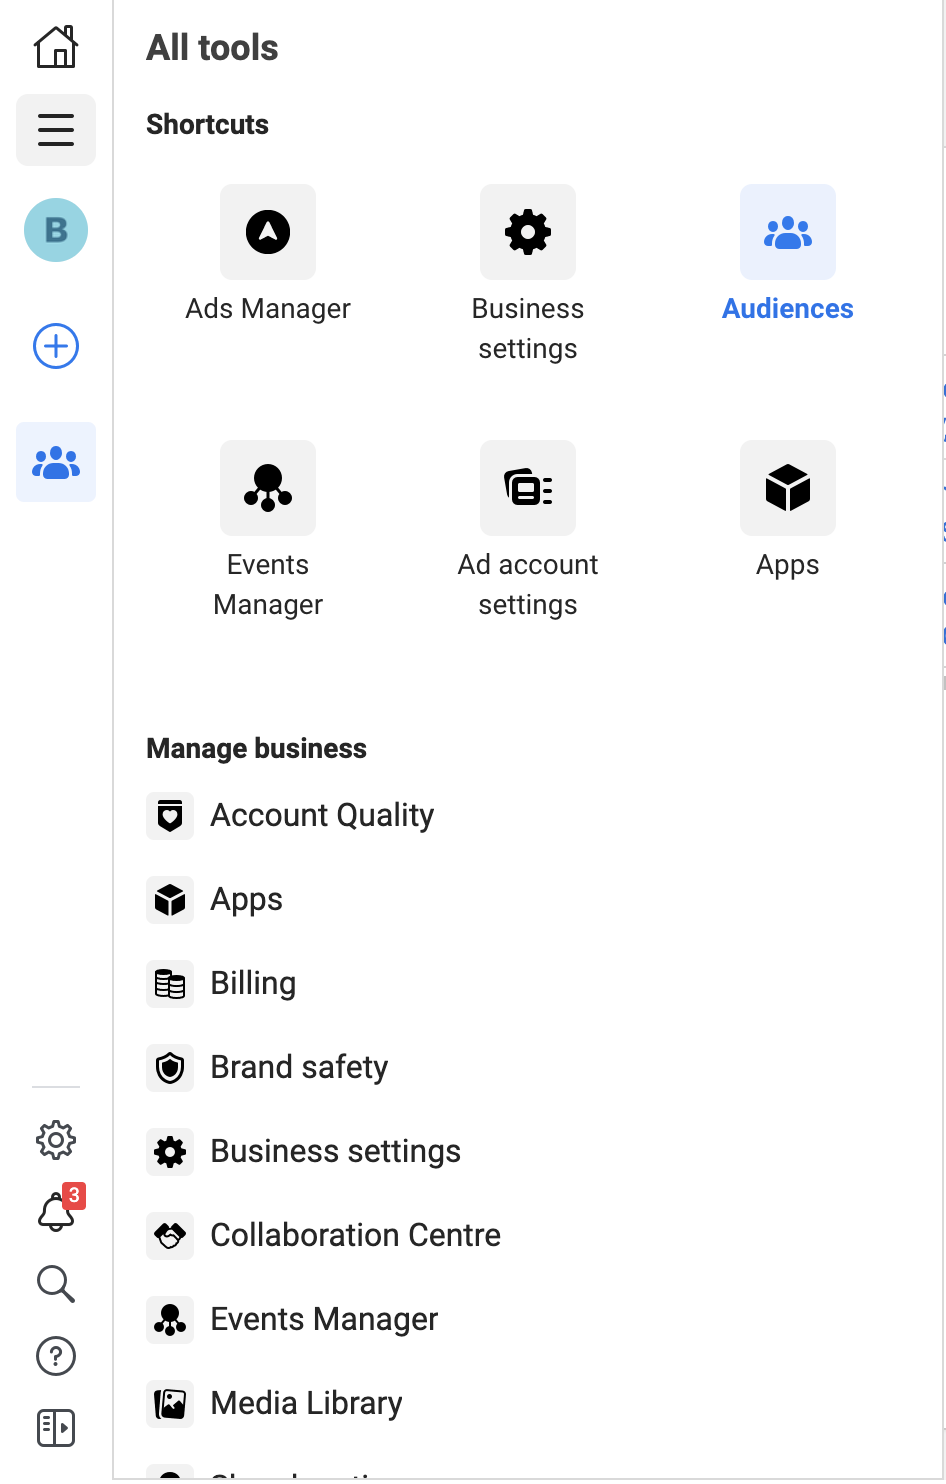
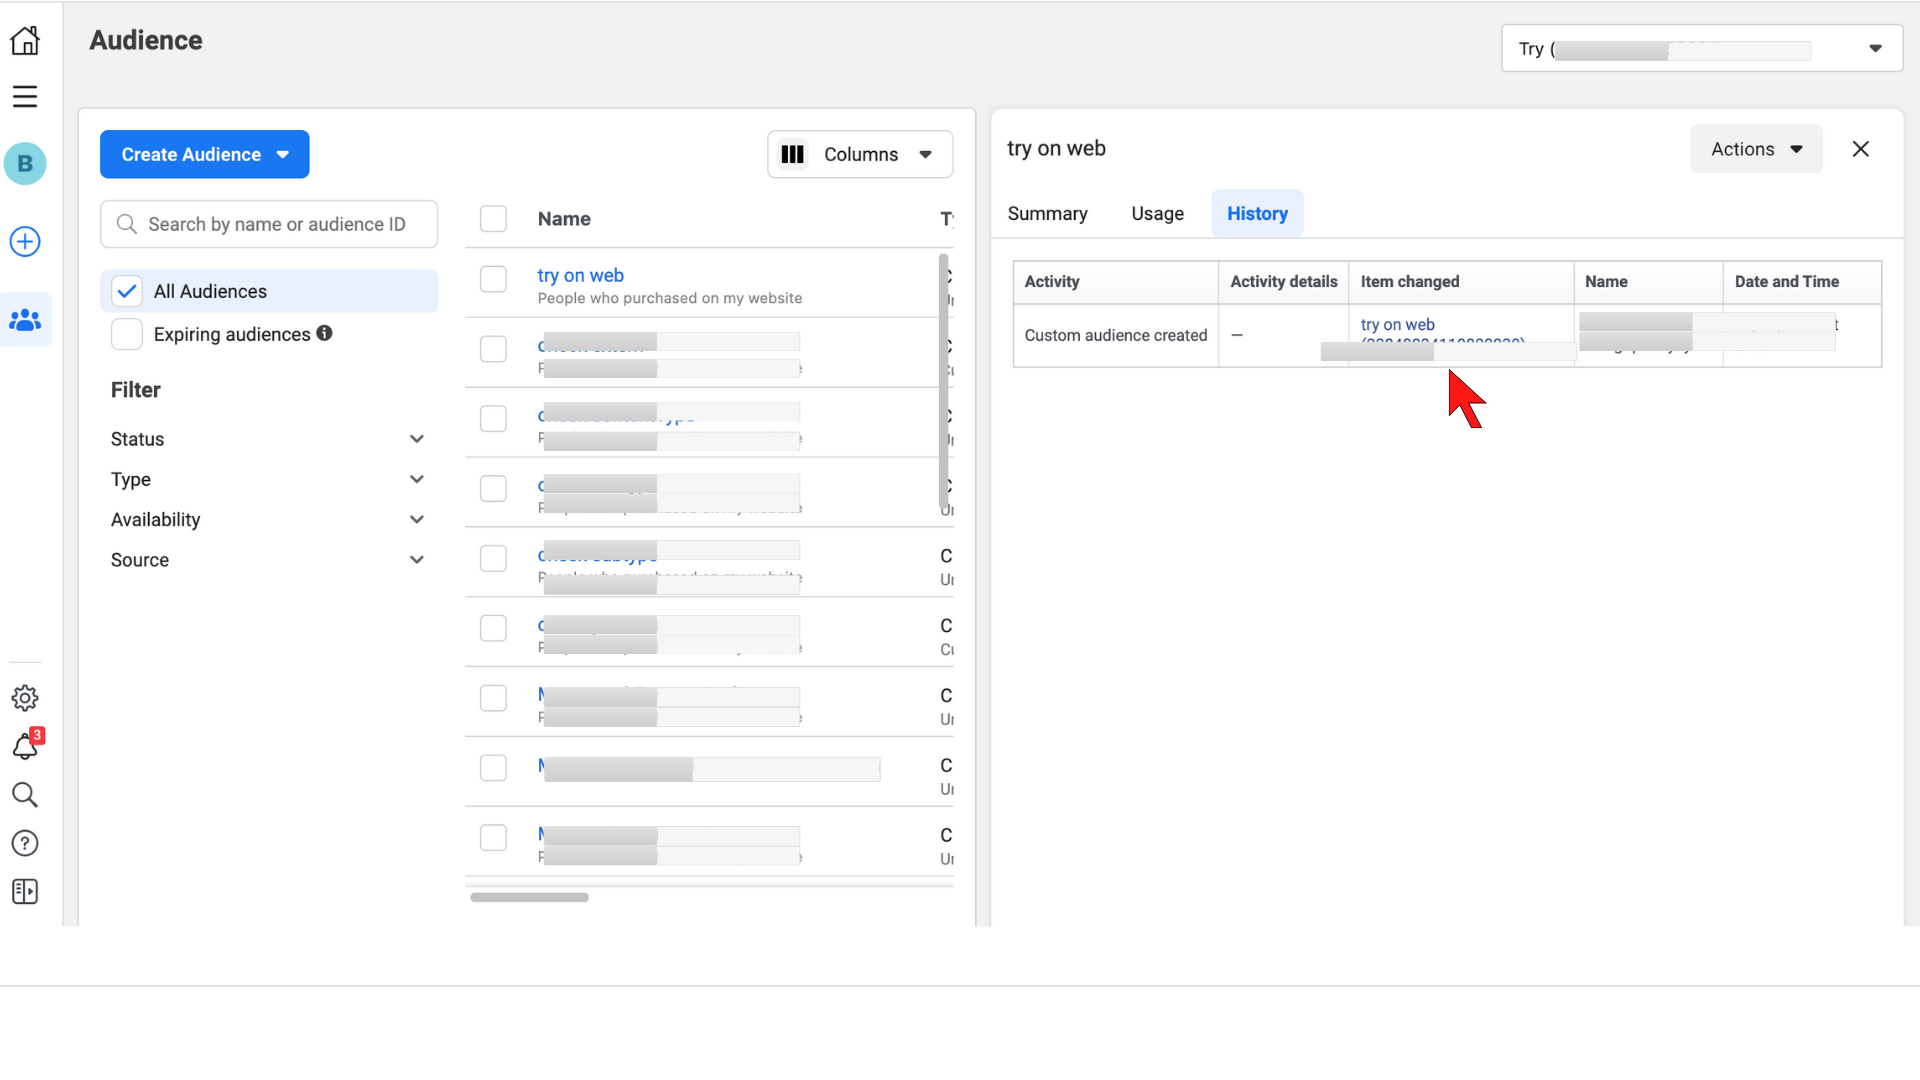
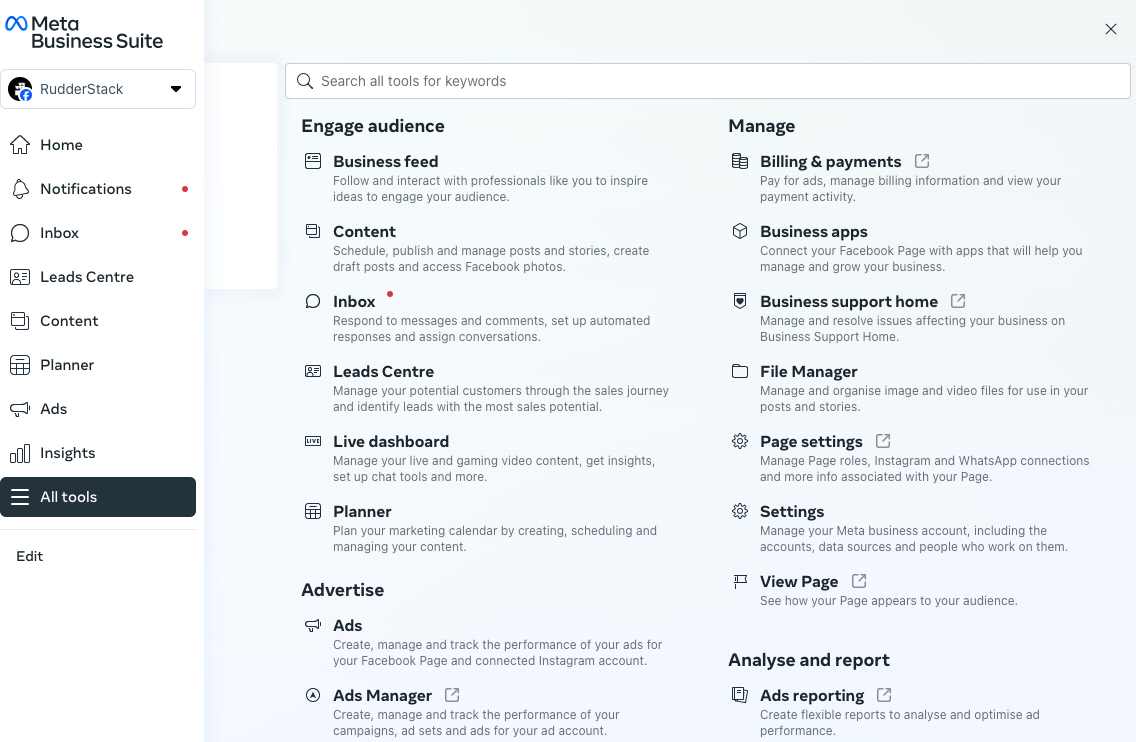
To get your Custom Audience ID, go to the Facebook Ads Manager account. On the left navigation bar, select Audiences and choose the Ad account you have created the custom audience for.
Click All Audiences and select the specific custom audience from the list.
Finally, click the History tab. Here, you will find the audience ID under the Item Changed column:
What are the prerequisites for creating an audience list?
Before creating a new audience list, make sure that:
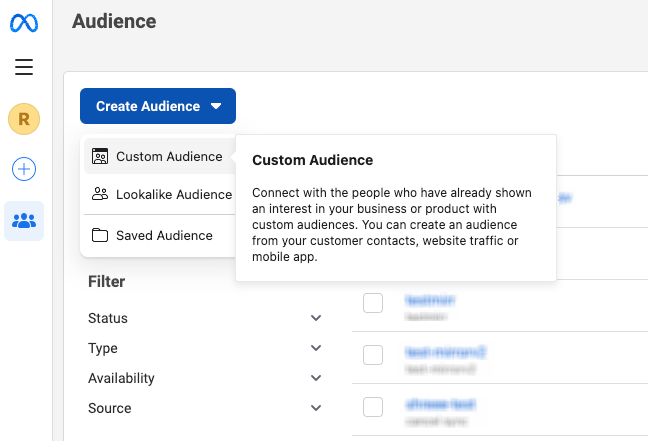
Hover over Create Audience and select Custom Audience.
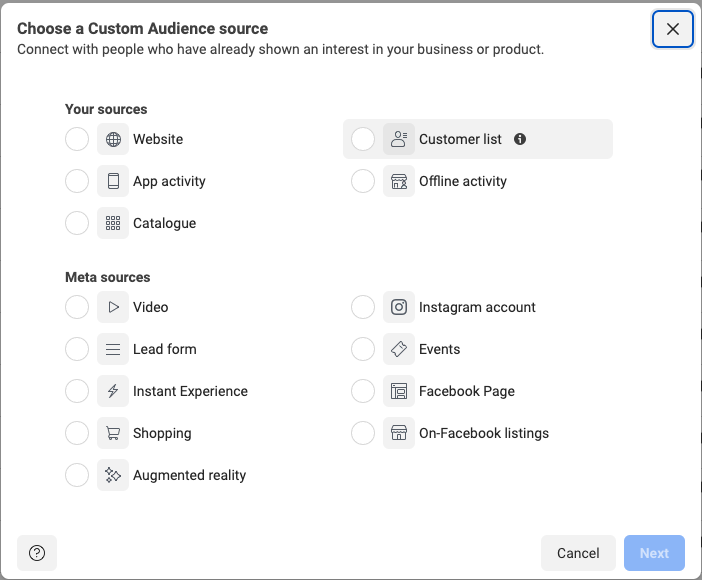
Select Customer List and click Next.
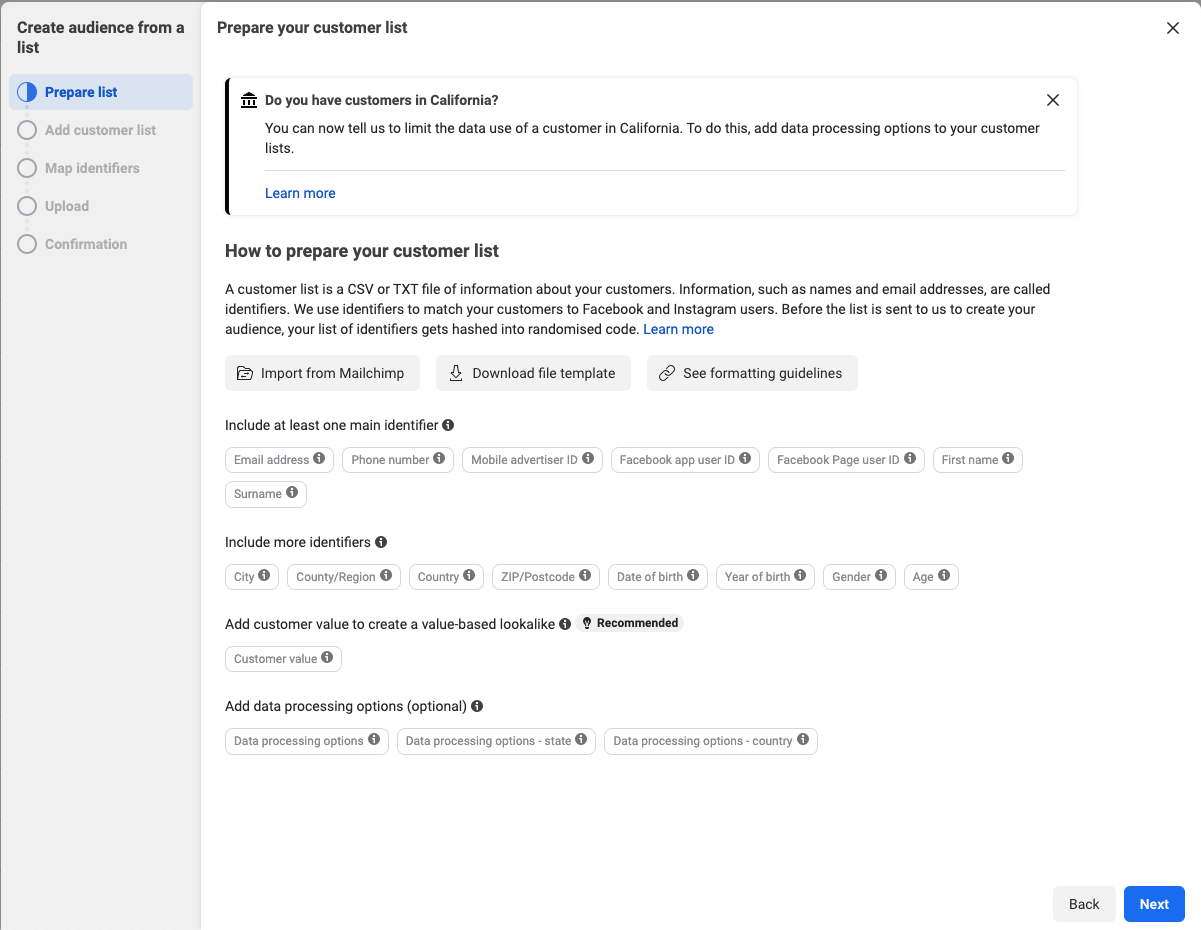
Prepare your customer list by selecting and mapping the identifiers. Make sure you have enough identifiers before uploading the list.
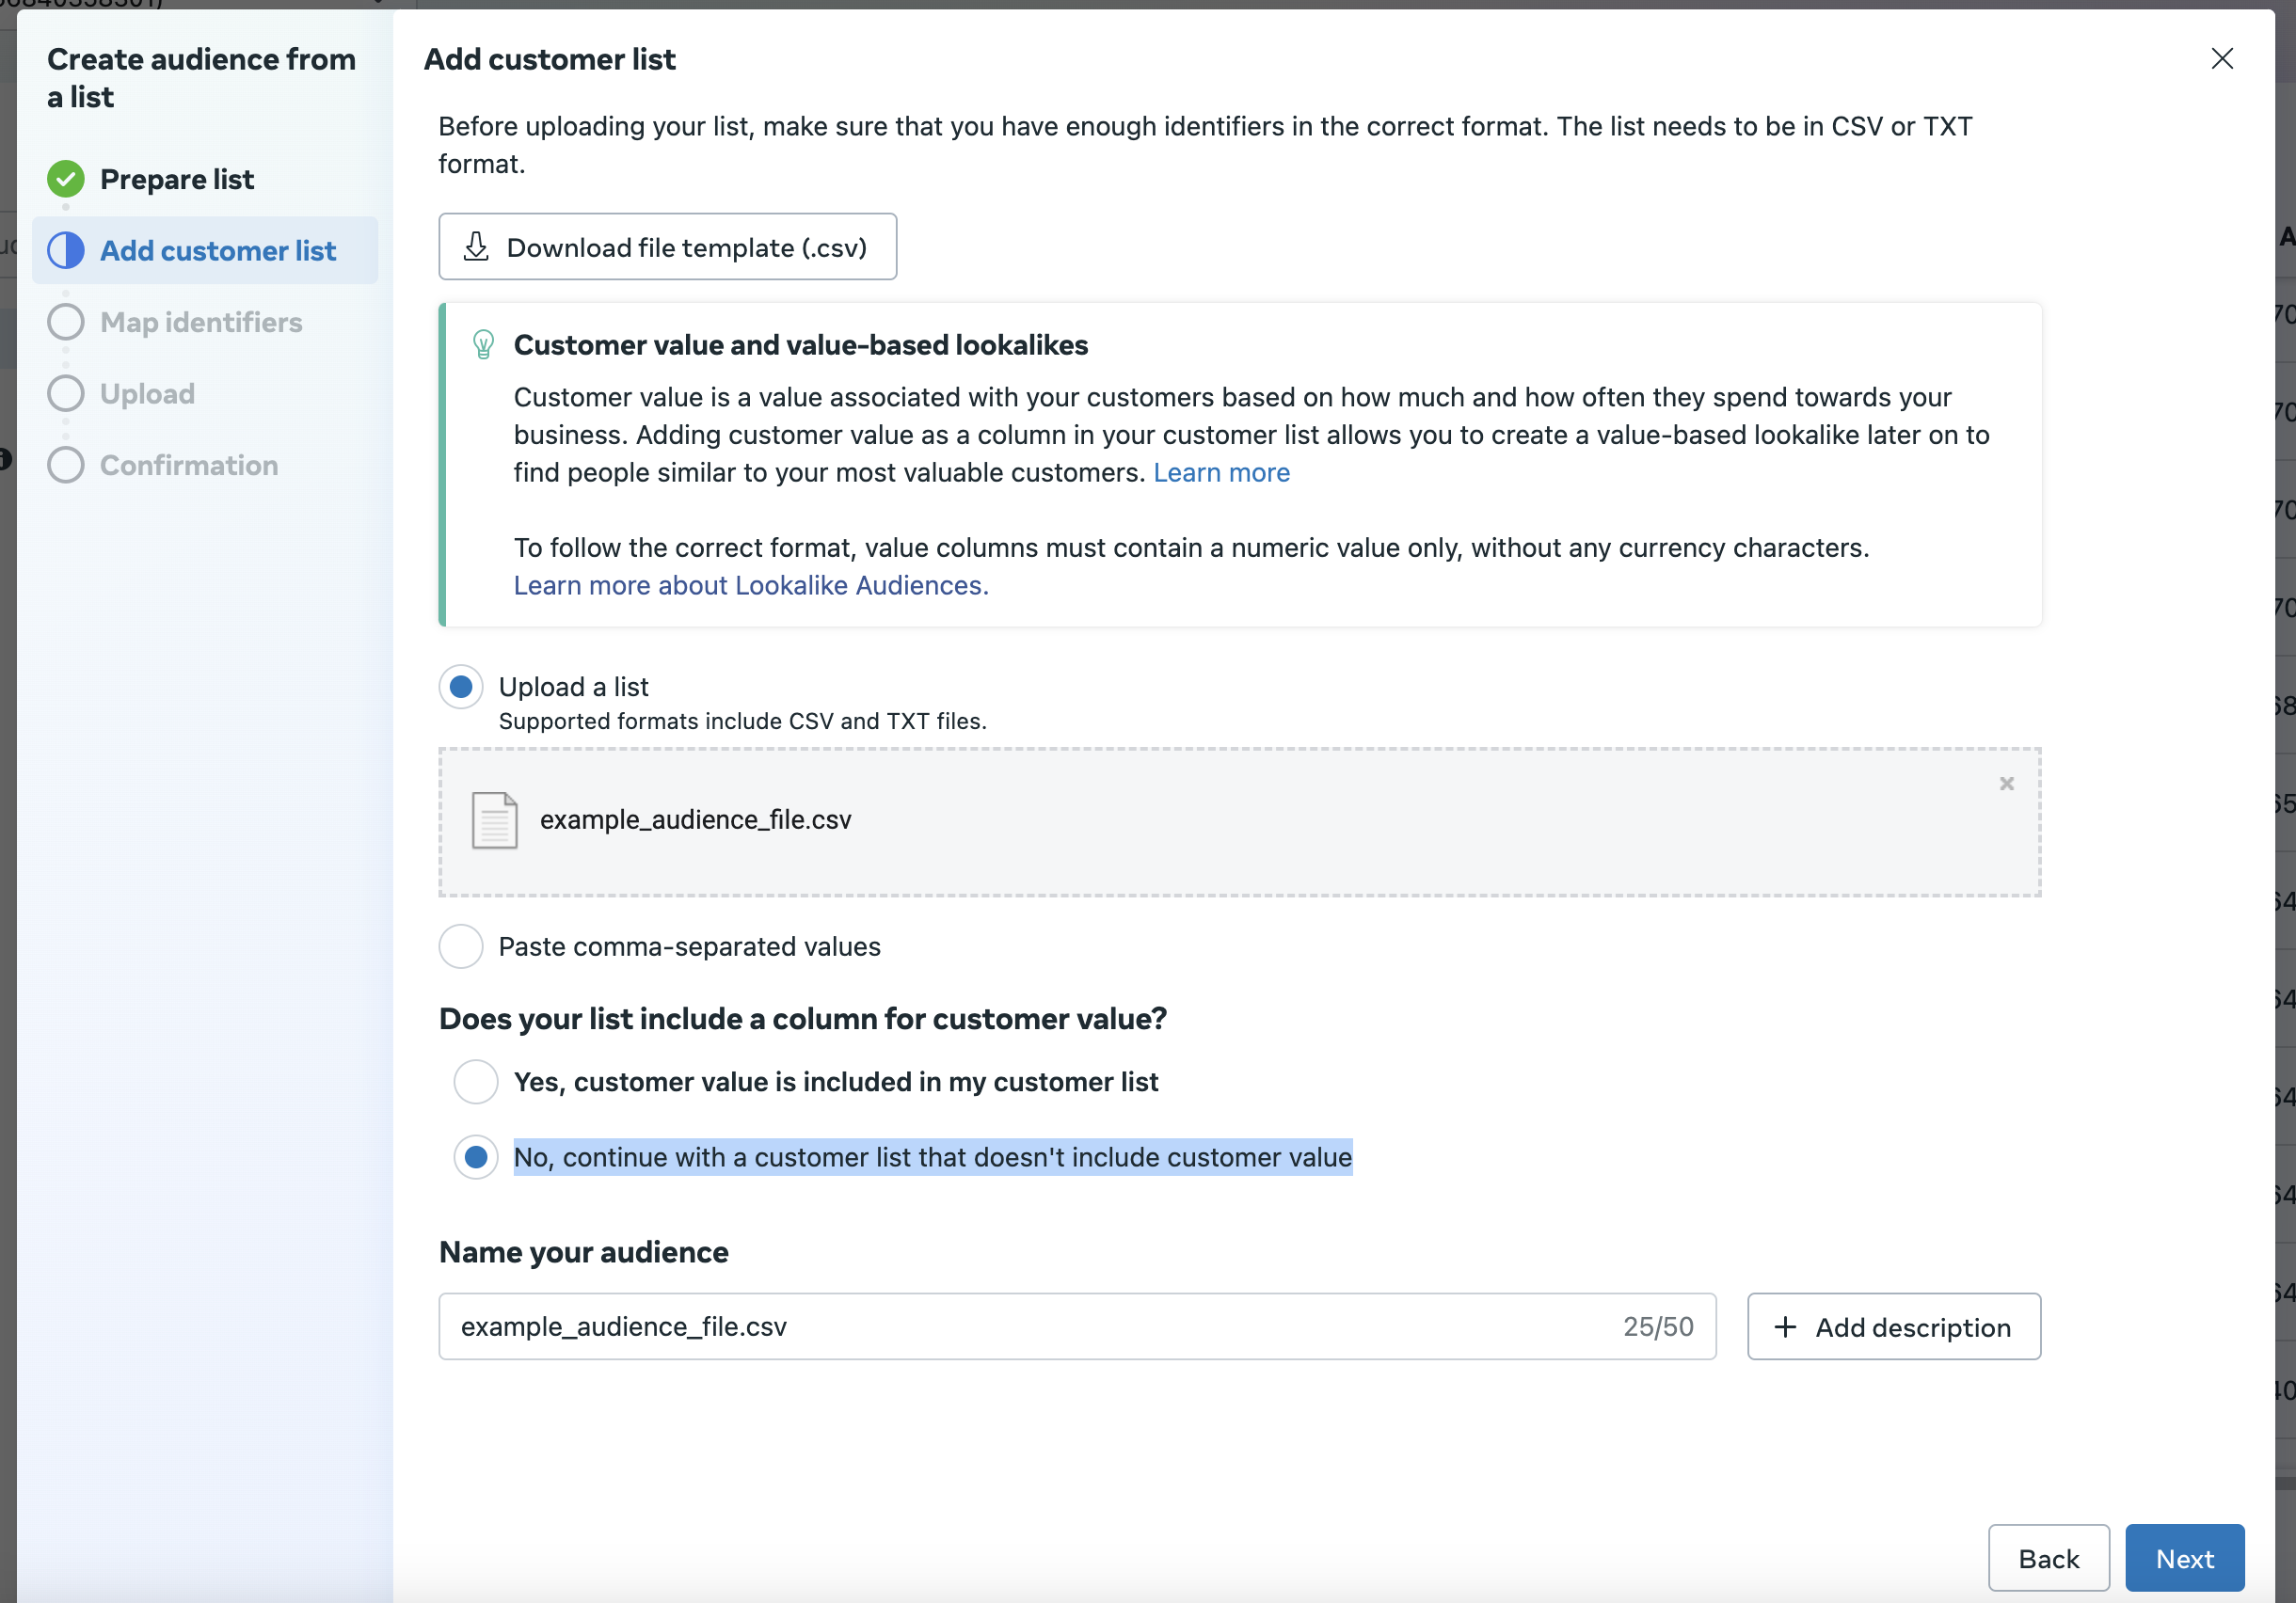
Upload the CSV file you want to use for your new custom audience. Under the Does your list include a column for customer value? setting, make sure to select No, continue with a customer list that doesn’t include customer value.
You can also download the file template CSV and upload it.
Finally, click Import and create to create the audience.
The custom audience you create should have edit permissions. Otherwise, RudderStack will not be able to add or remove users from the list.
How do I check if the custom audience has edit permissions?
To check if the audience has edit permissions enabled, go to the Audiences tab, select your custom audience, and check the Actions dropdown. You should see the Edit option as seen below:
How do I obtain the Ad Account ID?
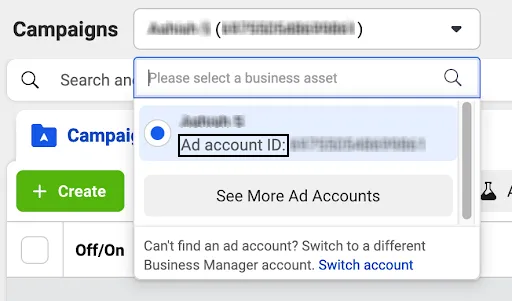
Go to your Facebook Ads Manager account where you can find the Ad Account ID in the account’s drop-down menu:
You can click on See More Ad Accounts if the required Ad account is not visible.
Where can I find the user Access Token for the application?
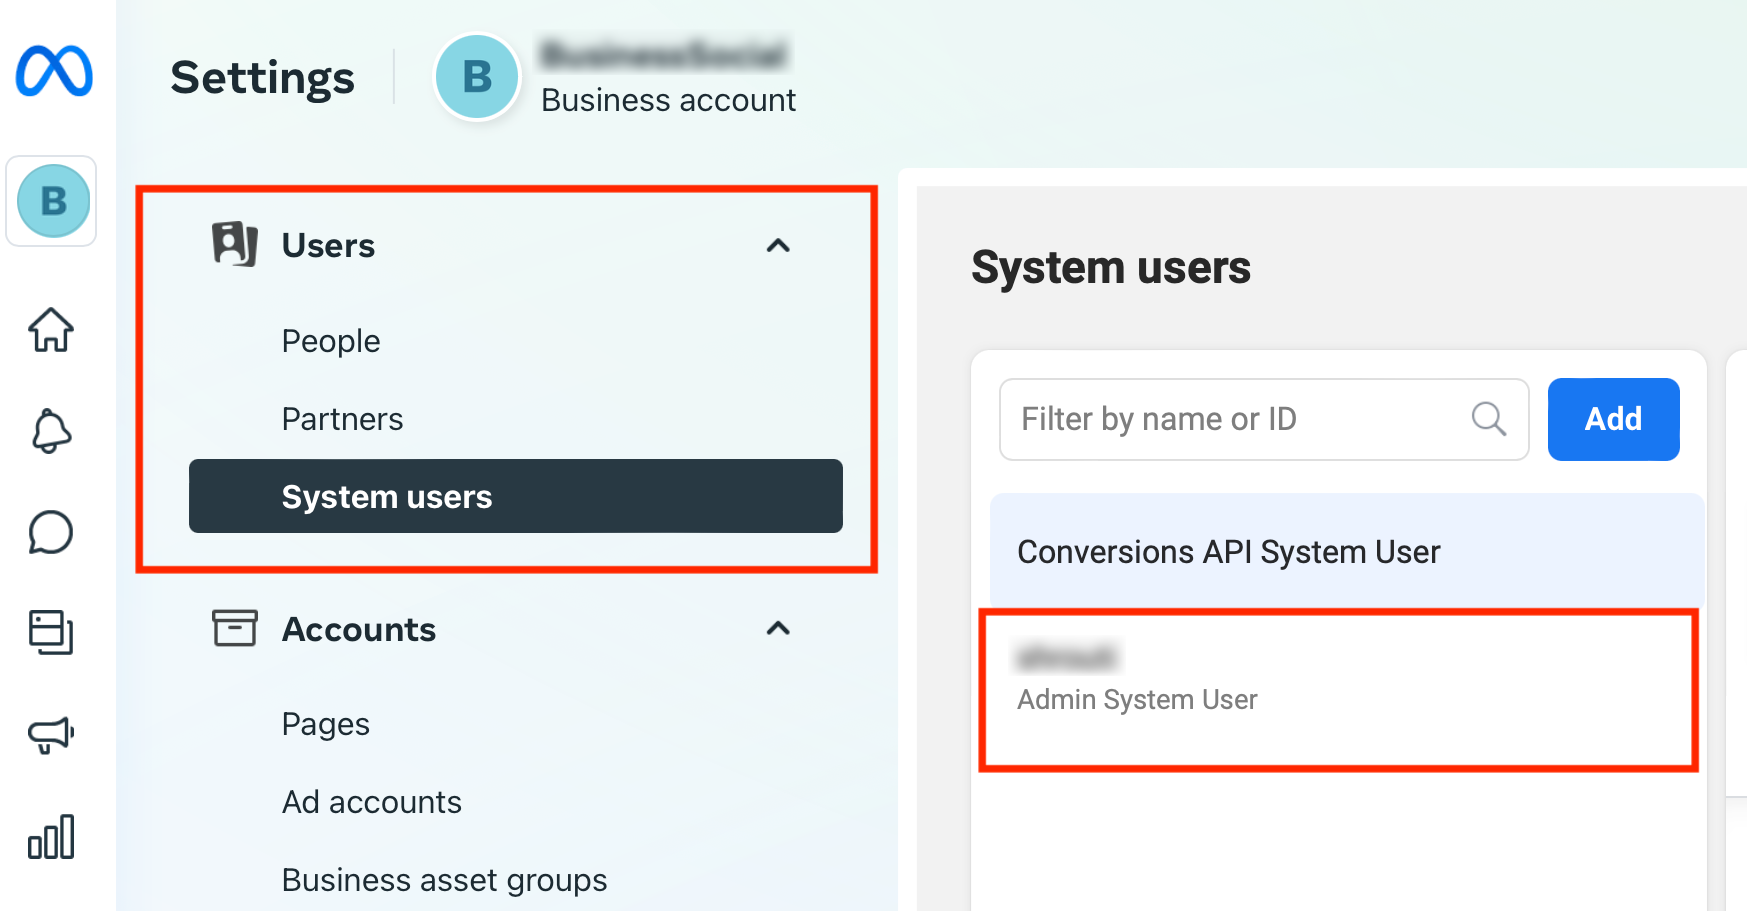
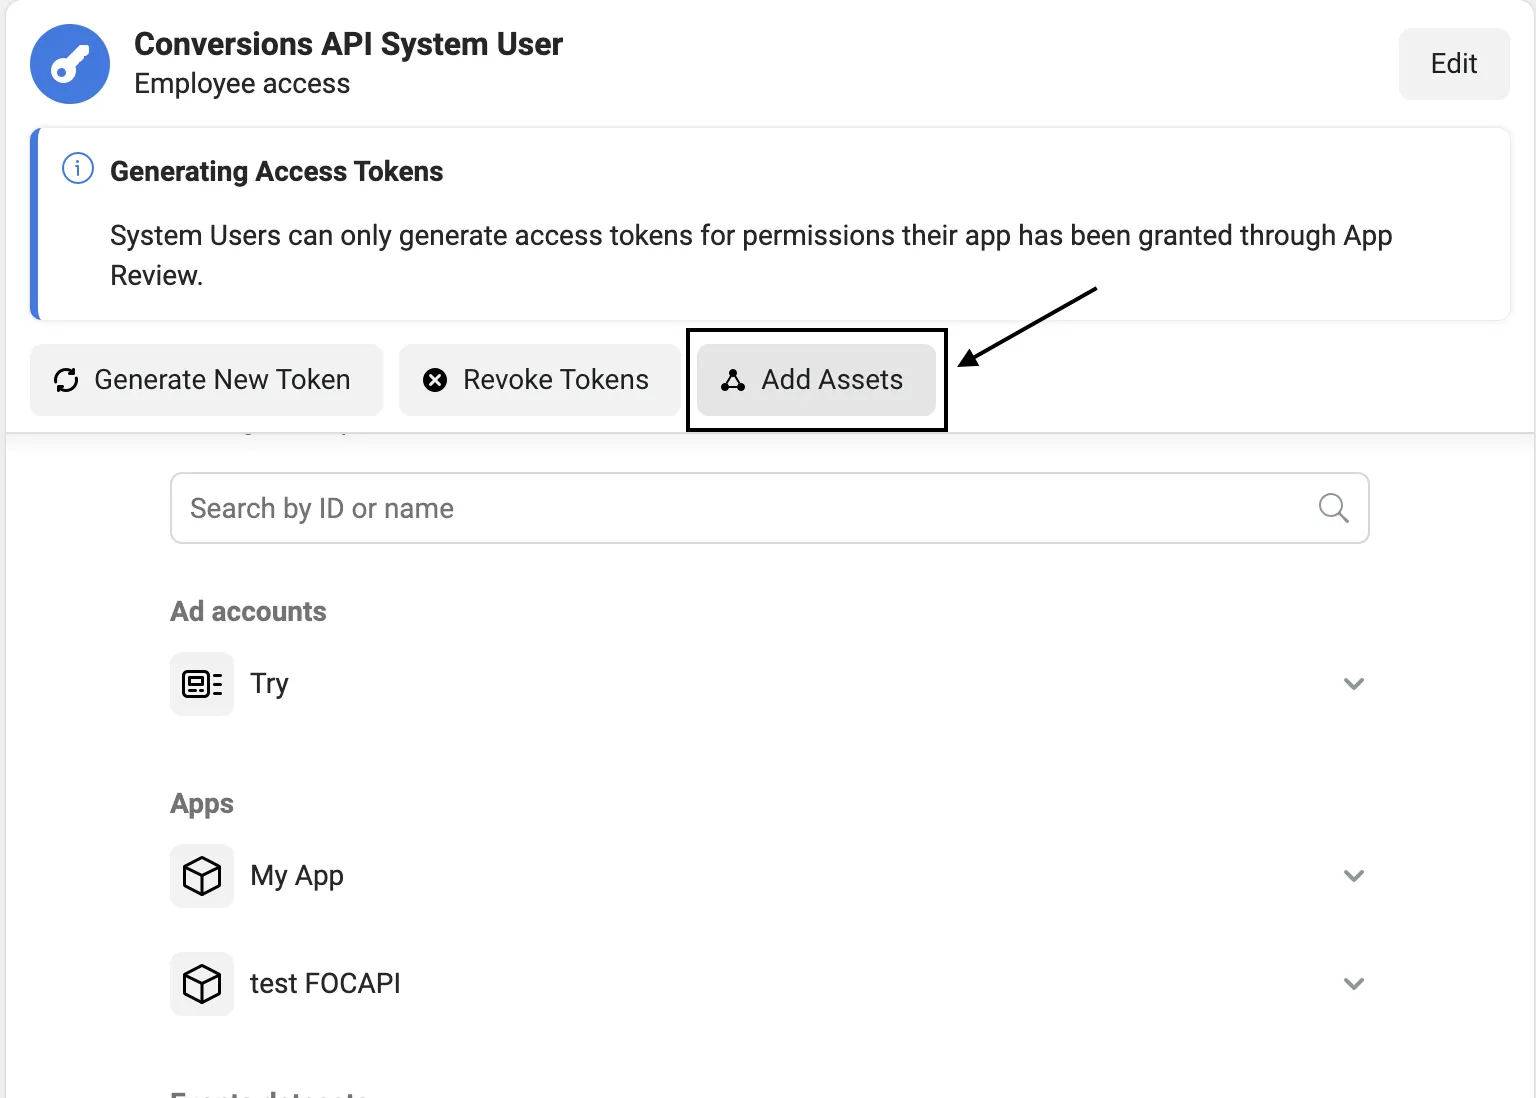
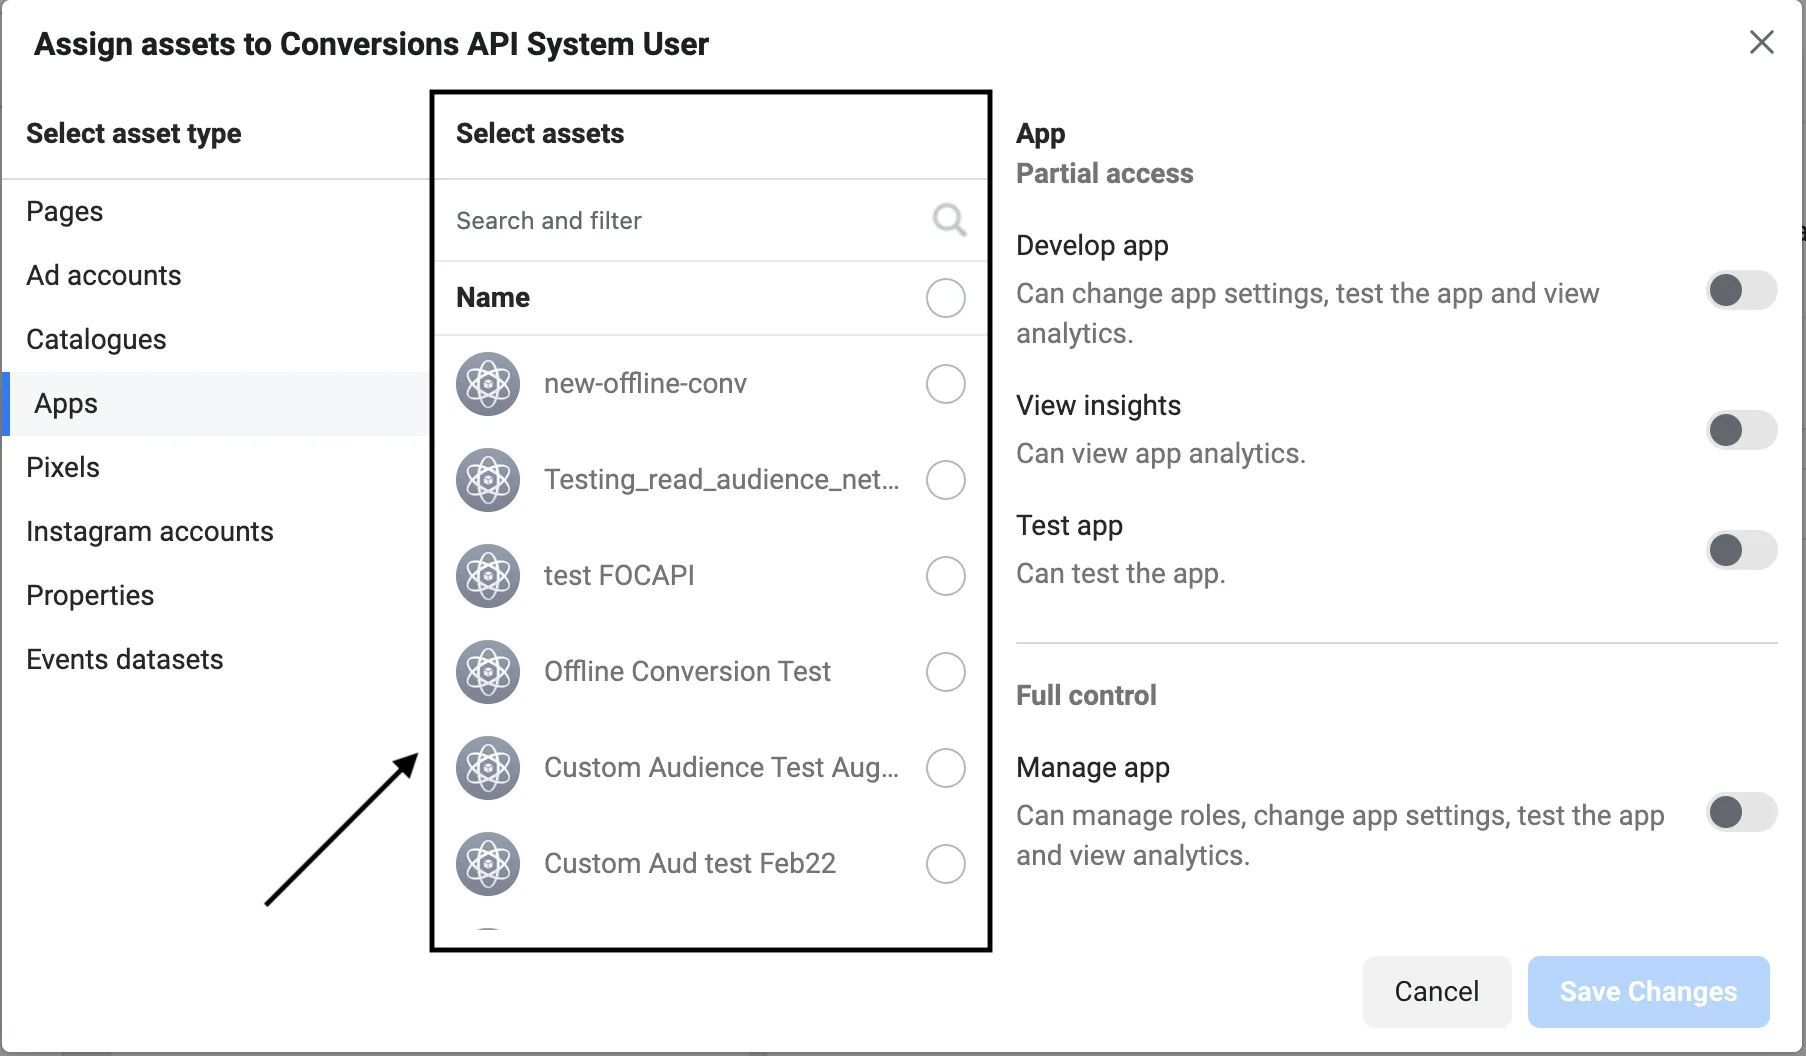
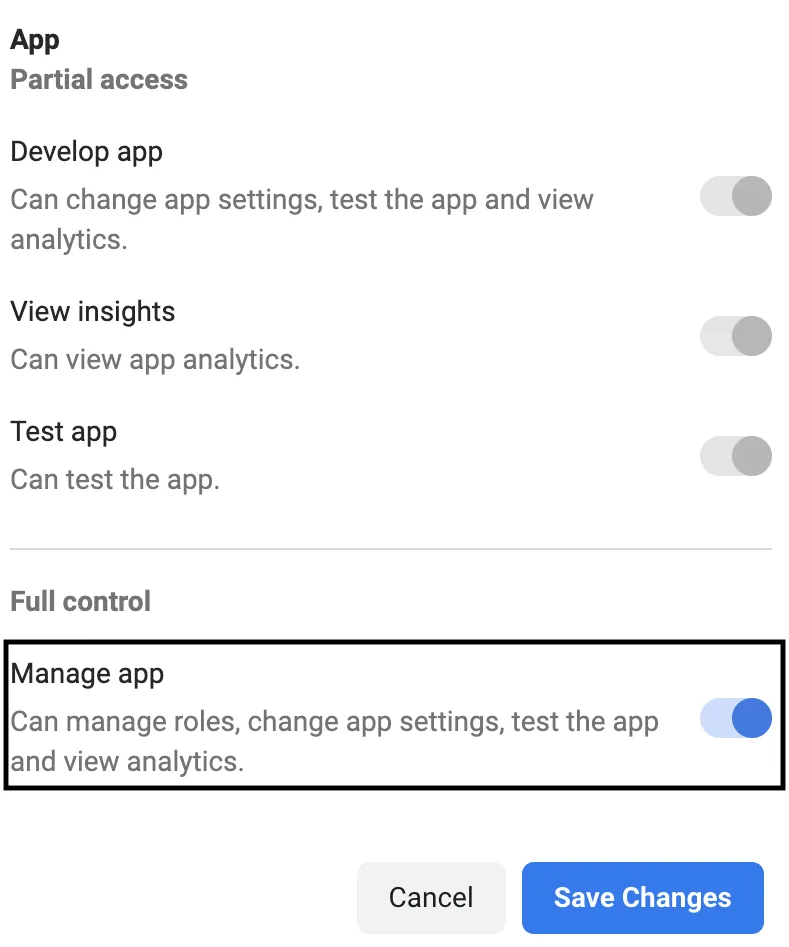
To generate the user access token for your application, you must first add it as a system user asset with manage permissions.
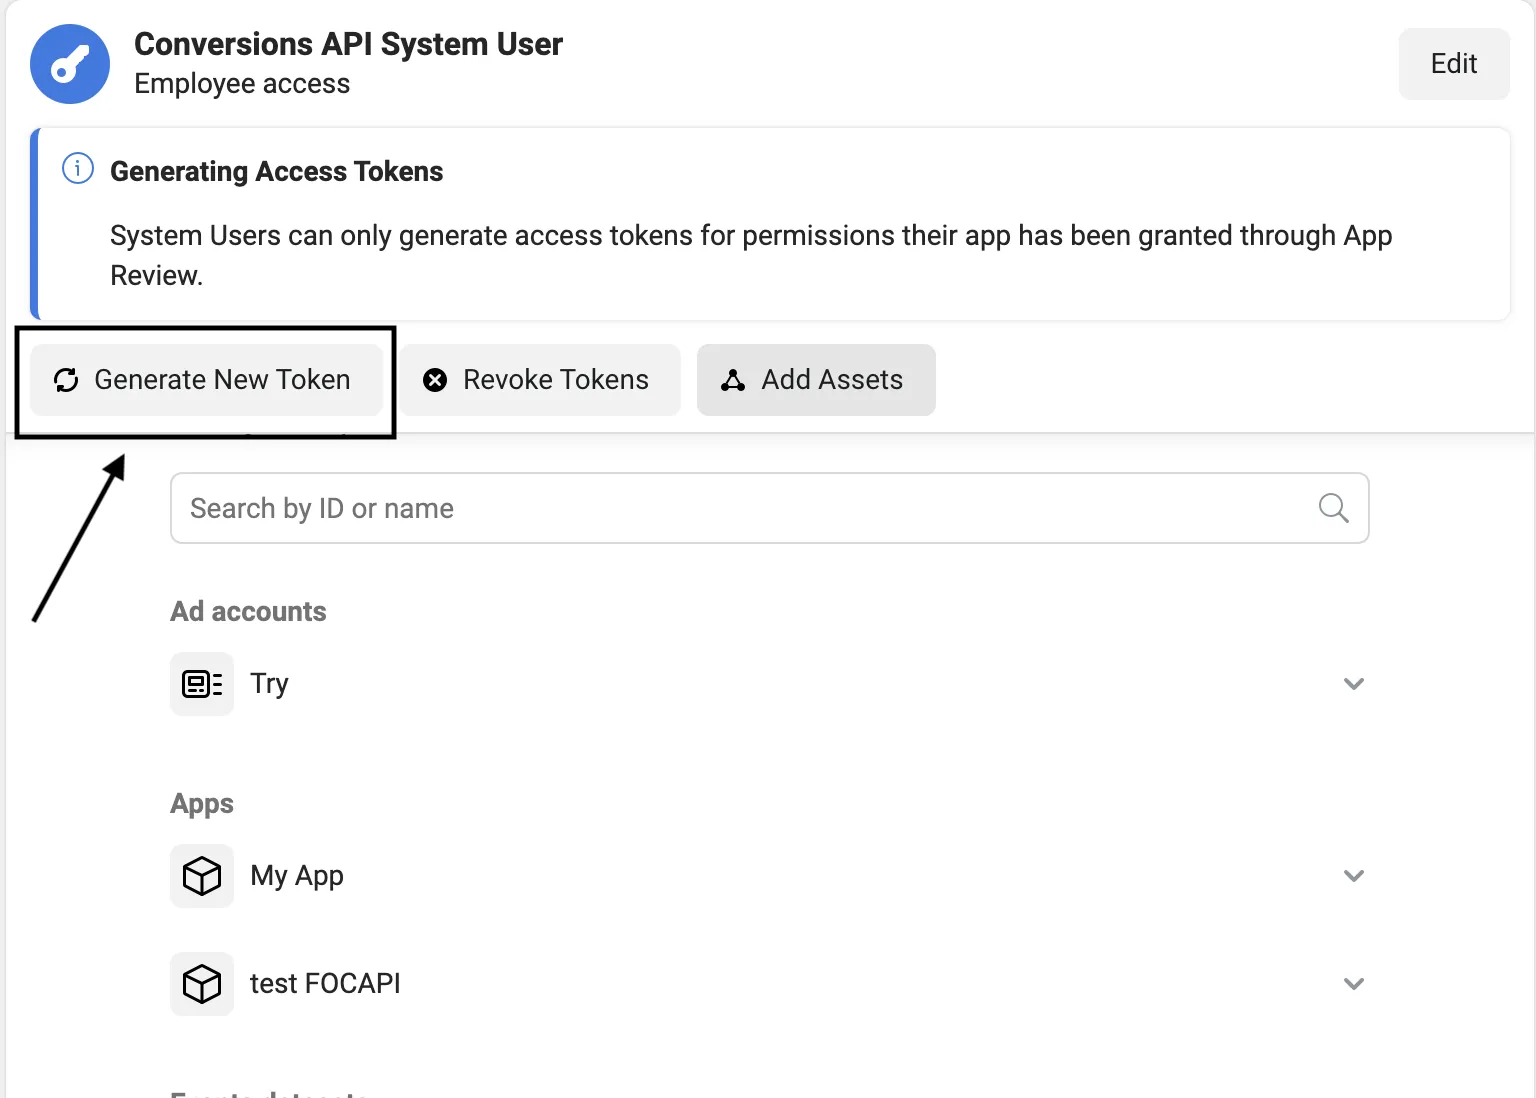
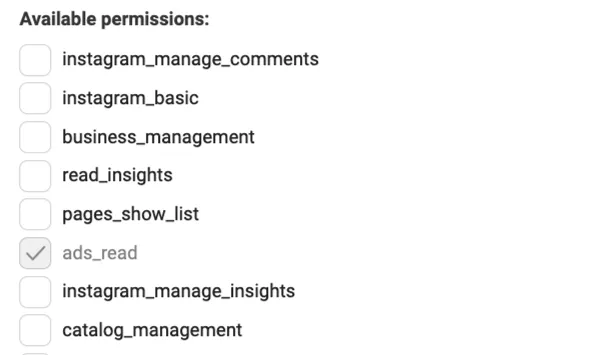
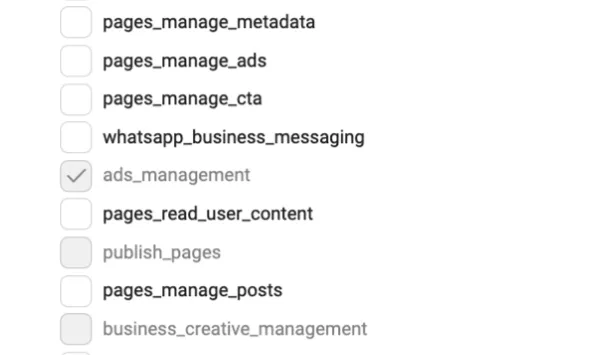
Follow these steps to generate a user access token required to use the Facebook Marketing API:
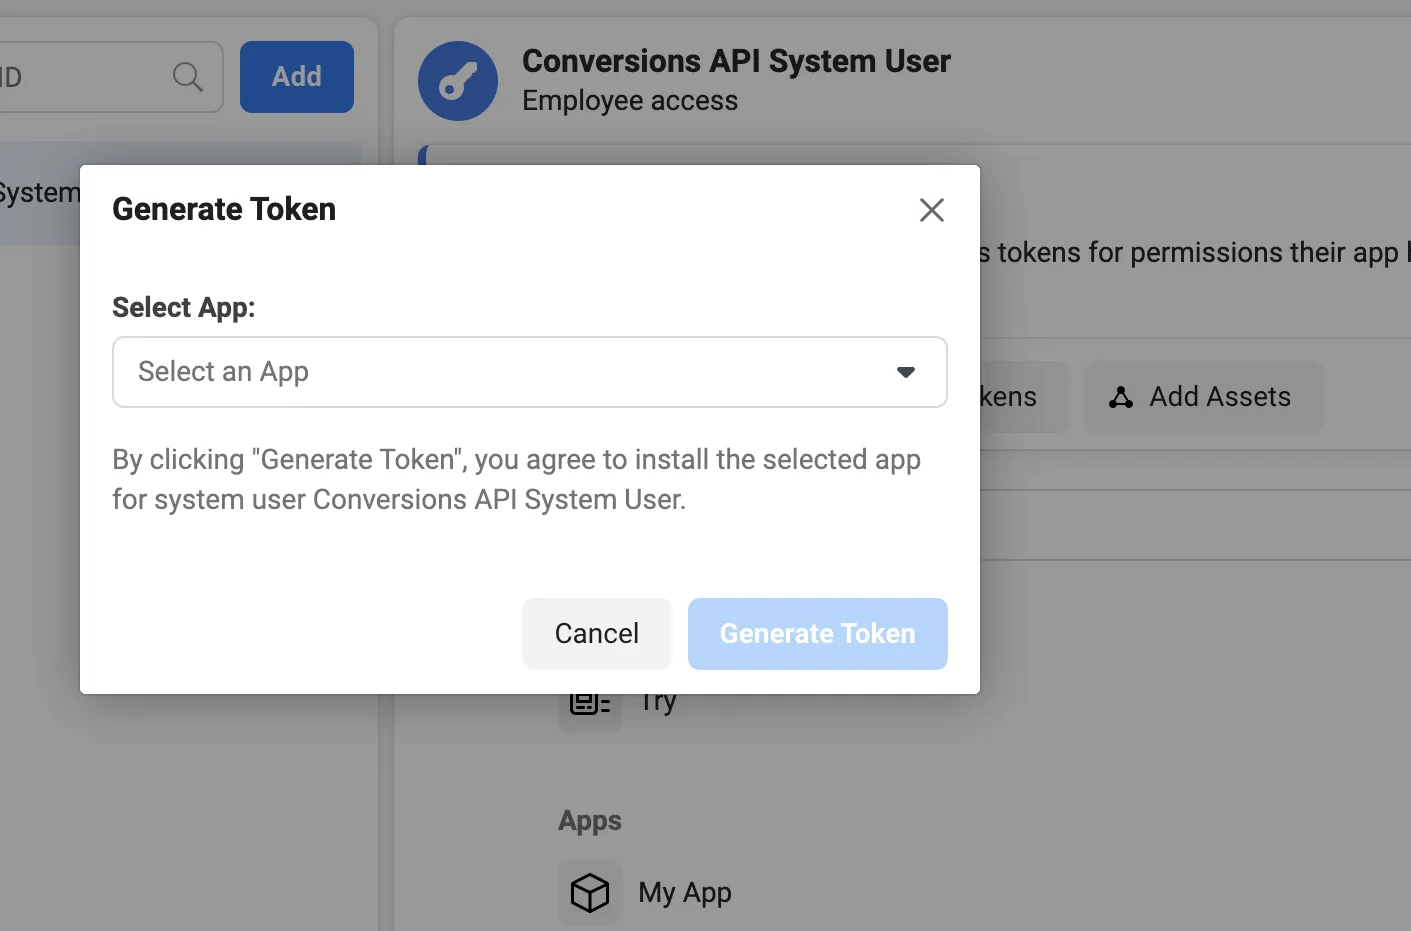
Under the system user, click the Generate New Token button and select the app from the dropdown.
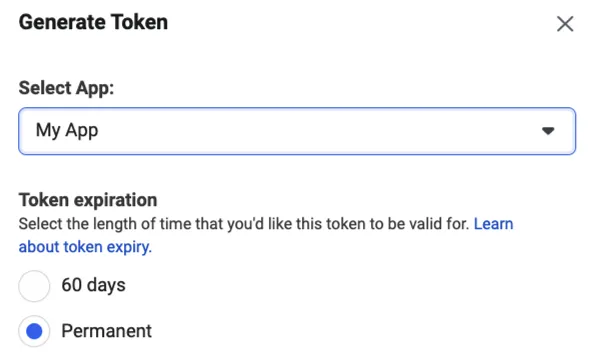
Choose the Token expiration time.
Under Available permissions, select ads_read and ads_management.
Click the Generate Token button and copy the token credentials.
Should I use sessionIdAdd or sessionIdDelete before adding or removing users in Custom Audience?
sessionIdAdd and sessionIdDelete helps you track and use a particular session ID while adding or removing users. This is useful when you are sending data in chunks. If you do not include these fields, Facebook creates a session ID itself.
Why am I seeing the error “Failed to update the custom audience. Facebook responded with error code: 2650?
This error is not explicitly documented by Facebook but is a known API-level limitation. Error 2650 typically occurs when attempting to add users to a custom audience that was created using a different data source.
For example:
Audience originally created via manual file upload
Audience created through another platform or integration
Facebook does not allow mixing data source types within the same custom audience.
Questions? We're here to help.
Join the RudderStack Slack community or email us for support
This site uses cookies to improve your experience while you navigate through the website. Out of
these
cookies, the cookies that are categorized as necessary are stored on your browser as they are as
essential
for the working of basic functionalities of the website. We also use third-party cookies that
help
us
analyze and understand how you use this website. These cookies will be stored in your browser
only
with
your
consent. You also have the option to opt-out of these cookies. But opting out of some of these
cookies
may
have an effect on your browsing experience.
Necessary
Always Enabled
Necessary cookies are absolutely essential for the website to function properly. This
category only includes cookies that ensures basic functionalities and security
features of the website. These cookies do not store any personal information.
This site uses cookies to improve your experience. If you want to
learn more about cookies and why we use them, visit our cookie
policy. We'll assume you're ok with this, but you can opt-out if you wish Cookie Settings.