Connect Reverse ETL Source to Custom Activation
10 minute read
This guide takes you through the steps to connect a Reverse ETL source to your Custom Activation destination and configure field mappings.
You can connect multiple Reverse ETL sources to the Custom Activation destination.
Setup
- Set up and configure your Reverse ETL source.
- In the Overview tab of the source page, click Add destination > Create new destination. You can also select an already-configured destination here.
- From the list of destinations, select Custom Activation and click Continue.
- Configure the following settings to specify how RudderStack connects to your API:
| Setting | Description |
|---|---|
| Name | A unique name that identifies this destination in your workspace. |
Audience delivery API configuration
| Setting | Description |
|---|---|
| Enter base URL | Specify the root URL for your API (for example, https://api.example.com). All requests are sent to this URL. |
| Need authentication support? | Turn this on to authenticate with your API. See Authentication for details. |
| Custom headers | This optional setting lets you add extra key-value headers to every request (for example, Content-Type, X-API-Version). |
Authentication
Except for No authentication, every method below requires Need authentication support? to be on — you then link an account in the account card.
| Method | Description |
|---|---|
| No authentication | Leave Need authentication support? off — use this for public endpoints only |
| Basic Auth | Enter a username and password |
| API Key | Specify a header name (for example, X-API-Key) and API key value |
| Bearer Token | Enter a bearer token value |
| OAuth 2.0 Client Credentials | Machine-to-machine token — available only when this account option is enabled for your workspace |
| OAuth 2.0 Authorization Code | Authorize through your provider in a browser — available only when this account option is enabled for your workspace |
Set up Client Credentials
- Turn on Need authentication support? and choose Client Credentials in the account card.
- Create an account with the account fields, or select an existing one, and link it to the destination.
- To change settings or rotate the secret, open the account from the destination’s account card and select Edit account. The Client secret is masked and optional — leave it blank to keep the stored secret, even when you change other settings. The current token stays in use until it expires, so your new settings take effect at the next token refresh.
If you run a hybrid or self-hosted data plane, upgrade rudder-server to a version that supports Client Credentials accounts before you link one. Cloud data planes need no action.
The first event for a new Client Credentials account triggers the token request. That first attempt fails and retries automatically once the token is issued — no action needed.
Set up Authorization Code
- Turn on Need authentication support? and choose Authorization Code in the account card.
- Copy the Redirect URI shown in the account form and register it in your provider’s app settings. It’s the same URI in all regions, so you only need to register one.
- Create an account with the account fields, complete the authorization in the popup, and link the account to the destination.
- Use Re-authorize when the provider asks you to reconnect. Authorization Code accounts can’t be edited; to change settings, create a new account and relink the destination.
Enter OAuth account fields
Fill in these fields when creating an account. Don’t put client secrets in URLs, Extra token parameters, or Custom headers.
| Field | What to enter |
|---|---|
| Authorization URL (Authorization Code only) | Your provider’s HTTPS authorization endpoint. |
| Token URL | Your provider’s public HTTPS token endpoint, without query parameters. |
| Client ID | The client ID from your provider app. |
| Client secret | The client secret from your provider app. |
| Scopes | Optional. The scopes your provider requires, one per tag — up to 50 tags, with no spaces or commas inside a tag. Pasting a space- or comma-separated list splits it into tags automatically. |
| Scope separator | Choose how the tags are joined in the token request: space (default) or comma, as your provider requires. This doesn’t change how pasted tags are split. |
| Extra token parameters | Optional. A URL-encoded form string of up to 2,000 characters (for example, resource=audiences&tenant=example), not JSON. Use only extra fields your provider requires — you can’t set standard OAuth parameters such as grant_type, scope, client_id, client_secret, redirect_uri, refresh_token, response_type, or state. A reserved key makes the token request fail and aborts delivery. |
| Token authentication method | client_secret_basic (default) sends the client ID and secret in the Authorization header; client_secret_post sends them in the token request body. Check your provider’s requirements. |
OAuth requirements
Your provider’s token endpoint must accept a standard OAuth 2.0 token request and return JSON with an access_token. RudderStack sends it to your API as an Authorization: Bearer header and refreshes it automatically when it expires. Authorization Code accounts without a refresh token can’t be refreshed; use Re-authorize when delivery stops.
Endpoint configurations
Configure how RudderStack adds, updates, and removes audience members:
| Setting | When it runs |
|---|---|
| Add record | A user enters the audience |
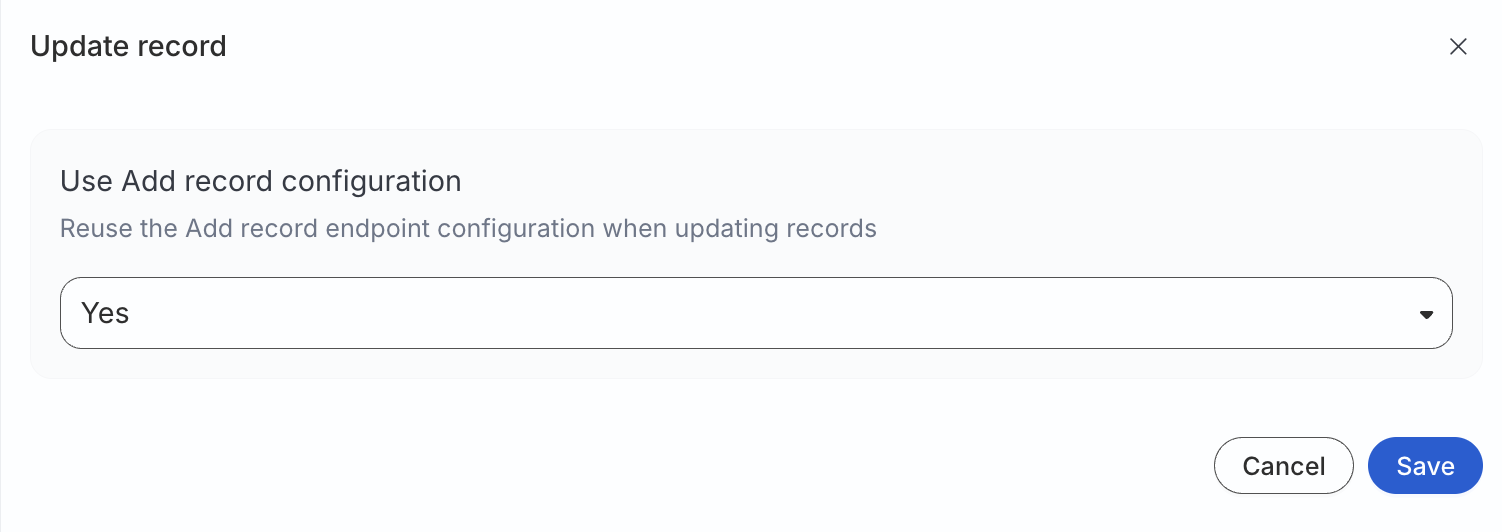
| Update record | A member’s mapped attributes change.
|
| Remove record | A user leaves the audience |
Action-specific settings
Each action’s (add/update/remove record) settings follow the same structure.
HTTP method and endpoint path
| Setting | Description |
|---|---|
| HTTP method | POST, PUT, PATCH, GET, or DELETE for this action. |
| Endpoint path URL | Path appended to the base URL. It supports simple interpolation with connection values, for example /audiences/{{connection.audienceId}}/members. |
The resolved URL is the base URL plus the evaluated endpoint path.
Batch size
| Setting | Description | Default value |
|---|---|---|
| Batch size | Maximum records per HTTP request for this action. Range 1–5000 | 5000 |
Request body template
Define the JSON body sent to your API. The template follows JSONata syntax.
Templates are validated when you save the destination. An invalid syntax is rejected with an error that identifies the action and issue.
A sample request body template is shown below:
{
  "audience_id": $$.connection.audienceId,
  "elements": [$$.records.{
    "userIds": [
      {"idType": "SHA256_EMAIL", "idValue": sha256_email},
      {"idType": "GOOGLE_AID", "idValue": google_aid}
    ],
    "firstName": first_name,
    "lastName": last_name,
    "nested": {
      "org": "static_value"
    }
  }]
}
Global objects available at runtime
| Object | Description |
|---|---|
$$.records | Array of records in the current batch (after field processing and hashing) |
$$.connection | Sync connection metadata, including audienceId |
Allowed operations
- Object and array construction
- Path expressions (
$$.records,$$.connection.audienceId) - Iteration with
{ ... }— for example,$$.records.{ "email": email, "user_id": user_id } - String, number, and boolean literals
Number()casting where needed, for example,$number($$.connection.audienceId)
Template example
A template for generic batched members is shown below:
{
   "audienceId": $$.connection.audienceId,
   "users": [$$.records.{
    "email": email,
     "user_id": user_id
  }]
}
Template fields
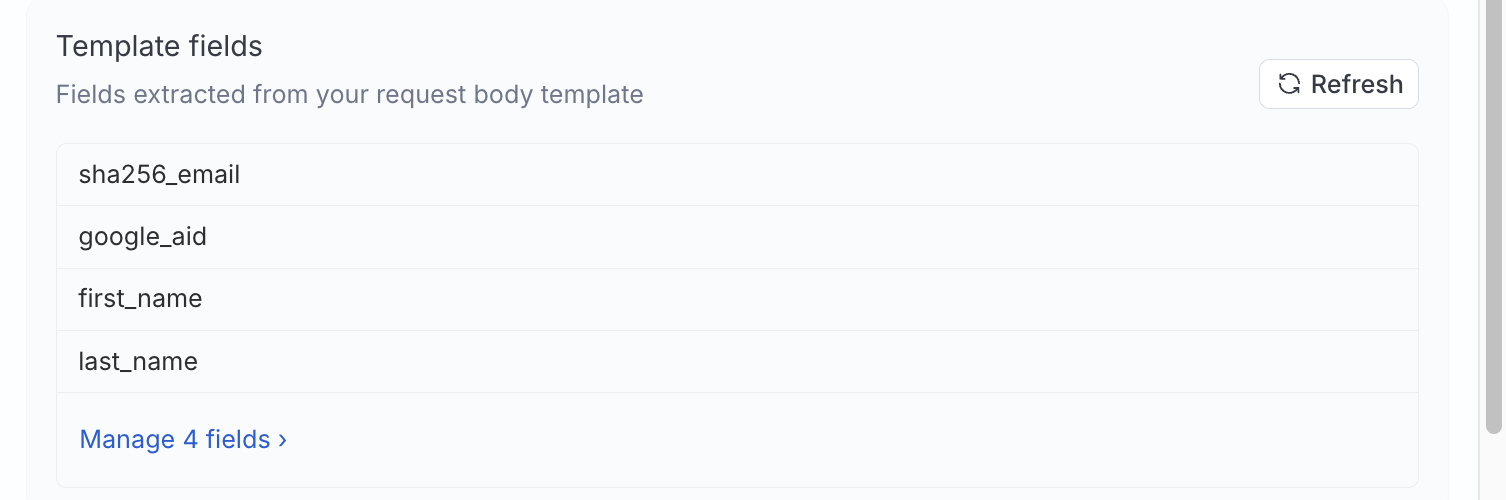
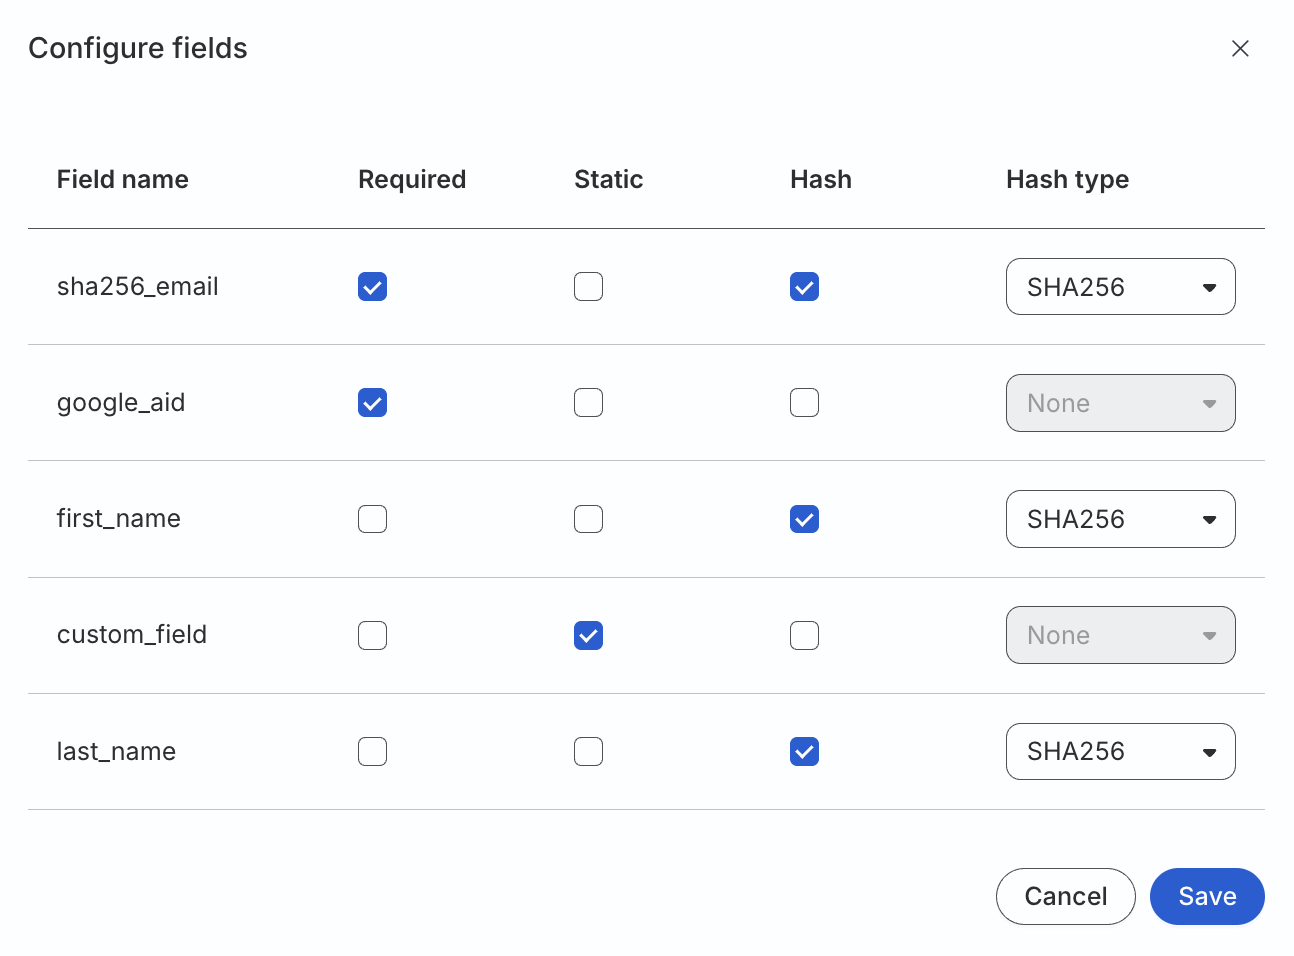
After you define a template, RudderStack extracts field names referenced under $$.records and lists them under Template fields. Click Refresh to re-scan the template, or Manage fields to configure each field.
| Field setting | Description |
|---|---|
| Name | Destination-side field name used in the template |
| Required | If enabled, you must map the field to a warehouse column in the Map identifiers section |
| Static | If enabled, the value is a literal you provide in the Map identifiers section |
| Hash | Hash algorithm applied before the template runs. You can choose between None, SHA256, SHA512, or MD5. |
If you rename or remove template fields after syncs exist, make sure to update mappings on each affected sync manually.
See Troubleshooting for more information.
Request preview
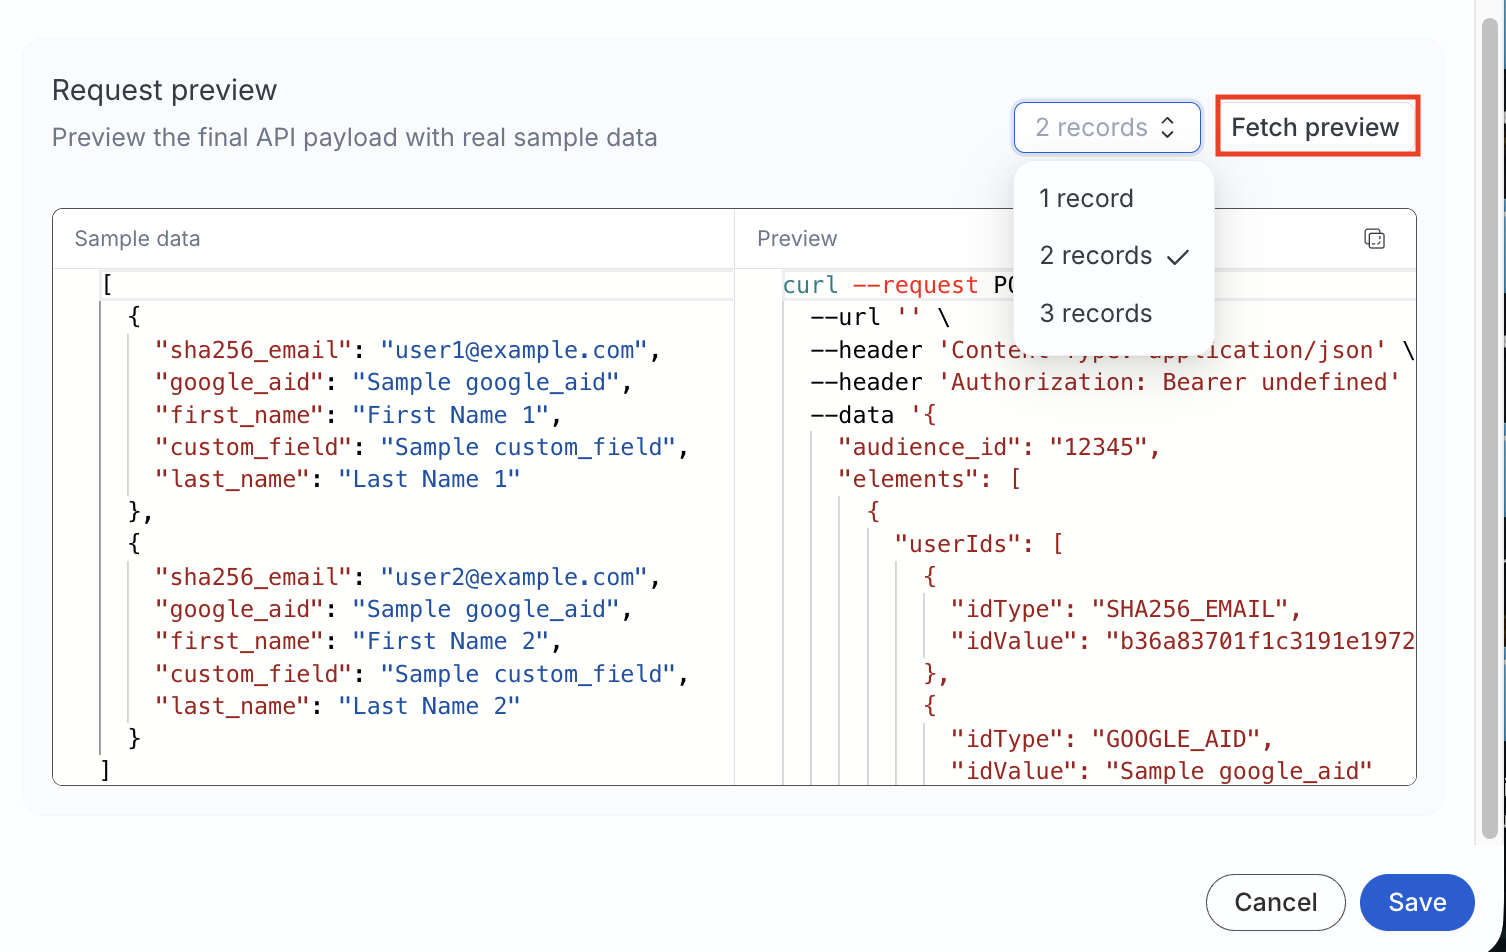
Use Fetch preview to build a sample HTTP request from test records.
Preview doesn’t call your API or fetch an OAuth token. It renders theAuthorizationheader with a masked value, so you can check the method, URL, and body without exposing a credential.
- Choose how many sample records to include (for example, 1 record).
- Edit sample data if needed.
- Click Fetch preview to see the resolved method, URL, headers, and JSON body.
- Proceed to configure the mapping settings.
Mapping settings
This section lists the settings to correctly map data from your Reverse ETL source to the Custom Activation destination.
Specify target audience
Create the audience on your platform before entering these values. RudderStack does not create audiences at the destination for this integration.
| Setting | Description |
|---|---|
| Audience name | Specify the name of the audience to sync data to |
| Audience ID | Specify the ID of the list on your platform |
Sync mode
RudderStack supports only Mirror mode for this integration.
On the first run, the full membership is sent to the platform. Later runs send only inserts, updates, and deletes.
Map identifiers
Map warehouse columns to each template field defined in the Custom Activation destination.
You can map two types of fields:
- Warehouse fields: Dropdown of warehouse columns
- Static fields: Specify literal values for fields configured as Static in the destination settings
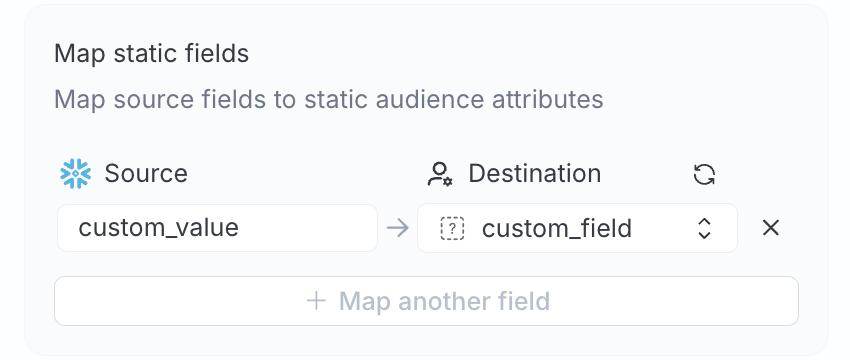
Required destination fields appear with an asterisk (*) during mapping.
Advanced settings
| Setting | Description |
|---|---|
| Automatically hash PII data | When set to Yes, RudderStack applies each field’s configured hash algorithm to unhashed warehouse data. When set to No, data is treated as already hashed and hashing is skipped — even if a field has a hash type configured. See Data hashing for more information. |
Sync settings
RudderStack determines how and when to run a sync based on the sync schedule you set for your Reverse ETL connection.
| Schedule type | Description |
|---|---|
| Basic | Run syncs at a set interval, optionally starting from a specified time (UTC). If a start time is set, syncs run from that time until the end of that day. |
| CRON | Run syncs based on a specified CRON expression (in UTC). |
| Manual | Run syncs manually. |
Sync observability settings
| Setting | Description | ||||||
|---|---|---|---|---|---|---|---|
| Retain sync logs | This setting is toggled on by default and instructs RudderStack to store the sync logs in your warehouse. You can also configure the below settings:
| ||||||
| Retry failed records | This setting is toggled on by default and causes RudderStack to continually retry sending the failed records. | ||||||
| Retain and show failures | This setting is toggled off by default. Turn it on to have RudderStack write the error recorded for every failed record to a failed records table in your warehouse and show it in the sync’s failed records view. It applies from the next sync and can take up to a minute to reach your data plane.
|
Storing sync logs, snapshot tables, and failed records may incur additional warehouse costs.
Data hashing
The Automatically hash PII data setting lets you hash your user data before sending it to your API.
- Configure the setting to Yes if your incoming data is not pre-hashed
- Configure this setting to No if your data is already hashed
Incorrect configuration of the Automatically hash PII data setting will result in failures.
- If the Automatically hash PII data setting is configured to Yes and your data is pre-hashed, the event will fail.
- If the Automatically hash PII data setting is configured to No and your data is not pre-hashed, the event will fail.
Such events are rejected with a clear error message, for example:
Hashing is disabled but the value for field EMAIL appears to be unhashed. Either enable hashing or send pre-hashed data.You will also see errors in the Events tab for cases that were previously marked as successful but resulted in no matches, helping you identify and fix data quality or configuration issues.
Troubleshooting
| Issue | Resolution |
|---|---|
| Template is rejected on save | The syntax is outside the allowlisted operations — the error message names the action and position |
| Unexpected payload shape | Use the Fetch preview with the same sample records and action type (INSERT, UPDATE, or DELETE) to verify the payload shape |
| OAuth delivery fails | For Client Credentials, credentials aren’t checked when you save the account — they’re first used at delivery. Check the token URL, client ID, secret, scopes, and token authentication method. Delivery aborts when your provider rejects the credentials (invalid_grant or invalid_client), returns 401, or when Extra token parameters contains a reserved key; other provider errors are retried. After five consecutive token errors, the last error is returned for about five minutes — editing the account doesn’t reset this, so allow a few minutes after a fix before delivery resumes. |
| Authorization popup shows an error | Make sure the redirect URI registered with your provider exactly matches the one in the account form. |
400 errors for all records | Required fields are unmapped or the warehouse values are empty |
| Wrong audience on API side | Verify the Audience ID and $$.connection.audienceId while configuring the template |
| Double-hashed identifiers | Automatically hash PII data setting is set to Yes while your incoming warehouse data is pre-hashed — set this setting to No |
| Sync fails after destination edit | Update sync mappings if destination field names or required flags have changed. See Template fields for more information |
