Create a RudderStack IAM role for AWS-based destinations
Create a RudderStack IAM role for authenticating AWS-based destinations.
3 minute read
This guide is applicable only for RudderStack dashboard users. As the access keys-based authentication method is deprecated, RudderStack recommends setting up a RudderStack IAM role for authenticating your AWS destinations.
Note that this guide is not applicable for the following users:
- RudderStack Open Source: You can use the access keys-based method to authenticate your AWS destinations.
- Customers with on-premise RudderStack deployments. Contact the RudderStack team to set up the IAM role.
This guide contains the steps to create an IAM role for authenticating RudderStack while setting up the following AWS destinations:
Cloud destinations
Warehouse destinations
See the RudderStack IAM Role for Redshift guide to create an IAM role for authenticating RudderStack while setting up the Redshift destination.
Create RudderStack IAM role
To set up a new RudderStack IAM role, follow these steps:
- Sign in to your AWS Management Console and open the IAM console.
- In the left navigation pane, click Roles followed by Create role.
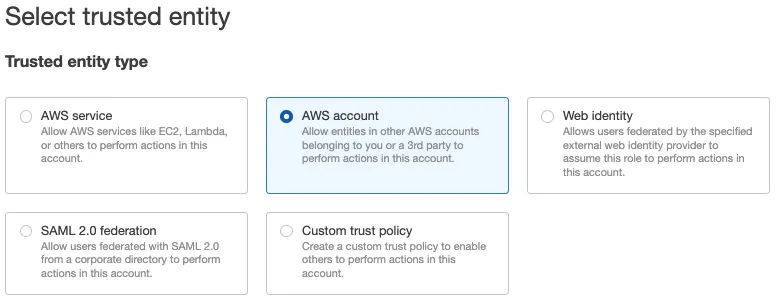
- Under Trusted entity type, select AWS account:
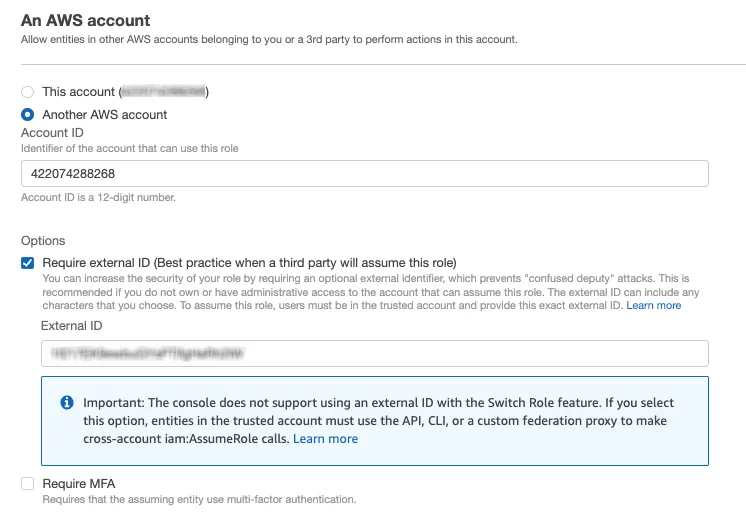
- Select Another AWS account and under Account ID, enter
422074288268, the account ID associated with RudderStack. - Under Options check Require external ID and enter your workspace ID as the External ID.
RudderStack currently does not support MFA setting that restricts the role only to the users who sign in using multi-factor authentication (MFA). Hence, do not check the Require MFA option.
- Review all settings carefully and click Next to proceed.
- Select your destination-specific permission policies applicable for the RudderStack IAM role. To create a new policy from scratch, click Create policy. For more information, refer to the Creating IAM policies guide.
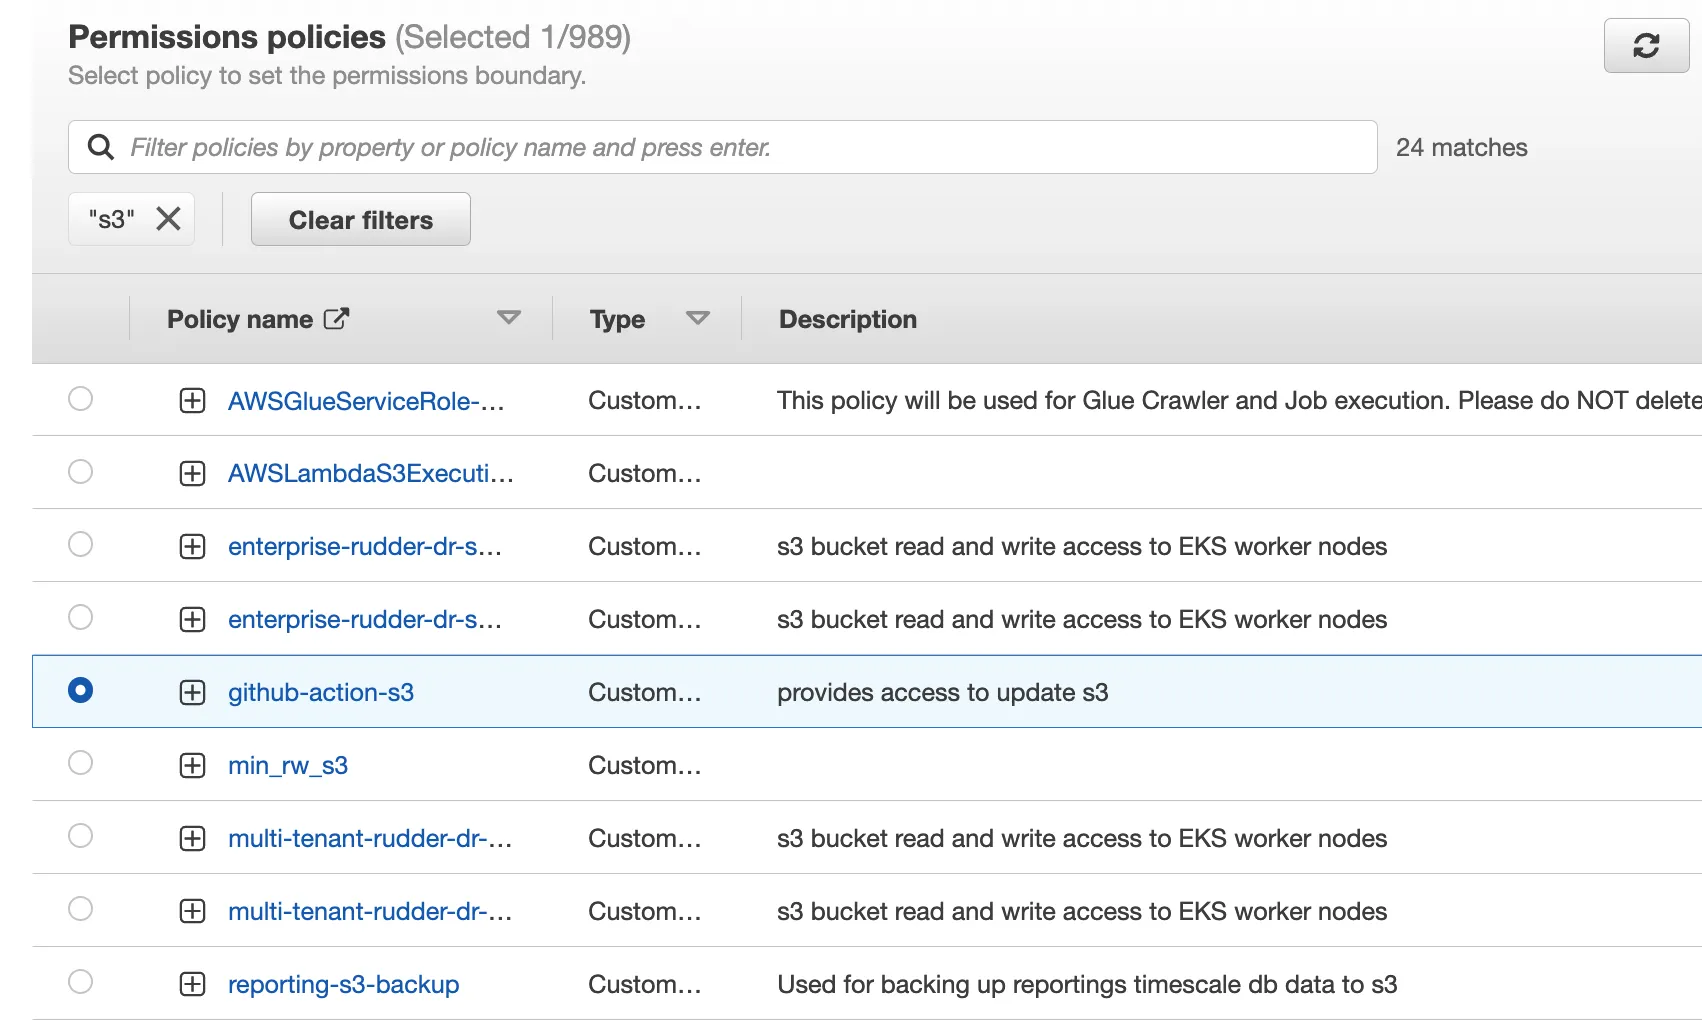
- Optional: You can also set a permissions boundary. Expand the Set permissions boundary section, choose Use a permissions boundary to control the maximum role permissions, and select the policy to use for the permissions boundary. An example is shown below:
- Review all settings carefully and click Next to proceed.
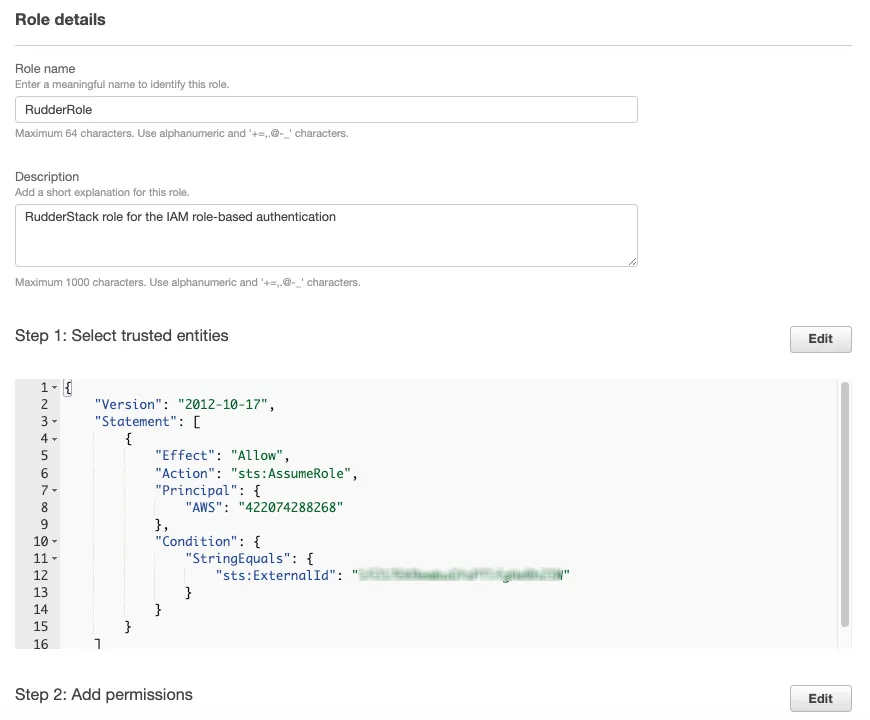
- Enter a unique name for your role. Note that this name cannot be distinguished by case. For example, you cannot create a role named
RUDDERSTACKifrudderstackalready exists.
You cannot edit the name of the role after it has been created.
- Optional: Enter the description for this role.
- To edit the use case or permissions for the role, click the Edit button next to the Step 1: Select trusted entities or Step 2: Add permissions, respectively.
- Optional: You can also add metadata to the role by attaching tags as key-value pairs. For more information, refer to the Tagging IAM resources guide.
- Click Create role to complete the setup.
- Finally, note the ARN of this newly created role.
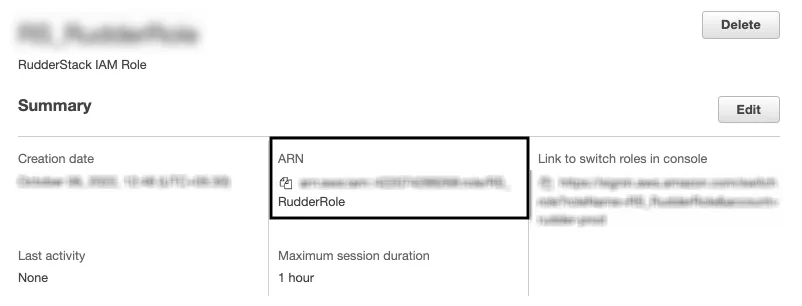
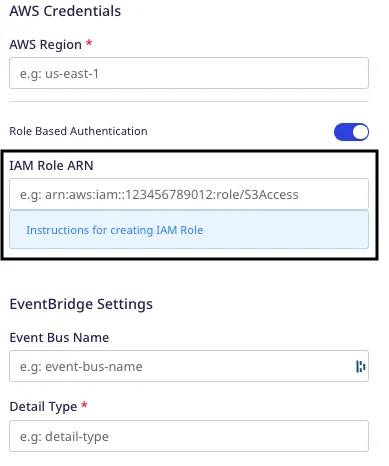
This ARN is required while configuring your AWS destination when you enable the Role-based Authentication setting:
Destination-specific policy permissions
Refer to the following sections for the destination-specific policy permissions:
