Set Up Facebook Custom Audience

Send your event data from RudderStack to Facebook Custom Audience.

RudderStack lets you send your customer events for creating custom audiences by leveraging the Facebook Marketing API.

Find the open source transformer code for this destination in the GitHub repository.

info
The user information in your events may include email, phone number, gender, etc. For more information on the supported fields, refer to the Facebook documentation.

Getting started

RudderStack supports sending event data to Facebook Custom Audience via the following connection modes:

Connection ModeWebMobileServer
Device mode---
Cloud mode--Supported

Once you have confirmed that the source platform supports sending events to Facebook Custom Audience, follow these steps:

  1. From your RudderStack dashboard, add the source. Then, from the list of destinations, select Facebook Custom Audience.
  2. Assign a name to your destination and click Continue.

Connection settings

To add Custom Audience as a destination in RudderStack, you will need to configure the following settings:

  • Access Token: Enter the access token of your business application set up for accessing the Facebook Marketing API. For more information on obtaining this token, refer to the FAQ section.
  • Audience ID: Enter the custom Audience ID to which the audiences should be added/removed. Refer to the FAQ section for more information.
  • Schema Fields Choose your schema fields (at least one) from the available options. This is a mandatory field. RudderStack expects the user events to consist of every schema field that has been chosen in the dashboard.
warning
RudderStack ignores any user information which does not adhere to the schema fields specified in the dashboard settings.
  • Enable Hashing: Enabled by default, this option lets RudderStack hash encode the user data irrespective of the schema type chosen in the RudderStack dashboard. Facebook expects the user data to be hash encoded using SHA256.
  • Is The Data Raw: As RudderStack does not support combinational schema fields, this field is ignored if not enabled.
  • Audience Batch Size: Specify the data size you want RudderStack to send to Facebook in a single event. For example, if you want to send a total 1000 user records to Facebook and set the batch size to 50, then RudderStack will send 20 events to Facebook with 50 user records in each event.
warning
It is highly recommended not to exceed the batch size of 100.
  • Disable Formatting: Enable this option to not format the user data before sending it to Custom Audience. Facebook has fixed data formats for all the allowed schema fields. Refer to the Explicit formatting feature section for more information.
  • Type: Specify the type of the custom audience.
  • Sub Type: Specify the sub-type of the custom audience.

audiencelist event structure

warning
Facebook Custom Audience destination supports only audiencelist calls.

The audiencelist event expects the add and remove arrays containing the user data objects. These arrays are wrapped inside the listData object. The custom audience must have edit permissions to let RudderStack add or remove users from it.

  • add: User information that needs to be added to Custom Audience.
  • remove: User information that needs to be deleted from Custom Audience.

Schema fields mapping

The following table details the mapping of the schema fields specified in the RudderStack dashboard and the Facebook Marketing API.

Dashboard Field NameMarketing API Schema Field (RudderStack Supported Field Name)Field Guidelines
EMAILEMAILTrim any leading or trailing whitespaces and convert all the characters to lower case.
PHONEPHONERemove symbols, letters, and any leading zeroes. The country code is needed as a prefix, if the COUNTRY field is not specified in the dashboard.
GENDERGENUse these values: m or male for male and f or female for female.
MADIDMADIDUse lowercase and keep the hyphens. This information will not be hashed.
EXTERN_IDEXTERN_IDThis information will not be hashed.
DOB YEAR (YYYY)DOBYUse the YYYY format from 1900 to the current year.
DOB MONTH (MM)DOBMUse the MM format from 01 to 12.
DOB DATE (DD)DOBDUse the DD format from 01 to 31.
LAST NAMELNUse a-z only. Lower case only, no punctuation. Use special characters in the UTF-8 format.
FIRST NAMEFNUse a-z only. Lower case only, no punctuation. Use special characters in the UTF-8 format.
FIRST NAME INITIALFIUse a-z only. Lower case only. Use special characters in the UTF-8 format.
CITYCTUse a-z only. Lower case only, with no punctuation, no special characters, and no whitespace.
US STATESSTUse the 2-character ANSI abbreviation code in lower case. Normalize the states outside the US in lowercase, with no punctuation, no special characters, and no white space.
ZIPZIPUse lower case and no white space. For the US, use only the first 5 digits. For the UK, use the Area/District/Sector format.
COUNTRYCOUNTRYUse lower case, 2-letter ISO 3166-1 alpha-2 country codes.
warning
RudderStack modifies the schema names visible in the dashboard to ensure better readability. However, during the event call, the field names must be exactly the same as the schema names specified by Facebook Marketing API, as mentioned in the table above.

Explicit formatting feature

If the Disable Formatting option is enabled in the RudderStack dashboard, RudderStack will not format the user data in the format prescribed by the Facebook Marketing API. If it is disabled, RudderStack formats the schema fields input by the user as shown in the table below:

Schema Field NameExample InputFormatted Output (Before Hashing)
EMAILABC@gmail.comabc@gmail.com
PHONE0@9634689596346895
GENFEMALEf
DOBD202
DOBM101
LN & FNAbc,@abc@
FIMr.mr.
CTHN#hn
ST? AL ?al
ZIP11502 @bc11502@bc
COUNTRYINin

The following code snippet shows an audiencelist event with the schema fields (EMAIL and FIRST NAME) specified in the RudderStack dashboard:

{
  "type": "audiencelist",
  "properties": {
    "listData": {
      "add": [{
          "EMAIL": "name1@abc.com",
          "FN": "name1"
        },
        {
          "EMAIL": "name2@abc.com",
          "FN": "name2"
        },
        {
          "EMAIL": "name3@abc.com",
          "FN": "name3"
        }
      ],
      "remove": [{
          "EMAIL": "name4@abc.com",
          "FN": "name4"
        },
        {
          "EMAIL": "name5@abc.com",
          "FN": "name5"
        }
      ]
    }
  }
}

Facebook Custom Audience payload restrictions

Payload FieldTransformed?
Using only addYes
Using only removeYes
Using both add and removeYes
Not using both add and removeNo

The following code snippet shows an audiencelist event containing the add array with the schema fields (EMAIL and FIRST NAME) specified in the RudderStack dashboard:

{
  "type": "audiencelist",
  "properties": {
    "listData": {
      "add": [{
          "EMAIL": 'name1@abc.com',
          "FN": 'name1'
        },
        {
          "EMAIL": 'name2@abc.com',
          "FN": 'name2'
        }
      ]
    }
  }
}

Similarly, you can use remove array in order to remove users from a particular custom audience without creating a session.

warning
The event payload must include either add or remove . Otherwise, the user data won’t be transformed and sent to Custom Audience.

FAQ

What are the prerequisites for creating an audience list?

Before creating a new audience list, make sure that:

Facebook Ads system user
  • The ad account under which the audience list is created should be added as an asset for the system user, with manage permissions.
  • The app for which you are creating the access token should be added as an asset of the system user with full control.

How do I add an app as a system user asset with manage permissions?

  1. Log in to your Facebook Business Manager account.
  2. Click Business settings.
Business Settings
  1. Under Users, click System users.
System users setting
  1. Choose the system user from the opened list.
  2. Click Add Assets for the above user.
Add Assets option
  1. Under Select asset type, click Apps and choose your app from the Select assets tab.
Asset type
  1. In the right-most App tab, enable the Manage app setting. Then, click Save Changes.
Manage app setting

How do I create a new audience list?

  1. Log in to your Facebook business account.
  2. Click All tools in the left panel.
Facebook custom audience creation
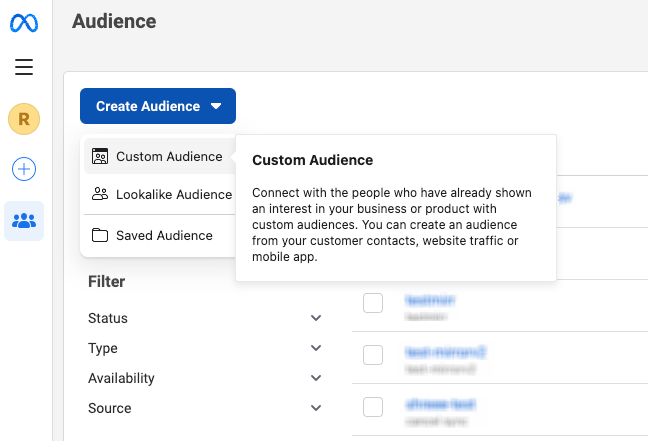
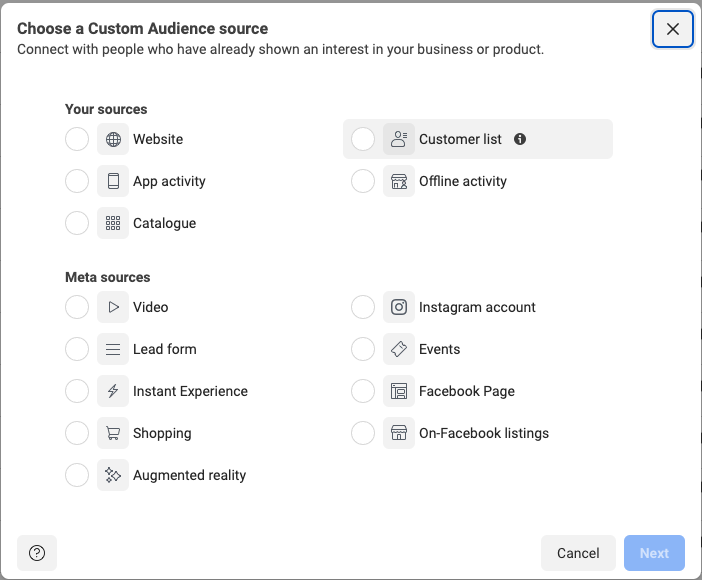
  1. Hover over Create Audience and select Custom Audience.
Facebook custom audience creation
  1. Select Customer List and click Next.
Facebook custom audience creation
  1. Upload the CSV file you want to use for your new custom audience. Alternatively, you can download the template file and upload it.
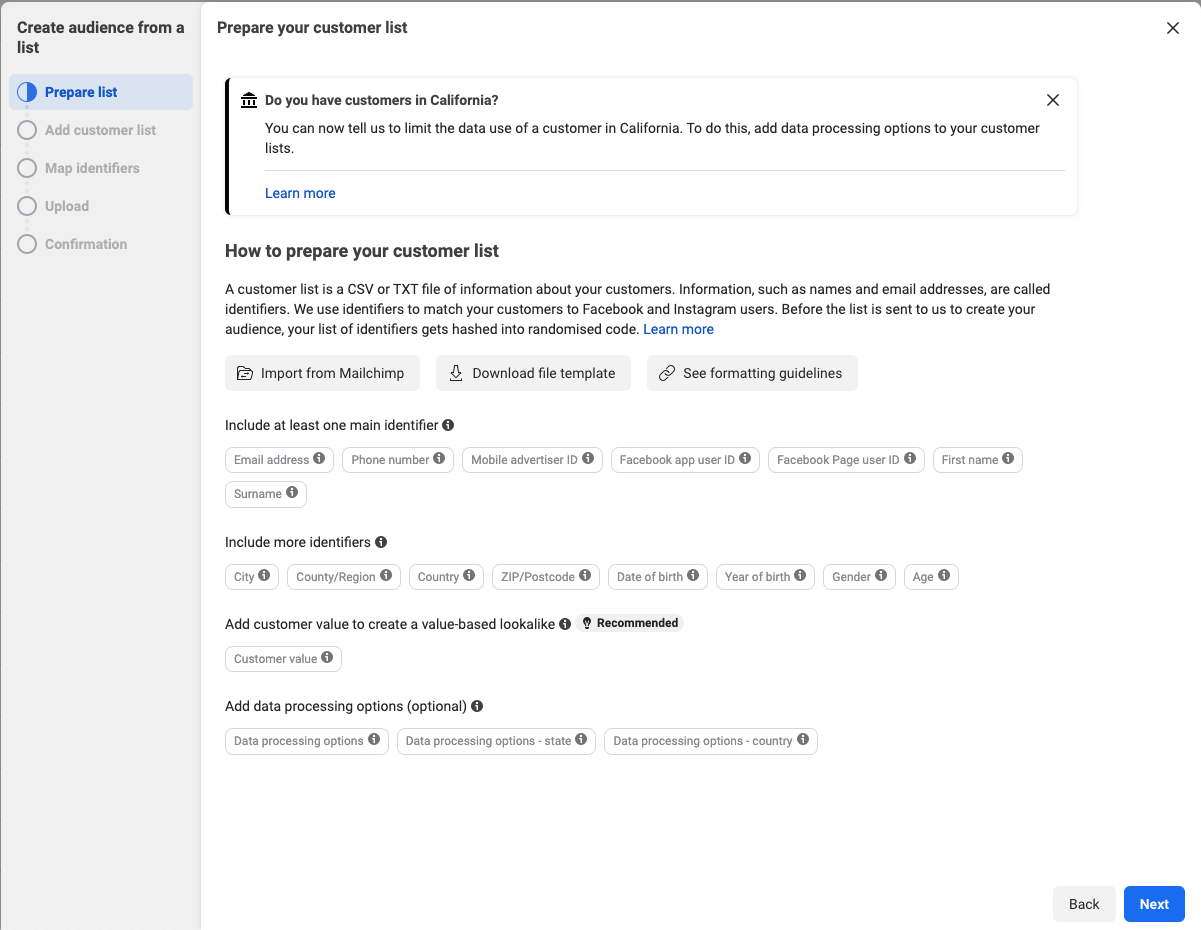
  2. Prepare your customer list by selecting and mapping the identifiers. Make sure you have enough identifiers before uploading the list.
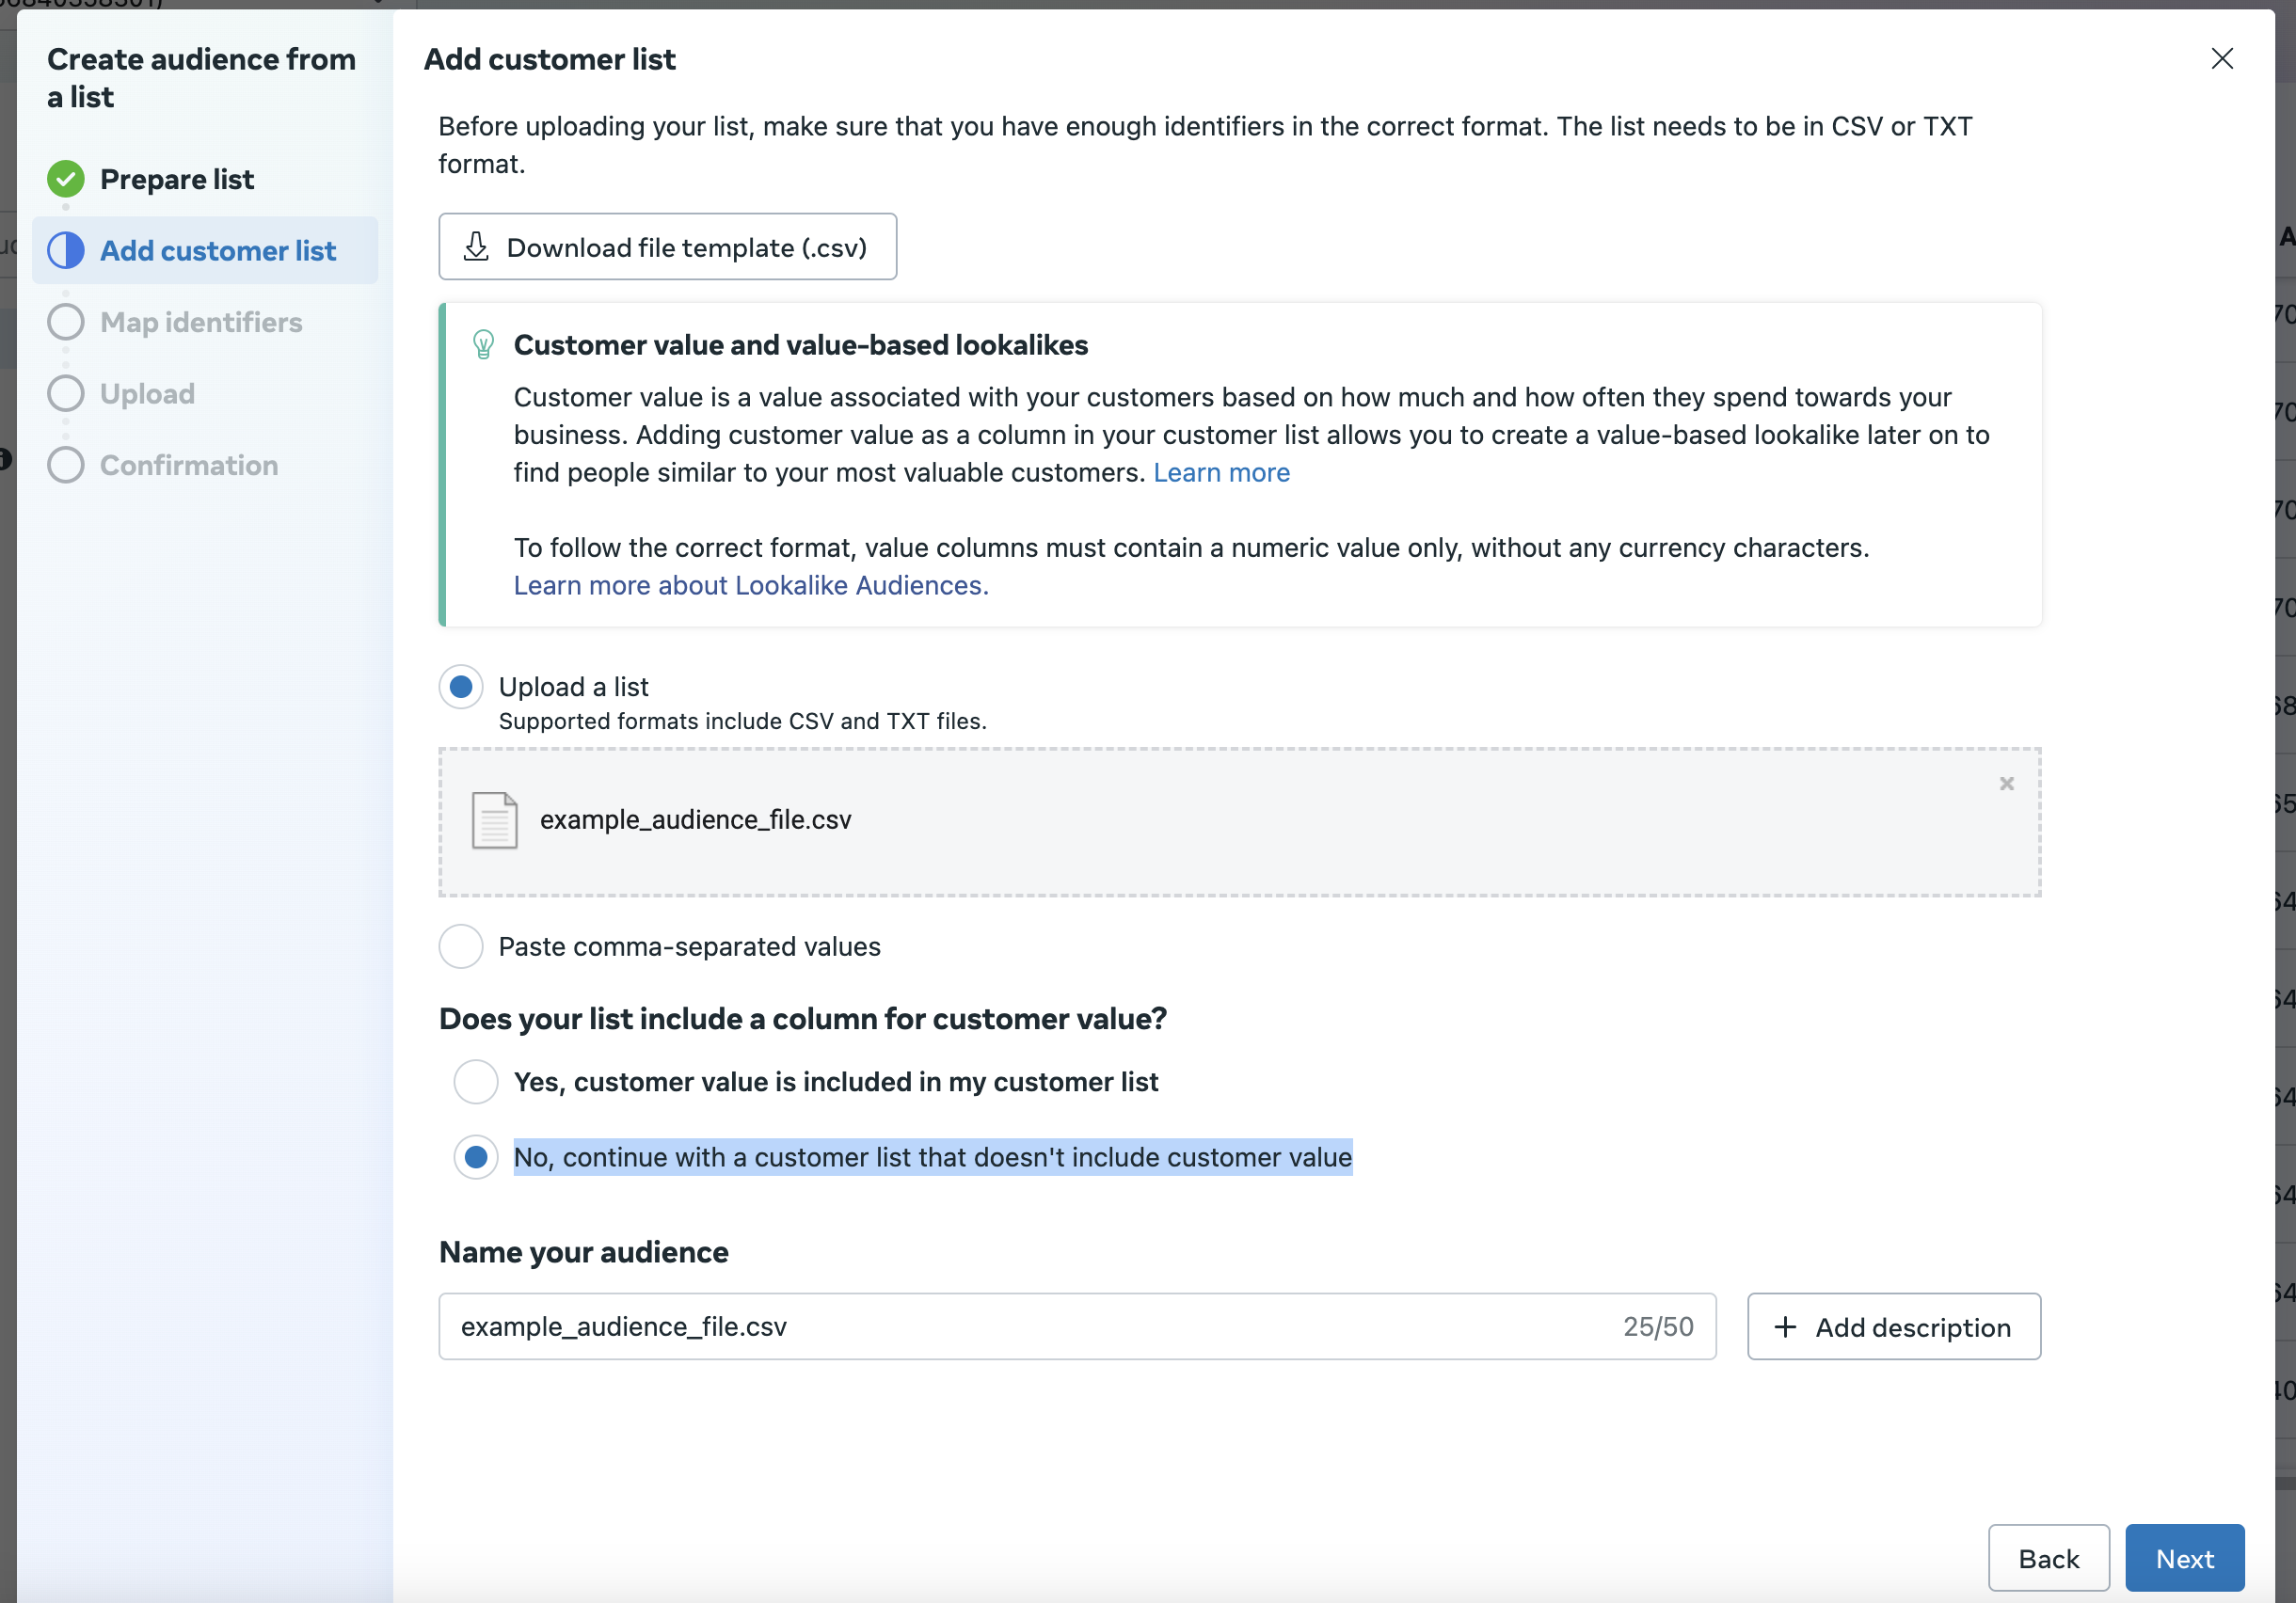
Facebook custom audience creation
  1. Finally, click Import and create to create the audience.
warning
The custom audience you create should have edit permissions. Otherwise, RudderStack will not be able to add or remove users from the list.

How do I check if the custom audience has edit permissions?

To check if the audience has edit permissions enabled, go to the Audiences tab, select your custom audience, and check the Actions dropdown. You should see the Edit option as seen below:
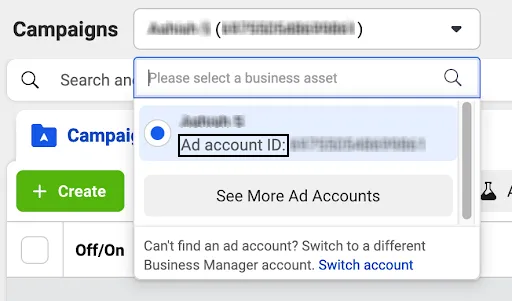
Customer audience edit permissions

Where can I find the Custom Audience ID?

  1. To get your Custom Audience ID, go to your Facebook Ads Manager account. On the left navigation bar, select Audiences and choose the Ad account you have created the custom audience for.
Customer audience ID
  1. Click All Audience and select the specific custom audience from the list.
  2. Finally, click the History tab. Here, you will find the audience ID under the Item Changed column:
Customer audience ID

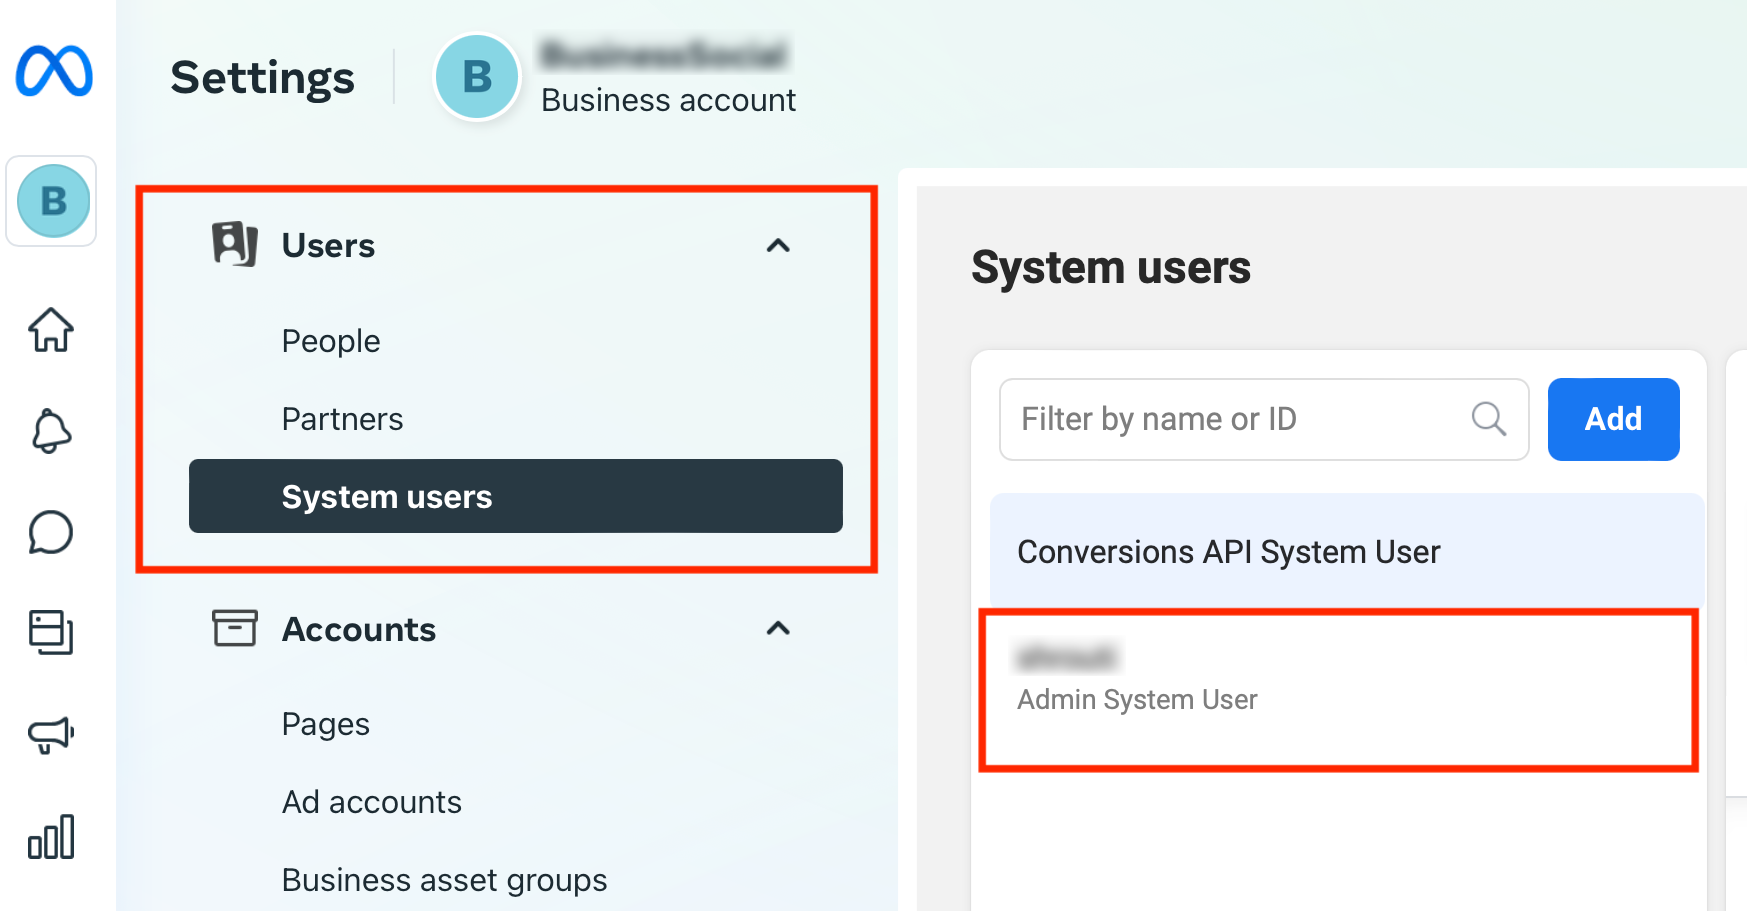
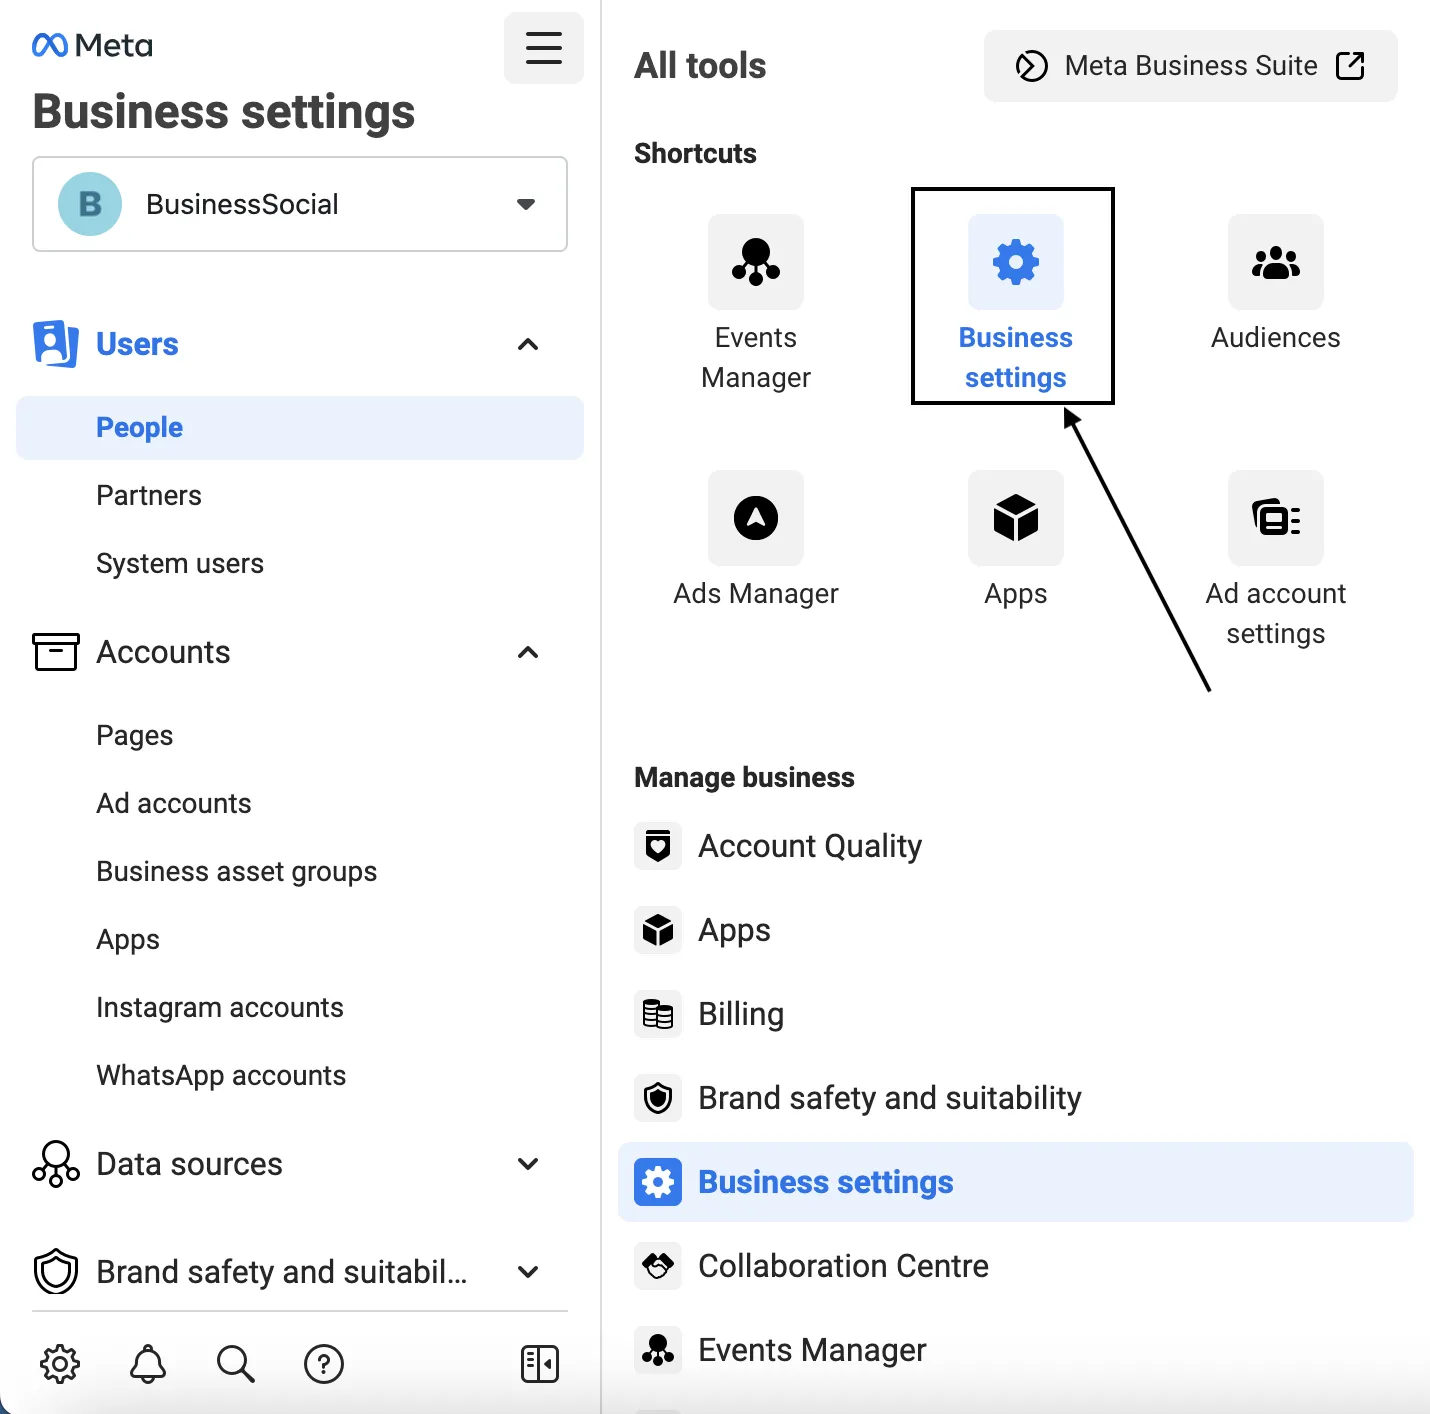
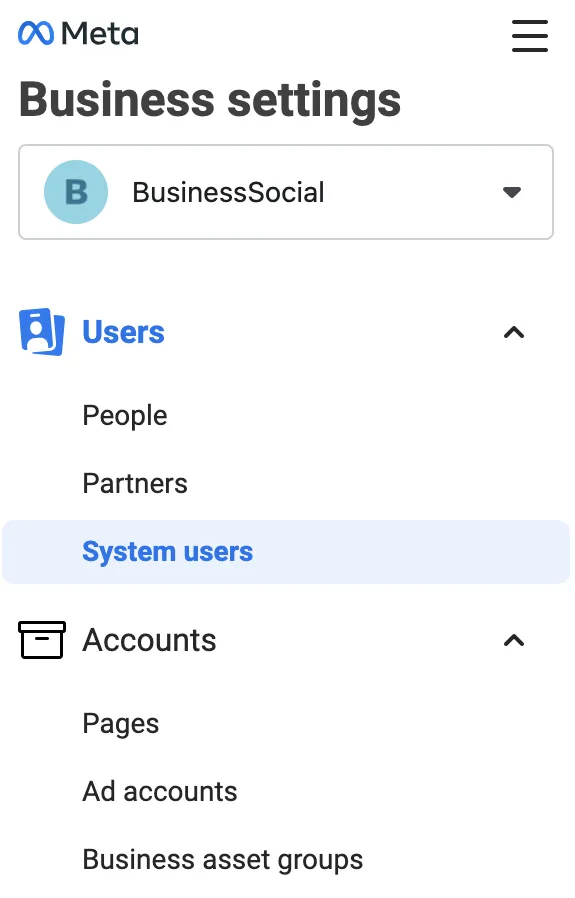
Where can I find the user Access Token for the application?

warning
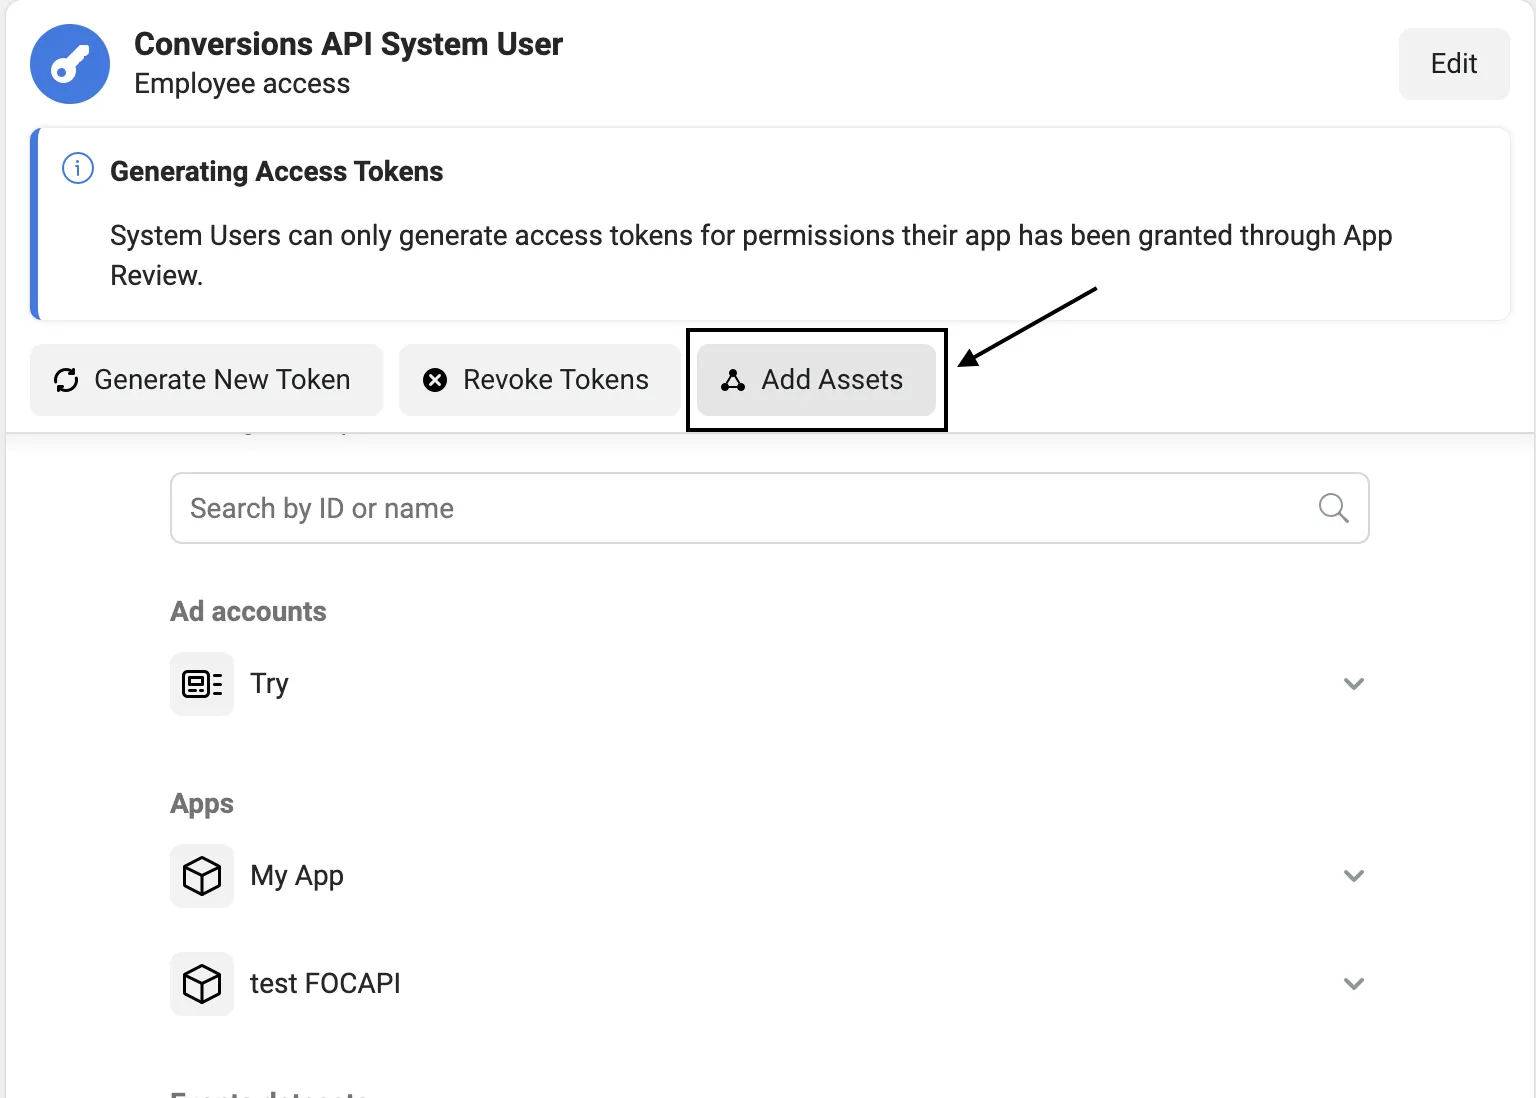
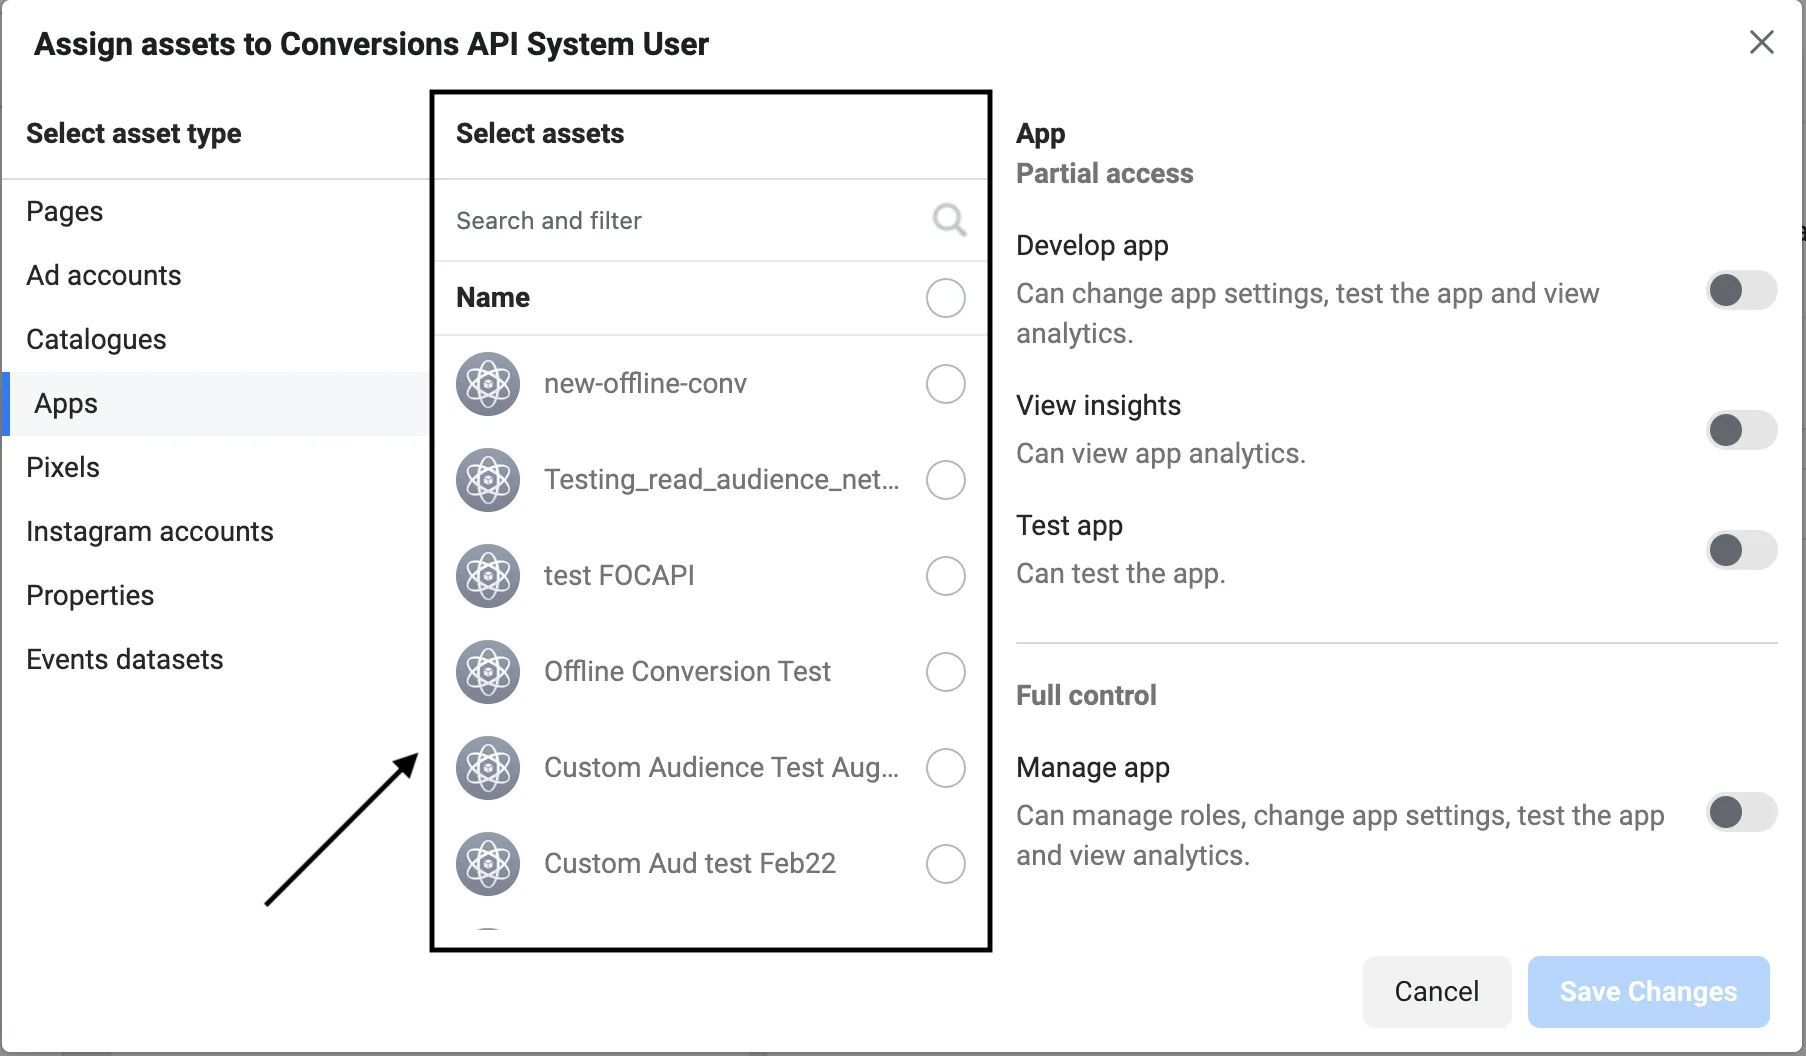
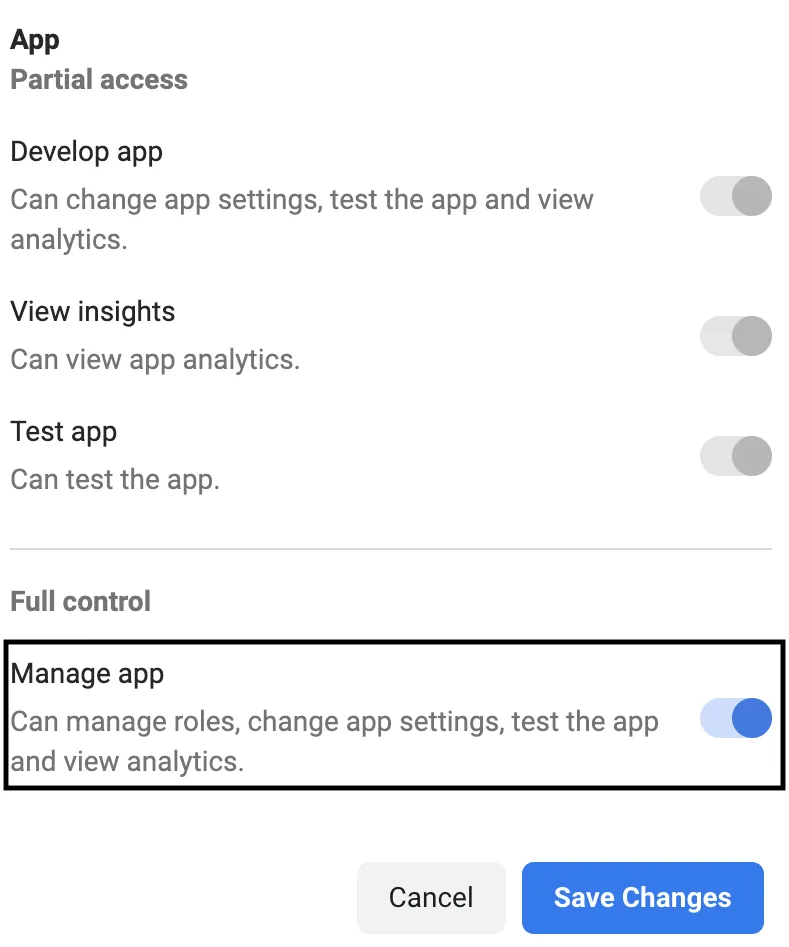
To generate the user access token for your application, you must first add it as a system user asset with manage permissions.

Follow these steps to generate a user access token required to use the Facebook Marketing API:

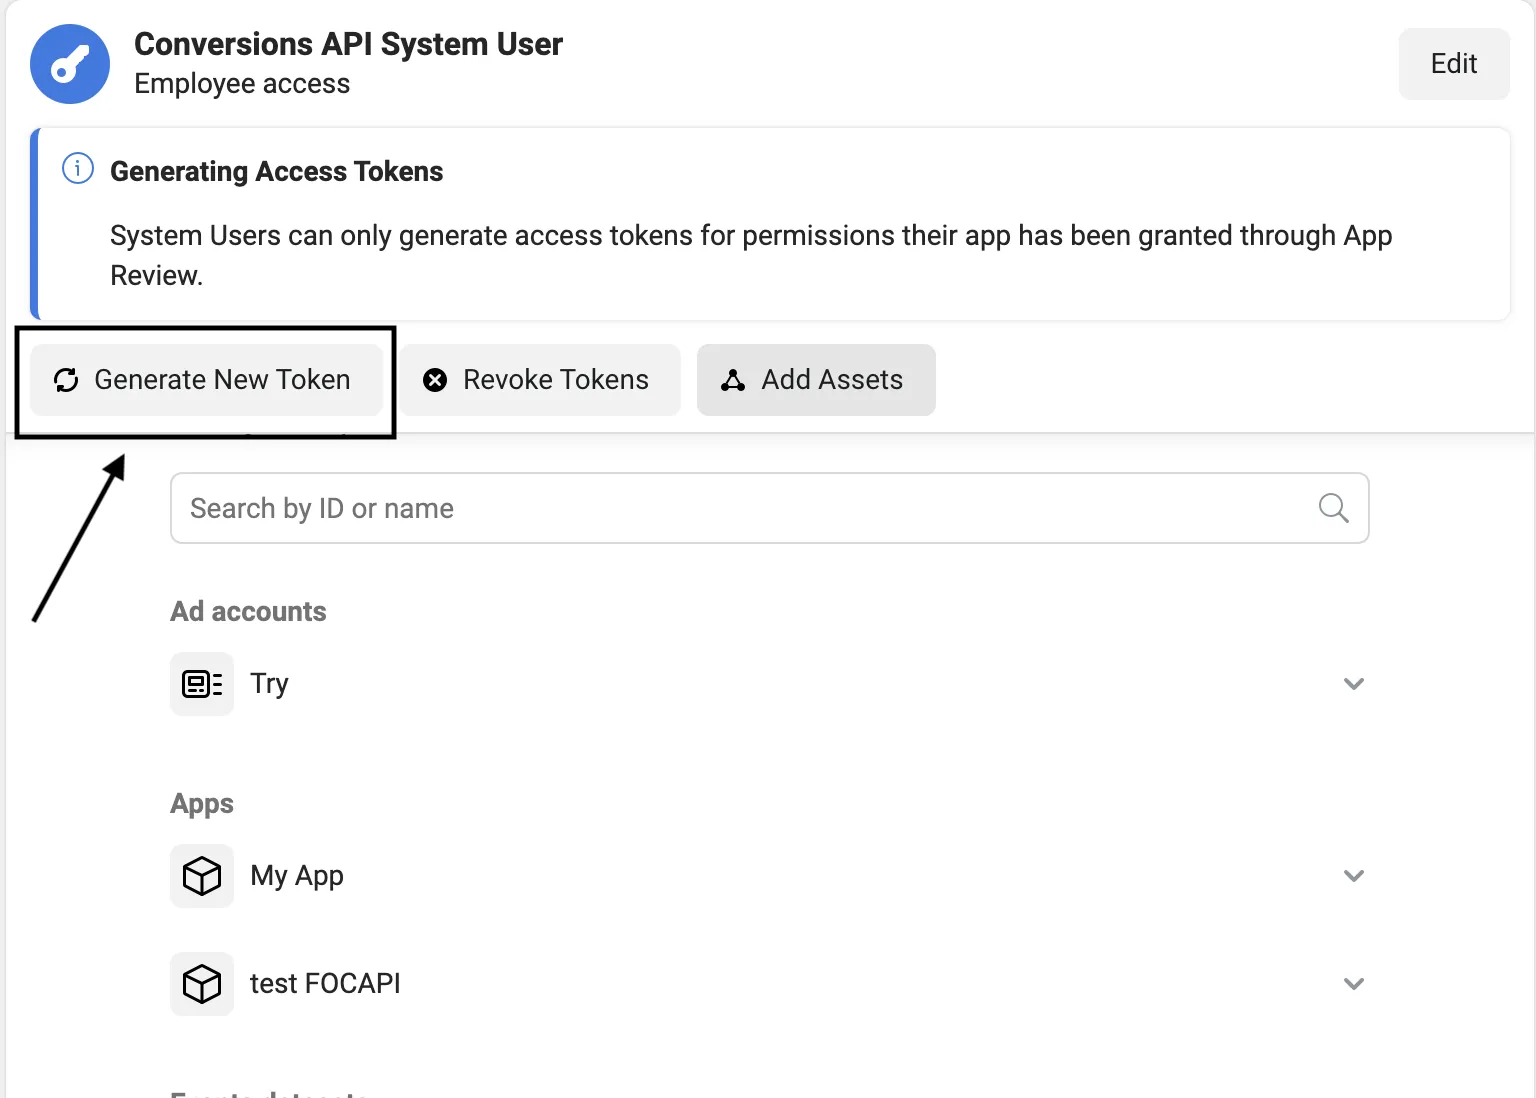
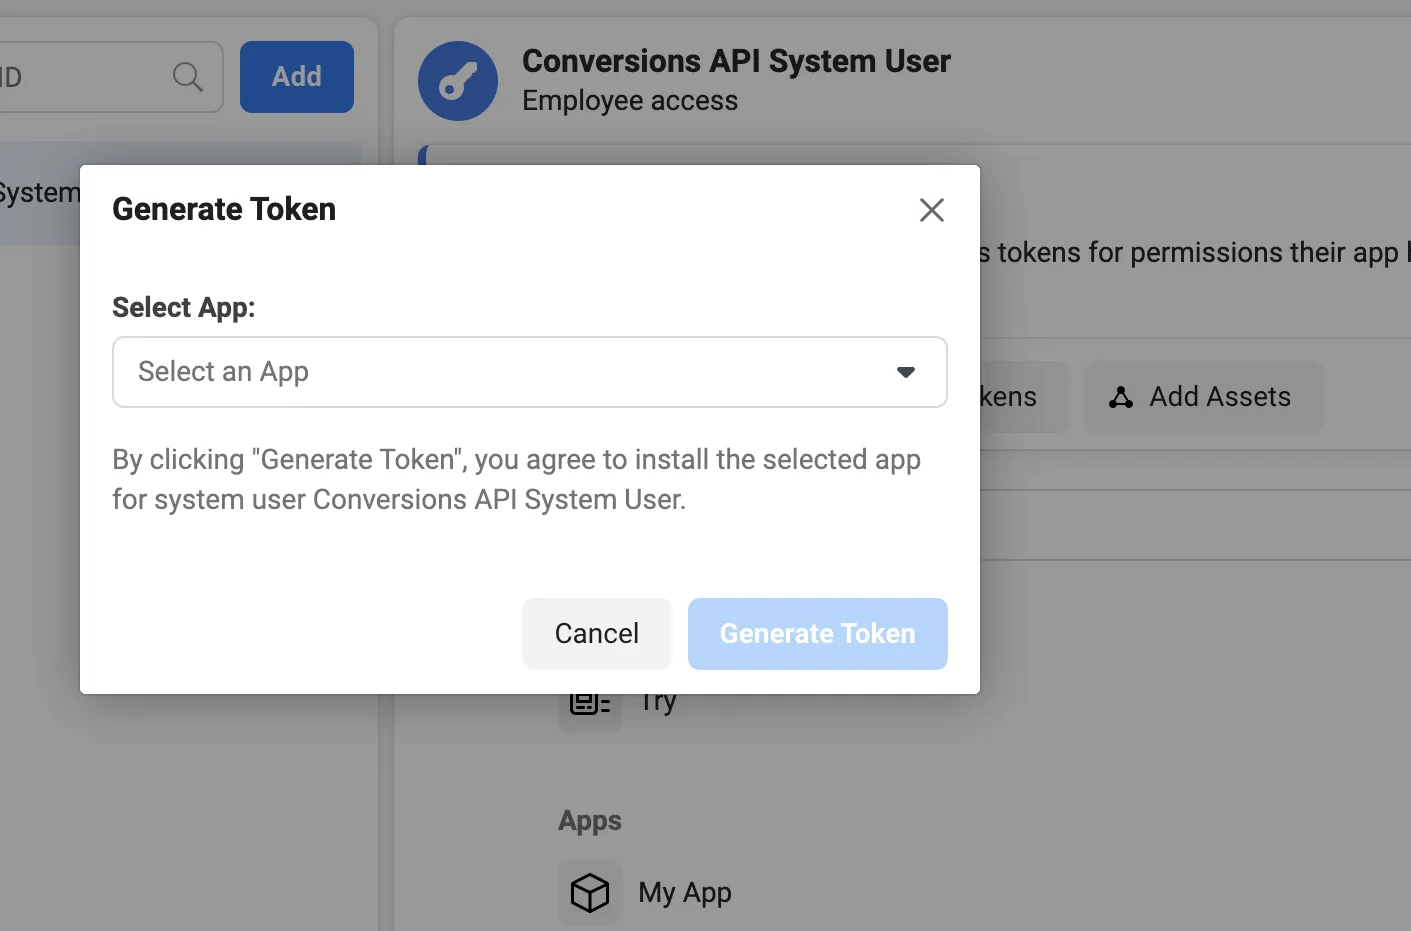
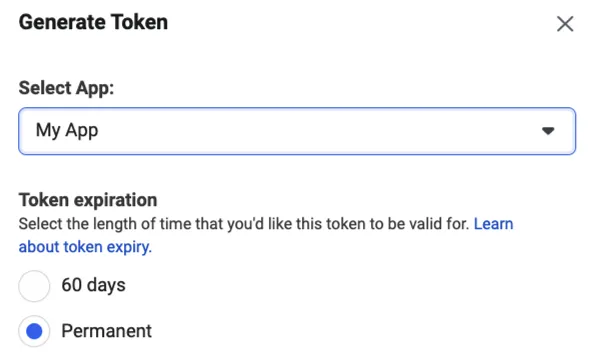
  1. Under the system user, click the Generate New Token button and select the app from the dropdown.
Generate new token
Select app for the token
  1. Choose the Token expiration time.
Token settings
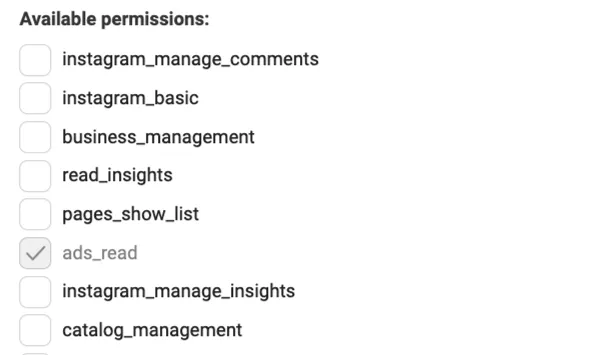
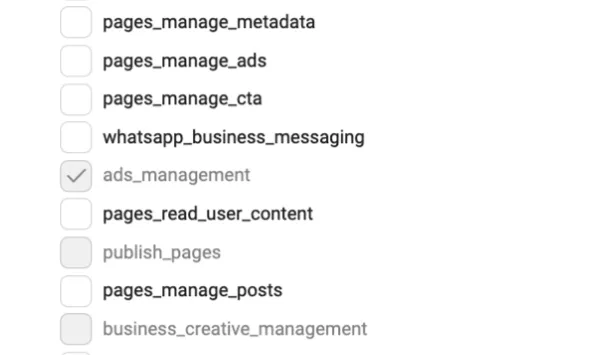
  1. Under Available permissions, select ads_read and ads_management.

Token permissions
Token permissions

  1. Click the Generate Token button and copy the token credentials.

Should I use sessionIdAdd or sessionIdDelete before adding/removing users in Custom Audience?

sessionIdAdd and sessionIdDelete helps you track and use a particular session ID while adding or removing users. This is useful when you are sending data in chunks. If you do not include these fields, Facebook creates a session ID itself.

Refer to the Facebook documentation for more information.


Questions? Contact us by email or on Slack