How to Set Up Reverse ETL Connection
8 minute read
This guide explains how to set up a Reverse ETL connection in RudderStack.
RudderStack has the following connection limits for Reverse ETL:
- Free plan: You can set up to 10 connections.
- Growth plan: You can set up to 25 connections.
- Enterprise plan: You can set up unlimited connections.
Overview
Follow these steps to set up a Reverse ETL connection in RudderStack:
- Create a Reverse ETL source
- Connect it to a destination
- Specify the data mappings
- Define a sync schedule
- Configure advanced settings
- Activate the connection
Required permissions
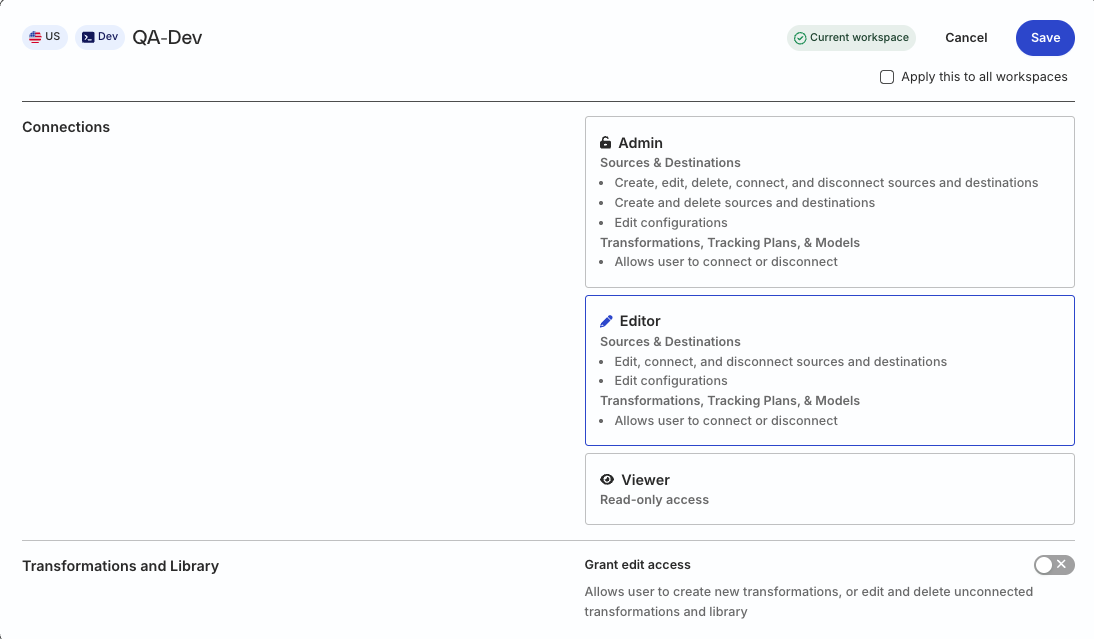
- Admins have full access to set up and manage Reverse ETL connections.
- Members must have the following permissions in their workspace policy:
| Resource | Permission |
|---|---|
| Tables / SQL Models / Audiences | Edit, Connect |
| Destinations | Edit, Connect |
Permissions for legacy RBAC system
In the legacy Permissions Management (RBAC) system, only Org Admins and members with the Connections Editor or Connections Admin role in their workspace policy can set up Reverse ETL connections.
Add source
Reverse ETL connections are source-driven, meaning you must first create a source and then connect it to a destination.
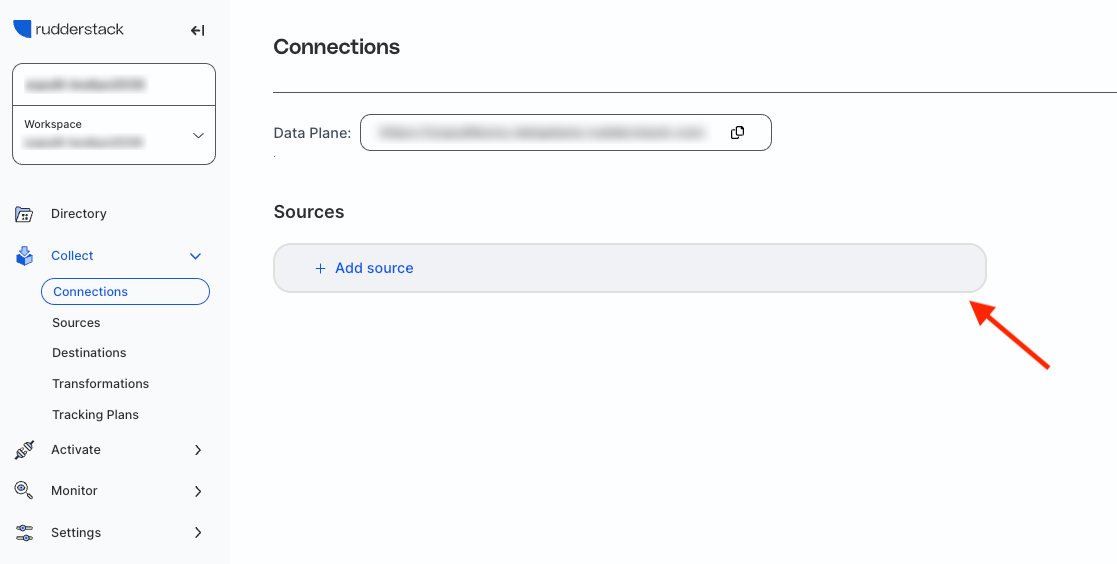
- Sign in to your RudderStack dashboard and click + Add source in the default Connections view.
- Under Sources, click Reverse ETL and select your warehouse source.
- Configure your source. See the source-specific documentation for configuration details.
RudderStack requires some warehouse-specific permissions to sync data from it. These permissions are listed in the source documentation, for example, see BigQuery permissions.
Make sure to grant these permissions before you set up the source.
Connect destination
Once you have created a Reverse ETL source, you can connect it to:
- A new destination, or
- An existing destination that is not already connected to any other source.
To connect a destination:
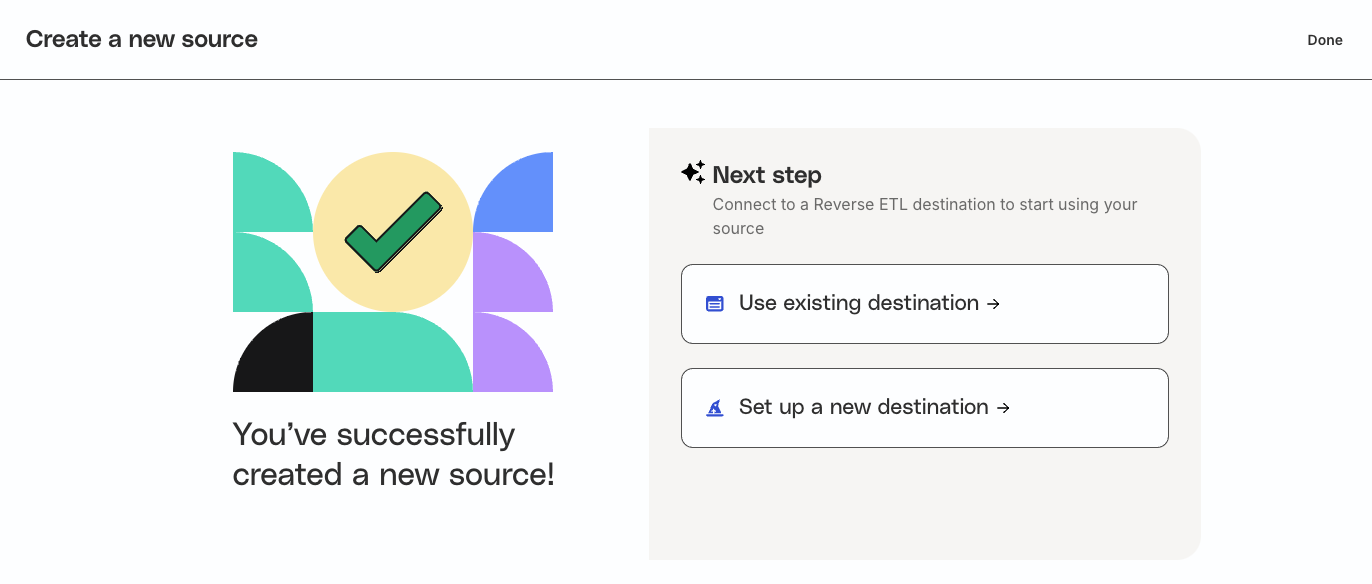
- Click Use existing destination or Set up a new destination depending on your requirement.
You can connect an Audience source only to Audience and List destinations.
- Enter the connection settings for the destination. See the destination-specific documentation for more details on these settings.
1:many connections
RudderStack supports connecting a Reverse ETL source to multiple destinations.
Event usage/billing in 1:many connections
When sending data from a Reverse ETL source to multiple destinations, RudderStack sends the record to each destination separately — this means you will be charged on a per connection basis.
Many:1 connections
RudderStack also supports connecting multiple Reverse ETL sources to a single downstream destination. However, this feature is available only for the below destinations currently — support for more integrations is coming soon.


Specify data mappings
RudderStack provides two options to map your warehouse columns to specific destination fields before syncing your data:
RudderStack supports the Map with Visualizer option only for selected destinations.
Other destinations that do not support Visual Data Mapper have the Map with JSON option by default, with the Map with Visualizer option greyed out.
The steps to set the data mappings (using JSON) are listed below:
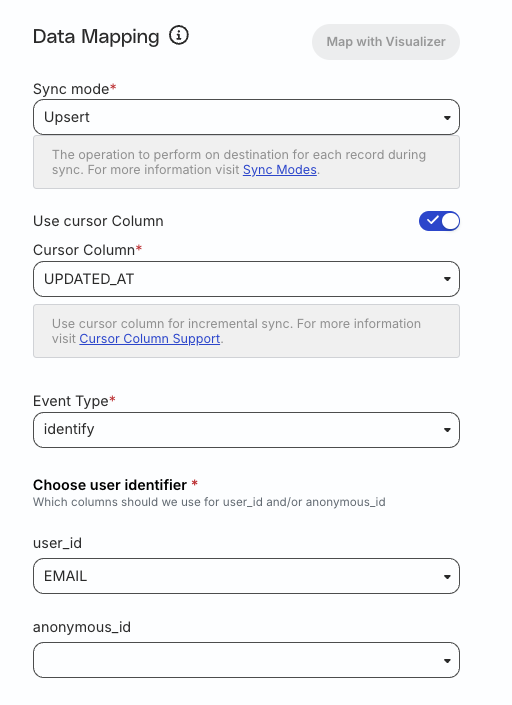
- Select the Sync mode to specify how RudderStack syncs each record to the destination. RudderStack supports two sync modes:
| Sync mode | Description |
|---|---|
| Upsert | In this mode, RudderStack inserts new records and updates the existing records in the destination while syncing the data. |
| Mirror | In this mode, RudderStack ‘mirrors’ the source by keeping the destination data the same as the source data. It performs insertion, deletion, and updates to the records while syncing the data. Note that:
|
If you have set the sync mode to Upsert, you can also use the Use cursor column setting for managing incremental syncs. See Cursor Column Support guide for more information on this setting.
Select the Event Type - RudderStack supports sending the synced data to your downstream destinations as
identifyortrackevents.- If you select
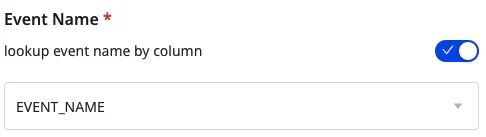
trackas the Event Type, you also need to set the event name that is sent to the downstream destination. This is because everytrackevent requires a name. - You can also set the column name as the event name by turning on the Lookup event name by column toggle and selecting the column from the dropdown:
- If you select
- Set at least one user identifier from
user_idoranonymous_idin the Choose user identifier setting.
- Preview the resulting data and make the necessary changes before proceeding.
Schedule syncs
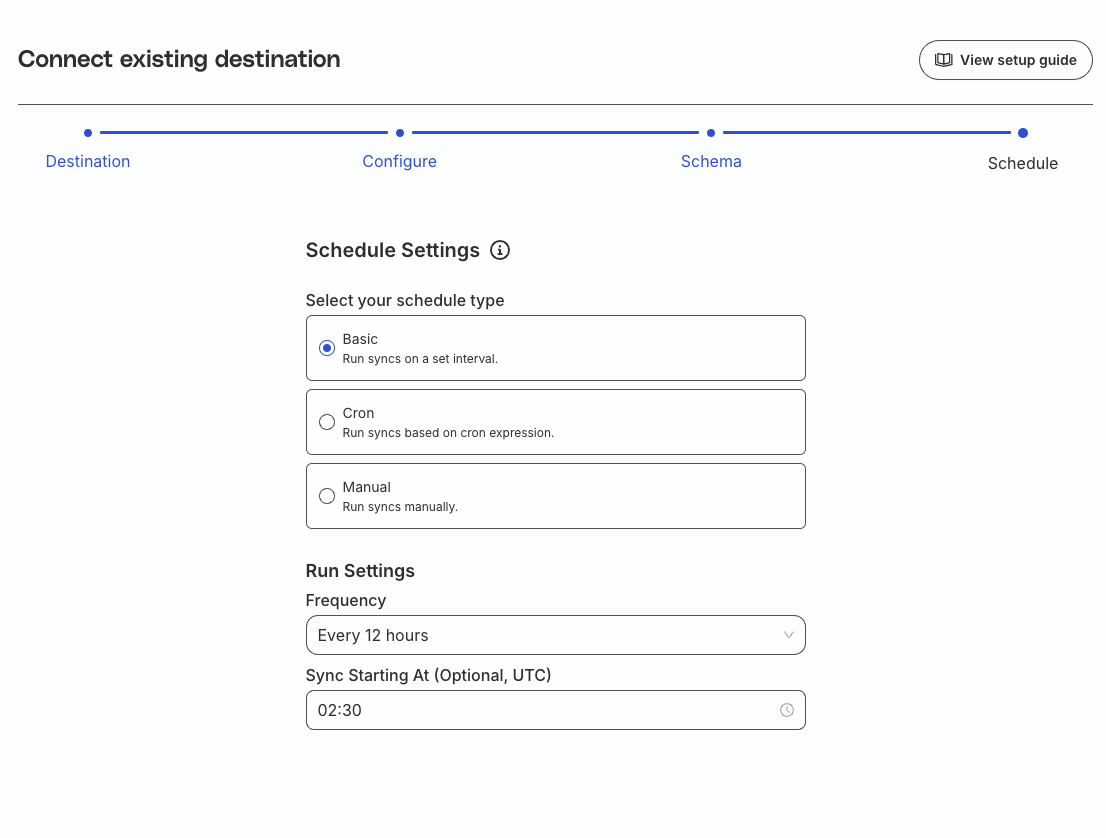
You can configure the schedule settings and sync frequency at the connection level. This is because a source might be connected to multiple destinations and the sync interval and frequency might need to be configured differently for each connection.
RudderStack determines how and when to run a sync based on the sync schedule you set for your Reverse ETL connection.
| Schedule type | Description |
|---|---|
| Basic | Run syncs at a set interval, optionally starting from a specified time (UTC). If a start time is set, syncs run from that time until the end of that day. |
| CRON | Run syncs based on a specified CRON expression (in UTC). |
| Manual | Run syncs manually. |
Configure advanced settings
This option is available only if you have set up a new destination.
Once you create a connection successfully, you can configure the optional advanced settings to receive the data correctly in your destination.
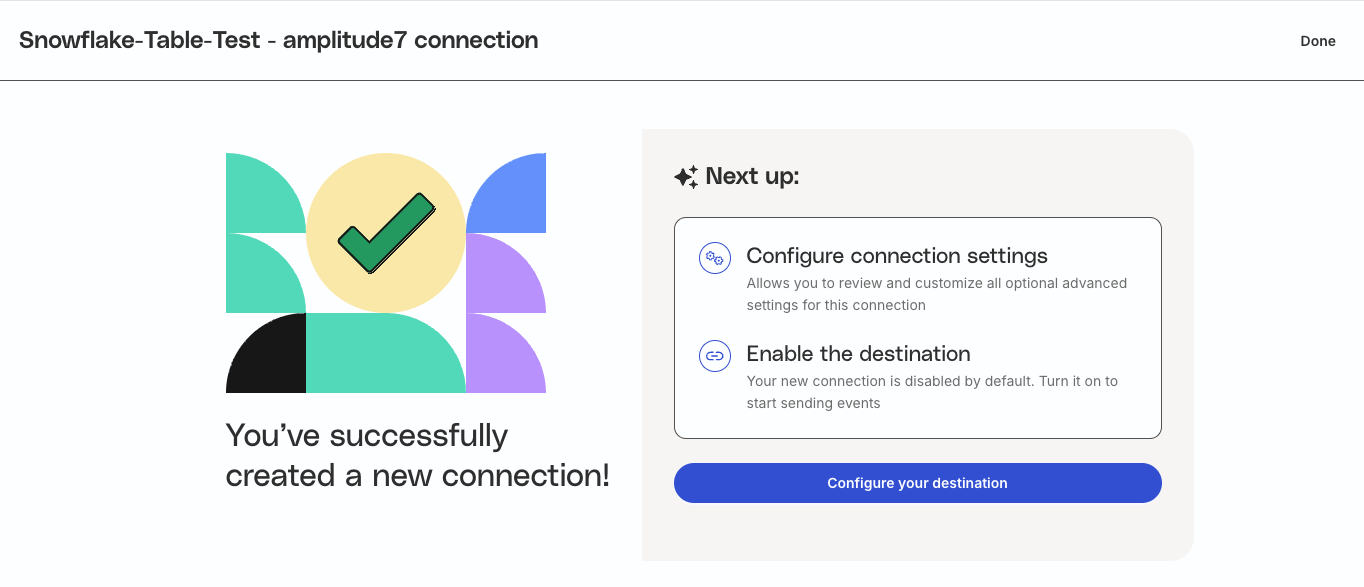
- Click Configure your destination.
- Specify the advanced settings and click Save.
Activate connection
- Activate the destination by turning on the toggle.
- Turn on the connection to activate the connection.
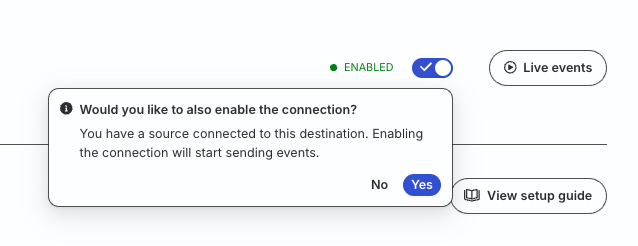
You will be redirected to the connections page.
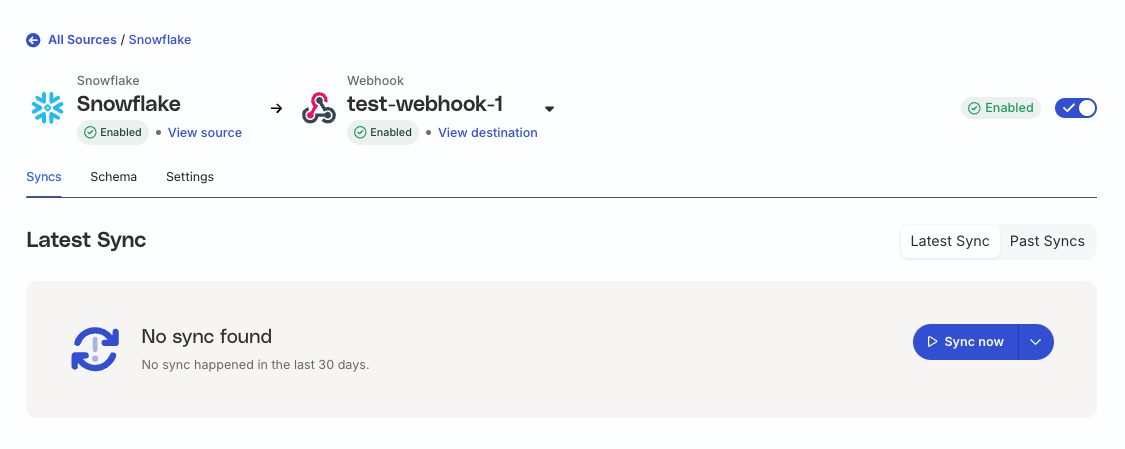
RudderStack will send data to your destination as per the specified sync frequency. Click Sync now to manually trigger a new sync.
Click Turn on the connection to activate the connection.
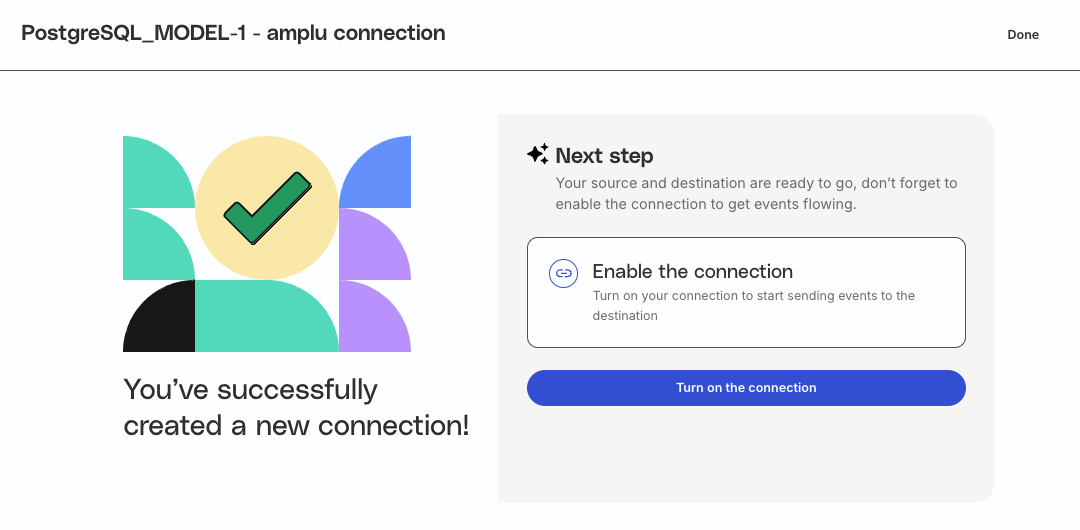
You will be redirected to the connections page.
RudderStack will send data to your destination as per the specified sync frequency. Click Sync now to manually trigger a new sync.
Stop data syncs for connection
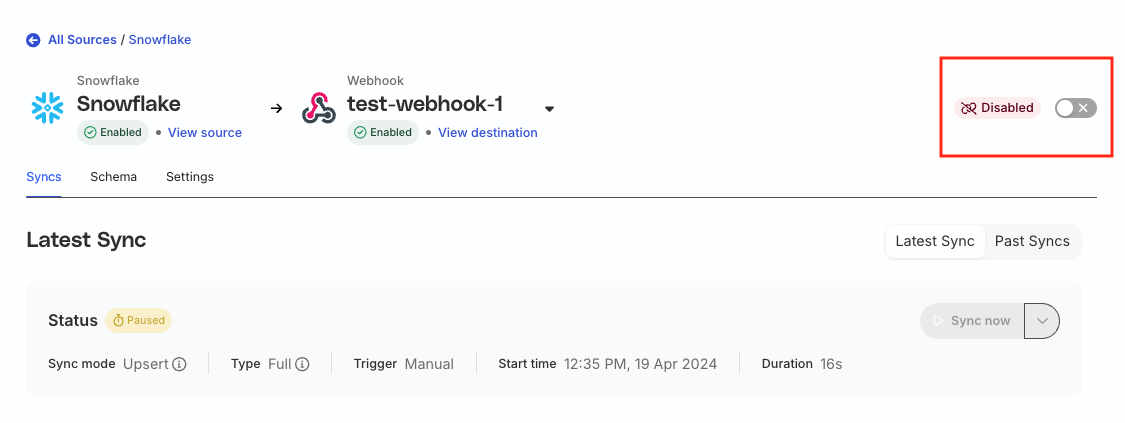
Go to the connection page and turn off the connection toggle to stop data syncs for the connection.
Note that the Sync Now button is greyed out and the connection status is Paused until you turn on the connection again.
Update mapping configuration
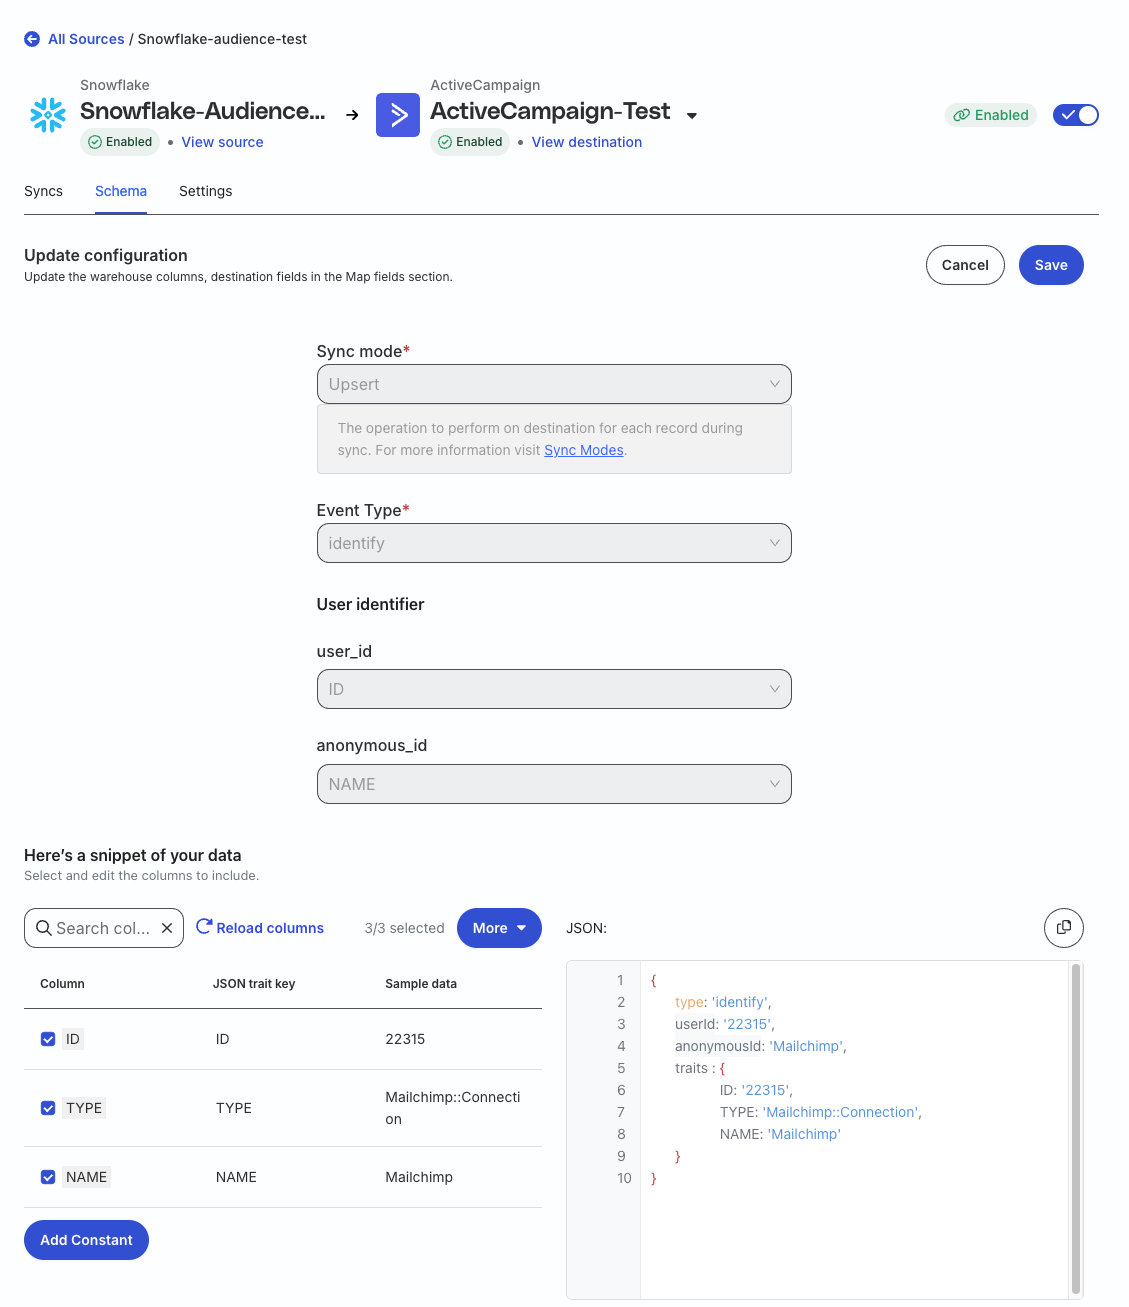
Go to the Schema tab of your connection and click Update to change the mapping configuration and update your column selection. Then, click Save to update and save the configuration.
The Object (for VDM mapping), Sync mode, Event type, and User identifier fields are not editable.
Update connection settings
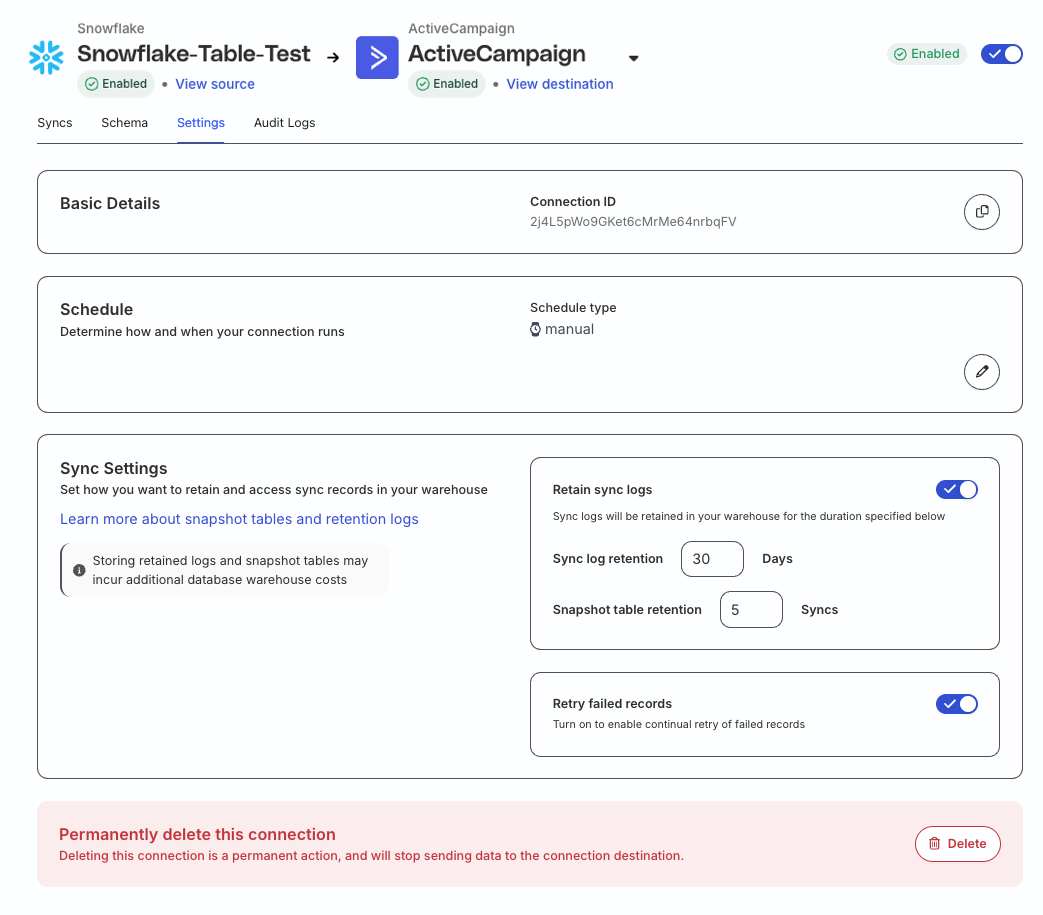
Go to the Settings tab of your connection to:
- Get the Connection ID.
- Change the sync schedule and frequency.
- Specify the settings to retain sync logs in your warehouse and retry syncing failed records. See Syncs Observability for more information.
- Delete the connection permanently.
View all connections for Reverse ETL source
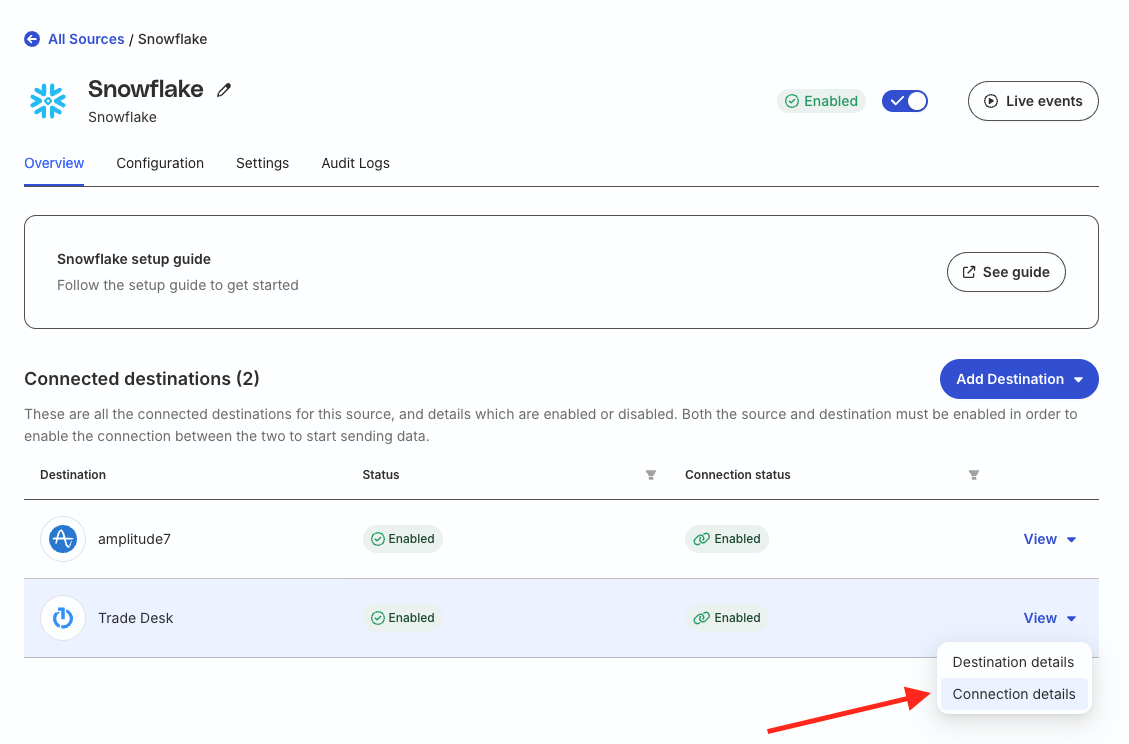
Go to the Overview tab of your Reverse ETL source. Here, you will see all the destinations connected to that source. Click the required destination or click View > Connection details to go to the connection’s page.
RudderStack automatically redirects you to the Syncs tab where you can view the latest sync details or check past syncs.
View sync details
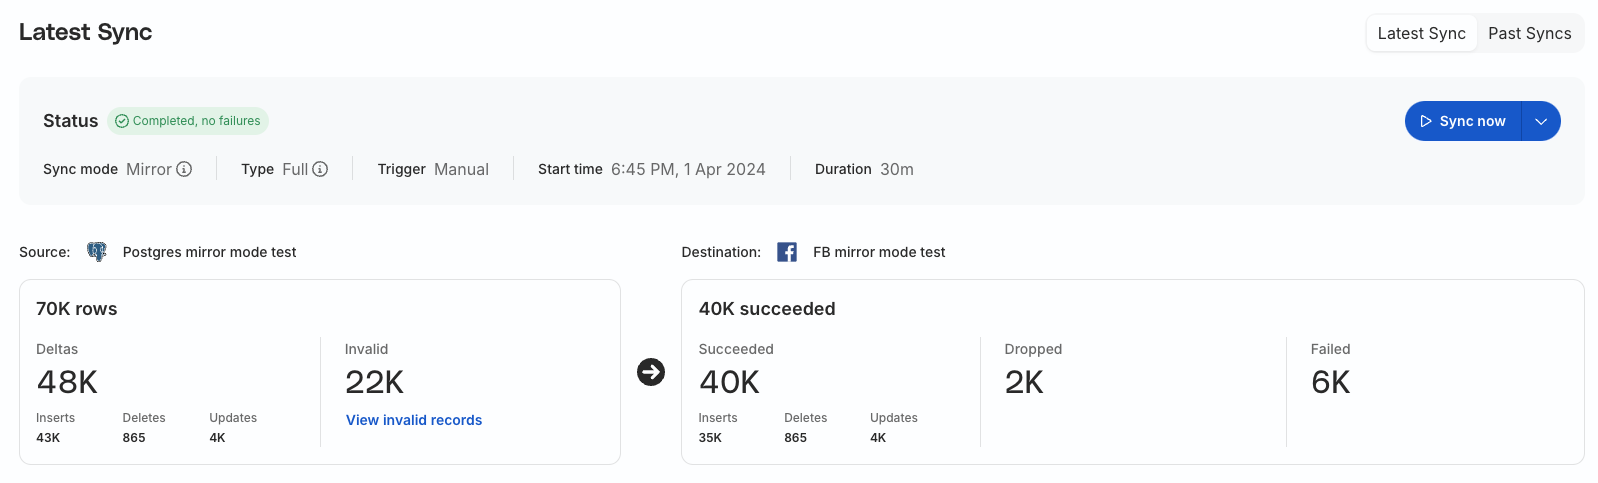
Go to the Syncs tab to see detailed metrics on the latest sync. You can also view details of the past syncs (up to 1 month). These details include:
| Metric | Details |
|---|---|
| Status | The sync status. It can be one of the following:
|
| Sync mode | Defines how RudderStack syncs data to the destination. It can be one of the following:
|
| Sync type | Determines the scope of the sync. It can be one of the following:
|
| Trigger | Determines how the sync was triggered. It can be one of the following:
|
| Sync start time | Determines when the sync was triggered. |
| Duration | The sync duration. |
You can also see the following source and destination-specific metrics:
- Number of synced rows.
- Deltas (new records since last sync) with the number of records inserted, deleted, and updated.
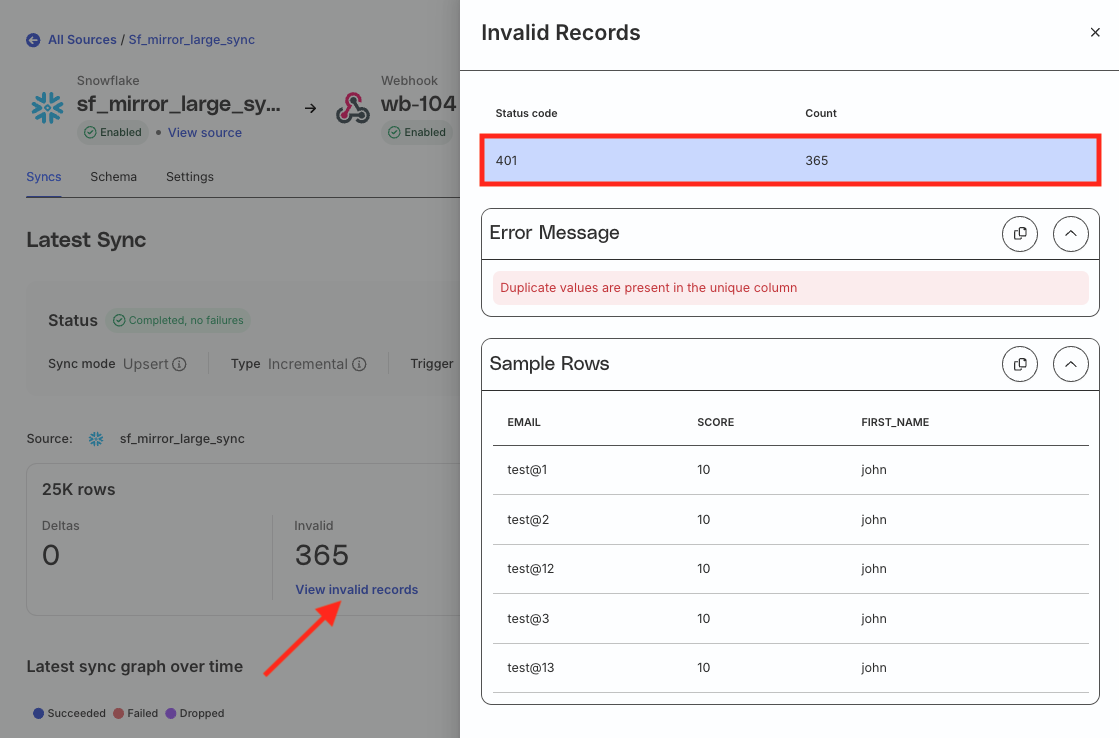
- Invalid records not synced to destination.
- Successfully synced records with the number of records inserted, deleted, and updated.
- Number of dropped records.
- Number of records that failed to sync.
View invalid records
Required permissions
- Admins have full access to view the invalid records resulting during a Reverse ETL sync.
- Members must have the Reverse ETL Sync Failure Samples PII permission to see these invalid records.
Click View invalid records and click a row to see all the invalid records that RudderStack did not sync to the destination.
You also see the error message and sample erroneous rows in this view.
View sync graph
This graph is only available for:
- The latest sync.
- Syncs performed using Upsert mode.
RudderStack provides an intuitive visual graph detailing the records sent to the destination over time. The X-axis represents the time of the day and the Y-axis represents the number of records classified as:
- Successfully synced records
- Dropped records
- Records that failed to sync
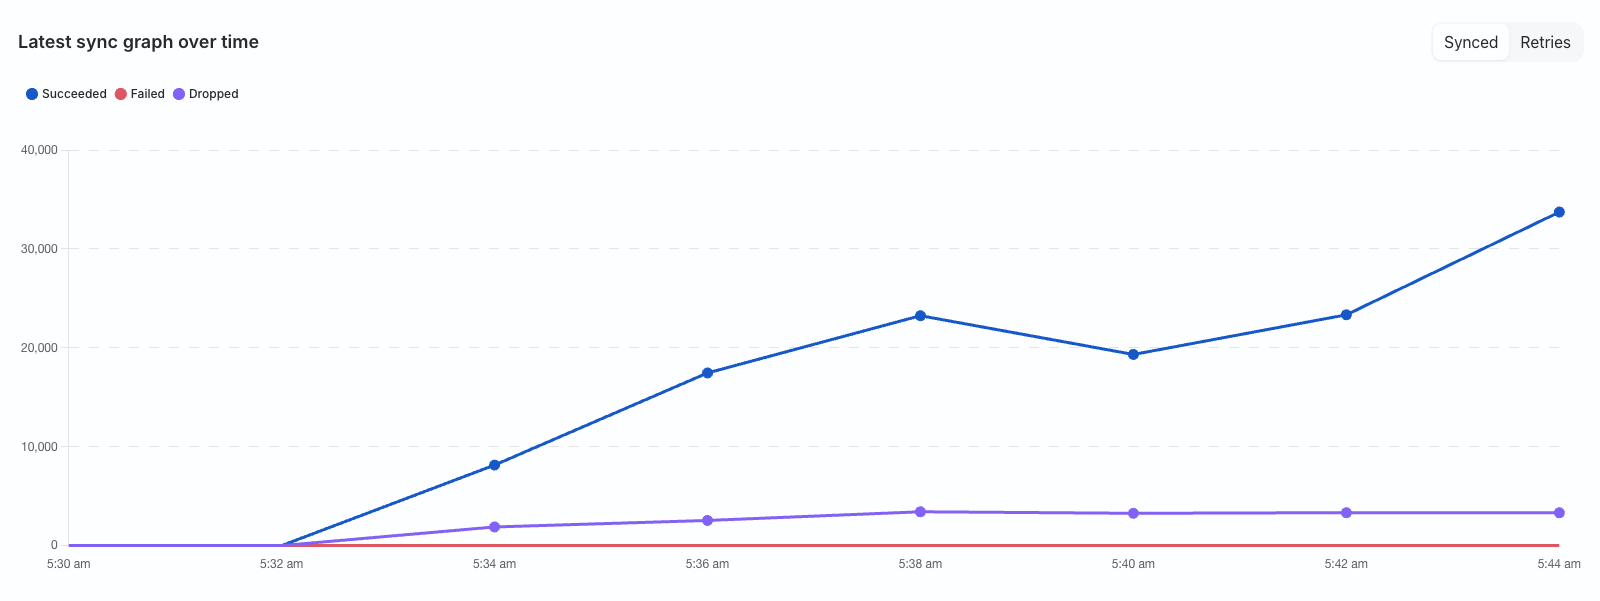
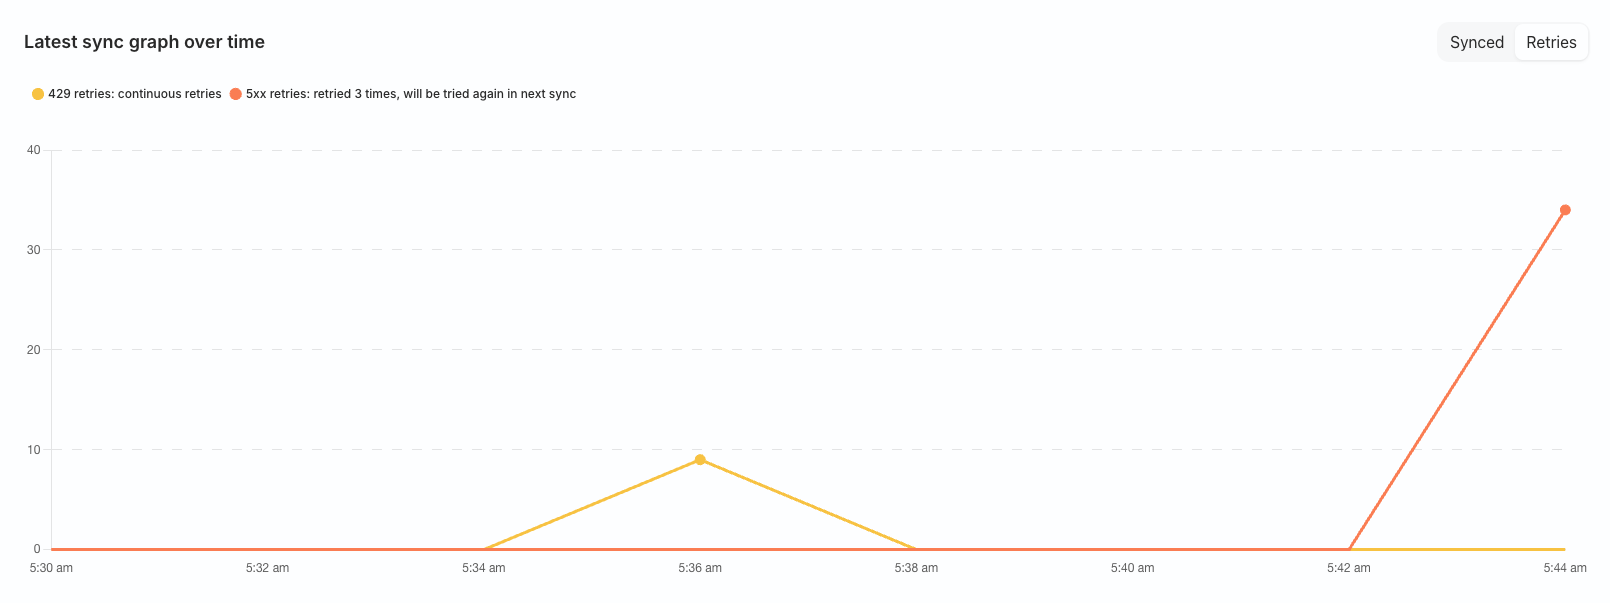
Switch to the Retries tab to get a graphical view of the retries over time. The X-axis represents the retry time of the day and the Y-axis represents the number of retry attempts.