See this sample iOS app for more information on initializing the SDK.
Step 2: Instrument API calls
All RudderStack mobile SDKs follow a standard event spec. It helps you plan your event data and supports various API calls for tracking your mobile app events - these include identify, track, screen, group, alias, and reset calls.
Step 3: Verify data flow and connect destination integrations
Once software engineers have installed the SDK and instrumented events, the data team can verify the event flow into RudderStack. Then, they can connect destination integrations to forward events to the tools in their stack automatically.
1. Verify data flow for your iOS (Obj-C) source
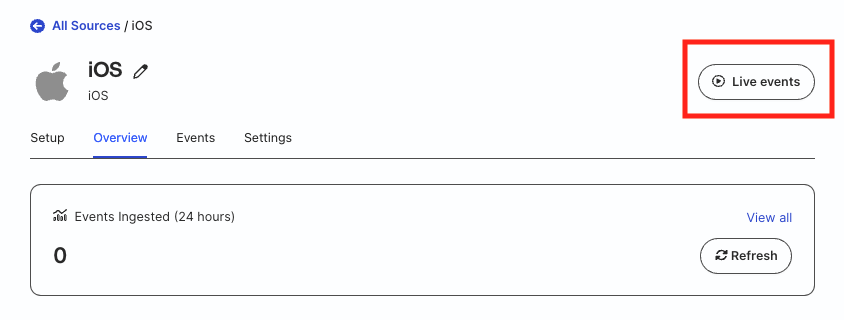
Before connecting destinations, verify that events are flowing into RudderStack by checking the Live Events viewer in your iOS (Obj-C) source.
To see live events, go to your iOS (Obj-C) source from the Connections view and click the Live Events button in the top right of your screen.
There will be a delay before you see events in the Live Events view. RudderStack doesn’t store any data; it temporarily opens a gateway between the control plane and data plane to show you the live events. The delays usually last only a few seconds but on the RudderStack Free plan, they can last up to one minute.
After a few seconds, you will see events populating the feed.
If you do not see events in the Live Events view, then there is likely a problem with your instrumentation.
2. Connect destination integrations
RudderStack supports 200+ integrations including data warehouses and data lakes, marketing platforms, CRMs, analytics tools, streaming platforms, and more. You can see the full list of supported destination integrations here.
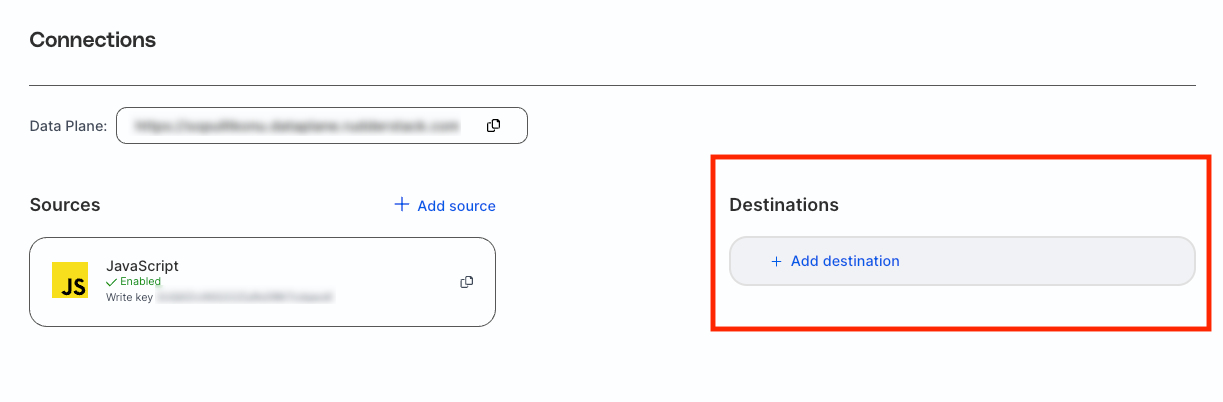
To add a destination in RudderStack:
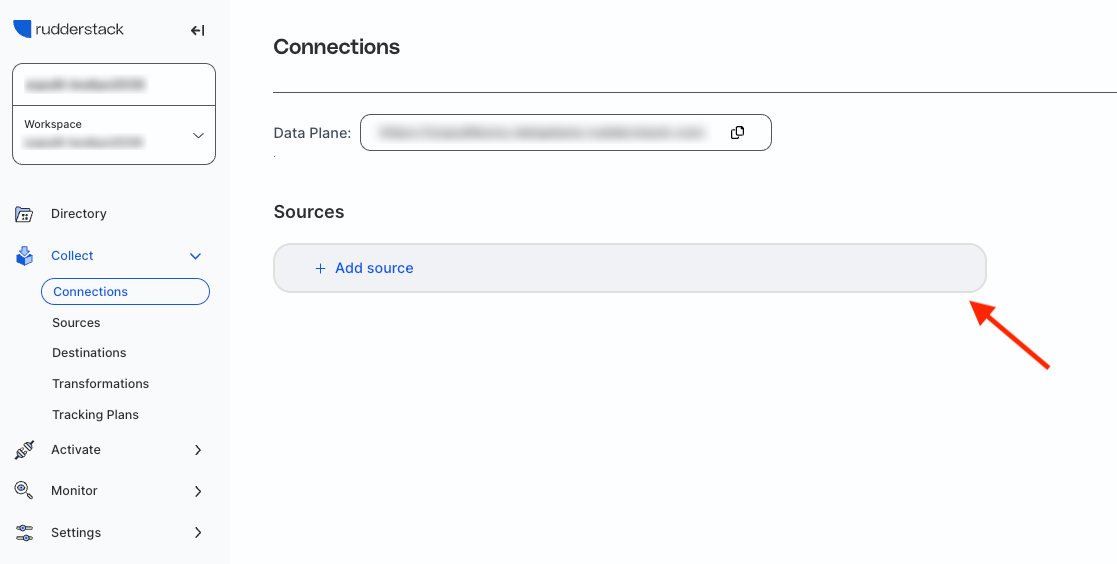
Click + Add destination in the default Connections view.
From the list, select your preferred destination where you want to route the event data. Here are some popular destinations to help you get started:
Set up the destination by configuring the connection settings. For details, see the destination-specific documentation.
Next steps
This section contains some optional, but helpful steps that leverage RudderStack’s most popular features for transforming events and debugging problems.
Add event transformations
One of RudderStack’s most-loved features is Event Transformations, which you can use to operate on the payloads flowing through RudderStack. You can use it for:
Sampling or filtering events.
Removing sensitive user PII from your events.
Enriching events using static logic, an external API, and more.
To use a transformation:
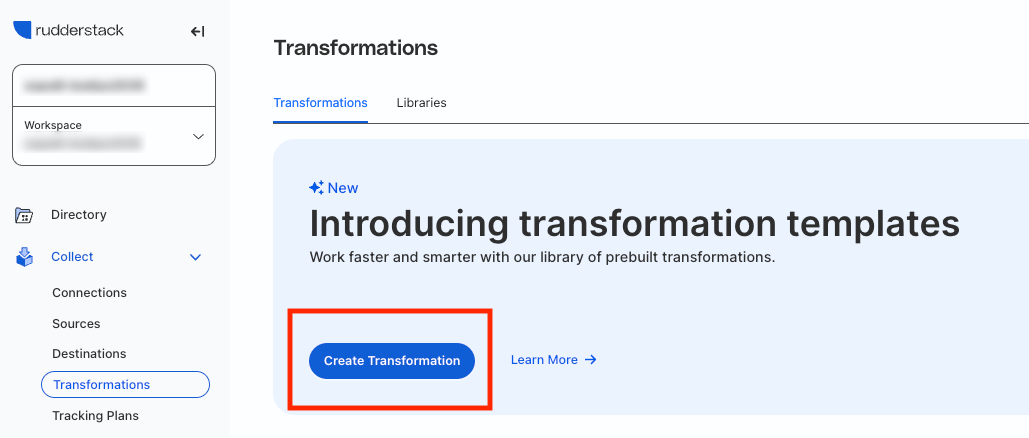
In the left sidebar, go to Collect > Transformations. Then, click Create Transformation.
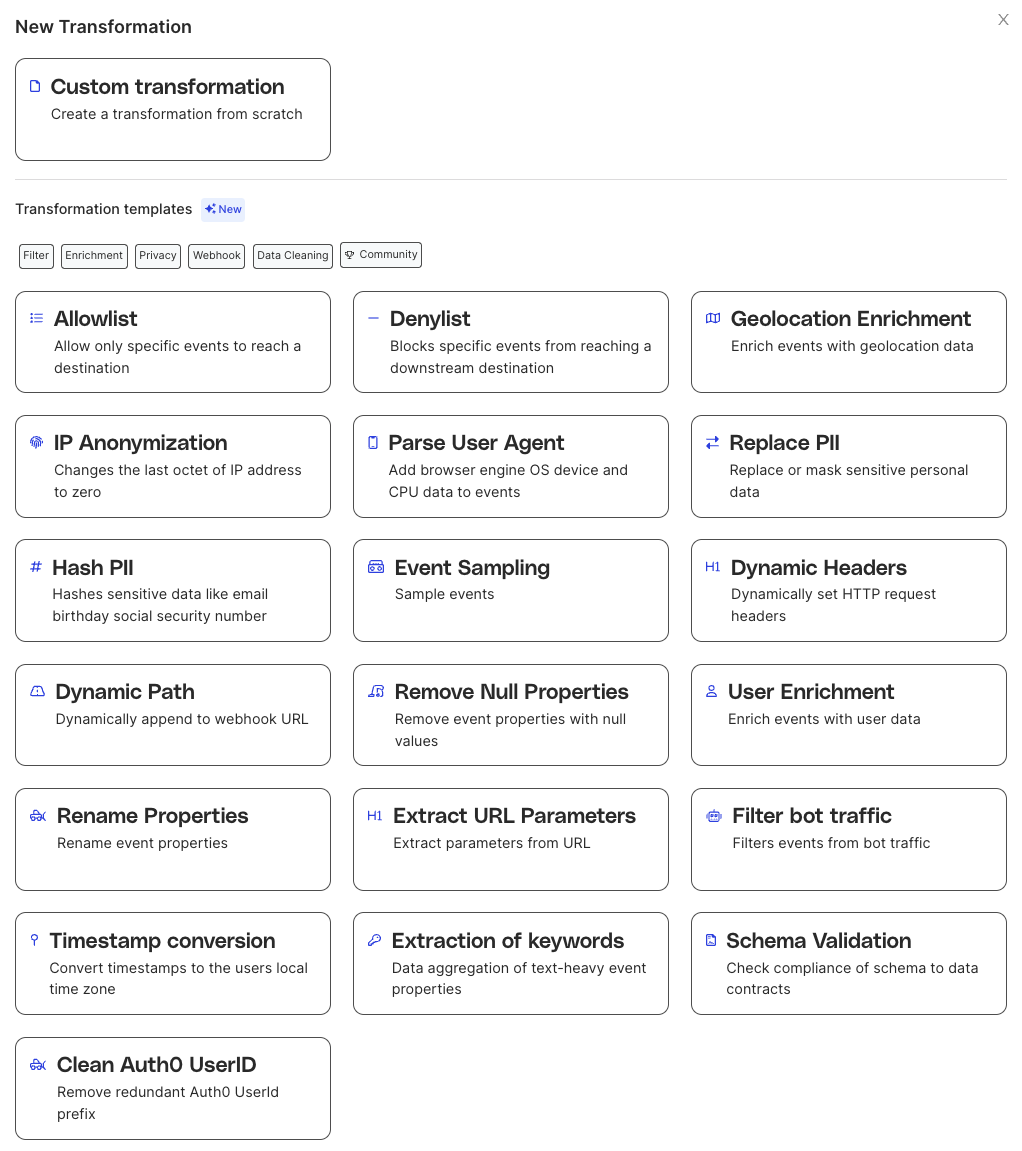
Select a transformation template from the list depending on your use case. To create a transformation from scratch, click Custom transformation.
Transformation templates contain prepopulated, ready-to-use transformation logic, which you can apply to your events before sending them to the destination. You can also modify the code as per your needs.
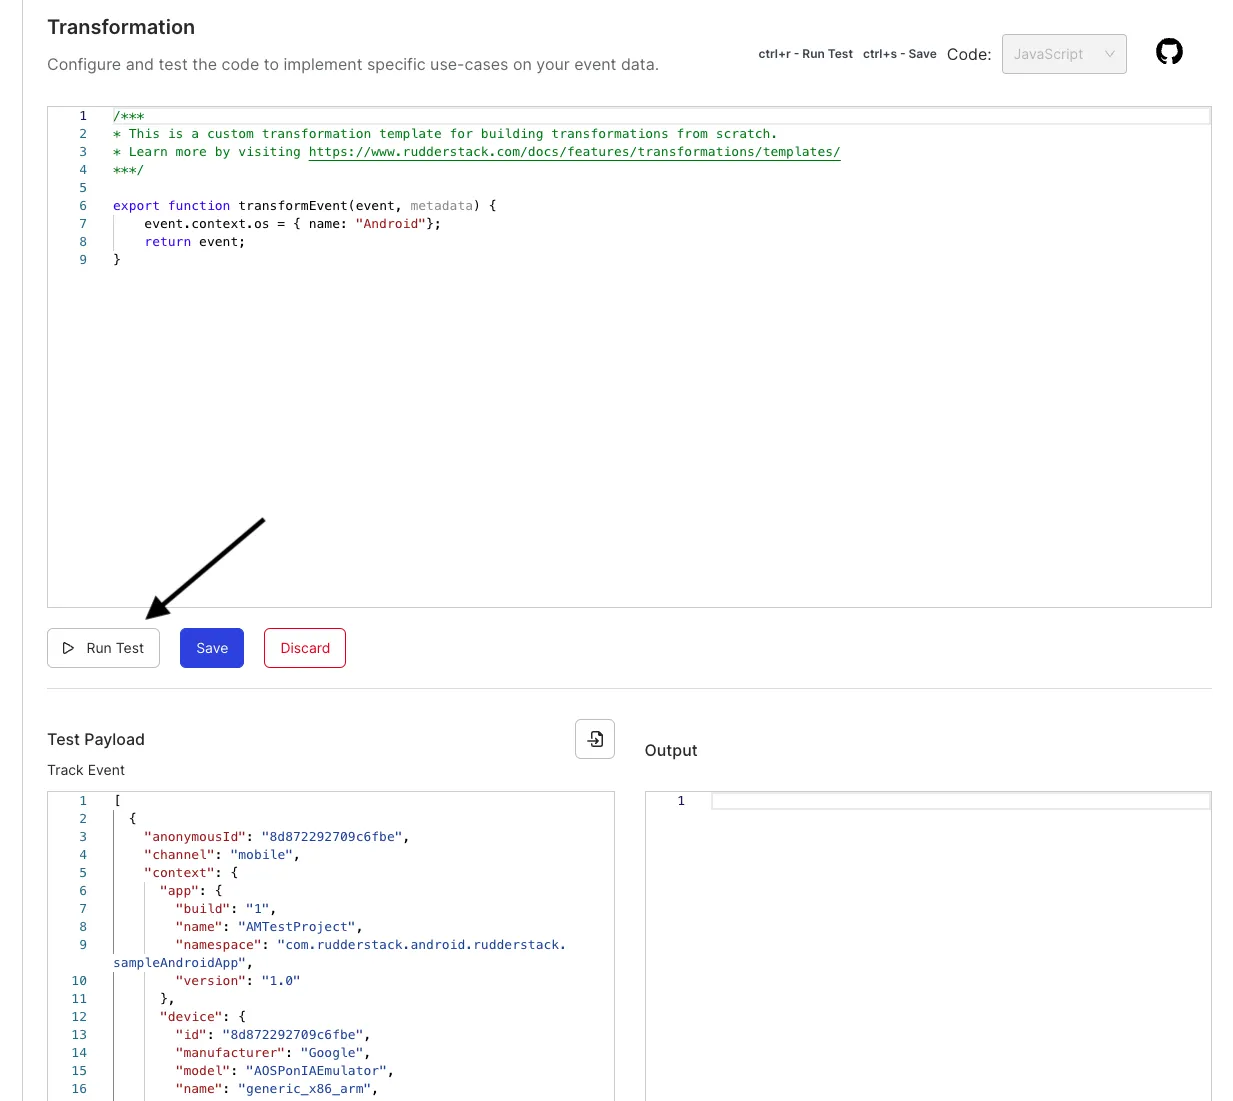
Verify if your transformation works as expected by clicking the Run Test button.
Click Save to save your transformation.
Go to the Connections tab of your transformation and connect it to the destination you set up above. See Connect transformation to destination for more information.
When you add a transformation and connect it to a destination, RudderStack does the following:
Tracks events at the source.
Applies the transformation logic to your events.
Converts the events in a format the destination expects - RudderStack does this internally and requires no user intervention.
Sends the transformed events to your destination.
Debugging
RudderStack gives you complete observability into your events and the ability to debug errors that might occur in case of event failures. It provides the Live Events feature, where you can:
Verify your instrumentation.
Get a real-time view of the events flowing from your sources to the connected destinations.
Identify and debug any errors at the source, destination, or transformation level and narrow down the root cause of the issue.
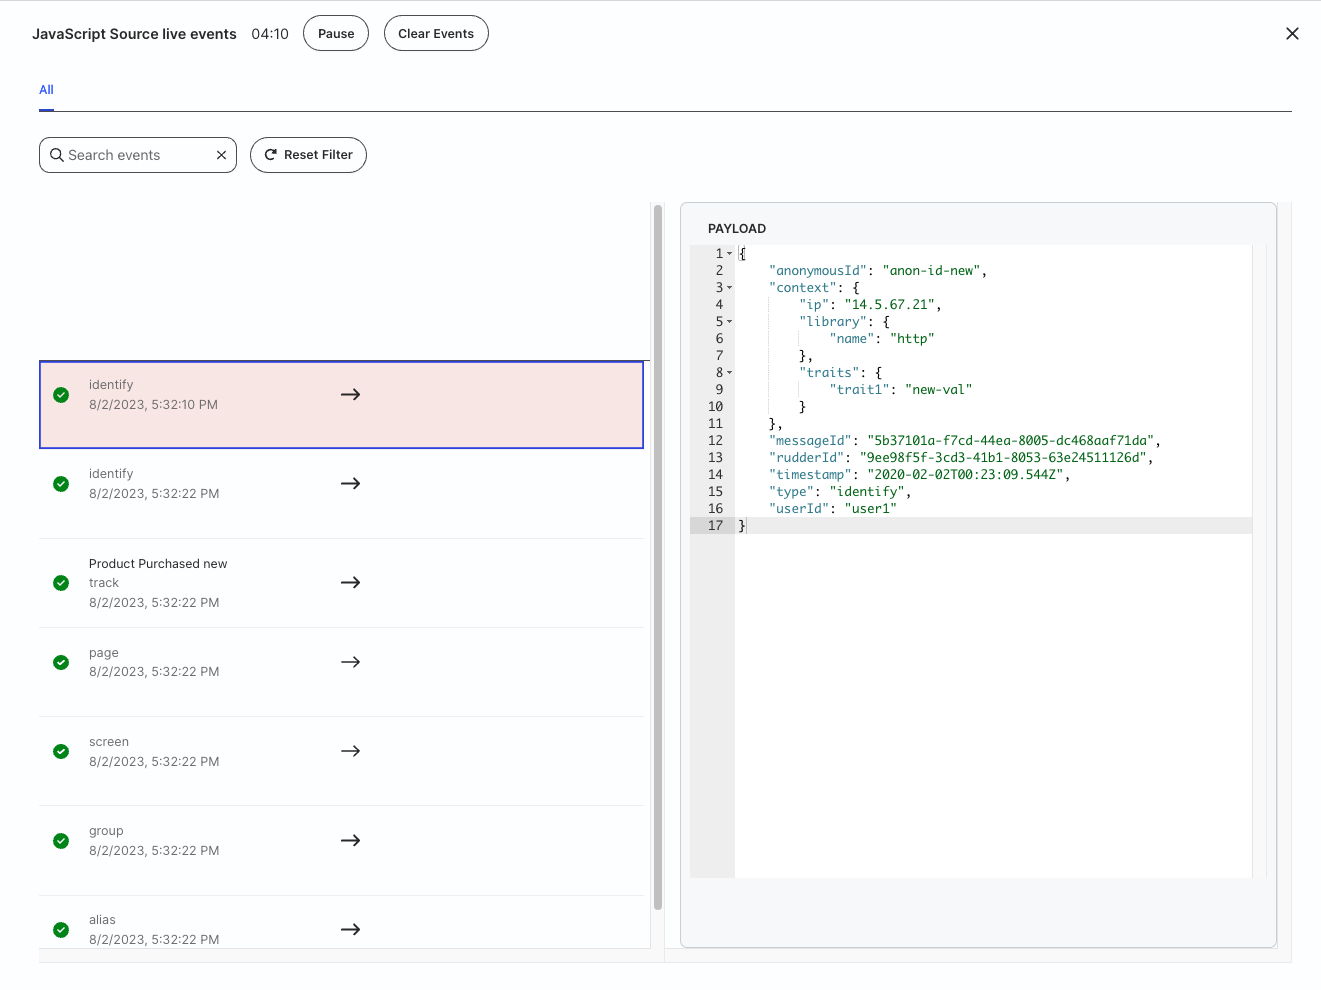
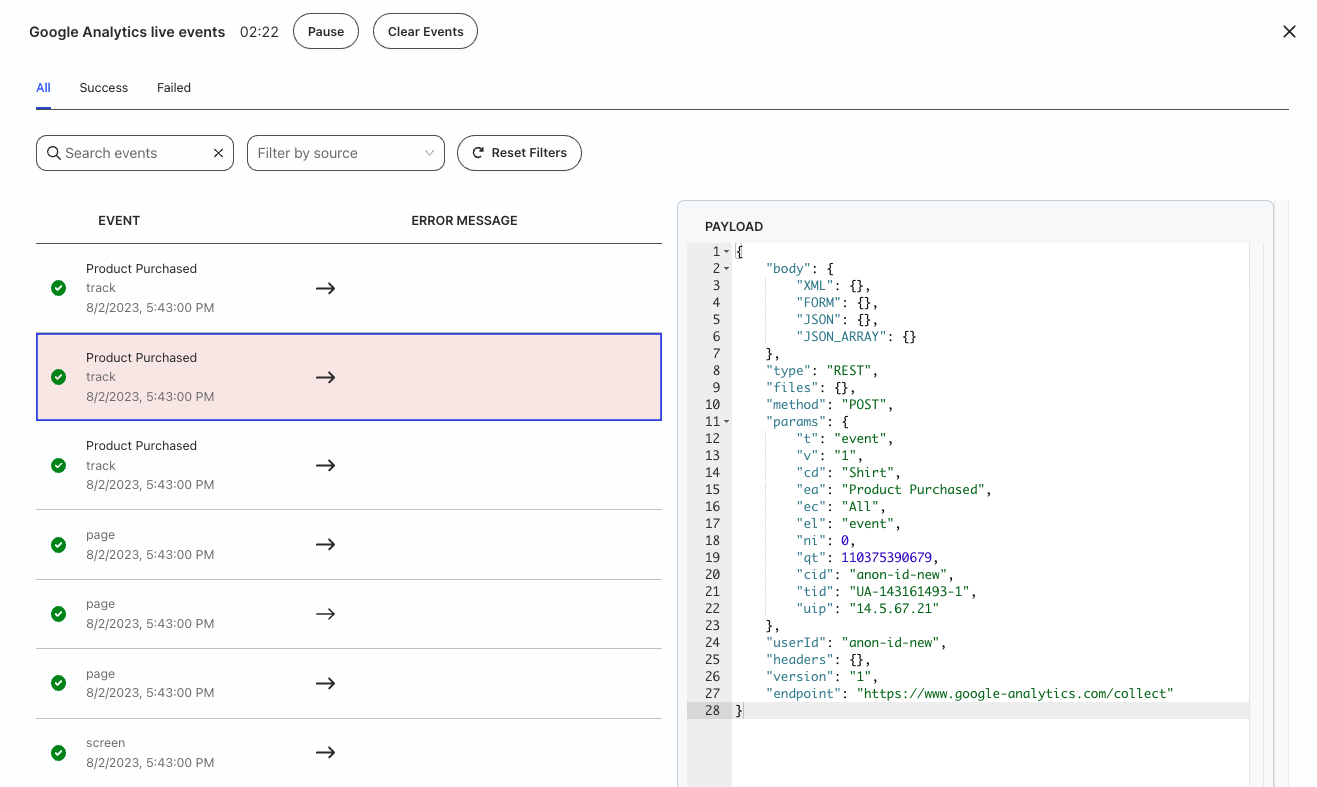
Source Live Events viewer
This is helpful to verify if RudderStack is receiving the source events at all. The payload you see in this viewer is the raw event payload collected from your website.
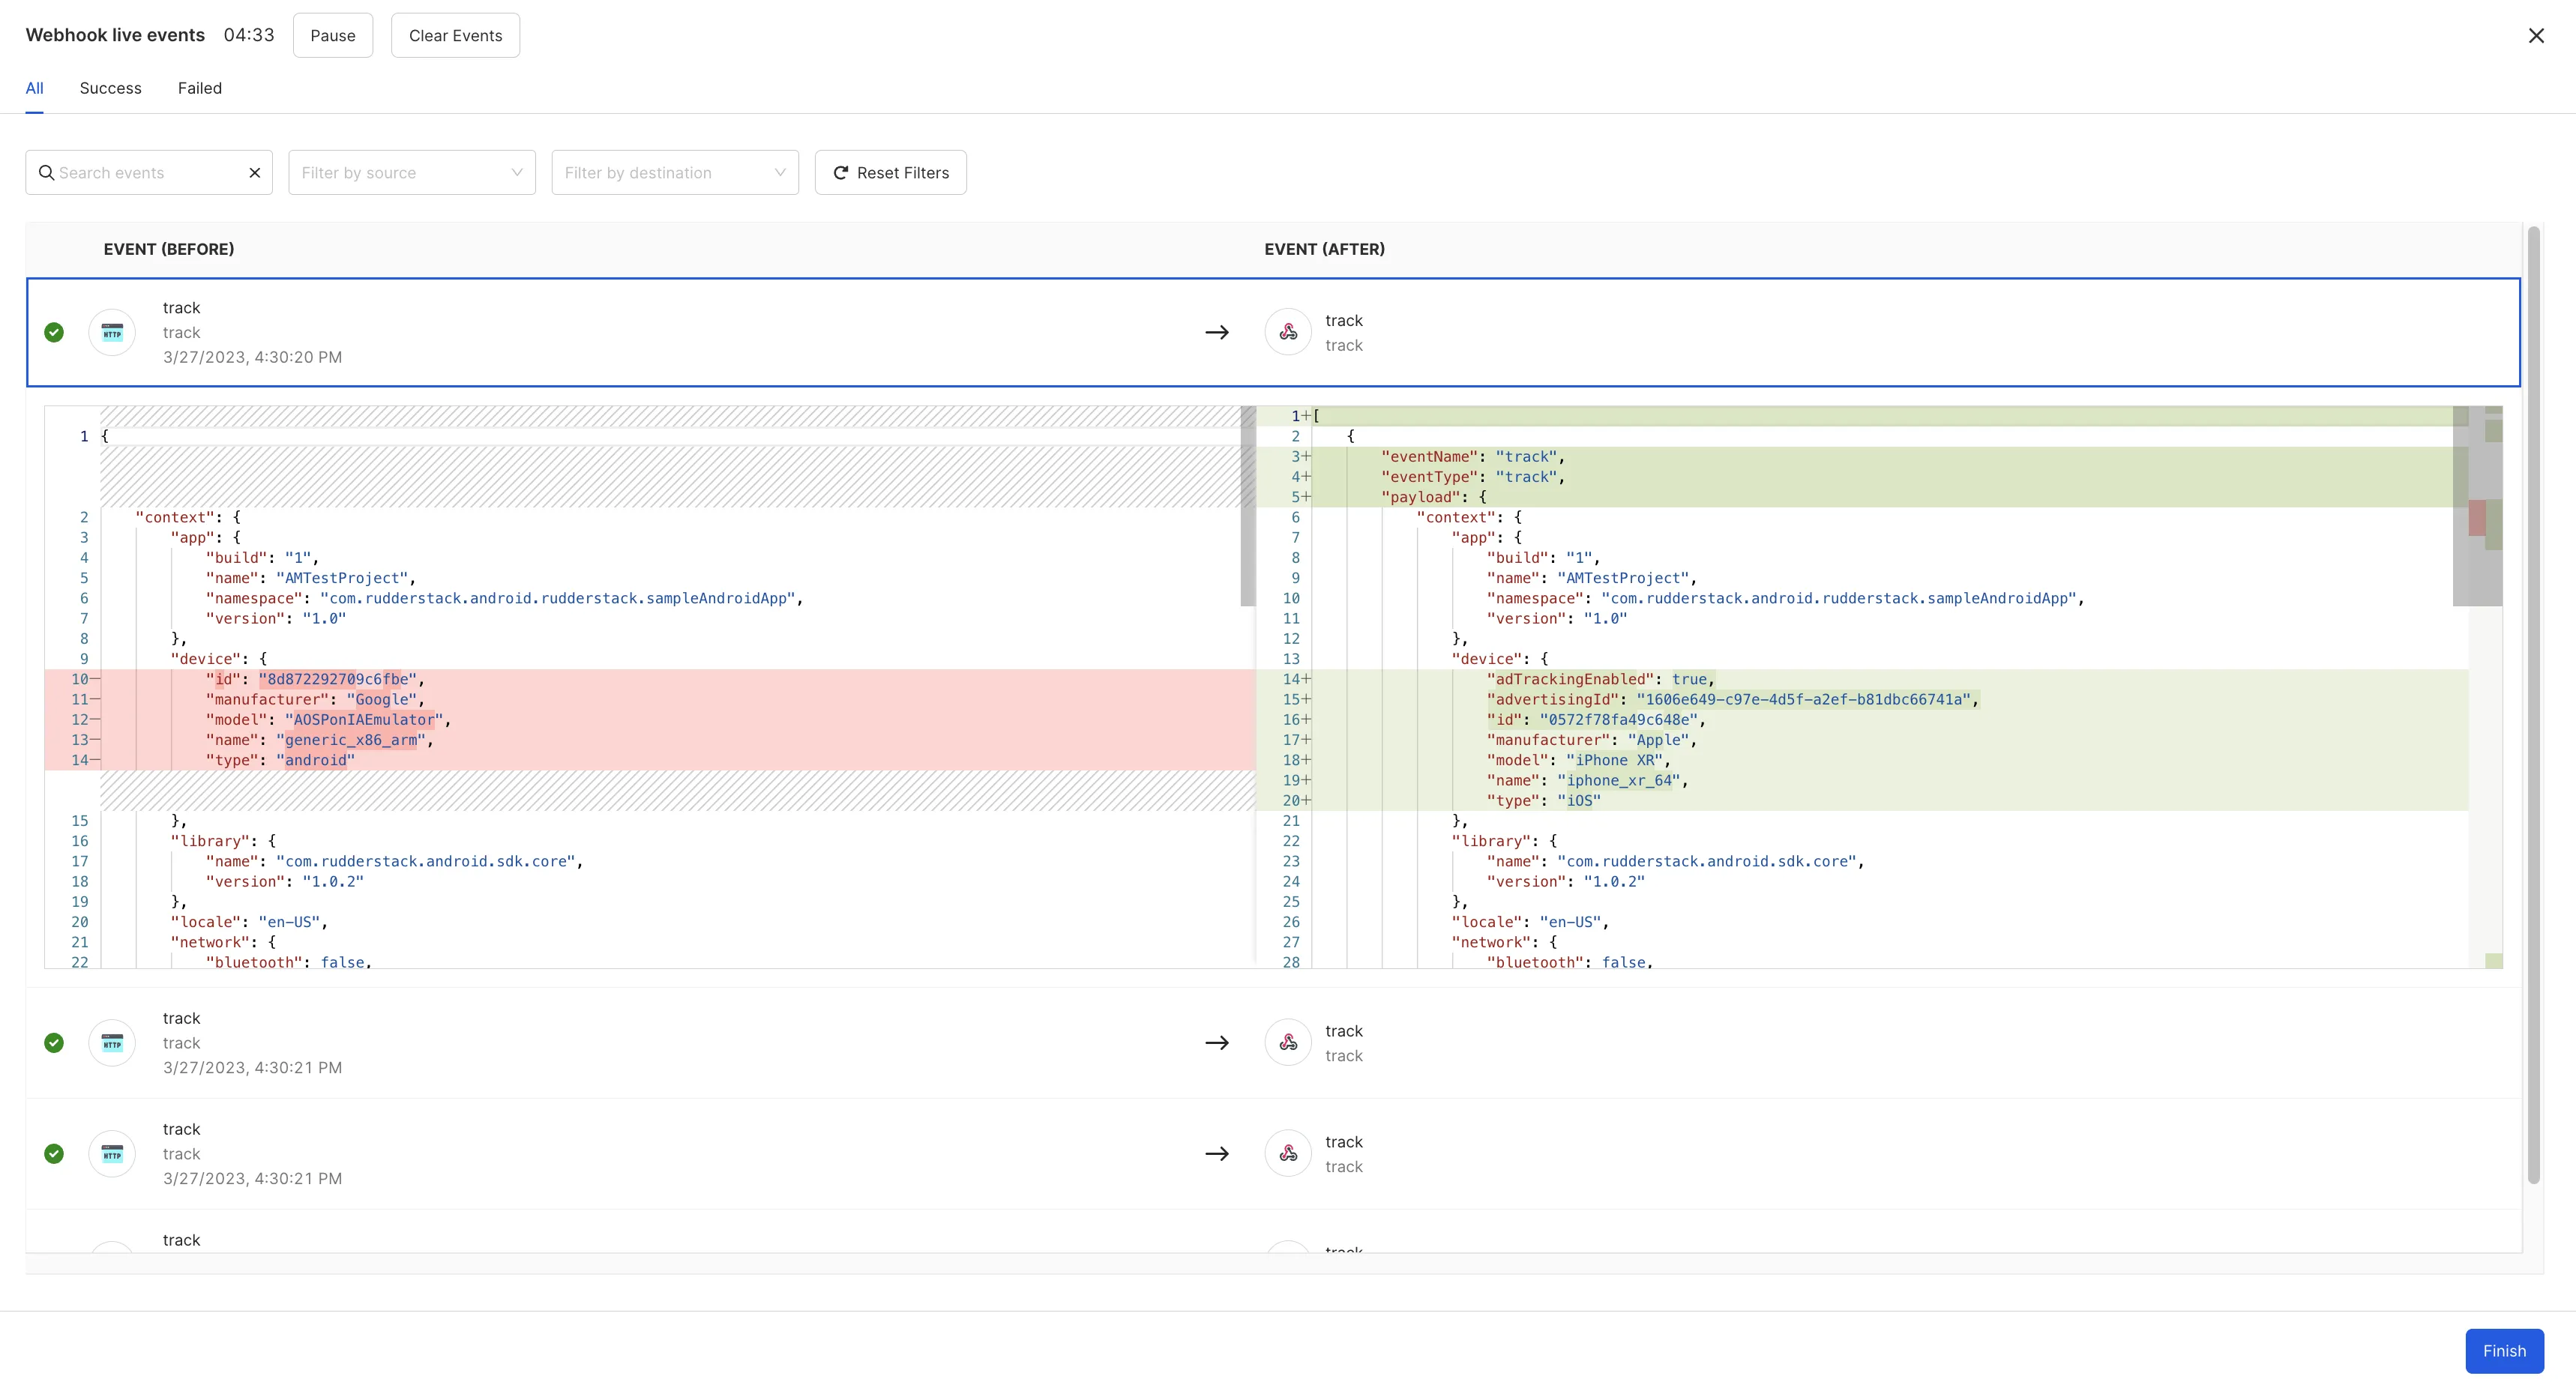
Transformation Live Events viewer
This viewer will give you a before and after snapshot of the event going into your user transformation and what it looks like afterward. It also notifies you about any dropped events or errors during the transformation, along with the details.
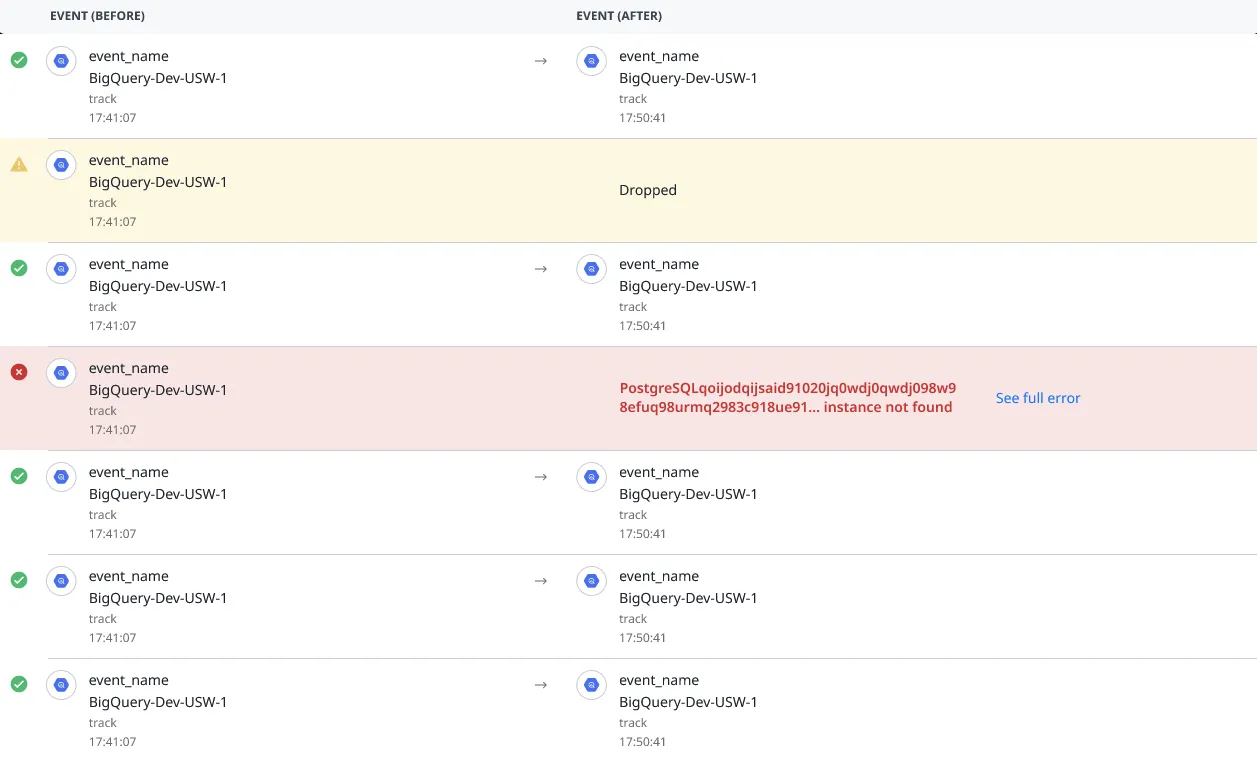
Destination Live Events viewer
This viewer shows you what the payload looks like when RudderStack sends it to the destination. You can also see the detailed error message if the destination returns an error.
See the Live Events documentation for more details.
This site uses cookies to improve your experience while you navigate through the website. Out of
these
cookies, the cookies that are categorized as necessary are stored on your browser as they are as
essential
for the working of basic functionalities of the website. We also use third-party cookies that
help
us
analyze and understand how you use this website. These cookies will be stored in your browser
only
with
your
consent. You also have the option to opt-out of these cookies. But opting out of some of these
cookies
may
have an effect on your browsing experience.
Necessary
Always Enabled
Necessary cookies are absolutely essential for the website to function properly. This
category only includes cookies that ensures basic functionalities and security
features of the website. These cookies do not store any personal information.
This site uses cookies to improve your experience. If you want to
learn more about cookies and why we use them, visit our cookie
policy. We'll assume you're ok with this, but you can opt-out if you wish Cookie Settings.