Manage your tracking plans in the RudderStack dashboard.
Available Plans
free
starter
growth
enterprise
9 minute read
This guide walks you through the different tracking plan management options in the RudderStack dashboard.
View tracking plans
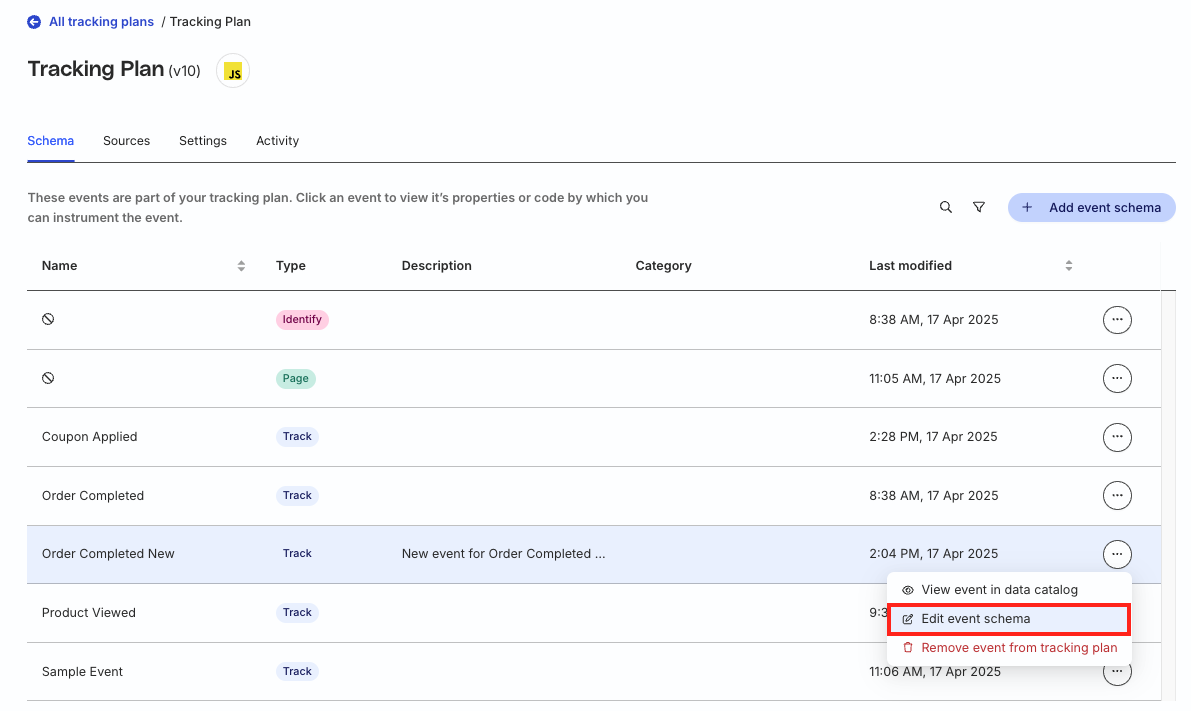
To see all the tracking plans associated with your workspace, go to Govern > Tracking Plans.
In this view, you get all the tracking plan-related details like name, description, last modified, tracking plan creation method, connected sources, and the last modified time.
The following table lists the different values for the Creation type column that explain how the tracking plan was created:
Creation type
Description
Migrated
Tracking plan was migrated from the old to new format.
Click on a tracking plan to view the following details:
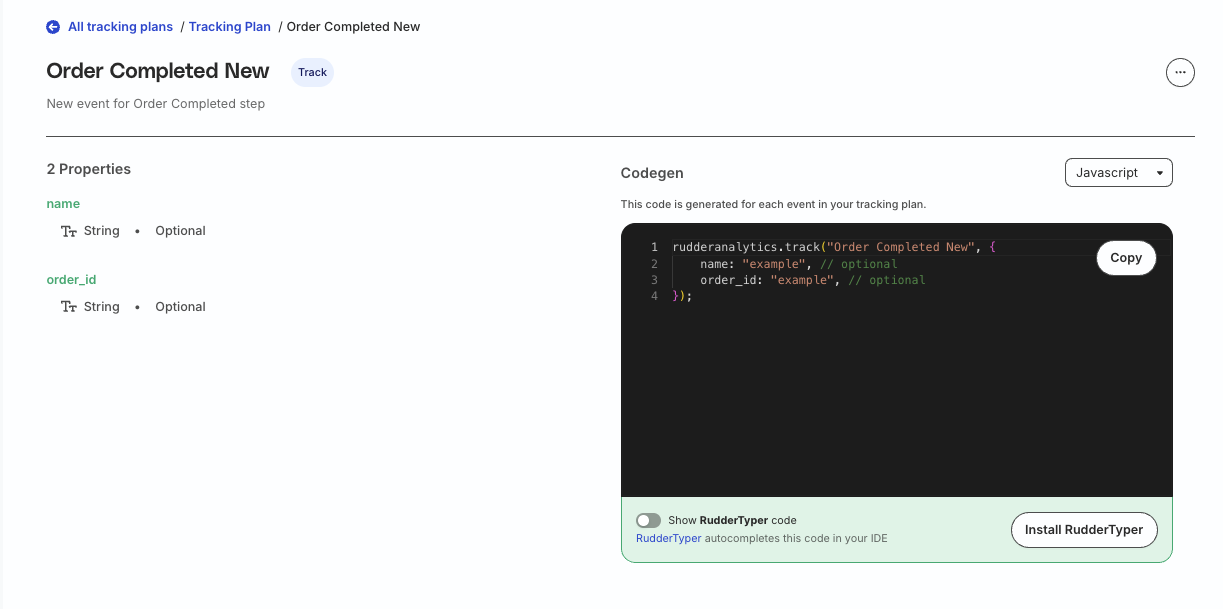
Schema: Displays the event schema for your tracking plan. Click an event to view its properties or the code which you can use to instrument the event in your source platform. You can also add a new event to the tracking plan by clicking the Add event schema button.
Sources: Displays the source(s) connected to the tracking plan. You can view the source details, edit source settings, and disconnect the source from tracking plan by clicking the meatballs menu next to the source.
Settings: Lets you edit the name of the tracking plan or delete the tracking plan (only if not connected to any source).
Activity: Lets you view all the activities performed on the tracking plan like events/properties added, removed, or updated etc. along with the user who performed that action.
Edit tracking plans
Go to Govern > Tracking Plans to see all the tracking plans in your workspace. Then, select a tracking plan to:
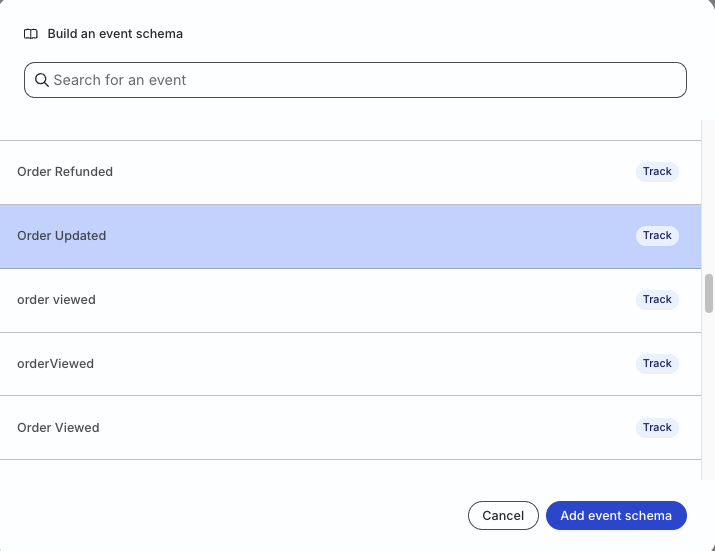
The Add event schema button lets you build a new event schema for the tracking plan. You can leverage an existing data catalog event or create a new event from scratch to build the new schema.
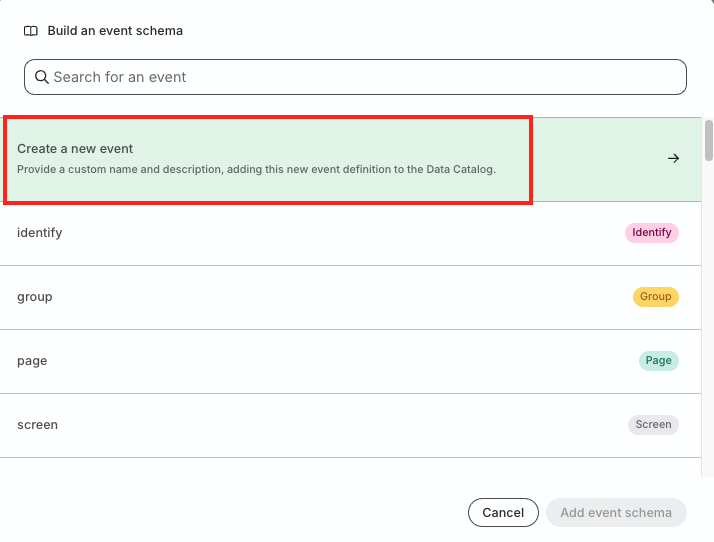
To build an event schema for a new event created from scratch:
RudderStack automatically adds this event to your Data Catalog
Click Add event schema > Create a new event.
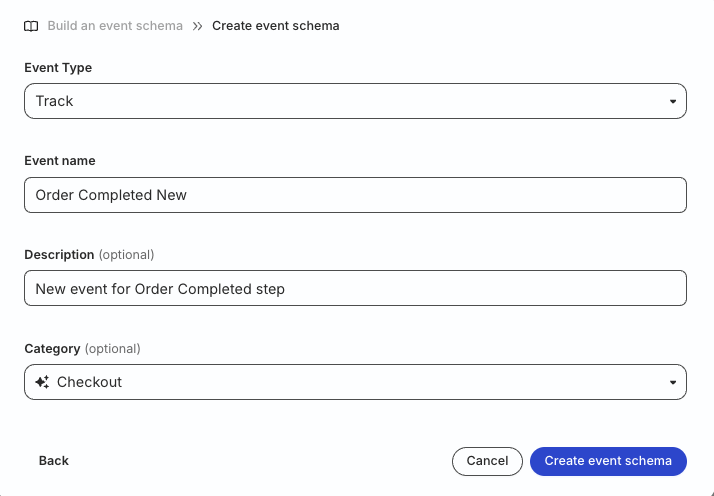
Specify the event type, name, description, and category.
Click Create event schema.
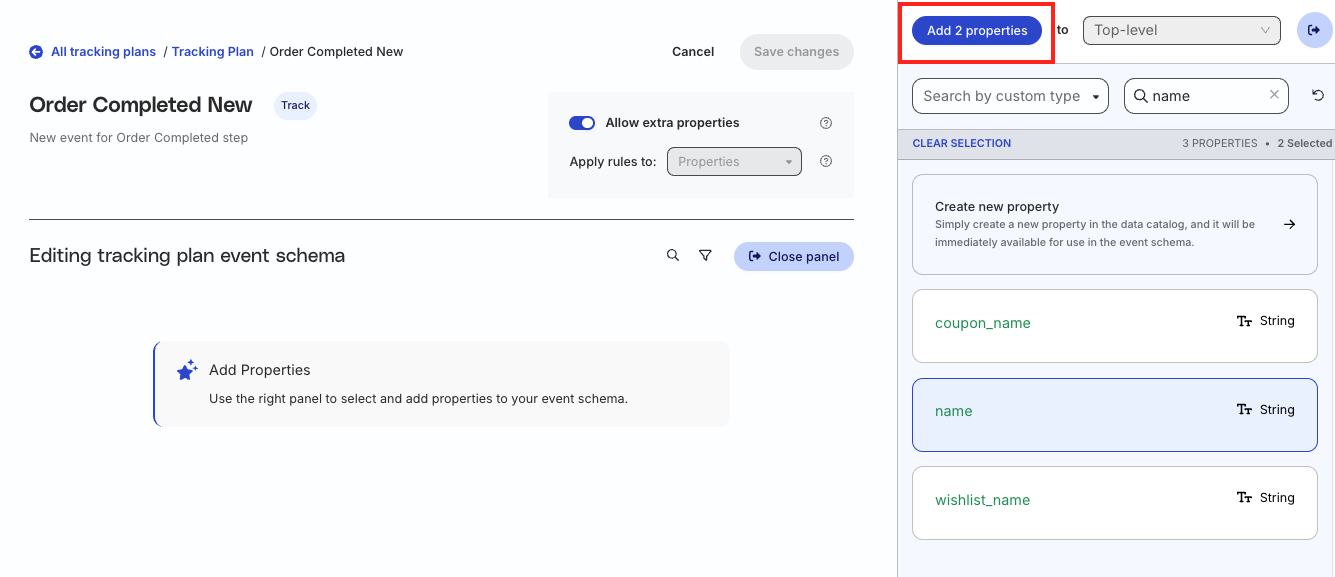
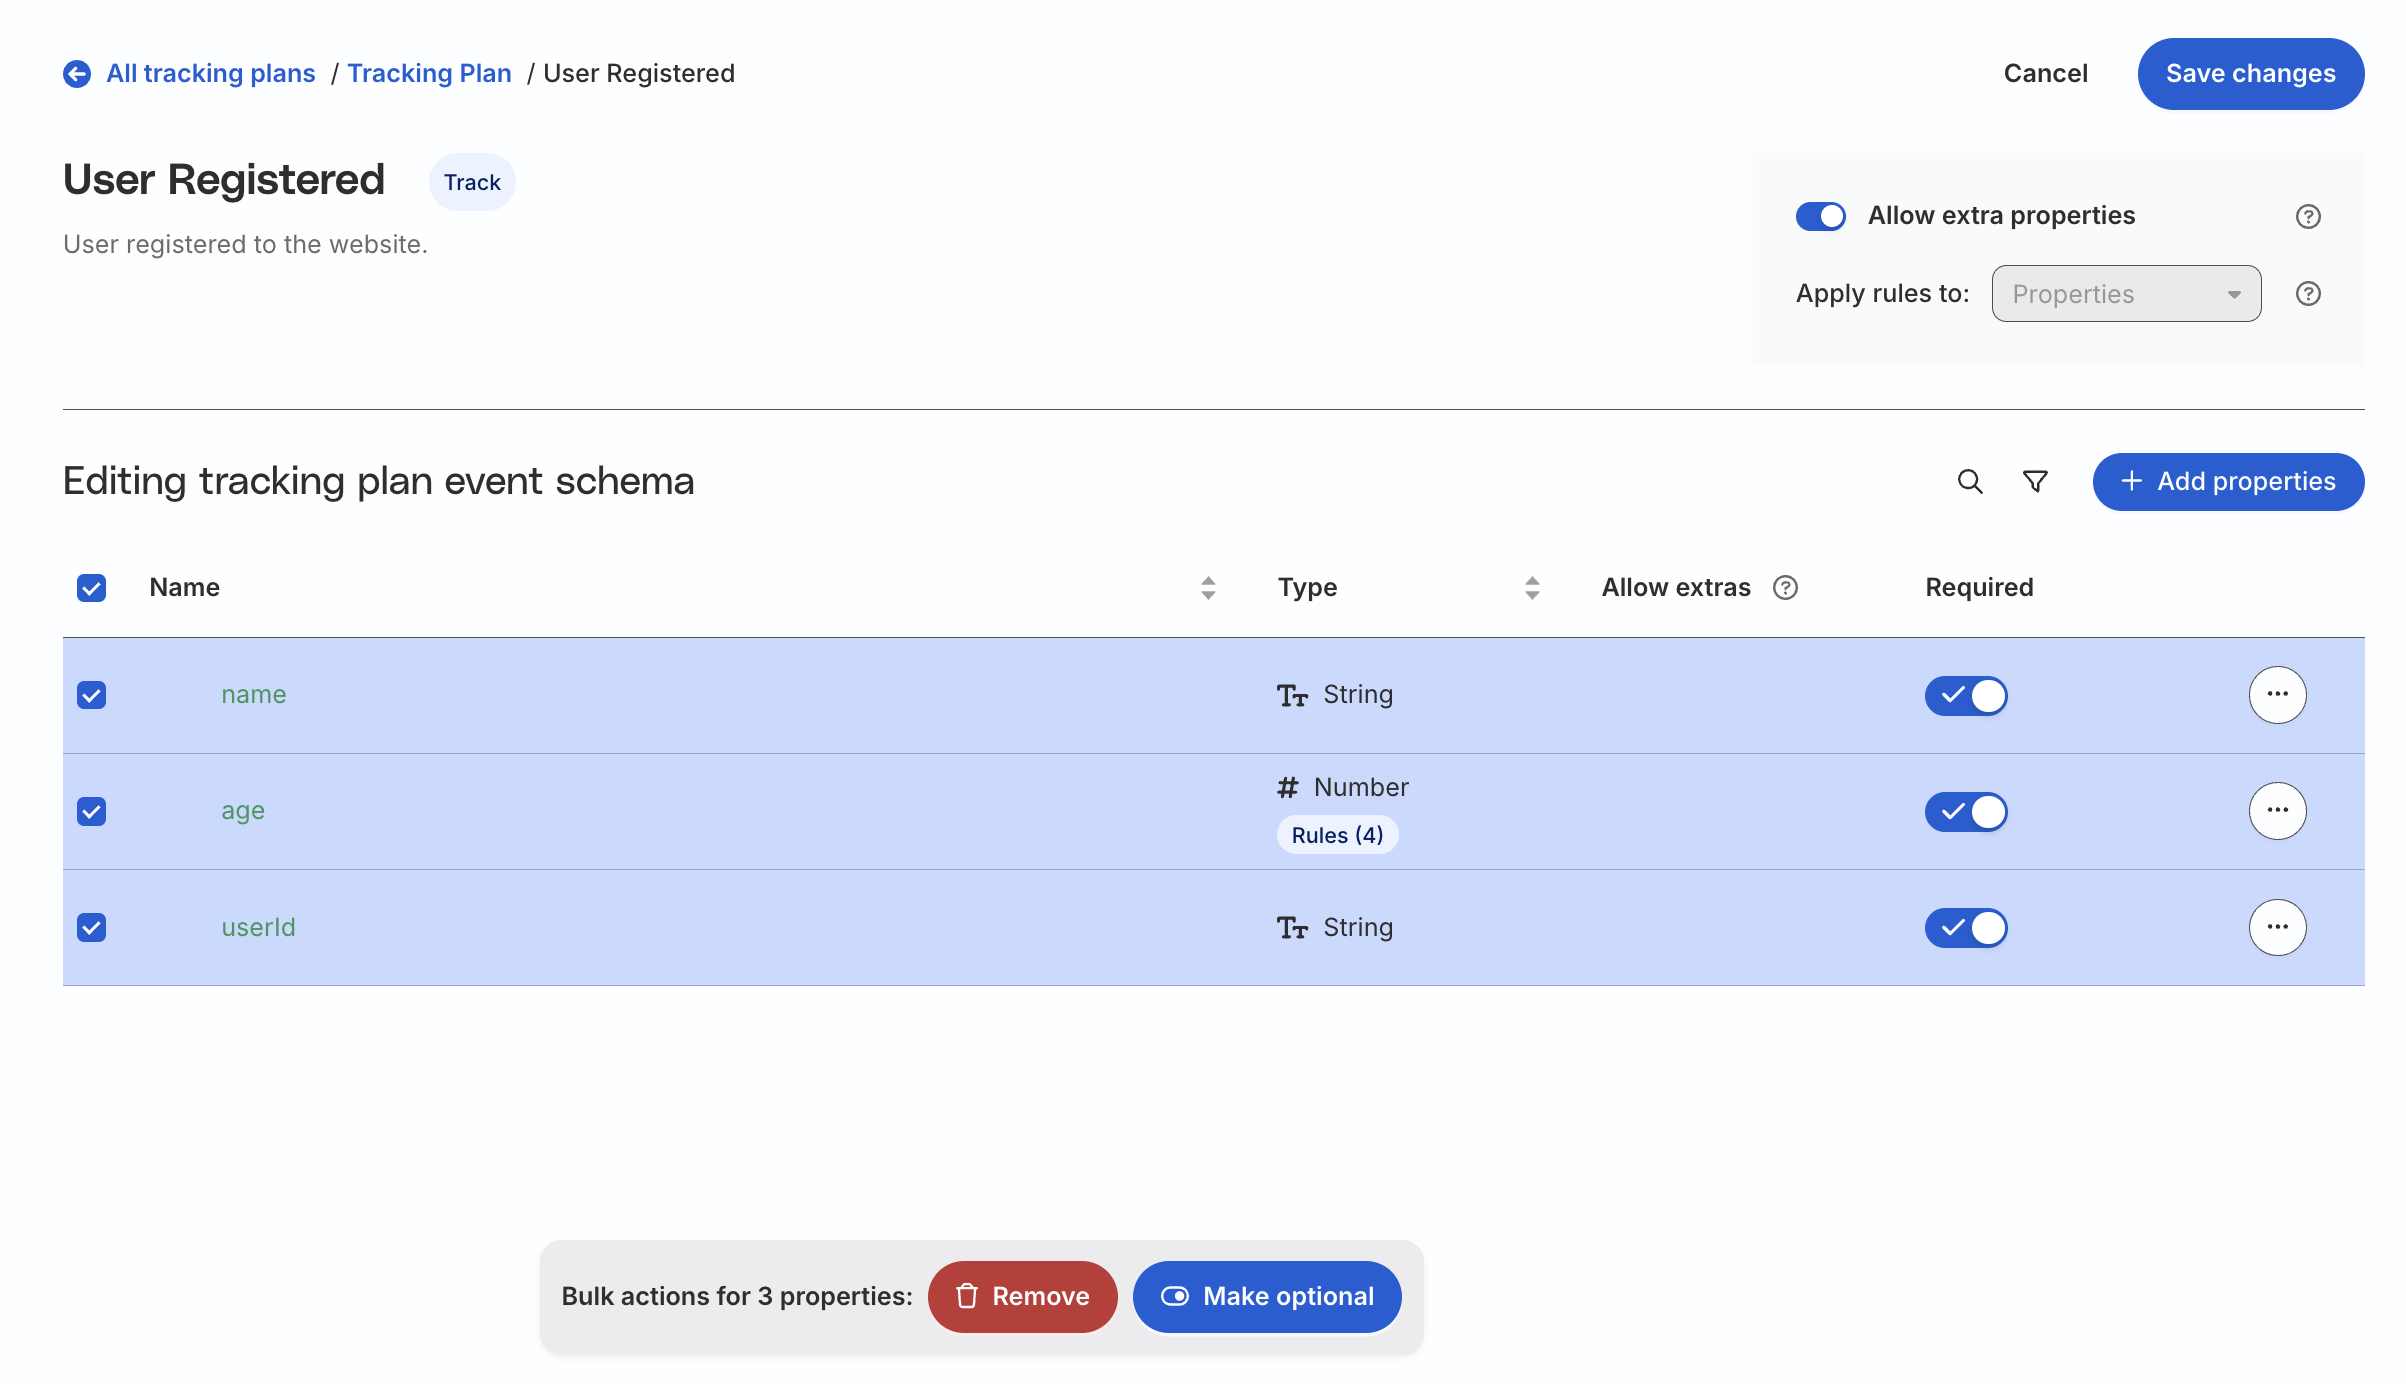
Manage properties
Click the Add properties button. A panel pops up on the right where you can select the properties to associate with this event. You can also create a new property from scratch from this panel.
Select the properties from the list. You can also filter them by data type, search a property by name, or create a new property in the Data Catalog. Then, click the Add properties button.
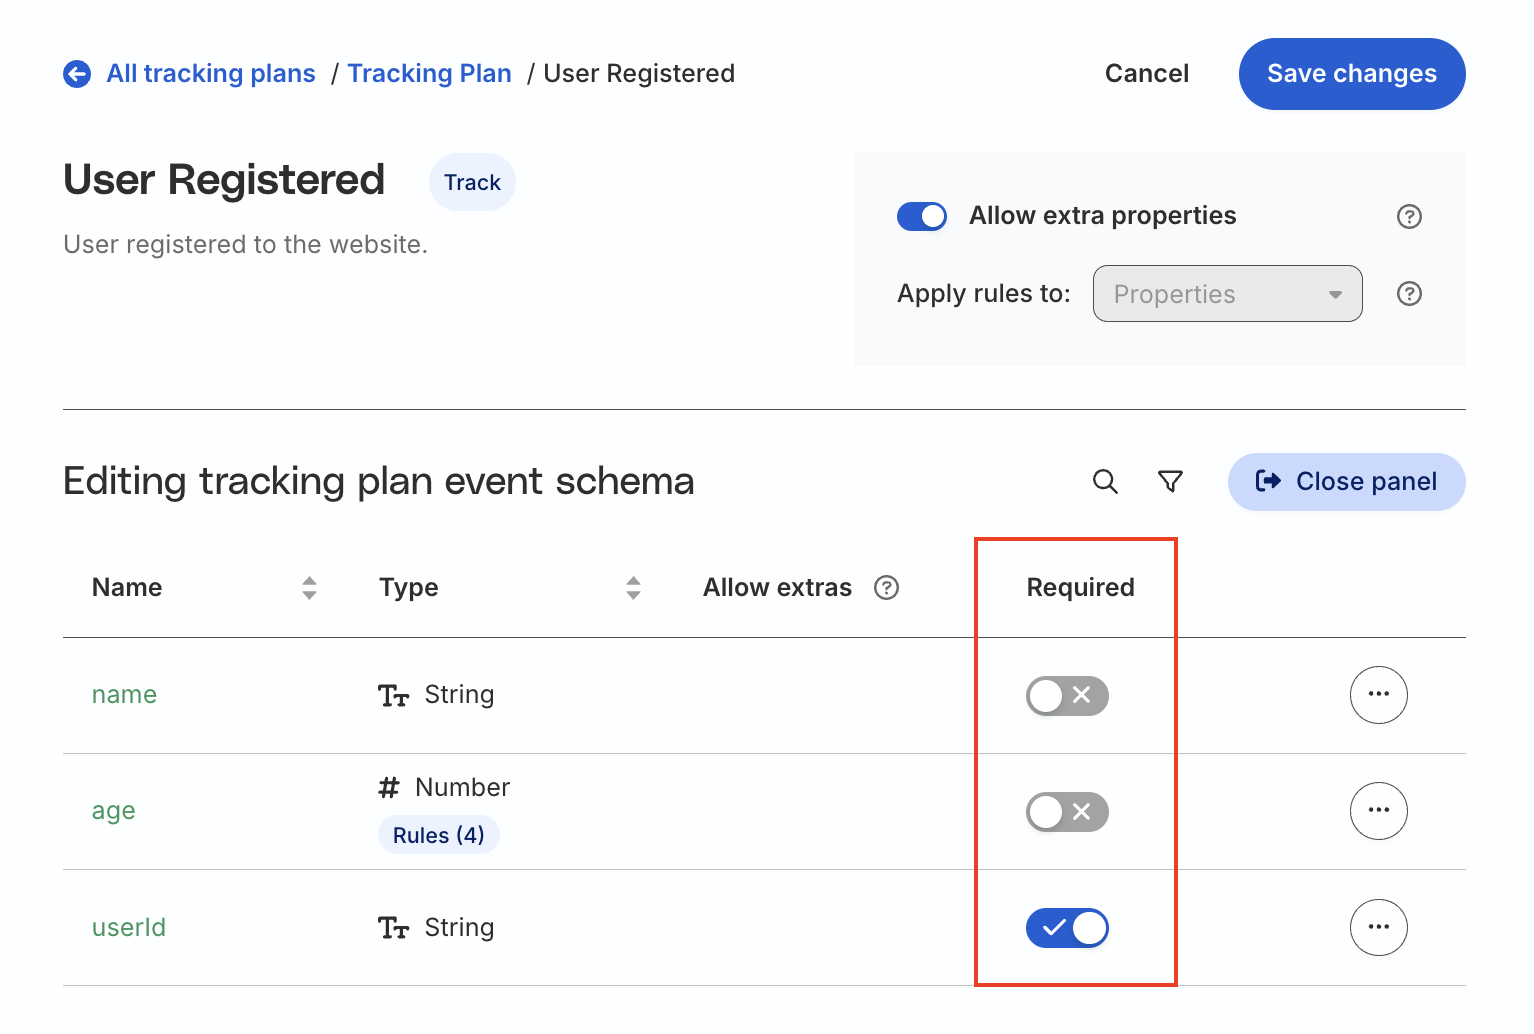
After adding the properties, you can add the required validation rules by marking them as Required or Optional.
Manage tracking plan configurations
You can also define the following tracking plan configurations for this event:
Whether RudderStack should allow events to contain properties beyond those defined in this schema. Turn off the toggle to ensure that the tracking plan accepts only the configured event properties.
To build an event schema for an existing data catalog event:
Click Add event schema.
Select the required event from the list of data catalog events.
Click Add event schema.
Manage properties
Click the Add properties button. A panel pops up on the right where you can select the properties to associate with this event. You can also create a new property from scratch from this panel.
Select the properties from the list. You can also filter them by data type, search a property by name, or create a new property in the Data Catalog. Then, click the Add properties button.
After adding the properties, you can add the required validation rules by marking them as Required or Optional.
Manage tracking plan configurations
You can also define the following tracking plan configurations for this event:
Whether RudderStack should allow events to contain properties beyond those defined in this schema. Turn off the toggle to ensure that the tracking plan accepts only the configured event properties.
Perform bulk actions for the event properties like removing them or marking them all as Required or Optional.
Make sure to click Save changes for any schema changes to take effect.
Note the following while editing an event schema:
You cannot specify or edit the advanced rules for an event property. To do so, you will need to go to the Data Catalog, click the required property, and go to the Advanced rules tab.
You cannot change an event type. To do so, you will need to delete the event from the Data Catalog and create a new event.
Event structure for tracking plan validation
By default, RudderStack applies the tracking plan validation on the following objects present within an event:
Events
Object
track / screen / page
properties
identify / group
traits
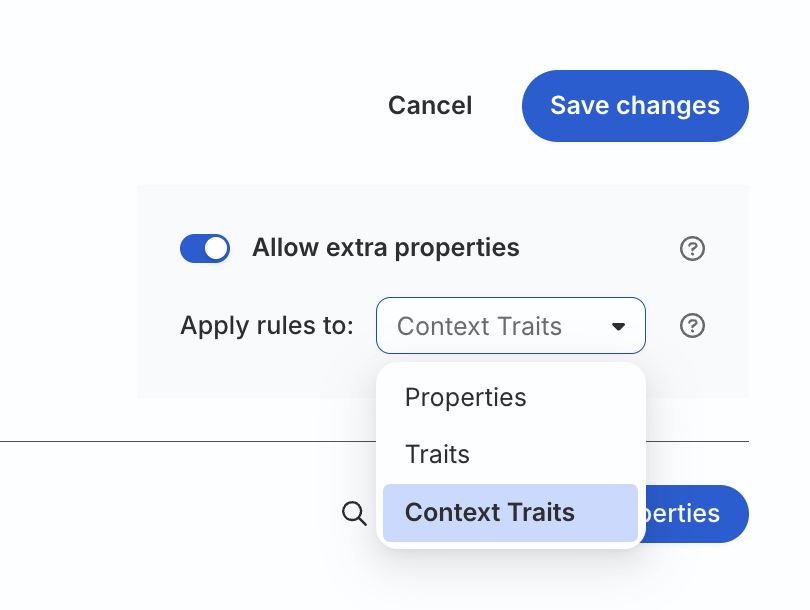
If you are instrumenting your events such that the relevant information is present in a different object, make sure to select the relevant option from the Apply rules to dropdown.
This dropdown is only available for the identify, page, screen and group events.
For track events, RudderStack automatically sets the object to properties by default - this is not editable.
Add nested event properties
RudderStack supports defining complex nested properties for an event in your tracking plan - this allows you to validate complex data structures in your inbound events and metadata.
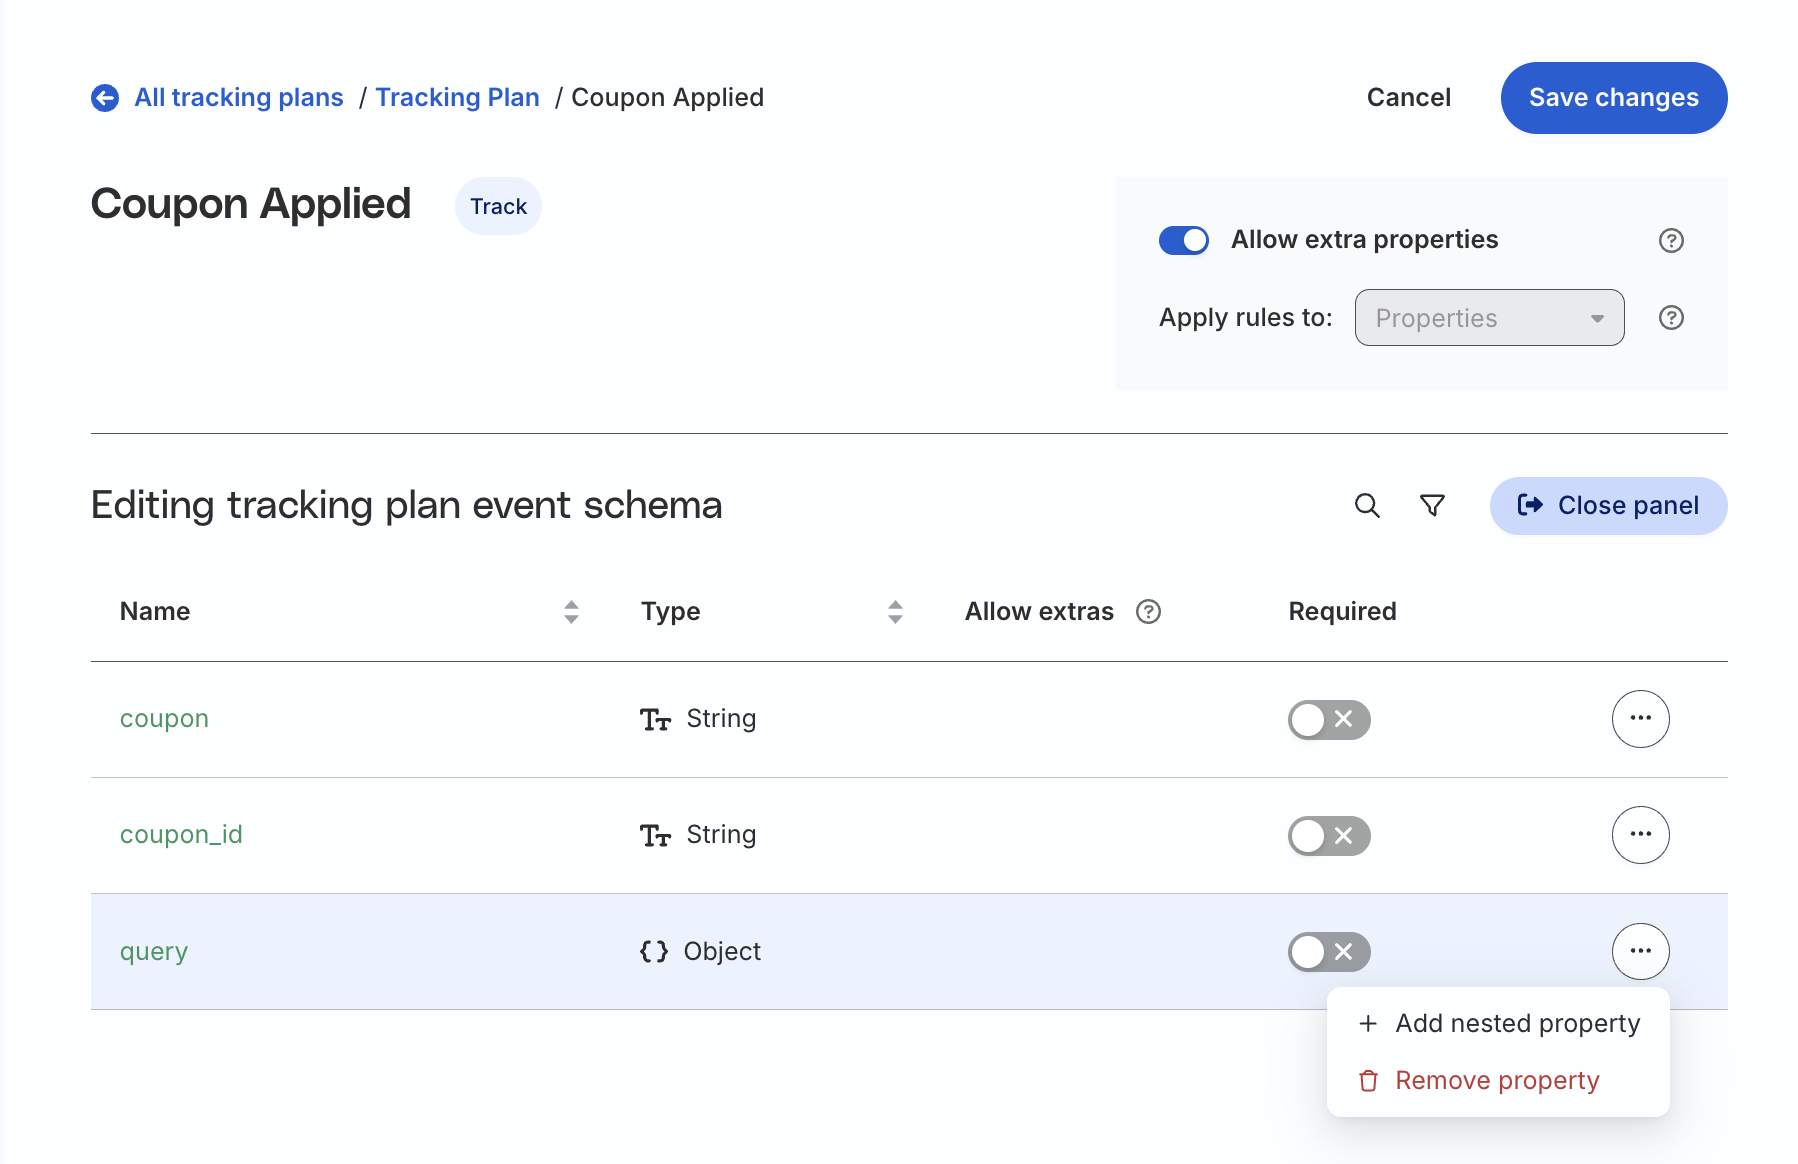
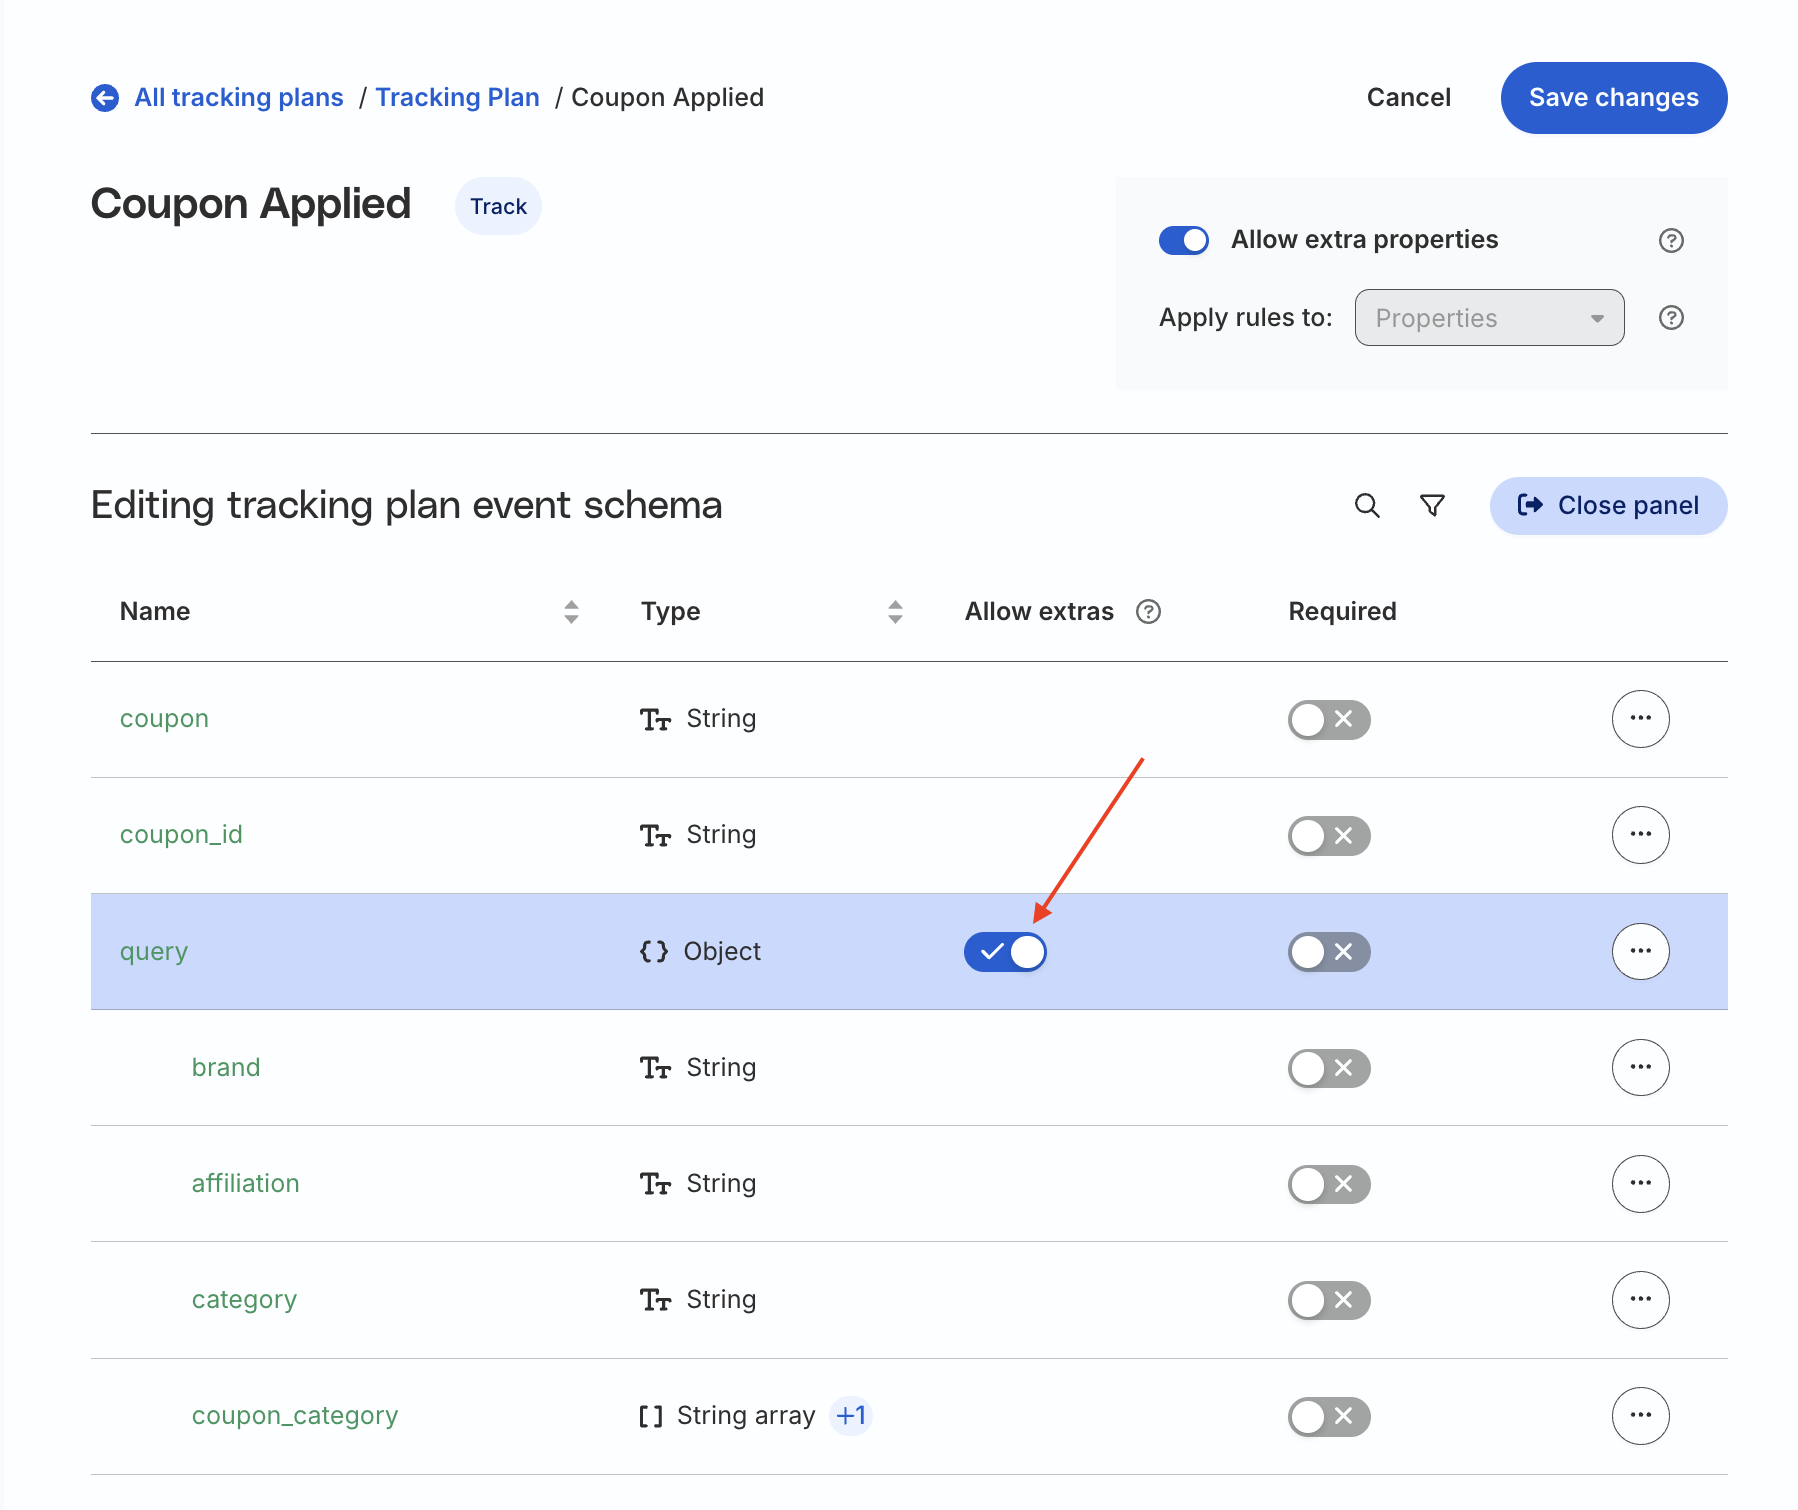
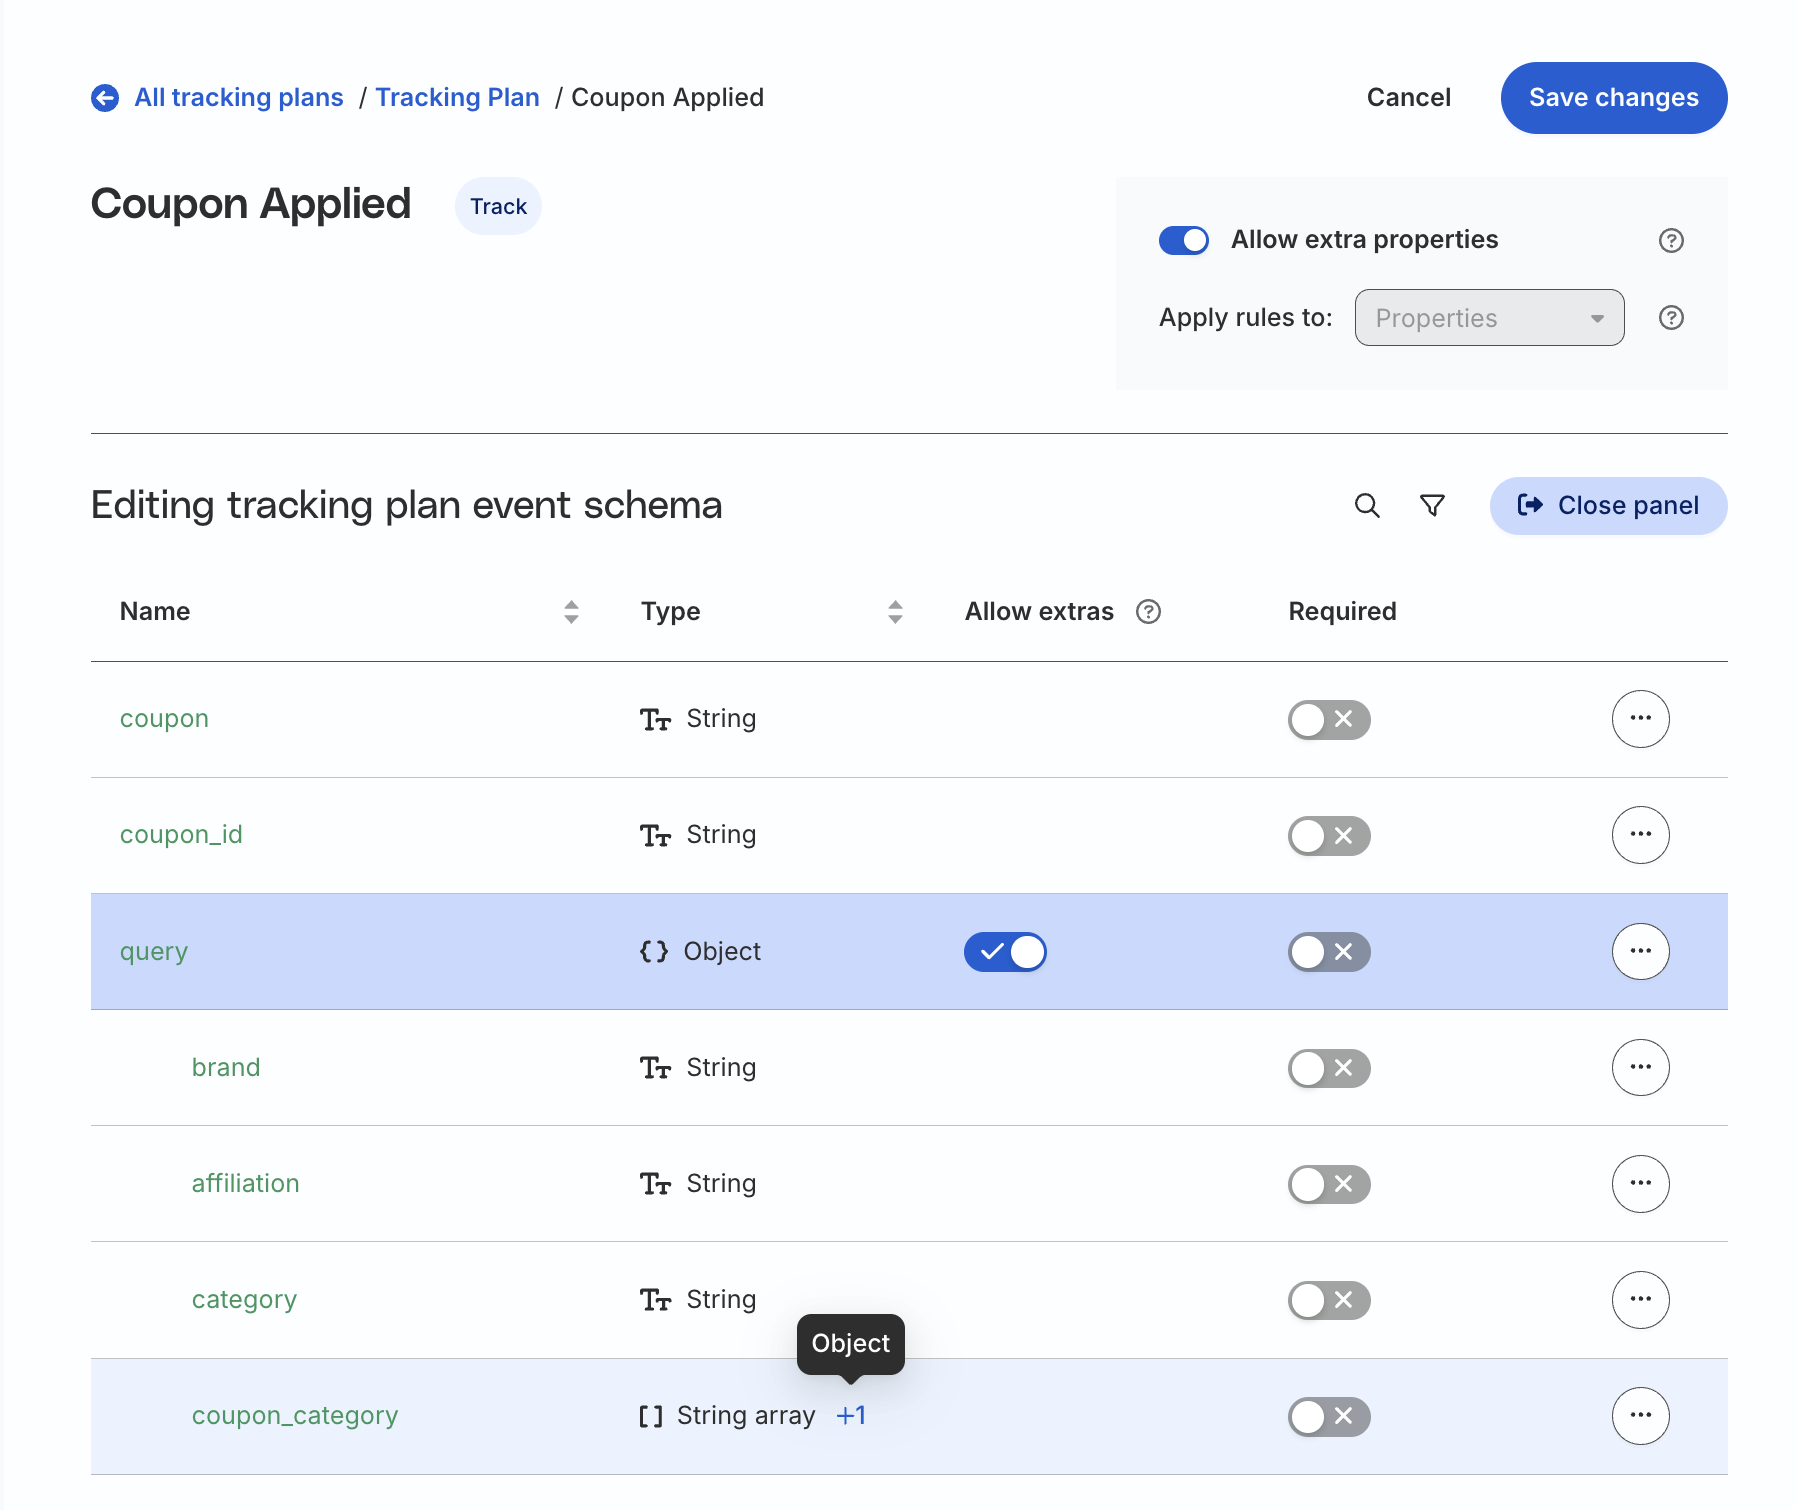
Click the Add properties button and choose an event property of the Object or Array data type from the right sidebar. Then, click the Add property button.
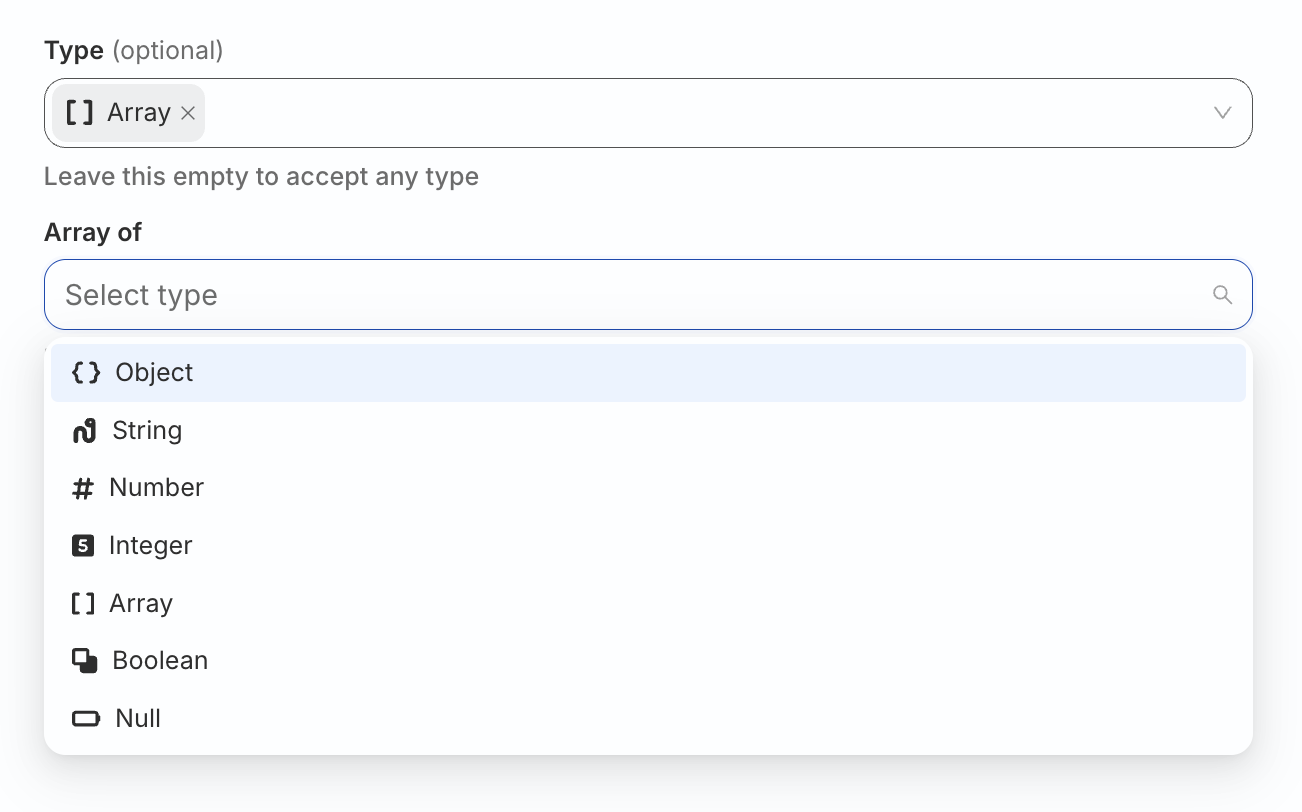
For nesting properties within a property of Array data type, you must set the Array of setting to Object, as shown:
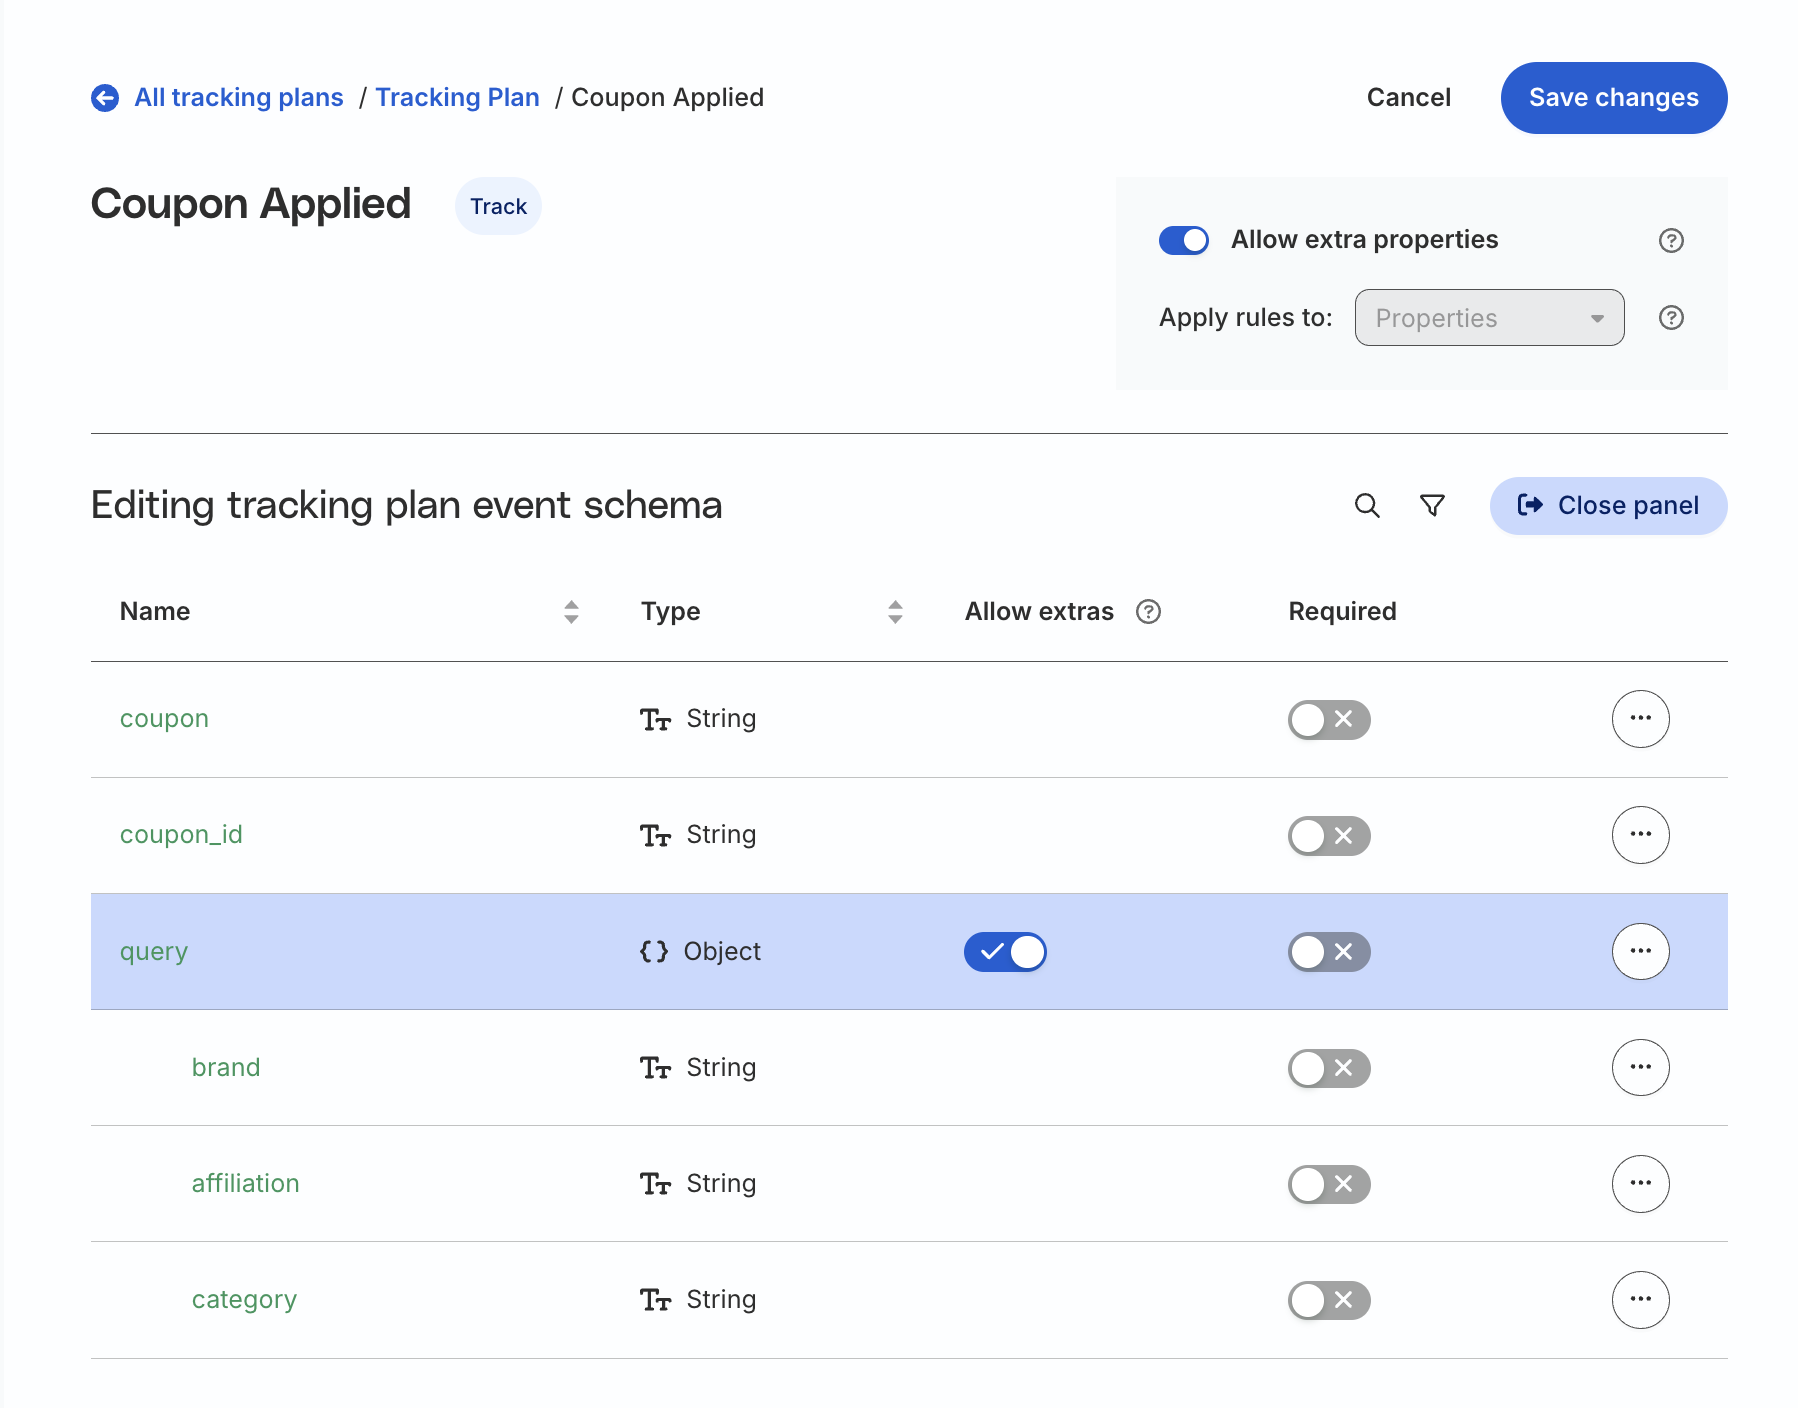
A + sign will appear as you hover over the Object or Array property. Alternatively, you can click the meatballs menu next to property and click Add nested property.
Select the properties to nest from the right sidebar.
You can also enable the Allow extras toggle to allow nested properties beyond those defined in this schema. Disabling this toggle ensures only the specified nested properties are accepted.
Note that:
You can nest properties only within a property of Object or Array data type.
RudderStack supports up to three levels of nested properties within an event property.
Removing the parent property from the tracking plan automatically removes all the nested properties.
You cannot nest properties within a property having both Array and Object data types. An example of such a property is shown:
Use case for tracking plan created from source
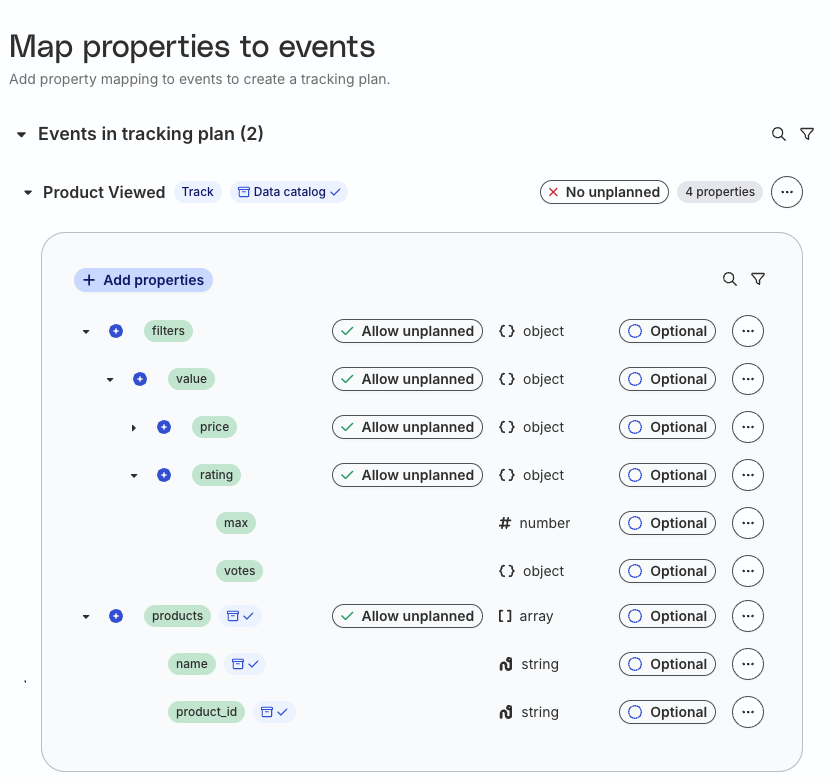
For tracking plans created using the Pull from source option, RudderStack populates the events and properties based on the schema sampled from your incoming events.
You can define up to three levels of nesting within an event property of Object or Array data type.
For example, consider the following event payload:
Upon importing the above event in your tracking plan, you will see the following levels of nested properties within the filters and products properties:
RudderStack will not show the property min nested within votes as it exceeds the third level of nesting.
Share event spec pages
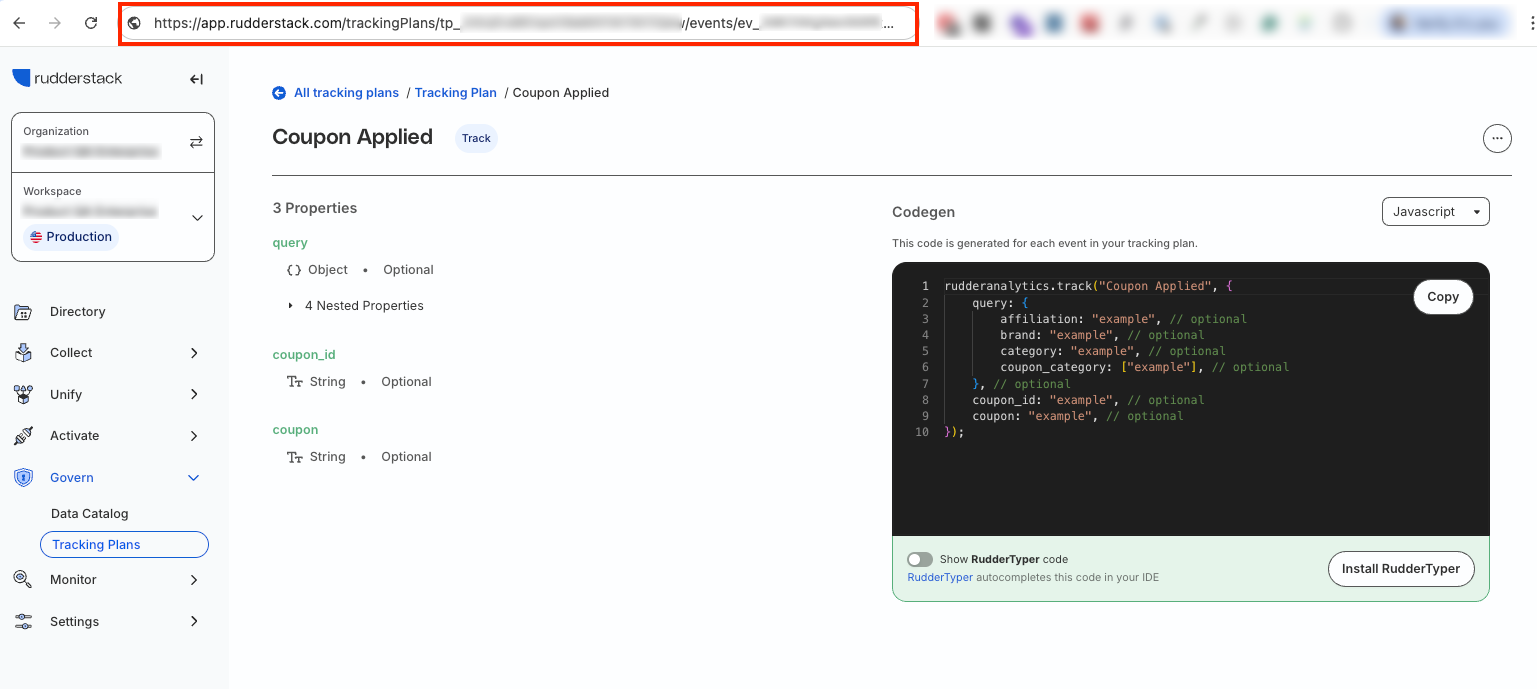
RudderStack supports sharing the spec for a tracking plan event across different workspace members for easier collaboration.
Go to Govern > Tracking Plans.
Click the tracking plan and select the event.
Copy the URL and share it with your workspace members.
This shareable page contains the following event details:
Event name and type
Property details like:
Property name and data type.
Whether it is required or optional, and
Details of the nested properties, if any.
You will also see this view once you create or update the schema for that tracking plan event.
View source-specific settings
Go to the source connected to the tracking plan to see the following settings in the Tracking Plans tab:
Unlink Tracking Plan: Lets you unlink the tracking plan from your source.
Previously linked tracking plans: Lets you view the previously linked tracking plans for a source (in the last 30 days).
Tracking plan settings: Lets you edit the following tracking plan settings for each event type for the connected source. Once done, click Save Settings for the changes to take effect:
Drop events with unplanned event names: When toggled on, RudderStack drops all events that do not match the predefined event names in the tracking plan (only applicable for track events).
Drop events with unplanned event properties: When turned on, RudderStack drops all events that contain properties not matching the list of predefined properties for the specific event.
Drop events with other violations: When toggled on, RudderStack drops all events with violations that include Type Mismatch, Required Fields Missing, and others outlined in the Violation types section.
Propagate errors: When turned on, RudderStack captures the validation errors in the event’s context object and sends them downstream (user transformations, destinations), depending on your use-case. If toggled off, RudderStack drops the event containing the validation errors. It is recommended to keep this setting toggled on as it helps you assess the performance of your tracking plans.
Questions? We're here to help.
Join the RudderStack Slack community or email us for support
This site uses cookies to improve your experience while you navigate through the website. Out of
these
cookies, the cookies that are categorized as necessary are stored on your browser as they are as
essential
for the working of basic functionalities of the website. We also use third-party cookies that
help
us
analyze and understand how you use this website. These cookies will be stored in your browser
only
with
your
consent. You also have the option to opt-out of these cookies. But opting out of some of these
cookies
may
have an effect on your browsing experience.
Necessary
Always Enabled
Necessary cookies are absolutely essential for the website to function properly. This
category only includes cookies that ensures basic functionalities and security
features of the website. These cookies do not store any personal information.
This site uses cookies to improve your experience. If you want to
learn more about cookies and why we use them, visit our cookie
policy. We'll assume you're ok with this, but you can opt-out if you wish Cookie Settings.