Org Admins have full access to create and manage Tracking Plans
Members with the Connections Admin role in their workspace policy can create and manage Tracking Plans
Members with the Connections Editor role in their workspace policy can only connect Tracking Plans to Event Stream sources
1. From an existing Event Stream source
You can create a Tracking Plan from an existing event data source. This option leverages the Event Audit API to import the events and properties tracked by the event data source and generates an initial plan.
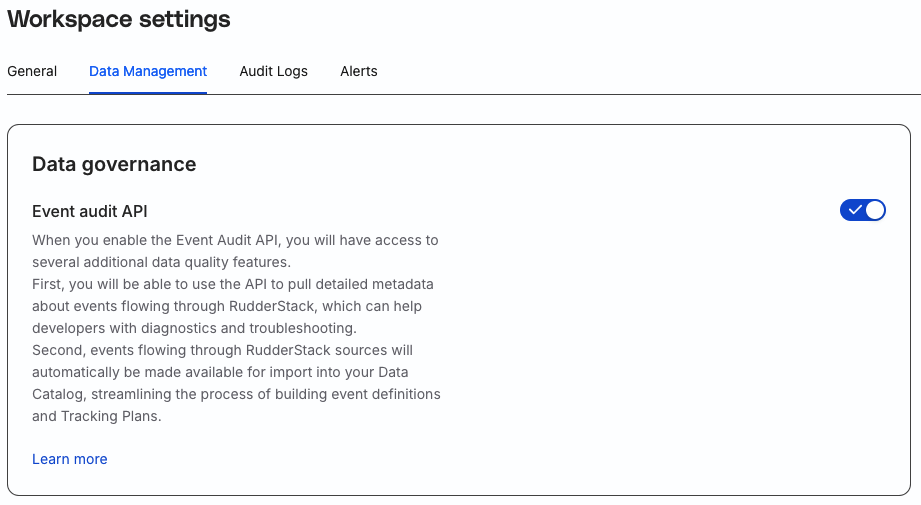
Before you proceed, make sure the Event Audit API setting is turned on in your RudderStack dashboard.
Go to Settings > Workspace and click the Data Management tab. Scroll down to the Data governance section and turn on the Event Audit API toggle.
Log in to the RudderStack dashboard and go to Govern > Tracking Plans option in the left sidebar.
Click Create Tracking Plan.
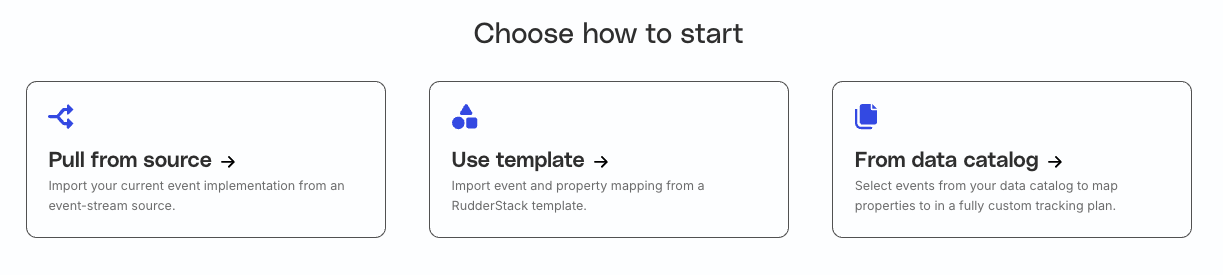
Select Pull from source on the next screen.
Select the event stream source from which you want to import the tracked events and properties and click Continue.
Enter a unique name and description for your Tracking Plan and click Continue.
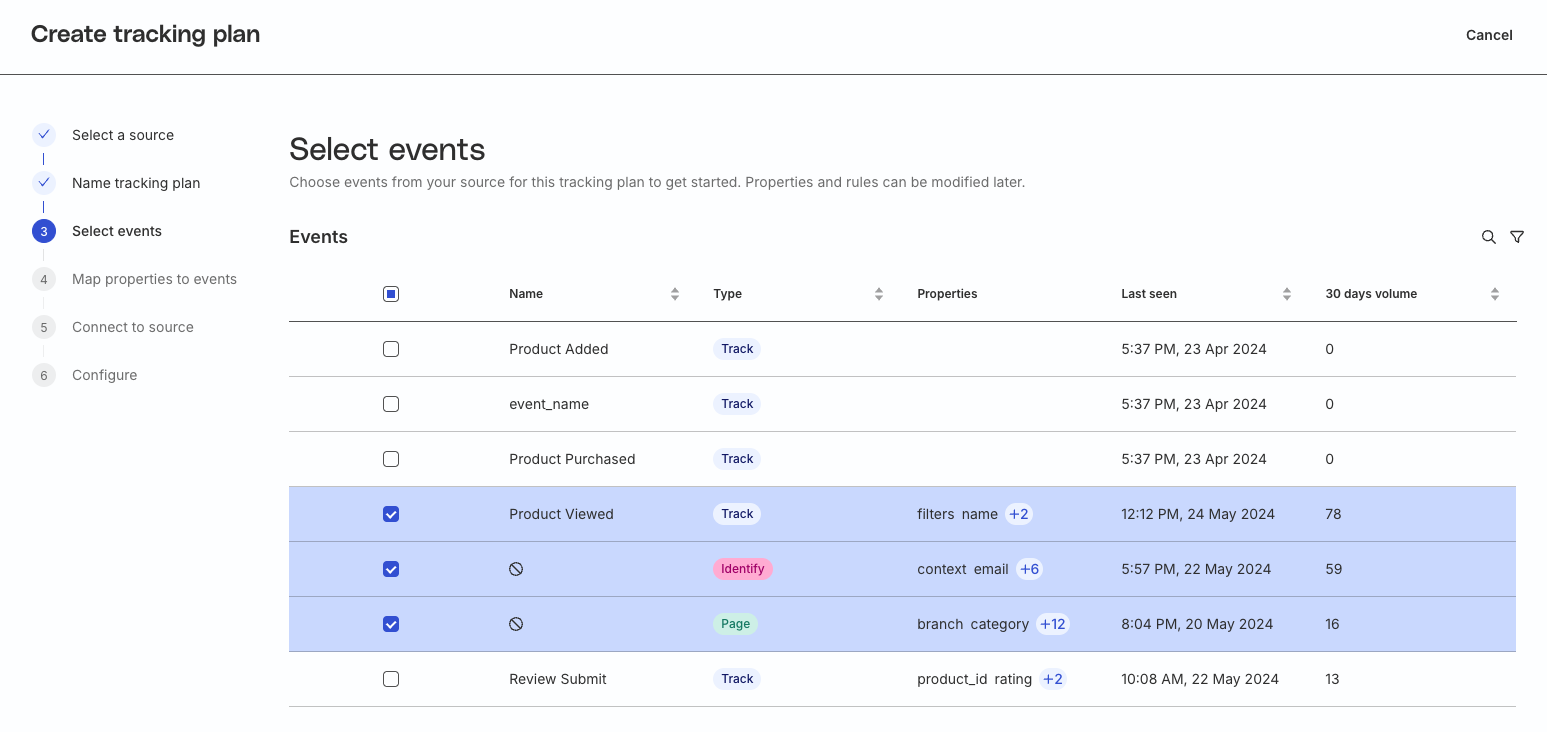
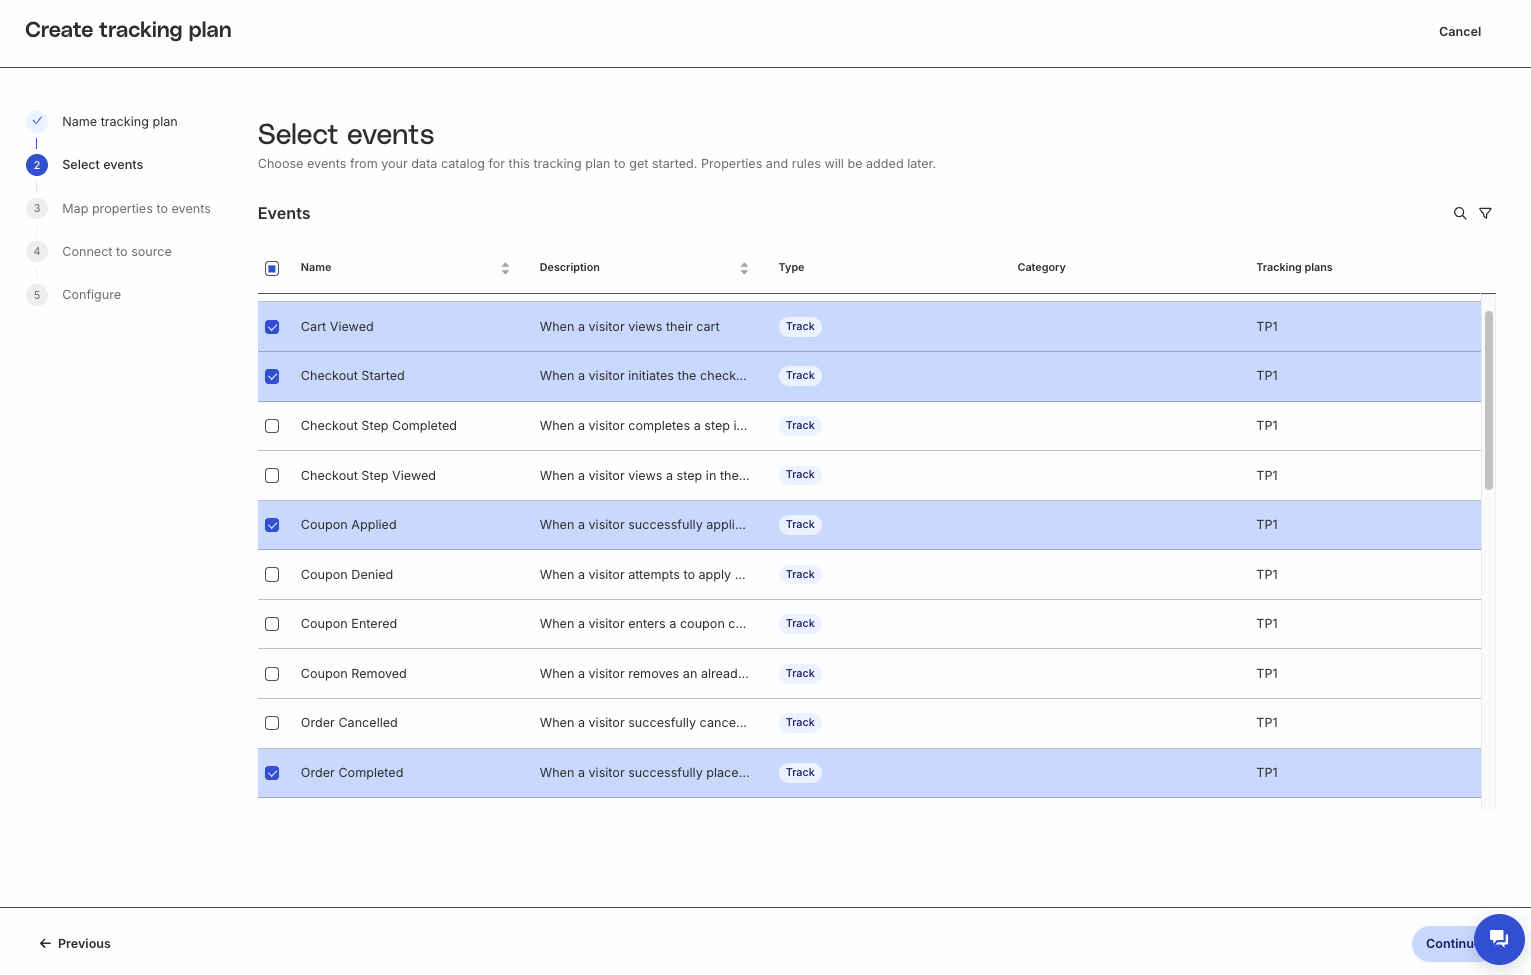
Select events tracked from the source and click Continue.
Note that:
The events and properties listed here are obtained from the Event Audit API.
RudderStack automatically adds these events and properties to the Data Catalog if they do not exist already.
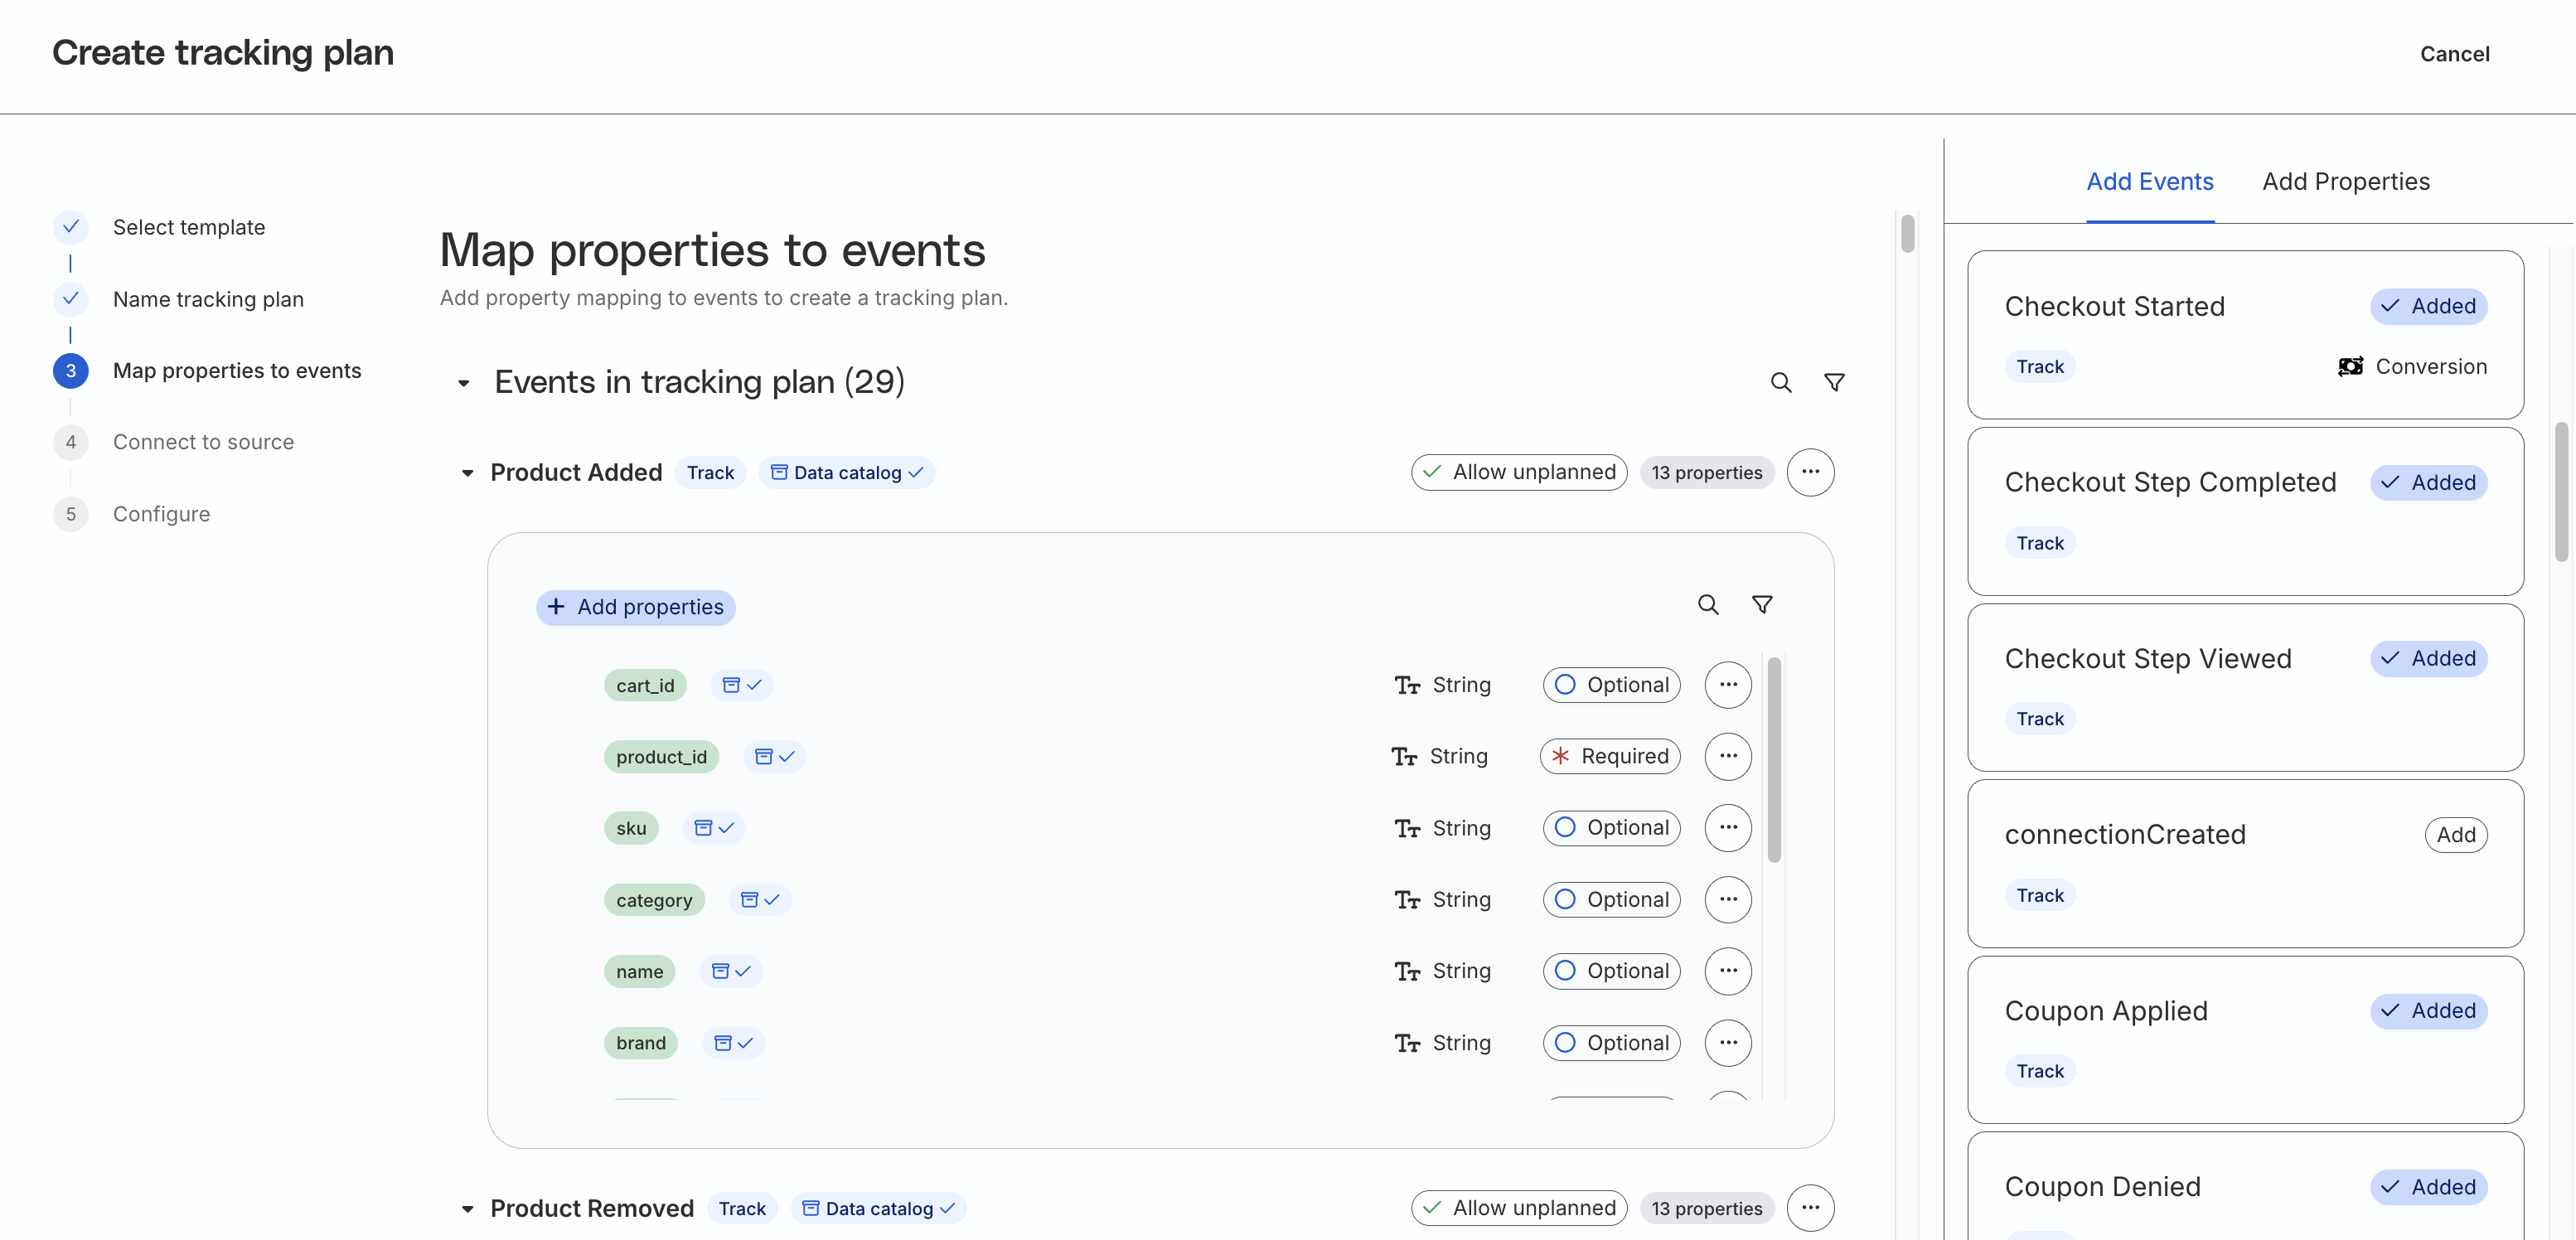
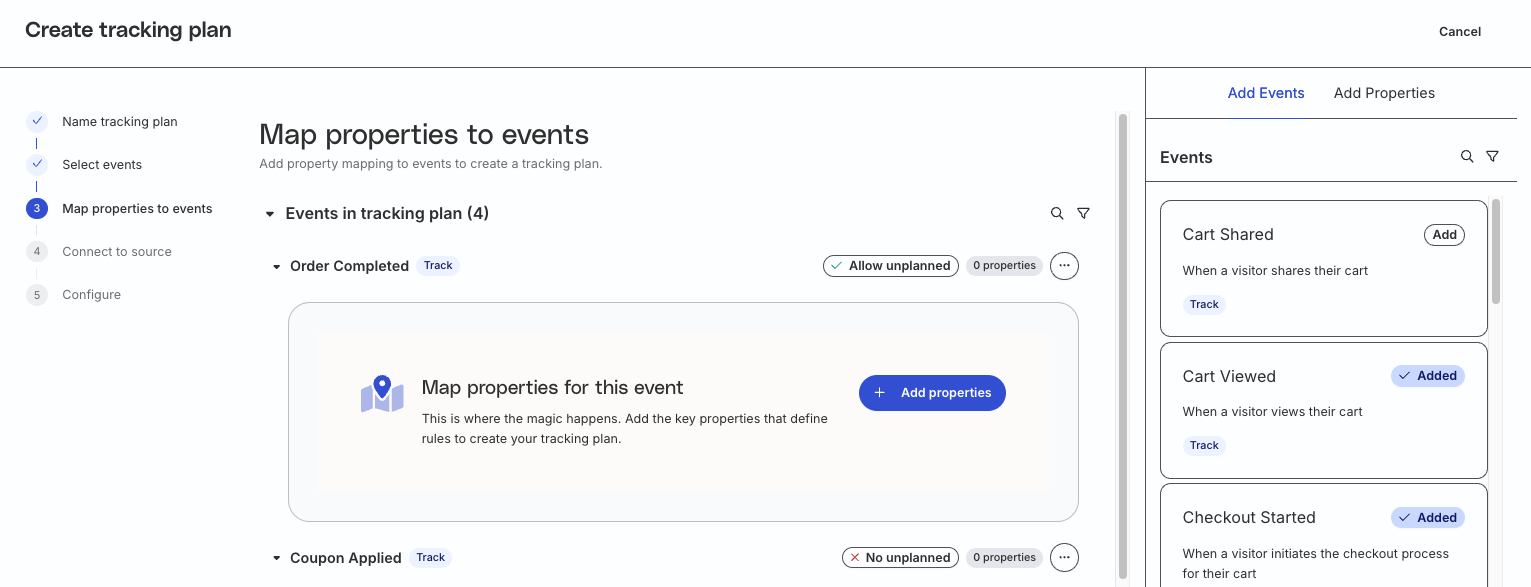
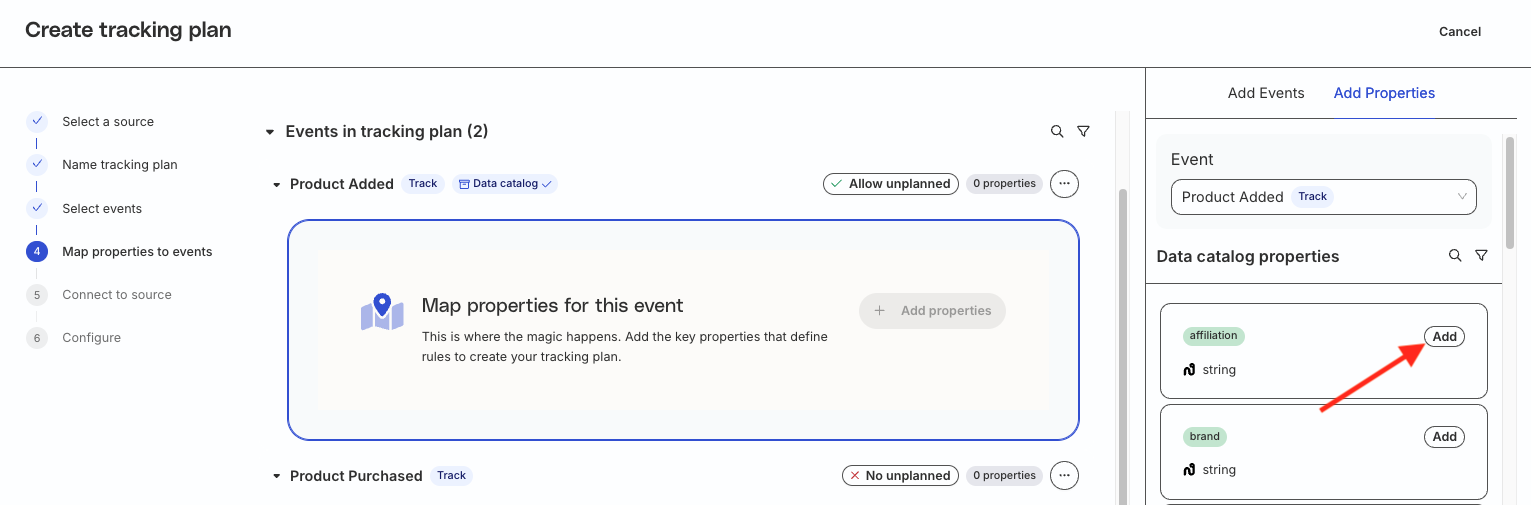
In the Map properties to events section, RudderStack displays the list of events selected in the above step with the associated properties.
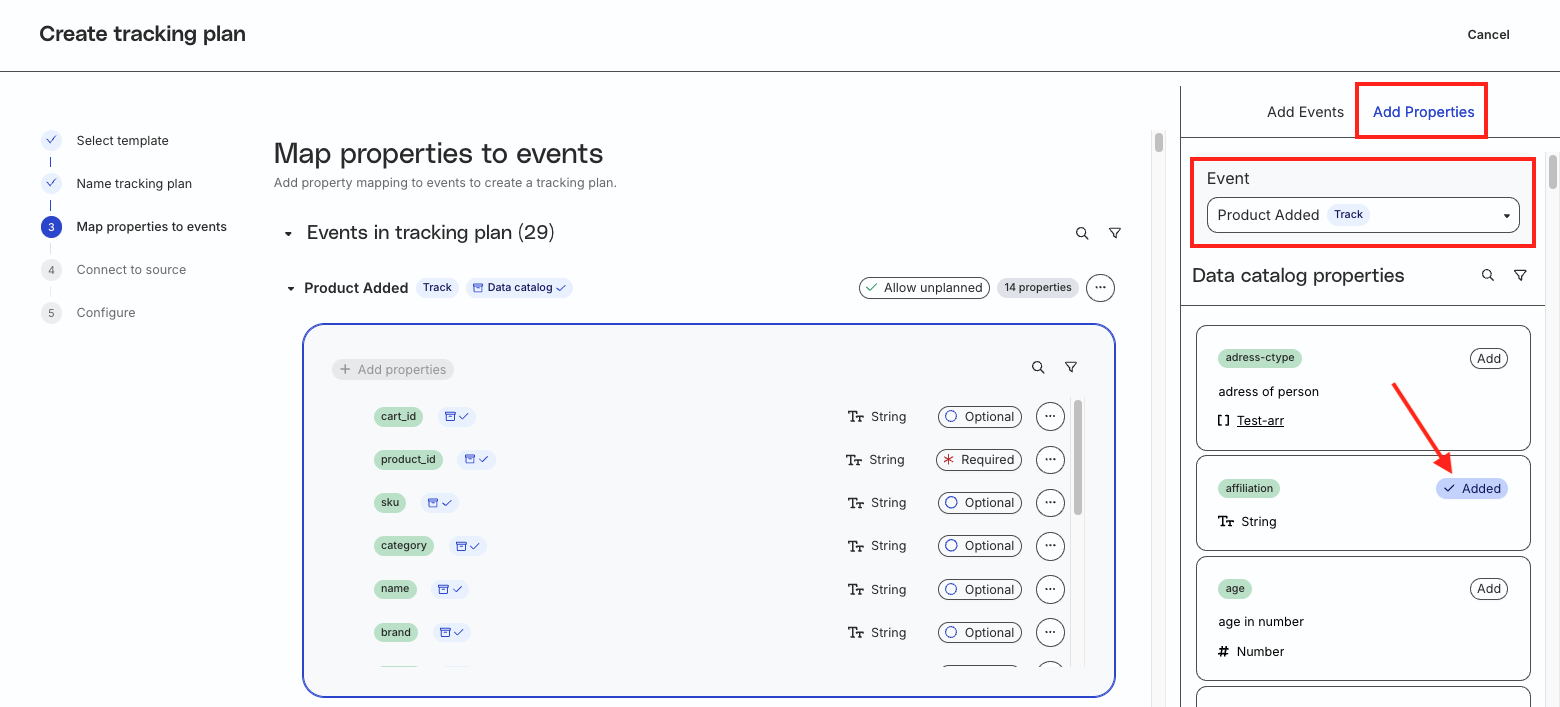
You can also add more properties to an event from the Data Catalog:
Go to the Add Properties tab.
Select the Event from the dropdown.
Click the Add button next to the properties you want to add.
You can also define nested properties for an event in your Tracking Plan.
Based on the schema sampled from the incoming events, RudderStack shows up to three levels of nesting for a property of Object or Array data type. See Nested properties for Tracking Plans created from source for more information.
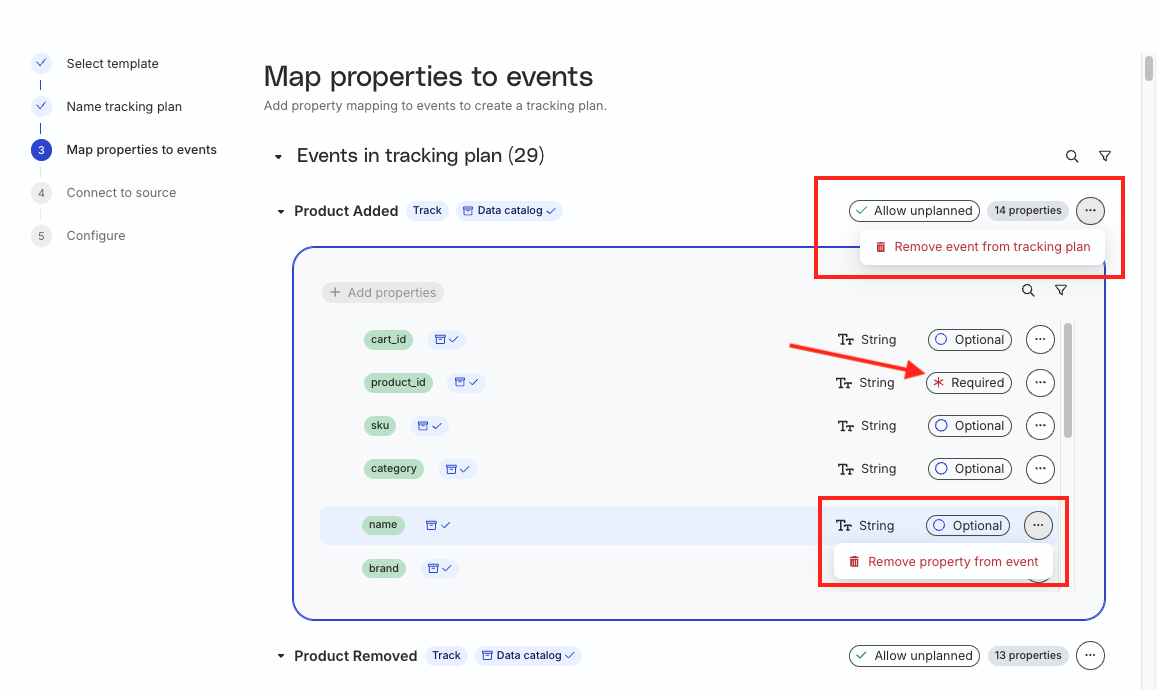
In addition, you can:
Configure the event settings to allow unplanned properties.
Remove an event from the Tracking Plan.
Mark the property as optional or required by clicking the Optional/Required option.
Remove specific properties from the event.
Select the sources you want to connect to the Tracking Plan and click Continue.
You can connect a Tracking Plan to multiple sources. However, note that a source can have only one Tracking Plan connected to it at a given time.
(Optional but Recommended) Use RudderTyper for autocomplete and linting.
2. Using a Tracking Plan template
Use this option to import your event and property mappings from a default RudderStack template:
Log in to the RudderStack dashboard and go to Govern > Tracking Plans option in the left sidebar.
Click Create Tracking Plan.
Click Use template.
Select the RudderStack template and click Continue.
RudderStack supports the Ecommerce Tracking Plan template.
Add a Tracking Plan name and description and click Continue.
In the Map properties to events section, RudderStack displays the list of events and properties inherited from the Tracking Plan template. You can customize these events and their associated properties for the Tracking Plan as per your requirement.
You can also add more properties to an event from the Data Catalog:
Go to the Add Properties tab.
Select the Event from the dropdown.
Click the Add button next to the property you want to add.
You can also add nested properties for an event in your Tracking Plan. You can add up to three levels of nesting for a property of Object or Array data type.
In addition, you can:
Add or remove an event from the Tracking Plan.
Configure the event settings to allow unplanned properties.
Remove specific properties from the event.
Connect the Tracking Plan to the required sources.
You can connect a Tracking Plan to multiple sources. However, note that a source can have only one Tracking Plan connected to it at a given time.
(Optional but Recommended) Use RudderTyper for autocomplete and linting.
3. From the Data Catalog
You can create a Tracking Plan from scratch using the events and properties defined in the Data Catalog section:
Log in to the RudderStack dashboard and go to Govern > Tracking Plans option in the left sidebar.
Click Create Tracking Plan.
Select From Data Catalog on the next screen.
Enter a unique name and description for your Tracking Plan.
Choose the required events from the displayed events list (populated from the Data Catalog) and click Continue.
In the Map properties to events section, add properties (populated from Data Catalog) to map to each event by clicking the Add properties button.
You can also add nested properties for an event in your Tracking Plan. You can add up to three levels of nesting for a property of Object or Array data type.
Click the Add button next to the property you want to add.
In addition, you can:
Add or remove an event from the Tracking Plan.
Configure the event settings to allow unplanned properties.
Remove specific properties from the event.
Mark a property as Optional or Required.
Select the sources you want to connect to the Tracking Plan and click Continue.
You can connect a Tracking Plan to multiple sources. However, note that a source can have only one Tracking Plan connected to it at a given time.
(Optional but Recommended) Use RudderTyper for autocomplete and linting.
Configure tracking plan settings
When creating a new tracking plan, you can define how RudderStack processes events that do not adhere to the tracking plan rules.
The settings are described below:
Setting
Description
Event type
Select the event type (Track, Identify, Group, Page, or Screen) for which you want to configure the tracking plan settings.
Drop events with unplanned event names
Toggle on this setting to drop events that do not match the events defined in your tracking plan.
Drop events with unplanned event properties
Toggle on this setting to drop all events that contain properties which do not match the list of properties defined for that event in your tracking plan.
Drop events with violations
Toggle on this setting to drop events that have any validation errors.
Propagate errors
Toggle on this setting to propagate any tracking plan error messages in your event payload. RudderStack recommends turning this setting on to assess the performance of your tracking plans.
Tracking plan version validation
When you connect a source to a tracking plan, RudderStack validates incoming events against the specific tracking plan version that was used to instrument each event. This version-aware validation ensures:
Accurate validation: Events are validated against the exact rules they were designed to follow
Multi-version support: Different app versions can run simultaneously without validation conflicts
Evolution safety: Tracking plan changes don’t break existing app versions
This behavior is particularly important when using RudderTyper for type-safe instrumentation, as it embeds the tracking plan version in the generated code.
This site uses cookies to improve your experience while you navigate through the website. Out of
these
cookies, the cookies that are categorized as necessary are stored on your browser as they are as
essential
for the working of basic functionalities of the website. We also use third-party cookies that
help
us
analyze and understand how you use this website. These cookies will be stored in your browser
only
with
your
consent. You also have the option to opt-out of these cookies. But opting out of some of these
cookies
may
have an effect on your browsing experience.
Necessary
Always Enabled
Necessary cookies are absolutely essential for the website to function properly. This
category only includes cookies that ensures basic functionalities and security
features of the website. These cookies do not store any personal information.
This site uses cookies to improve your experience. If you want to
learn more about cookies and why we use them, visit our cookie
policy. We'll assume you're ok with this, but you can opt-out if you wish Cookie Settings.