Sync Audiences to Google Ads Remarketing Lists (Customer Match)
Private Beta
Sync audiences created in RudderStack to Google Ads Remarketing Lists.
7 minute read
This guide lists the steps to configure Google Ads Remarketing Lists (Customer Match) as a destination in RudderStack and sync the created audiences to it.
Go to the Syncs tab of the audience page and click Add sync. Then, select Google Ads Remarketing Lists.
Click New destination — you can also select an already-configured destination here.
Specify a unique name to identify this destination in RudderStack.
In the Event delivery account section, click Select to choose from an existing Google Ads account from the list. You can also click Add account and authenticate via OAuth, by specifying the following settings:
Setting
Description
Account Name
Specify a unique account name
oAuth settings
Click Connect account, sign in with Google, and give RudderStack the required permissions to access your Google Ads account.
The Custom ID is pre-populated associated with your Google Ads account — select the ID from the dropdown.
Turn on the Subaccount setting if you are using a Google Ads subaccount.
Note: See this guide for more information on subaccounts.
If Subaccount is toggled on, enter the Login Customer ID of the parent (manager) account associated with the subaccount. See the FAQ for guidance on when this field is required.
Proceed to configure the mapping settings.
Mapping settings
This section lists the settings to correctly map data from your audience to the Google Ads Remarketing Lists destination.
Select user list
In this section, you can create a new user list or use an existing one.
Create new list: Use this option to create a new list in Google Ads. You can specify the name and description of the new list.
Use existing list: Select an existing list in Google Ads. This field is populated based on your connection settings.
Sync mode
RudderStack supports only Mirror mode for this integration.
Select list type
If you select the Create new list option, you need to select the type of list where you want to sync the data. Three options are available:
List type
Description
CONTACT_INFO
You can send email, phone number, and address information in this list
CRM_ID
You can send internal customer IDs in this list
MOBILE_ADVERTISING_ID
You can send mobile advertising IDs (IDFA/GAID) in this list
Note: If selected, specify the App ID of the mobile app the data was collected from.
For iOS, it is the 9-digit number at the end of the App Store URL, for example, 123456789.
For Android, it’s the package name, for example, com.sampleapp.samplename.
Map identifiers
In this section, you can map your warehouse columns to specific Google Ads fields that represent your audience’s identity.
The fields available for mapping depend on the list type you select.
Advanced settings
Setting
Description
Automatically hash PII data
When set to Yes, Sensitive user data is hash-encoded like email, phone, first name, and last name in the SHA-256 format.
Specify the consent type for the uploaded users for using their data in Google Ads. Four options are available:
Unspecified
Unknown
Granted
Denied
Note that if you do not set this field, The default is Unspecified, by default.
Specify ad personalization consent
Specify consent for uploaded users for personalizing ads. Four options are available:
Unspecified
Unknown
Granted
Denied
Note that if you do not set this field, The default is Unspecified by default.
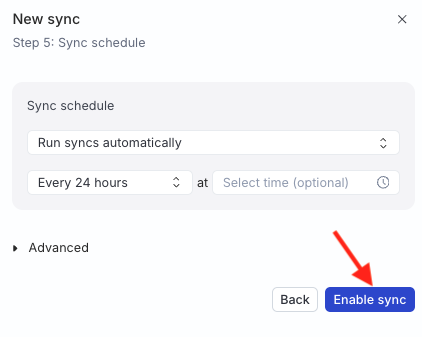
Sync settings
Two options are available to schedule your audience syncs:
Run syncs automatically based on a specified frequency (every 5 minutes, 10 minutes, 15 minutes, 30 minutes, 1 hour, 3 hours, 6 hours, 12 hours, or 24 hours) and a specific time (in UTC).
Run syncs manually — trigger a sync from the sync details page. You will need to run the sync each time.
Sync observability settings
Setting
Description
Retain sync logs
This setting is toggled on by default and instructs RudderStack to store the sync logs in your warehouse. You can also configure the below settings:
Setting
Description
Sync log retention
Specify the retention period of the sync logs in your warehouse.
If you set it to 1, then RudderStack deletes any sync log older than a day (in UTC time).
Storing sync logs and snapshot tables may incur additional warehouse costs.
Enable sync
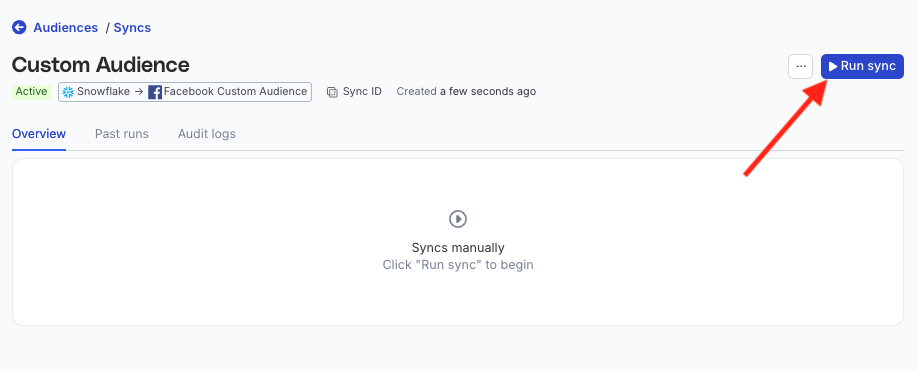
Once the setup is complete, enable the sync.
Data normalization
By default, data is cleaned and standardized as prescribed by Google Ads.
After normalization, each field is validated before sending to Google Ads:
Invalid fields are not sent to Google Ads.
If all fields in a row are invalid, then the entire row is rejected and marked as failed
Data is first normalized, then validated (skipping invalid rows), then hashed before sending to Google Ads.
Data hashing
The Automatically hash PII data setting lets you hash your user data before sending it to Google Ads. This setting is enabled by default.
Configure the setting to Yes if your incoming data is not pre-hashed
Configure this setting to No if your data is already hashed
Incorrect configuration of the Automatically hash PII data setting will result in failures.
If the Automatically hash PII data setting is configured to Yes and your data is pre-hashed, the event will fail.
If the Automatically hash PII data setting is configured to No and your data is not pre-hashed, the event will fail.
Such events are rejected with a clear error message, for example:
Hashing is disabled but the value for field EMAIL appears to be unhashed. Either enable hashing or send pre-hashed data.
You will also see errors in the Events tab for cases that were previously marked as successful but resulted in no matches, helping you identify and fix data quality or configuration issues.
FAQ
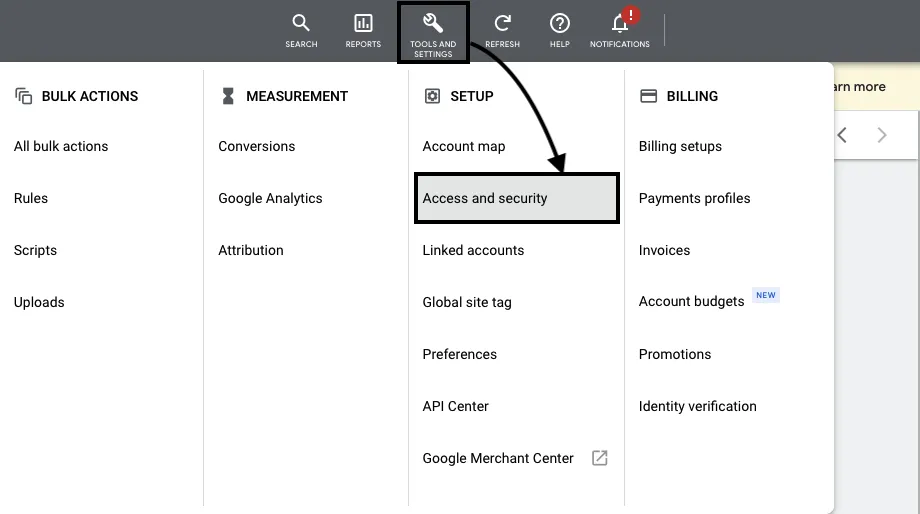
What are the account permissions required for the Google Ads Remarketing Lists integration?
Make sure the customer account used for OAuth verification adheres to Google’s Customer Match policy and has Standard or higher (Administrative) access level permissions.
For more information on the access level permissions, refer to this Google Ads support page.
Follow these steps to set the access level:
Sign into to your Google Ads account and go to TOOLS AND SETTINGS > Access and security:
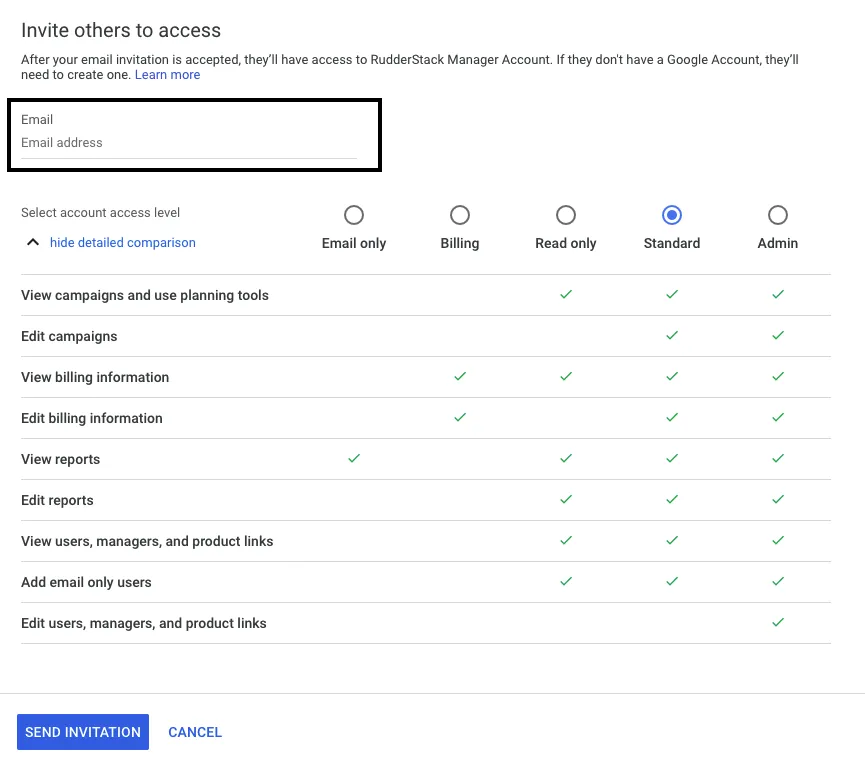
Enter the email address of the account. From the list of permissions, select Standard or Administrative. Then, click SEND INVITATION:
The account will have the required access-level permissions once the user accepts the invitation.
When do I need to provide a Login Customer ID?
You need to provide the Manager Account ID (Login Customer ID setting in the dashboard) only when:
The Manager Account ID is a manager of the Customer ID
The Google account you authenticated with does not have direct user access to the Customer ID.
You can leave the Login Customer ID field empty if the authenticated Google account has direct access to the Customer ID.
How do I know which Customer ID and Login Customer ID combination applies to my setup?
Setup
Customer ID
Login Customer ID
Standalone account, direct OAuth access
The account itself
Leave empty
Standalone account, OAuth access via a manager
The account itself
The manager
Why am I getting the USER_PERMISSION_DENIED, INVALID_CUSTOMER_ID, or CUSTOMER_NOT_ACCEPTED_CUSTOMER_DATA_TERMS errors?
These errors usually mean the Customer ID or Manager Account ID (Login Customer ID setting in the dashboard) is misconfigured or you are hitting the API rate limits.
Error
Notes
USER_PERMISSION_DENIED
The authenticated Google account doesn’t have permission to act on the Customer ID or you’re trying to modify a customer list created by a different account (only the owning account can edit a list).
Verify the Login Customer ID is correct, and that this manager is linked to the Customer ID in Google Ads.
INVALID_CUSTOMER_ID
Either the Customer ID is wrong, or the Login Customer ID isn’t authorized to access it.
RESOURCE_EXHAUSTED
Too many requests are sent in a short period — this is a quota/rate limit issue rather than a configuration error. Batch your operations and review Google’s API limits and quotas.
Why am I getting a 400 Bad Request error message while setting up the Google Ads Remarketing Lists destination?
If you get a 400 Bad Request error while configuring the destination, make sure your customer account is allowlisted and configured to have Standard or Administrative access levels in Google Ads.
See the above FAQ for steps on setting the access level permissions for the account.
Questions? We're here to help.
Join the RudderStack Slack community or email us for support
This site uses cookies to improve your experience while you navigate through the website. Out of
these
cookies, the cookies that are categorized as necessary are stored on your browser as they are as
essential
for the working of basic functionalities of the website. We also use third-party cookies that
help
us
analyze and understand how you use this website. These cookies will be stored in your browser
only
with
your
consent. You also have the option to opt-out of these cookies. But opting out of some of these
cookies
may
have an effect on your browsing experience.
Necessary
Always Enabled
Necessary cookies are absolutely essential for the website to function properly. This
category only includes cookies that ensures basic functionalities and security
features of the website. These cookies do not store any personal information.
This site uses cookies to improve your experience. If you want to
learn more about cookies and why we use them, visit our cookie
policy. We'll assume you're ok with this, but you can opt-out if you wish Cookie Settings.