Ask your data team to set up a Data Graph containing a root entity model before starting — you won’t be able to select a data source until this is done.
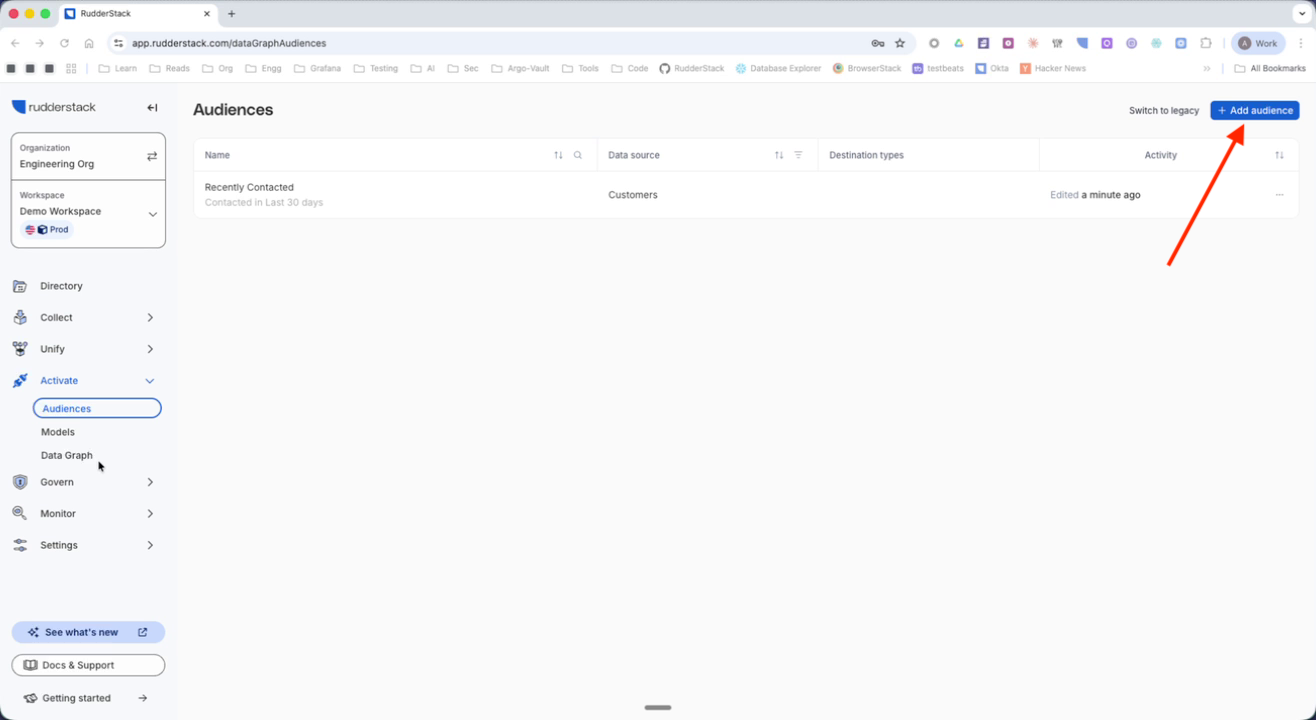
1. Add a new audience
Navigate to Audiences and click Add audience.
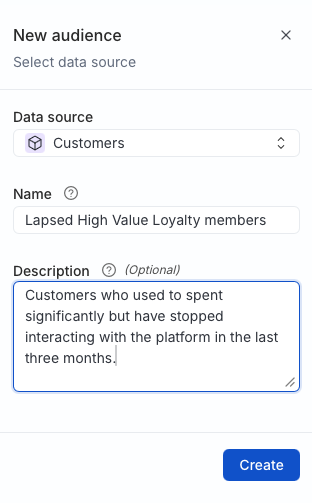
2. Select the data source
Select a root entity model of the data graph as the audience data source.
You cannot change the data source after the audience is created.
Provide a name and description.
Confirm and create the audience.
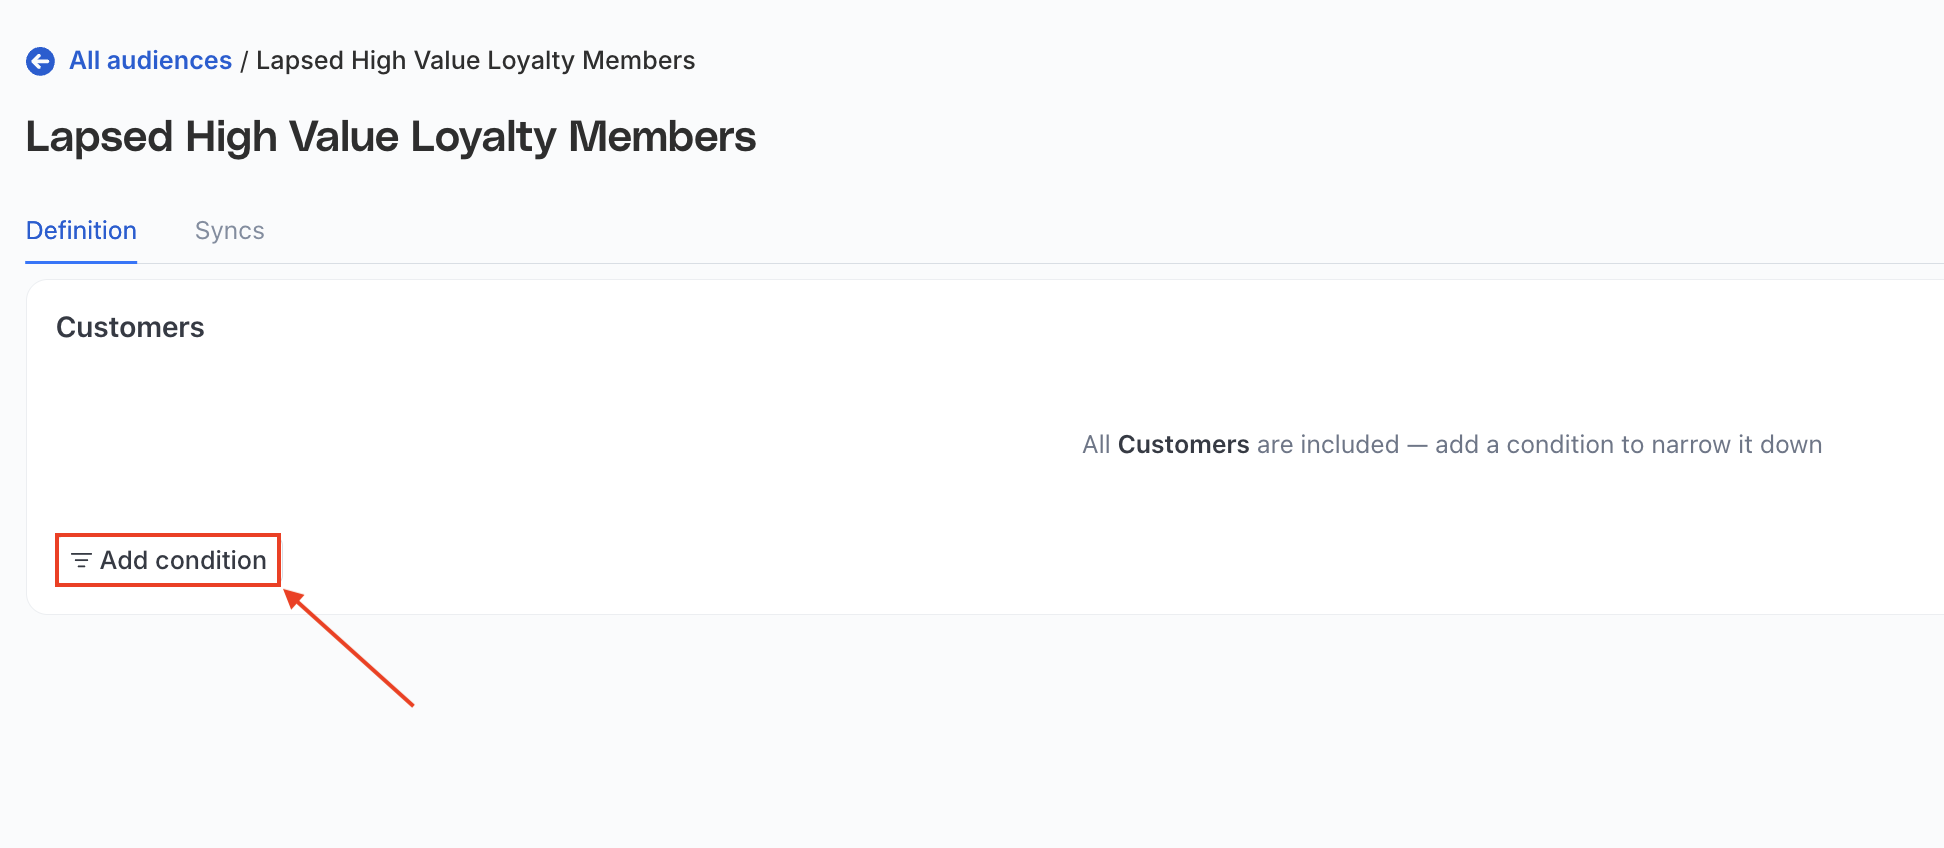
3. Add the audience conditions
Click Add Condition to start defining conditions for the audience.
Reference existing saved audiences for inclusion or exclusion
Each group of conditions uses either AND or OR — not both. Click the AND or OR label between conditions to switch the entire block. To combine both, create separate condition groups.
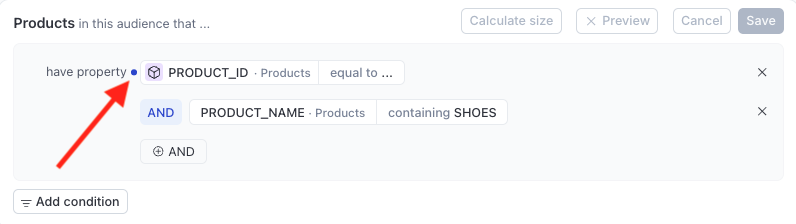
Properties
Define conditions on columns of the data source. Use AND/OR to combine multiple conditions. Add a Where condition to narrow further.
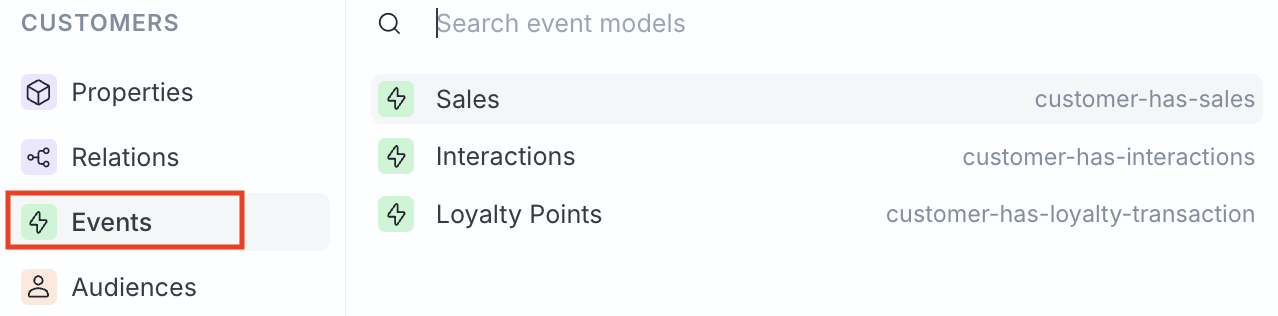
Events
Select an event model and define a condition. See Audience Builder Reference for time-window modes and filtering details.
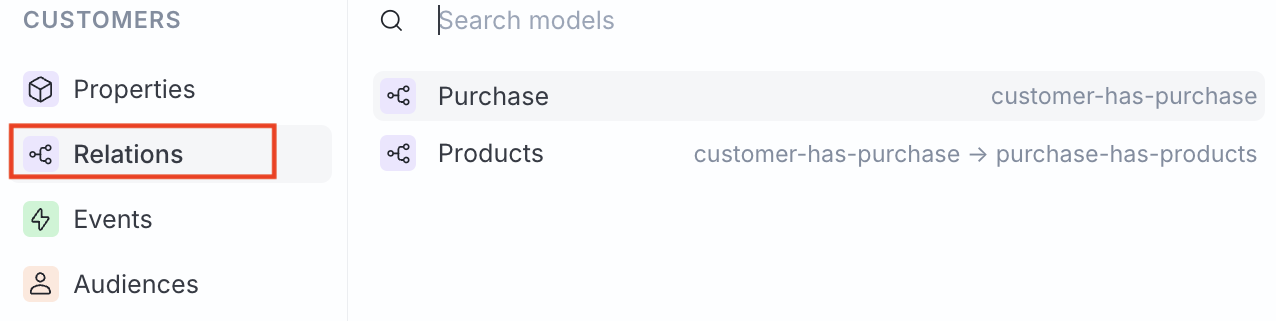
Relations
Relations connect two entity models via a one-to-many relationship, while Events connect entity models to event models.
Define a condition on related records. Optionally, add a Where condition to narrow further. See Audience Builder Reference for relationship paths, quantifiers, and aggregates.
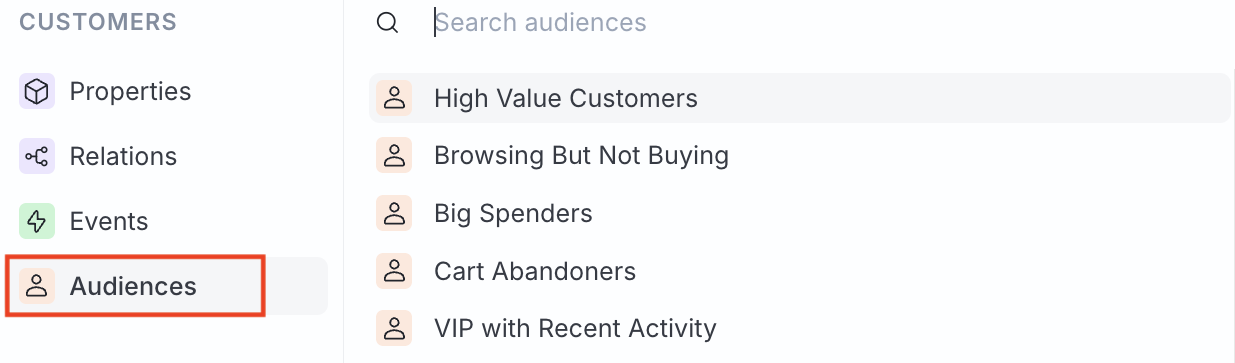
Audiences
Select an existing audience and specify whether customers should be a part of or should not be a part of that audience. See Audience Builder Reference for nesting and exclusion details.
4. Verify and sync
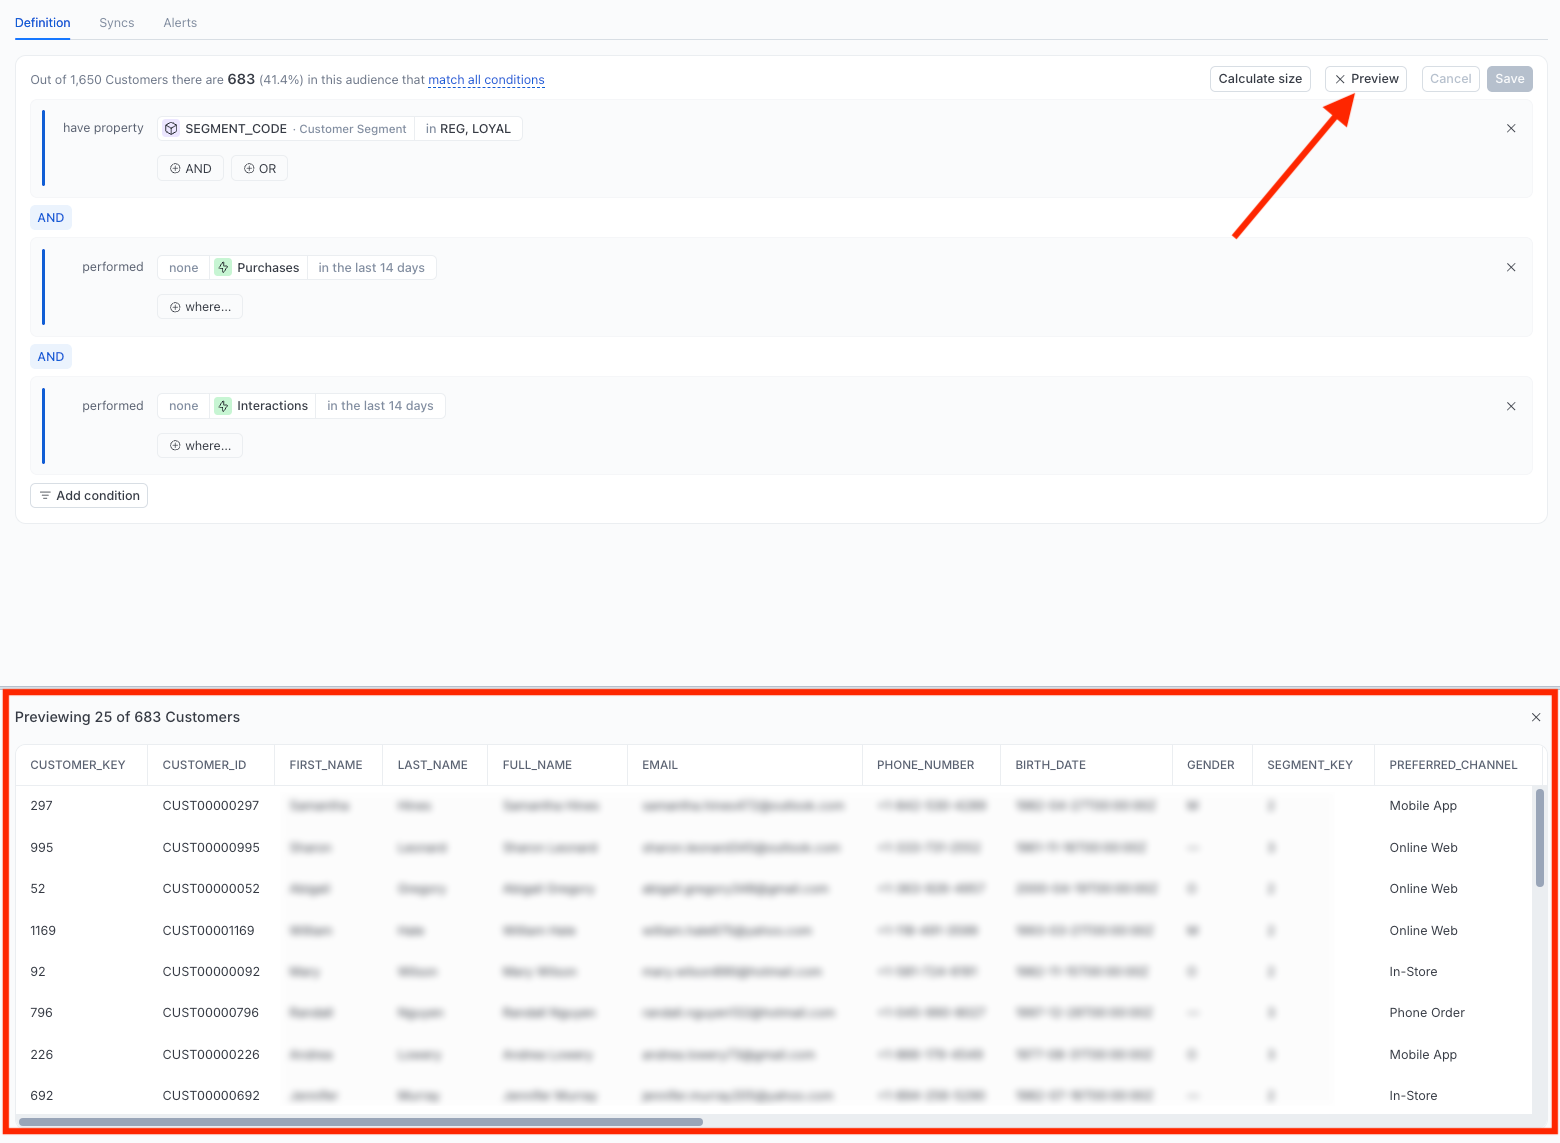
Click Calculate size to see how many customers match the specified conditions.
Click Preview to see a sample of the audience data.
This site uses cookies to improve your experience while you navigate through the website. Out of
these
cookies, the cookies that are categorized as necessary are stored on your browser as they are as
essential
for the working of basic functionalities of the website. We also use third-party cookies that
help
us
analyze and understand how you use this website. These cookies will be stored in your browser
only
with
your
consent. You also have the option to opt-out of these cookies. But opting out of some of these
cookies
may
have an effect on your browsing experience.
Necessary
Always Enabled
Necessary cookies are absolutely essential for the website to function properly. This
category only includes cookies that ensures basic functionalities and security
features of the website. These cookies do not store any personal information.
This site uses cookies to improve your experience. If you want to
learn more about cookies and why we use them, visit our cookie
policy. We'll assume you're ok with this, but you can opt-out if you wish Cookie Settings.