Admins have full access to manage Profiles projects in RudderStack.
Members can have the following permissions depending on their workspace policy:
Permission
Description
Edit
Make changes to the configuration of Profiles projects
Create & Delete
Create or delete Profiles projects in the workspace
Connect
Connect a Profiles project to a warehouse destination
The Connect permission also applies on the warehouse source used to create the Profiles project.
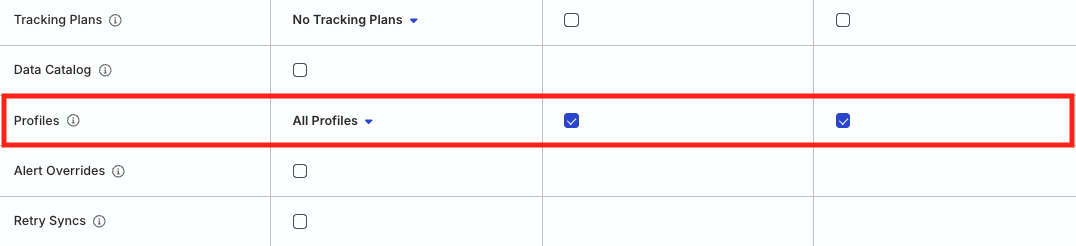
Click here to see how these permissions appear in the workspace policy.
To make a connection, that is, connect a Profiles project to a warehouse destination, the member must have both Edit and Connect permissions on both the resources.
Org Admins and members with the Connections Admin role in their workspace policy can create and delete Profiles projects, manage their configuration, and connect them to a warehouse destination
Members with the Connections Editor role in their workspace policy can only edit the Profiles project configuration and connect Profiles projects to a warehouse destination
If you’re interested in trying the Profiles 0.25 (Beta) release, install the specific beta version instead:
pip3 install profiles-rudderstack==0.25.0b18
Verify the installation was successful:
pb version
2. Create warehouse connection
Profiles supports Snowflake, Redshift, BigQuery and Databricks. The user in your connection configuration must have permission to read from schemas containing source data and write to the schema created for Profiles.
Create a warehouse connection:
pb init connection
Follow the prompts to enter details about your warehouse connection:
Select a warehouse: s
Enter Connection Name: my_warehouse
Enter target: (default:dev): # Press enter, leaving it to default
Enter account: company.us-east-1
Enter warehouse: RUDDER_WAREHOUSE
Enter dbname: RUDDER_EVENTS
Enter schema: RUDDER_PROFILES
Enter user: <YOUR_USERNAME>  // Optional for Databricks
Enter password: <YOUR_PASSWORD>
Enter role: <YOUR_ROLE>
Append to /Users/<user_name>/.pb/siteconfig.yaml? [y/N] y
This creates a local site configuration file inside your home directory: ~/.pb/siteconfig.yaml. Your Profiles project uses this file to access the warehouse, git credentials, and other details. If you don’t see the file, enable the view hidden files option.
If you would like to create a project in the current folder instead, run:
pb init pb-project -o .
Open the pb_project.yaml file at the root of your project and set the value of connection: to the connection name as defined in the previous step.
4. Add inputs
Open the inputs.yaml file in the models folder. This file is where you will define your inputs.
Each input has a name, source table (in the format database.schema.table), occurred_at_col (timestamp column if available), and list of entity ids. Each ID inclues a select (column name), type (ID type as defined in pb_project.yaml) and entity name (defined in pb_project.yaml).
Edit the two sample inputs to use your own data. This may only require changing the table fields to point to your identifies and tracks tables. If your identifies table does not include email addresses, remove that ID. If email address is included under a different column name, change the select field accordingly.
5. Validate warehouse access
Validate your warehouse connection has the necessary access:
pb validate access
If there are no errors, proceed to the next step. In case of errors, make sure to provide the necessary warehouse permissions.
This compiles your project into SQL files stored in the output folder, then runs that SQL on your warehouse.
7. Add feature
Open the profiles.yaml file in the models folder. There should be a var group with four entity vars, two of which are features (included in feature views).
Add a new entity var / feature that gets the event count for each user:
- entity_var:name:event_countselect:COUNT(*)from:inputs/rsTracksdescription:No. of events tracked for customer
Profiles automatically groups data by customer, so you only need to specify the aggregate function.
If you run the project again, you will see this event_count feature in your feature views.
8. Add cohort
The feature views in your warehouse contain features for all customers. A cohort can be used to create feature views for a subset of customers.
In the profiles.yaml file, add a cohort for power users:
This site uses cookies to improve your experience while you navigate through the website. Out of
these
cookies, the cookies that are categorized as necessary are stored on your browser as they are as
essential
for the working of basic functionalities of the website. We also use third-party cookies that
help
us
analyze and understand how you use this website. These cookies will be stored in your browser
only
with
your
consent. You also have the option to opt-out of these cookies. But opting out of some of these
cookies
may
have an effect on your browsing experience.
Necessary
Always Enabled
Necessary cookies are absolutely essential for the website to function properly. This
category only includes cookies that ensures basic functionalities and security
features of the website. These cookies do not store any personal information.
This site uses cookies to improve your experience. If you want to
learn more about cookies and why we use them, visit our cookie
policy. We'll assume you're ok with this, but you can opt-out if you wish Cookie Settings.