You are viewing documentation for an older version.

Prerequisites
8 minute read
To follow this guide, you will need access to both RudderStack and Snowflake. If you do not have access, follow these links to create a free RudderStack account and Snowflake account.
Once you set up your RudderStack account, reach out to our support team to request access to our Predictions feature.
Set up Snowflake for Event Stream data
Because Predictions is designed to run in a production environment, you need to perform some basic set up in Snowflake (and later, your RudderStack workspace) to simulate the pipelines you would run when collecting user event data.
Create a new role and user in Snowflake
In your Snowflake console, run the following commands to create the role QUICKSTART.
CREATE ROLE QUICKSTART;Verify the role QUICKSTART was successfully created.
SHOW ROLES;Create a new user QUICKSTART_USER with a password <strong_unique_password>.
CREATE USER QUICKSTART_USER PASSWORD = '<strong_unique_password>' DEFAULT_ROLE = 'QUICKSTART';Verify the user QUICKSTART_USER was successfully created.
SHOW USERS;Create RudderStack schema and grant permissions to role
Create a dedicated schema _RUDDERSTACK in your database.
Replace <YOUR_DATABASE> in all queries with your actual database name.
CREATE SCHEMA "<YOUR_DATABASE>"."_RUDDERSTACK";Grant full access to the schema _RUDDERSTACK for the previously created role QUICKSTART.
GRANT ALL PRIVILEGES ON SCHEMA "<YOUR_DATABASE>"."_RUDDERSTACK" TO ROLE QUICKSTART;Grant permissions on the warehouse, database, schema, and table
Enable the user QUICKSTART_USER to perform all operations allowed for the role QUICKSTART (via the privileges granted to it).
GRANT ROLE QUICKSTART TO USER QUICKSTART_USER;Run the following commands to allow the role QUICKSTART to look up the objects within your warehouse, database, schema, and the specific table or view:
GRANT USAGE ON WAREHOUSE "<YOUR_WAREHOUSE>" TO ROLE QUICKSTART;
GRANT USAGE ON DATABASE "<YOUR_DATABASE>" TO ROLE QUICKSTART;
GRANT USAGE ON SCHEMA "<YOUR_DATABASE>"."_RUDDERSTACK" TO ROLE QUICKSTART;
GRANT SELECT ON ALL TABLES IN SCHEMA "<YOUR_DATABASE>"."_RUDDERSTACK" TO ROLE  QUICKSTART;
GRANT SELECT ON FUTURE TABLES IN SCHEMA "<YOUR_DATABASE>"."_RUDDERSTACK" TO ROLE QUICKSTART;
GRANT SELECT ON ALL VIEWS IN SCHEMA "<YOUR_DATABASE>"."_RUDDERSTACK" TO ROLE QUICKSTART;
GRANT SELECT ON FUTURE VIEWS IN SCHEMA "<YOUR_DATABASE>"."_RUDDERSTACK" TO ROLE QUICKSTART;
Replace <YOUR_DATABASE> with the exact Snowflake database name.
Import RudderStack event data from the Snowflake marketplace
To set up automated features, you will need the RudderStack event data in your Snowflake warehouse. If you already use RudderStack and have the following tables and fields (see below), skip to the Profiles Schema and Permissions section. For this guide, using the provided sample data is recommended.
TRACKSIDENTIFIESuser_idanonymous_idemail
PAGESORDER_COMPLETED
NOTE: You must have all the three identity types in your INDENTIFIES table. If you are using your own data and don’t normally track email, you can send the following identify call to add the column:
rudderanalytics.identify('userId', {
    email:'email@address.com',
    name:'name'
})
Get sample data
If you are setting up RudderStack for the first time go to the Snowflake Marketplace and add RudderStack Event Data for Quickstart to your Snowflake account for free. This will add a database with the needed tables to your Snowflake warehouse with no additional storage cost for you.
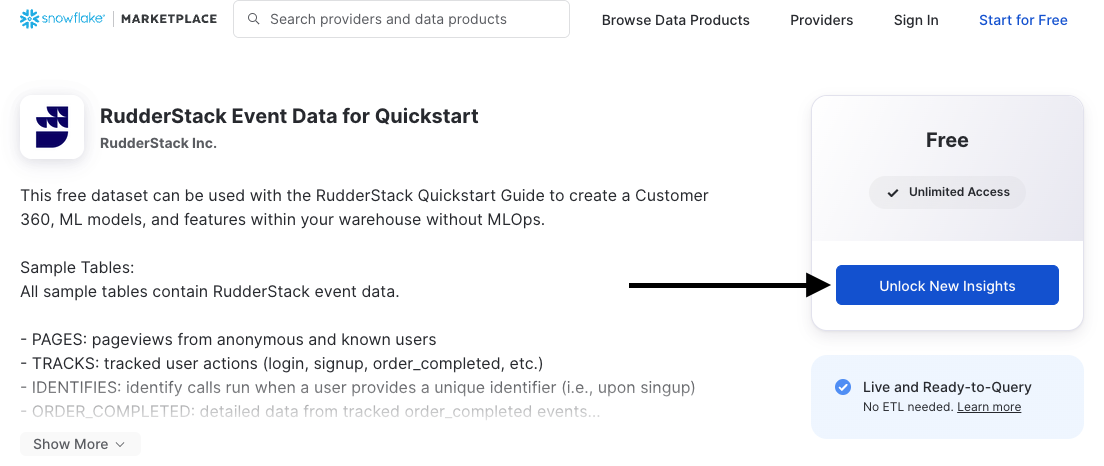
At the next screen, open Options and add role QUICKSTART to have access to this database.
Create schema for sample data
The database with the sample data is read-only so you will need to copy it to a new schema to be able to create a valid event stream pipeline (and run a Predictions job on the data).
Create a new schema in the database you already set up. Name the schema “EVENTS”.
CREATE SCHEMA "<YOUR_DATABASE>"."EVENTS";Give permission to the QUICKSTART role to create new tables in the above schema.
GRANT ALL PRIVILEGES ON SCHEMA "<YOUR_DATABASE>"."EVENTS" FOR ROLE QUICKSTART;Copy the sample data into the newly create schema.
CREATE TABLE "<YOUR_DATABASE>"."EVENTS"."TRACKS" AS SELECT * FROM "SNOWFLAKE_QUICKSTART"."PUBLIC"."TRACKS";
CREATE TABLE "<YOUR_DATABASE>"."EVENTS"."IDENTIFIES" AS SELECT * FROM "SNOWFLAKE_QUICKSTART"."PUBLIC"."IDENTIFIES";
CREATE TABLE "<YOUR_DATABASE>"."EVENTS"."PAGES" AS SELECT * FROM "SNOWFLAKE_QUICKSTART"."PUBLIC"."PAGES";
CREATE TABLE "<YOUR_DATABASE>"."EVENTS"."ORDER_COMPLETED" AS SELECT * FROM "SNOWFLAKE_QUICKSTART"."PUBLIC"."ORDER_COMPLETED";
Now you are ready to create a pipeline connection in RudderStack.
Create JavaScript source
RudderStack’s Profiles and Predictions products require a warehouse destination with an active sync from a source (a data pipeline). Therefore we will create a JavaScript source that can send a test event to Snowflake.
After logging into RudderStack, navigate to the Directory from the sidebar on the left, then select the JavaScript source from the list of sources.
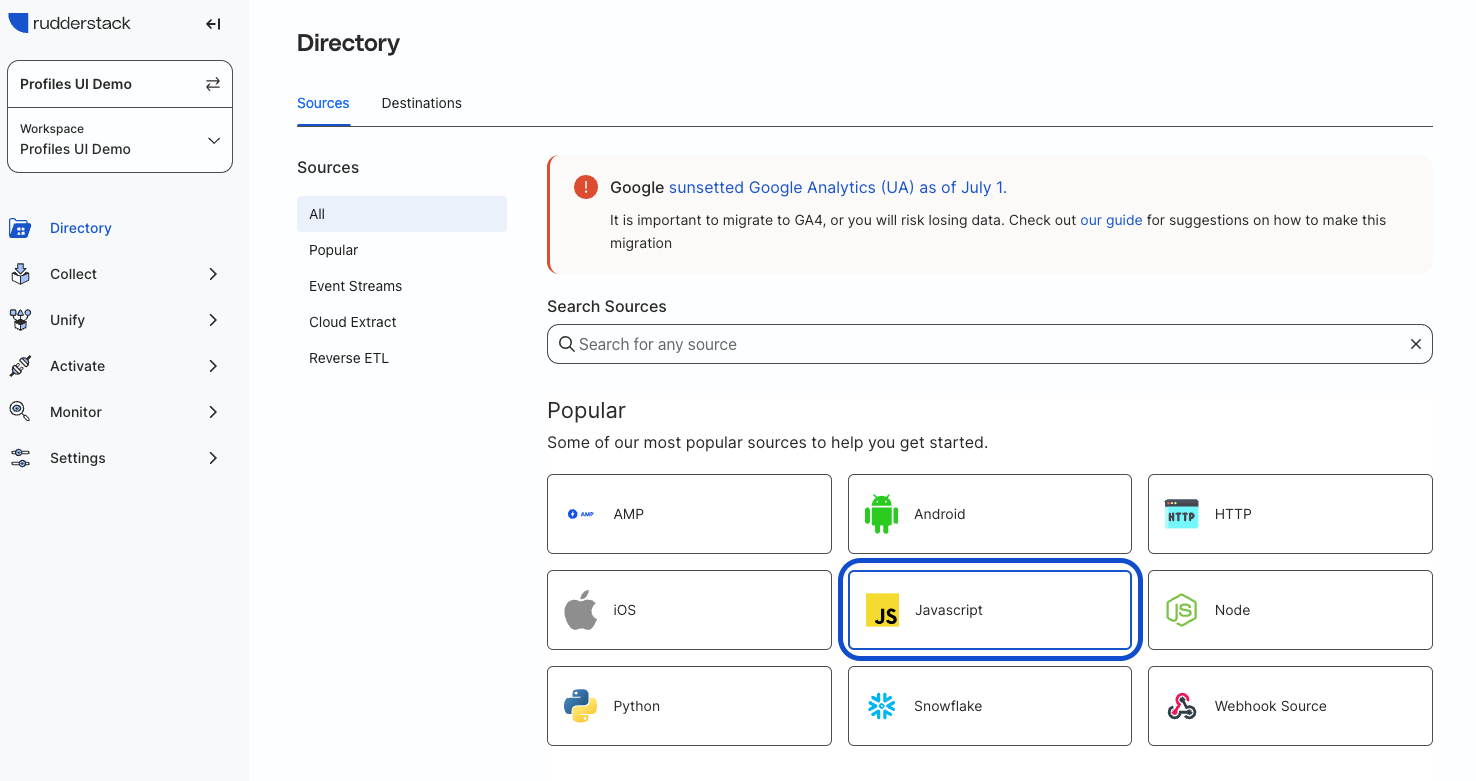
Enter “QuickStart Test Site” for the source name and click Continue. You have successfully added a source!
Note at the bottom of the JavaScript Source page is a Write Key. You will need this for sending a test event after connecting the Snowflake destination.
Create Snowflake destination
Navigate to the Overview tab in the JavaScript source view and click on Add Destination.
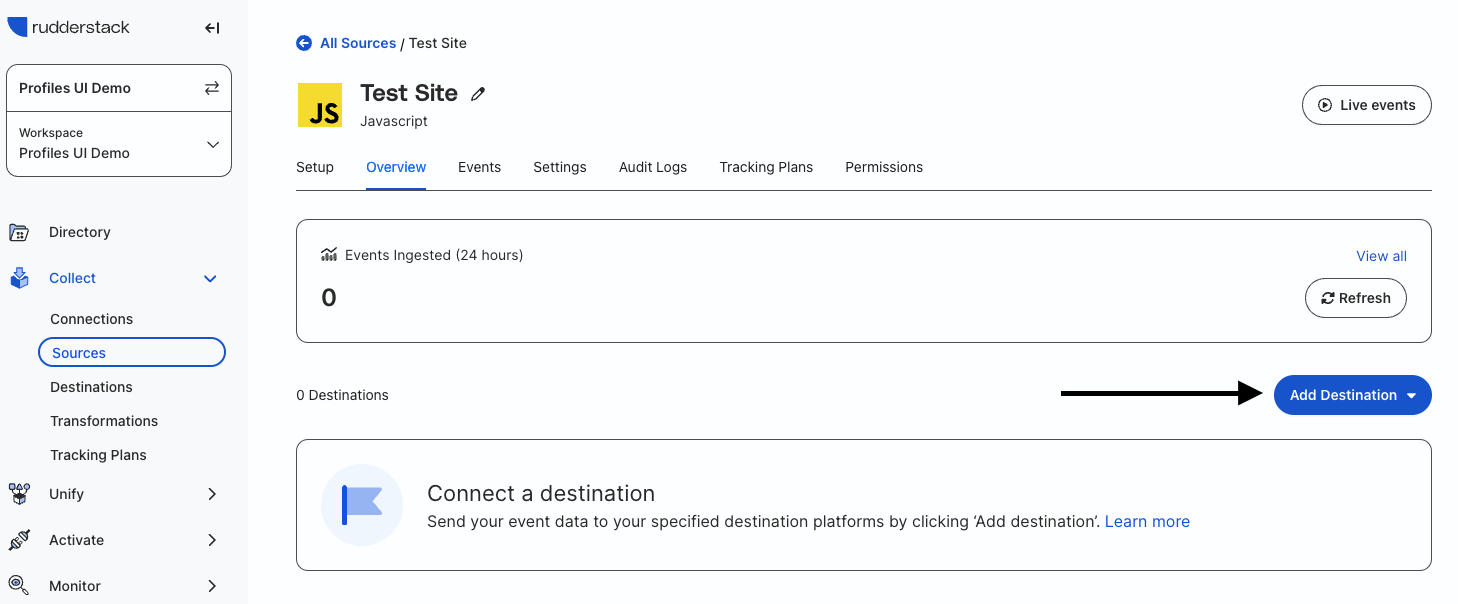
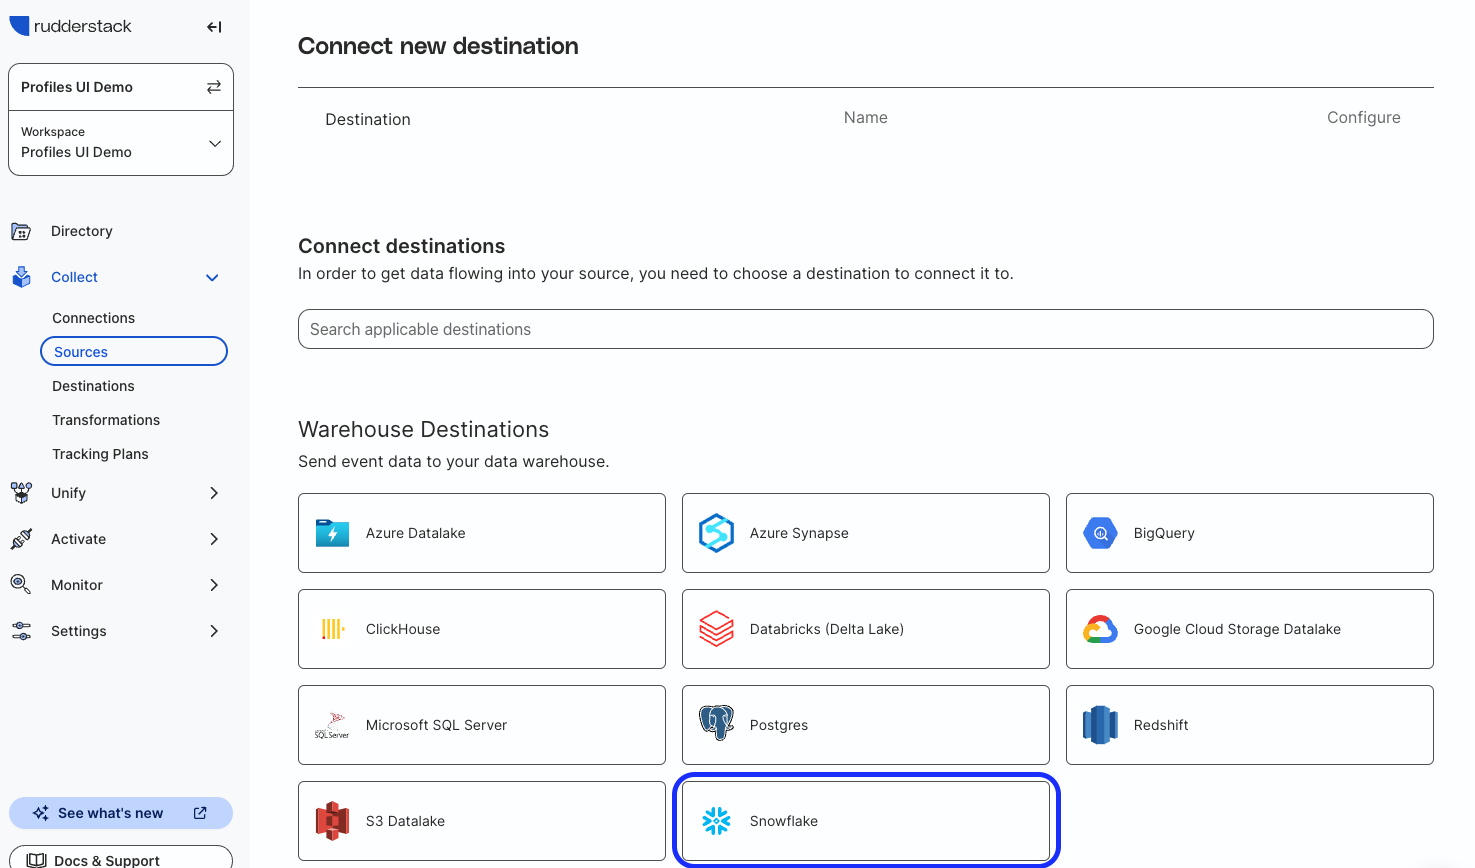
Select the Snowflake destination from the list, then on the next page give it the name “Snowflake QuickStart” and click Continue.
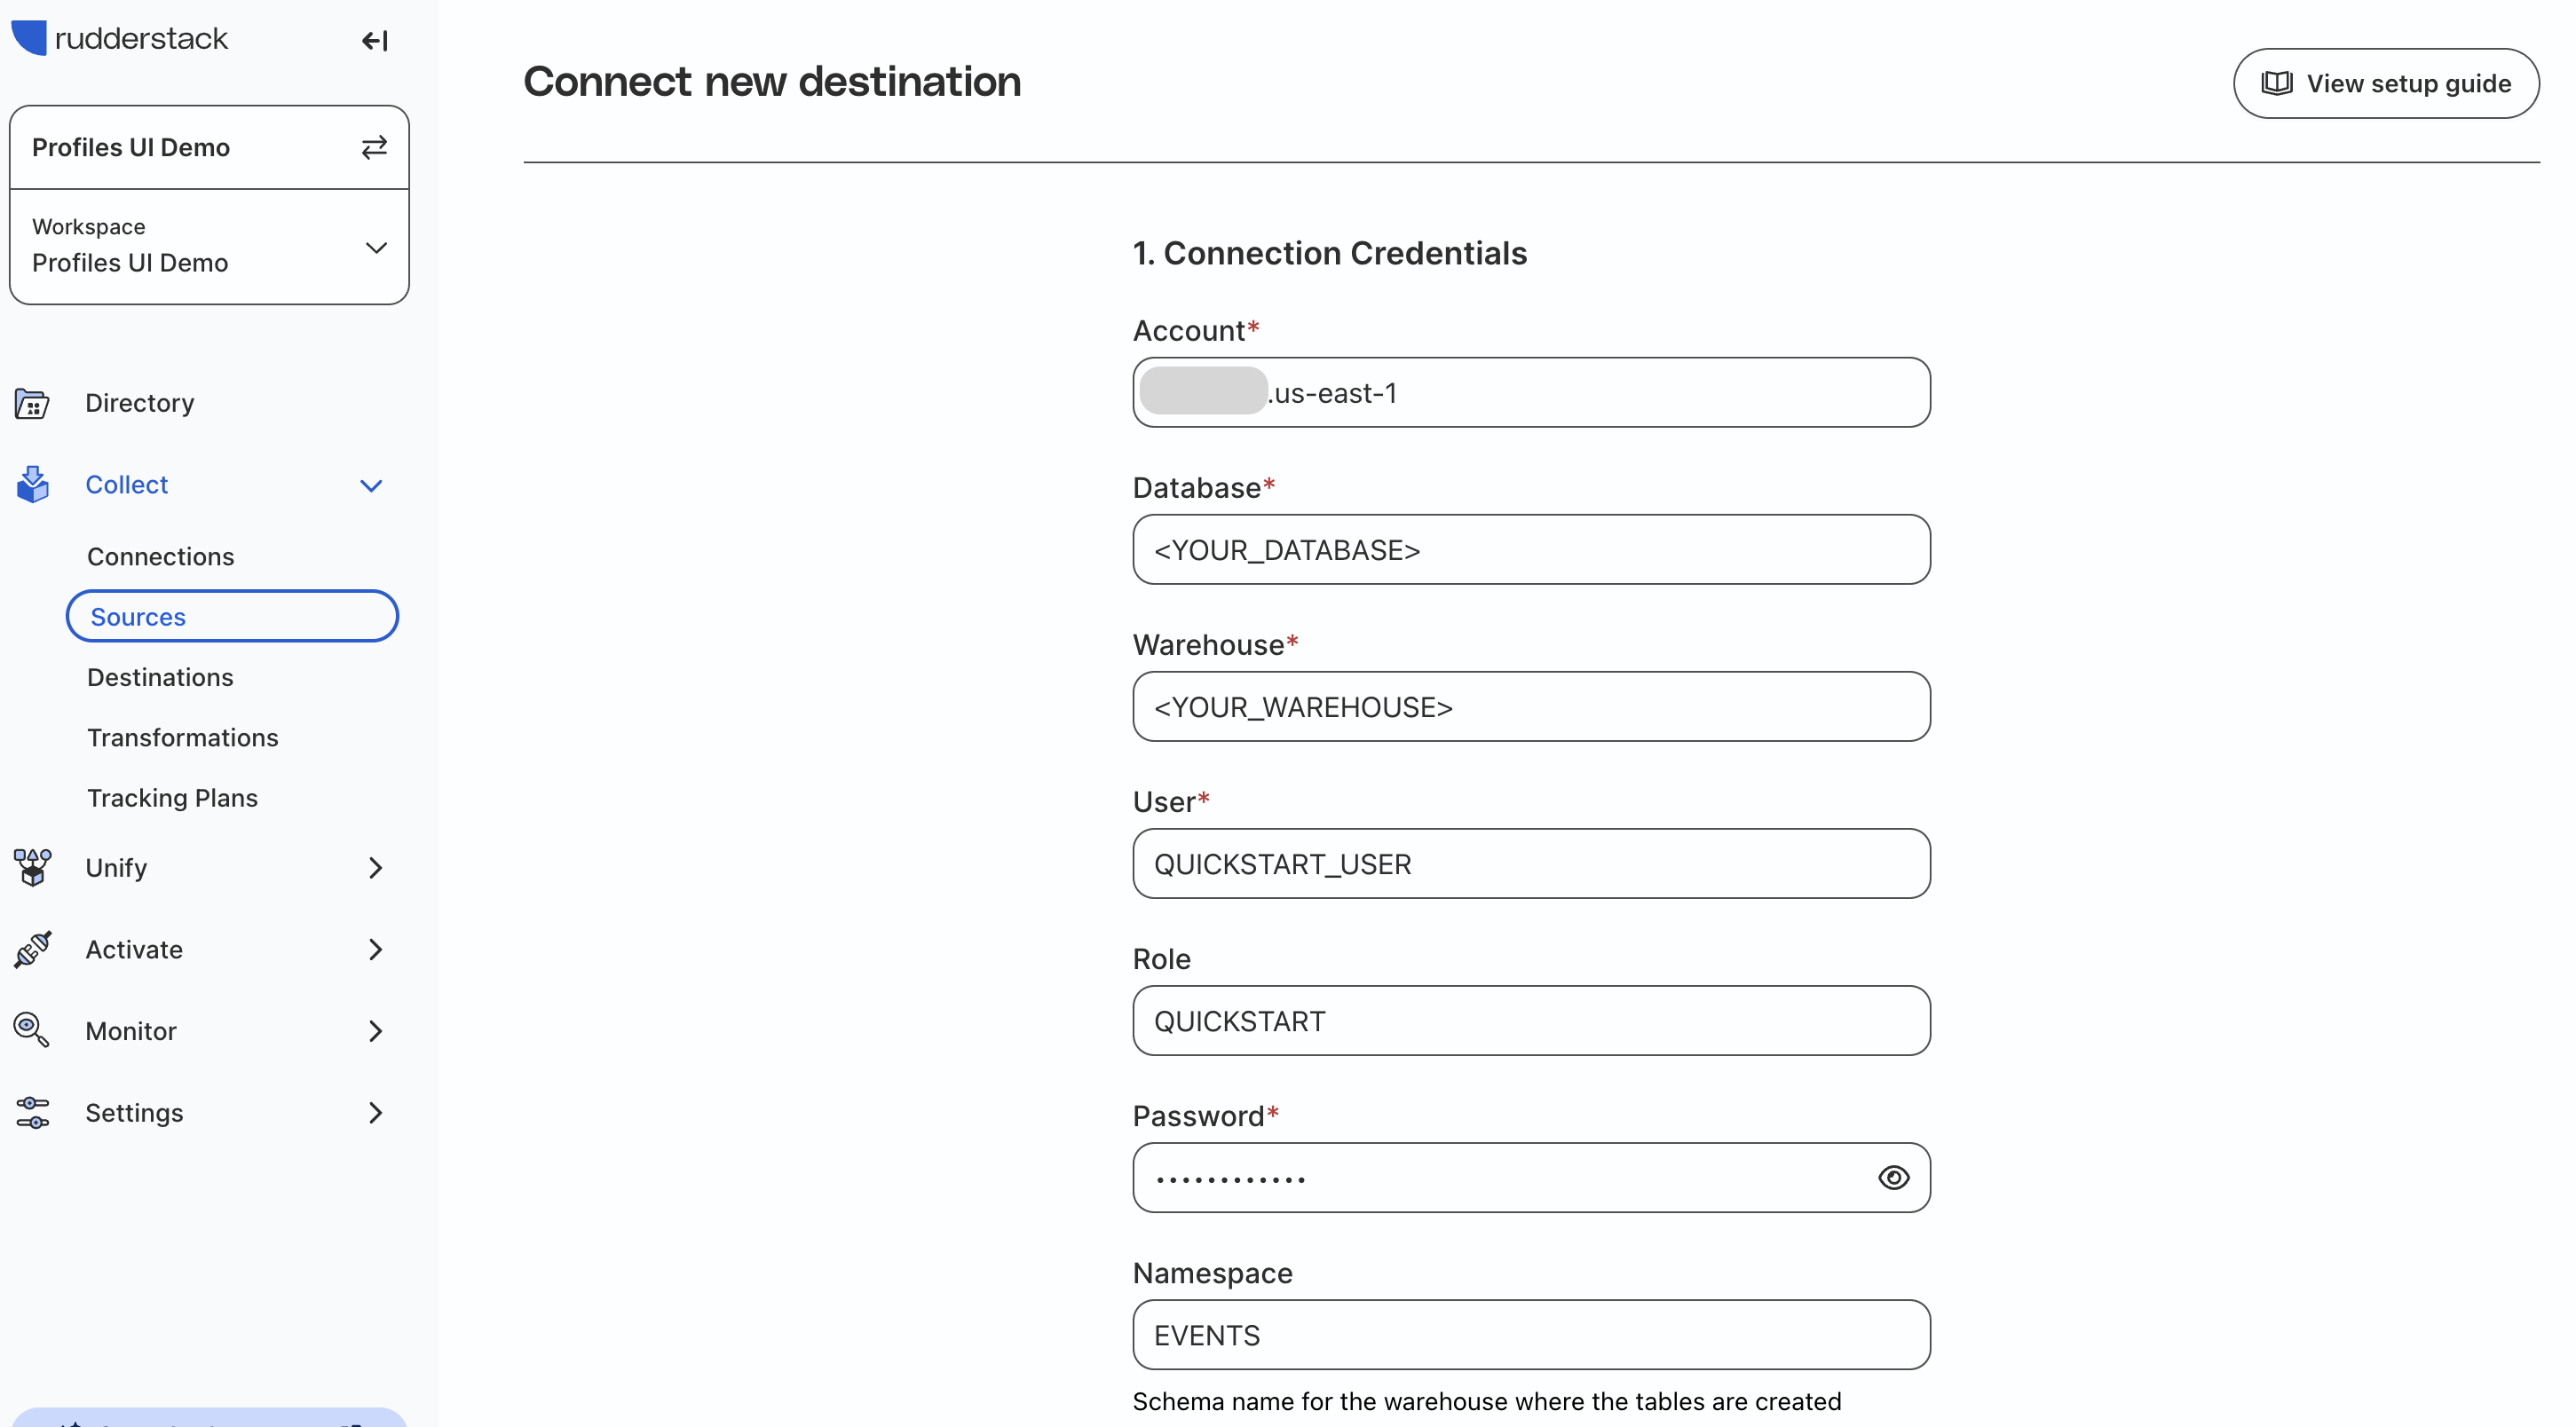
Add in your Snowflake connection credentials:
- Account: Your account name.
- Database: Your database name that you used in the previous steps for
QUICKSTART. - Warehouse: Your warehouse that you granted usage to
QUICKSTART. - User:
QUICKSTART_USER - Role:
QUICKSTART - Password: Password for
QUICKSTART_USER. - Namespace:
EVENTS
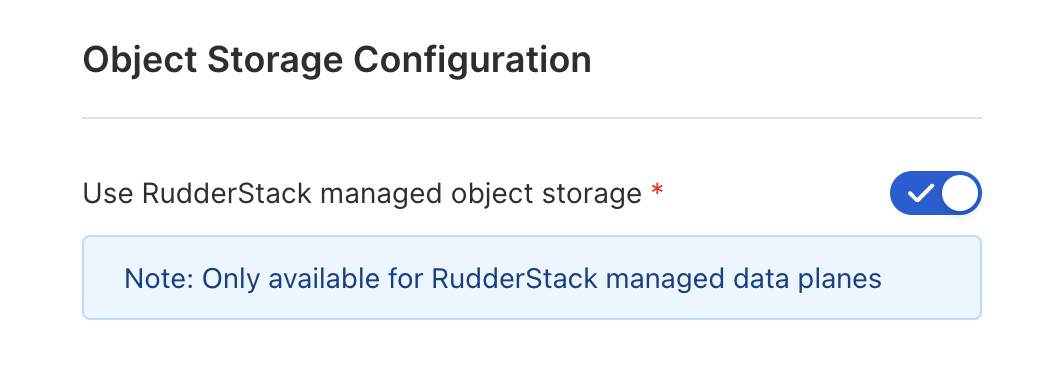
At the bottom under Object Storage Configuration toggle Use RudderStack managed object storage ON.
Leave the defaults for all other settings and click Continue. RudderStack will verify credentials and that it has the needed permissions.
You have now created a pipeline connection in RudderStack!
Send test event
You can use a test site to send a connection_setup event. This will not effect the sample data tables. But first, get the following configuration data from RudderStack:
- RudderStack Data Plane URL
- JavaScript Source Write Key
Data Plane URL
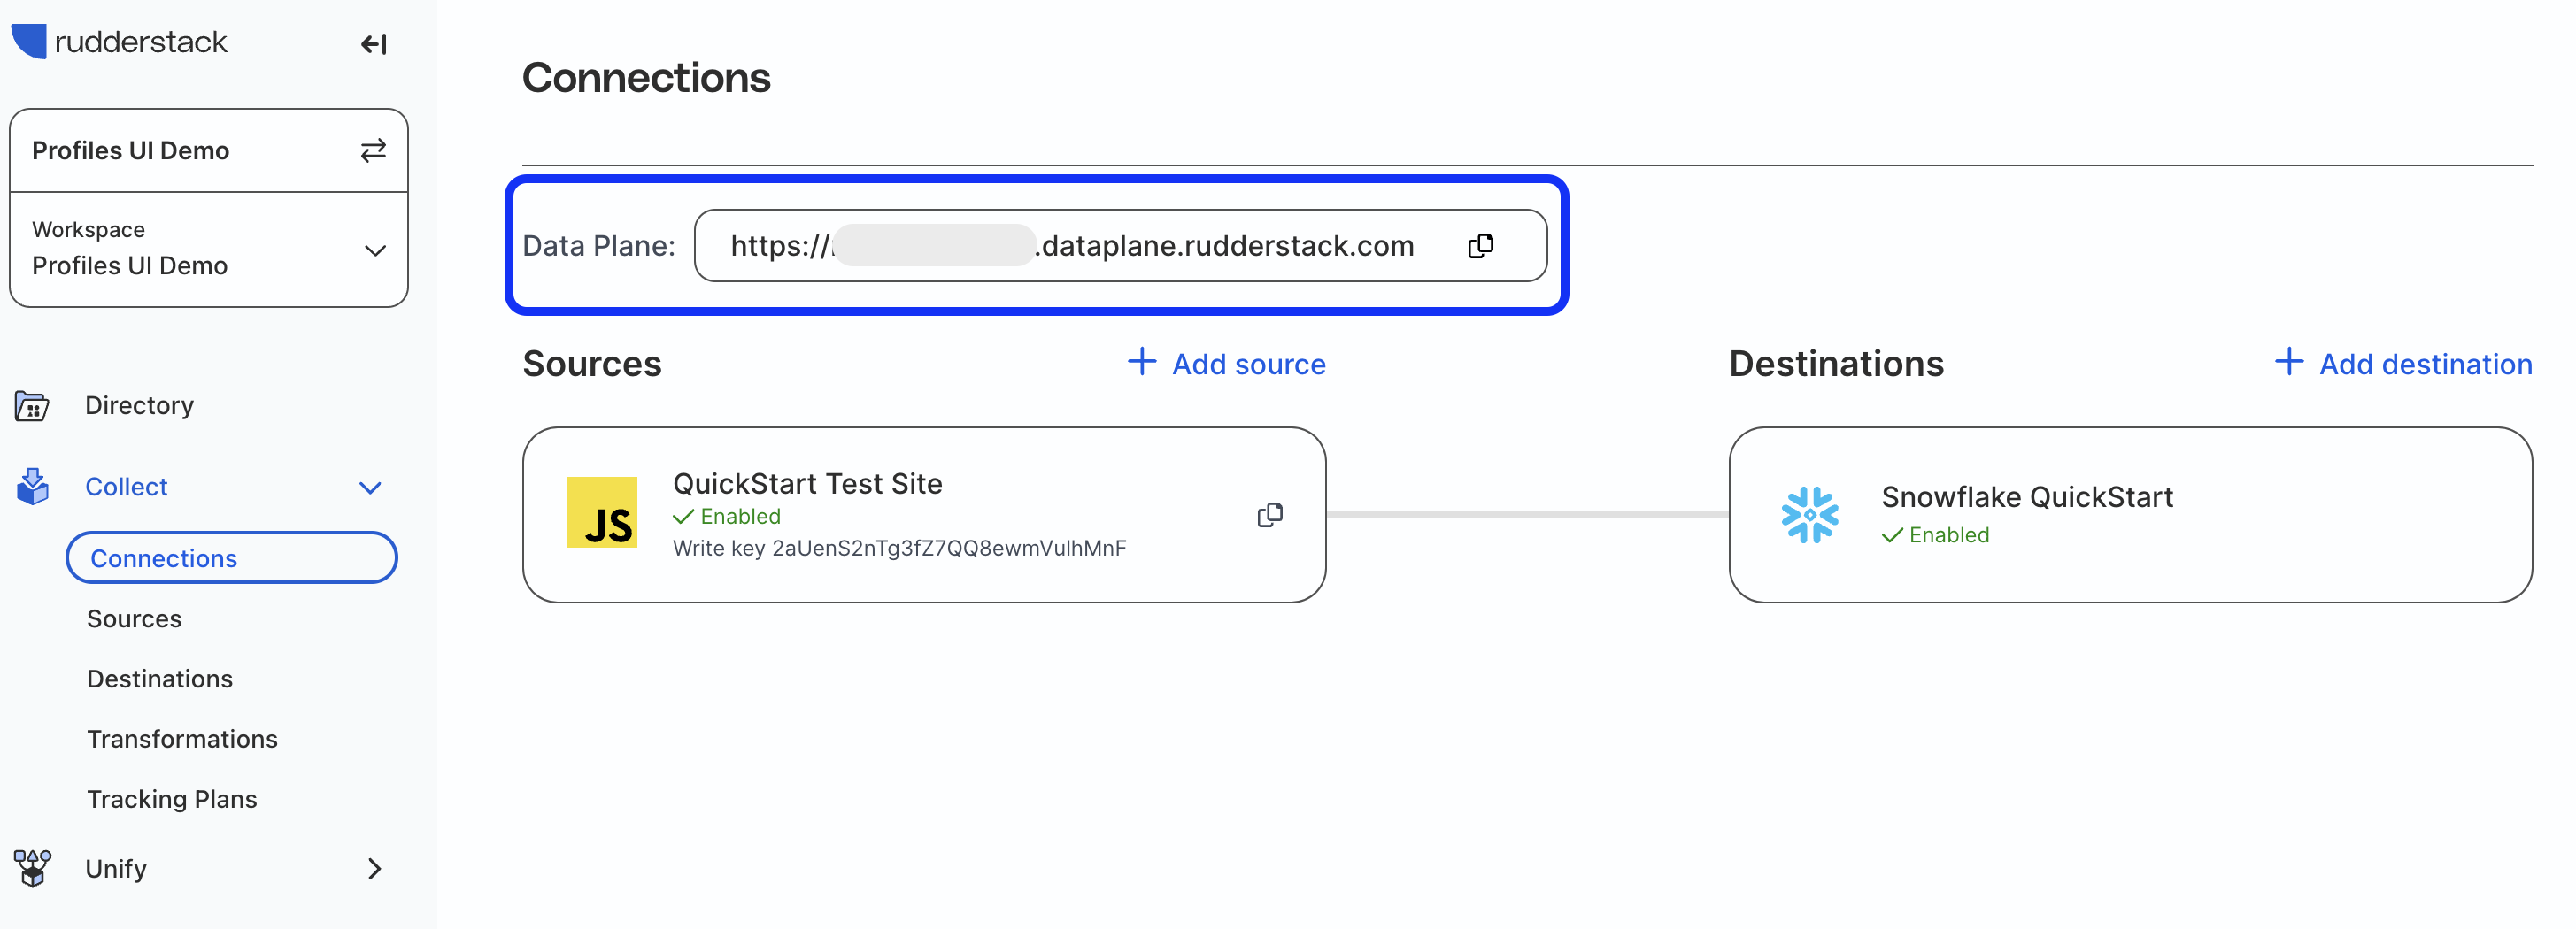
Go to the Connections page in the RudderStack app and copy the Data Plane URL from the top of the page.
Write key
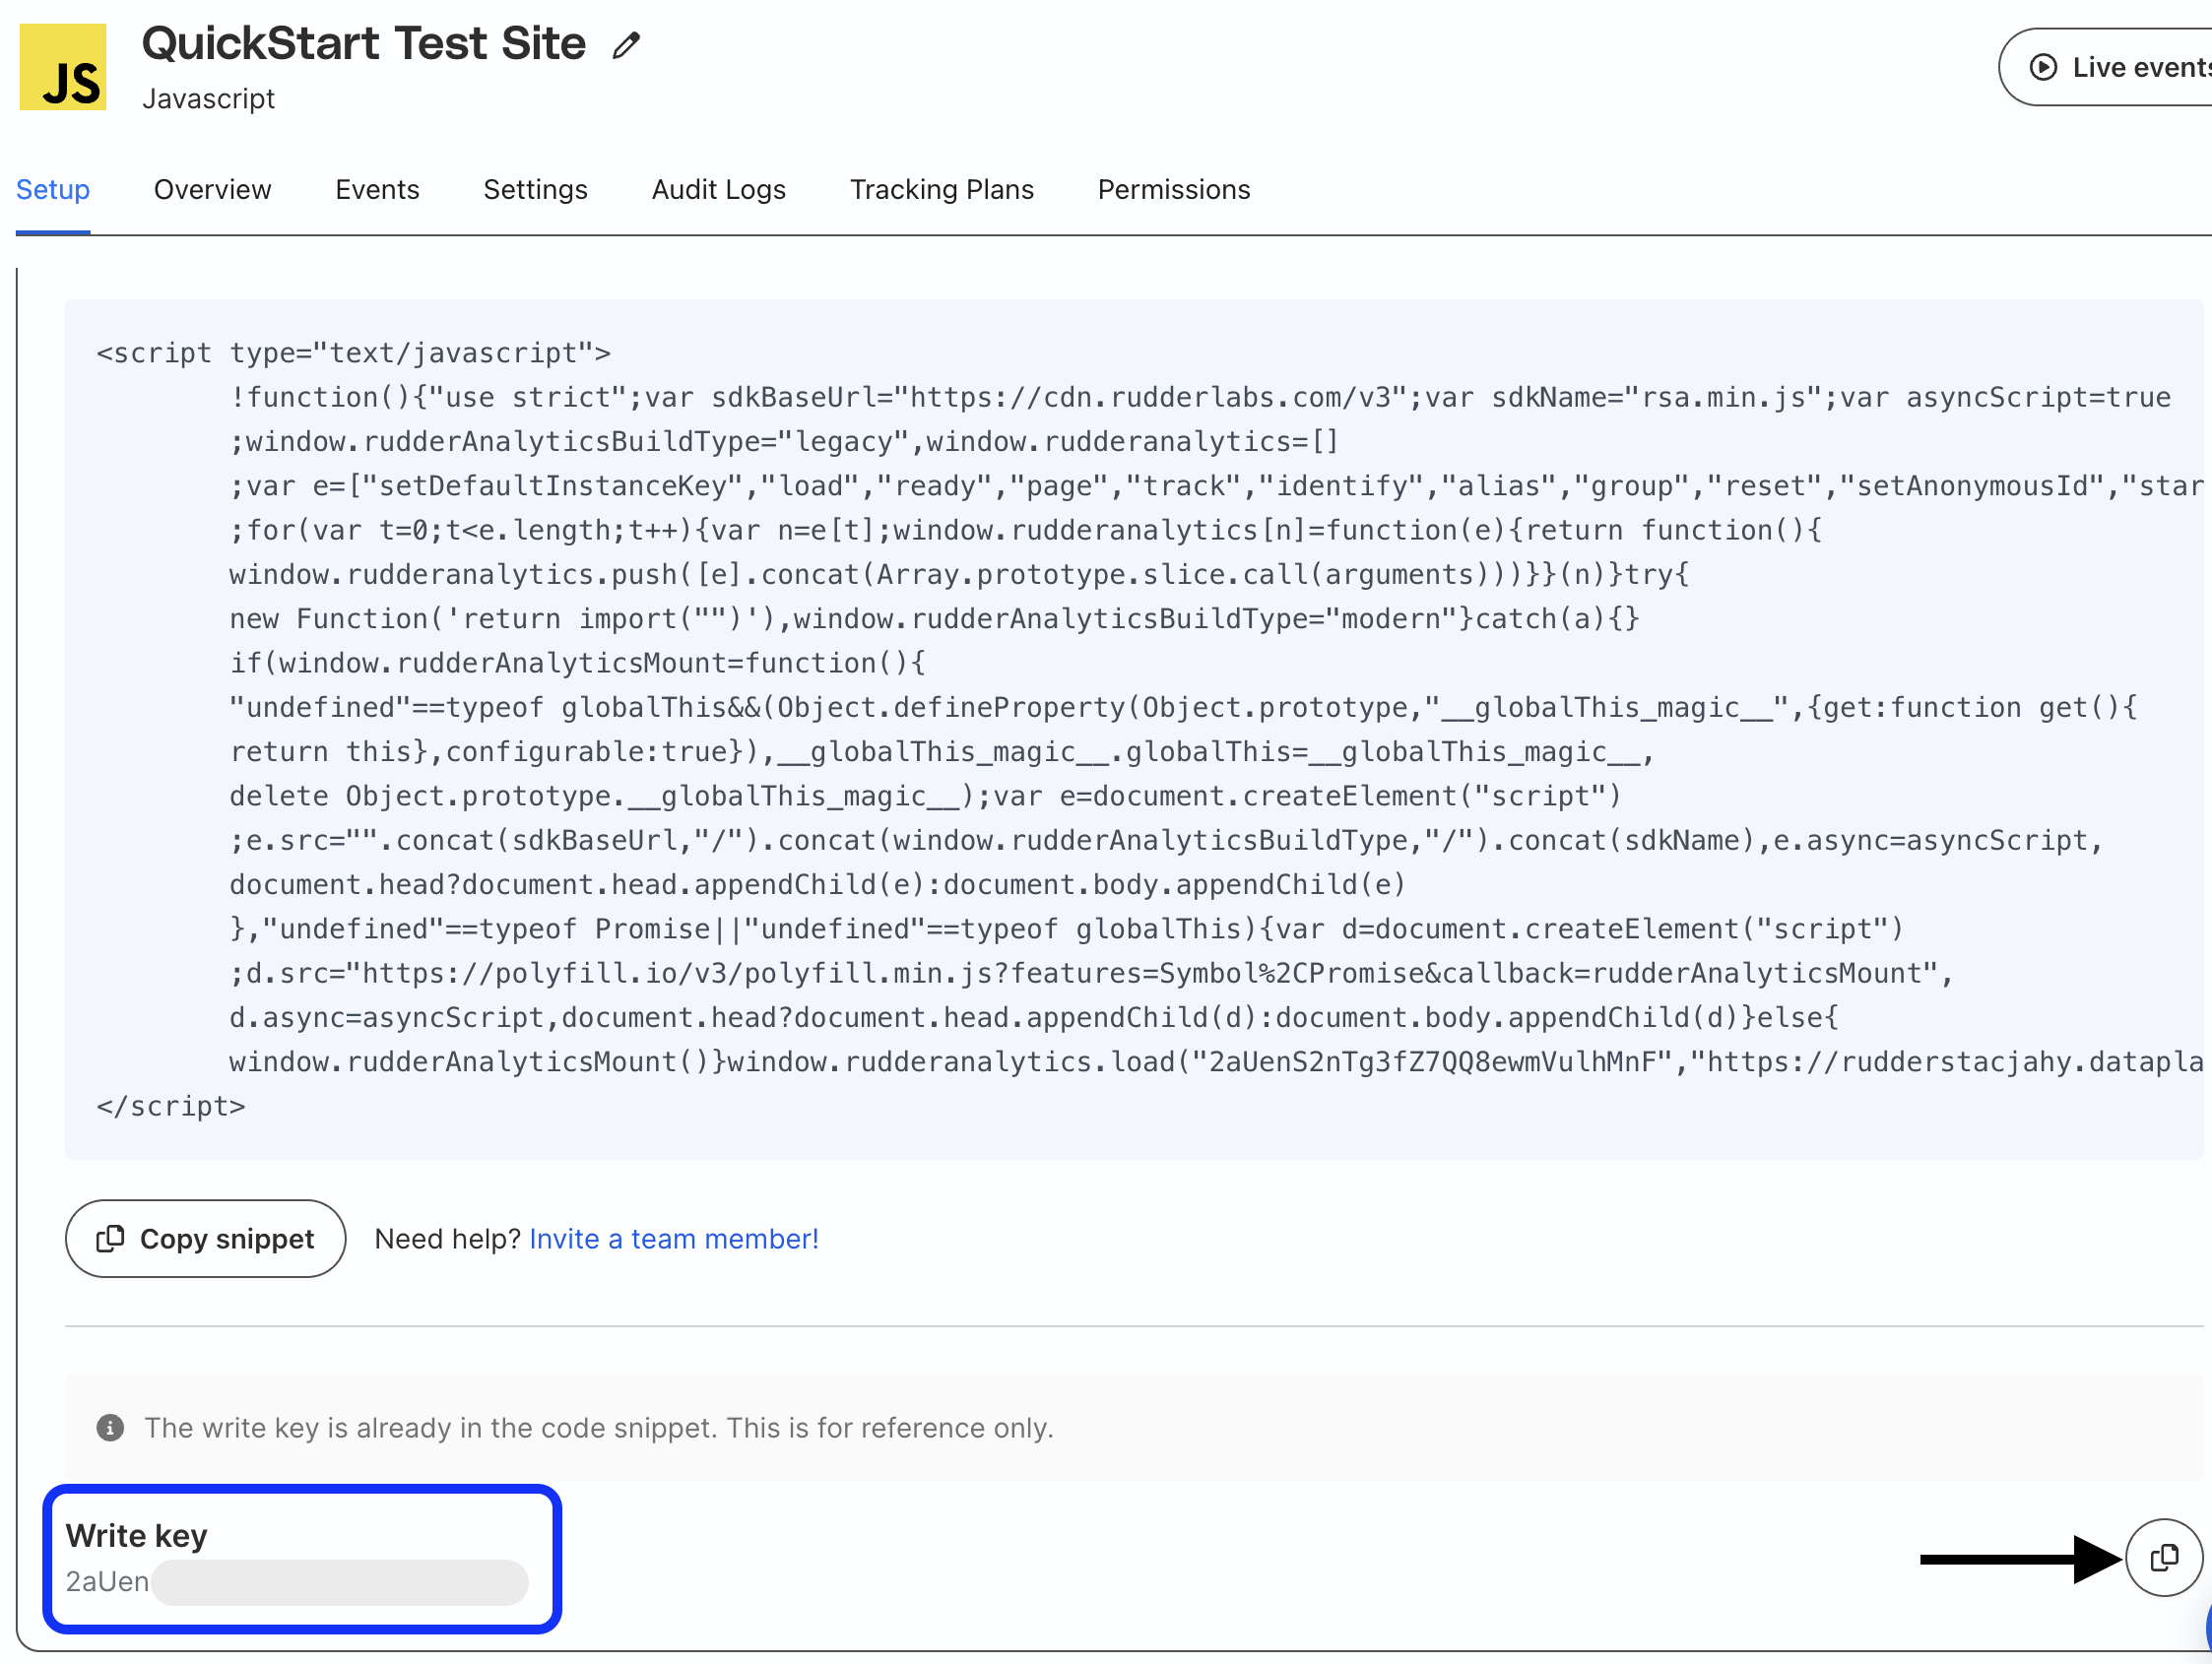
Go to your JavaScript source in RudderStack and in the Setup tab scroll down and copy the Write key.
Test event
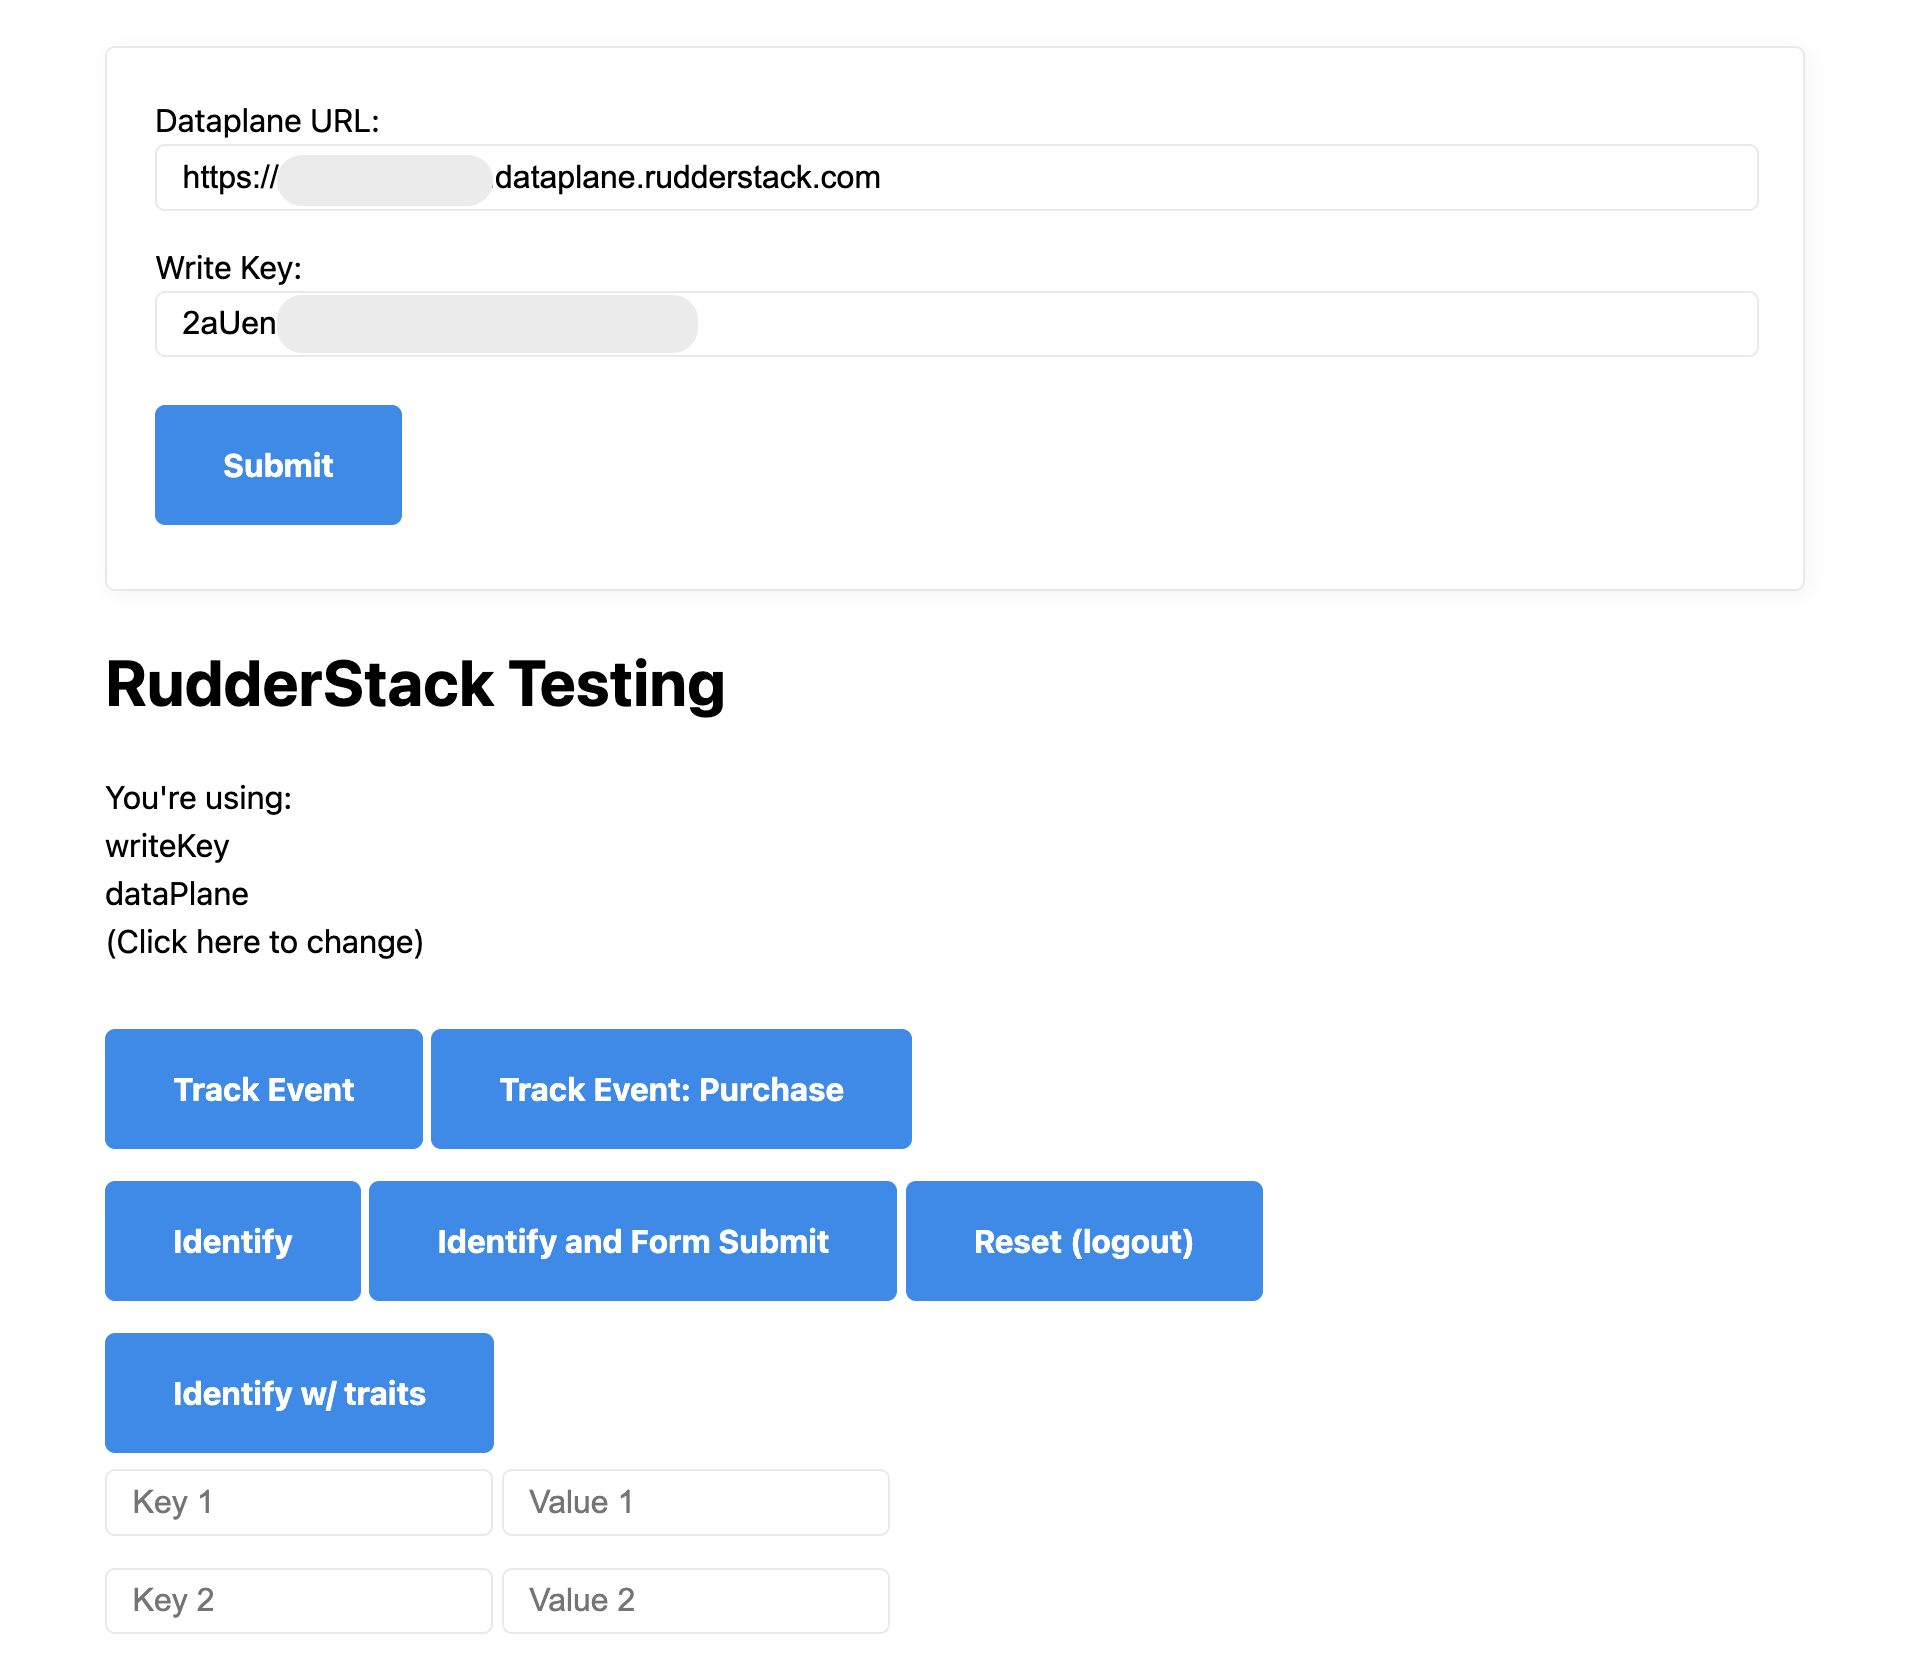
Go to RudderStack’s test website and copy your Data Plane URL and Write Key into the top fields and press Submit.
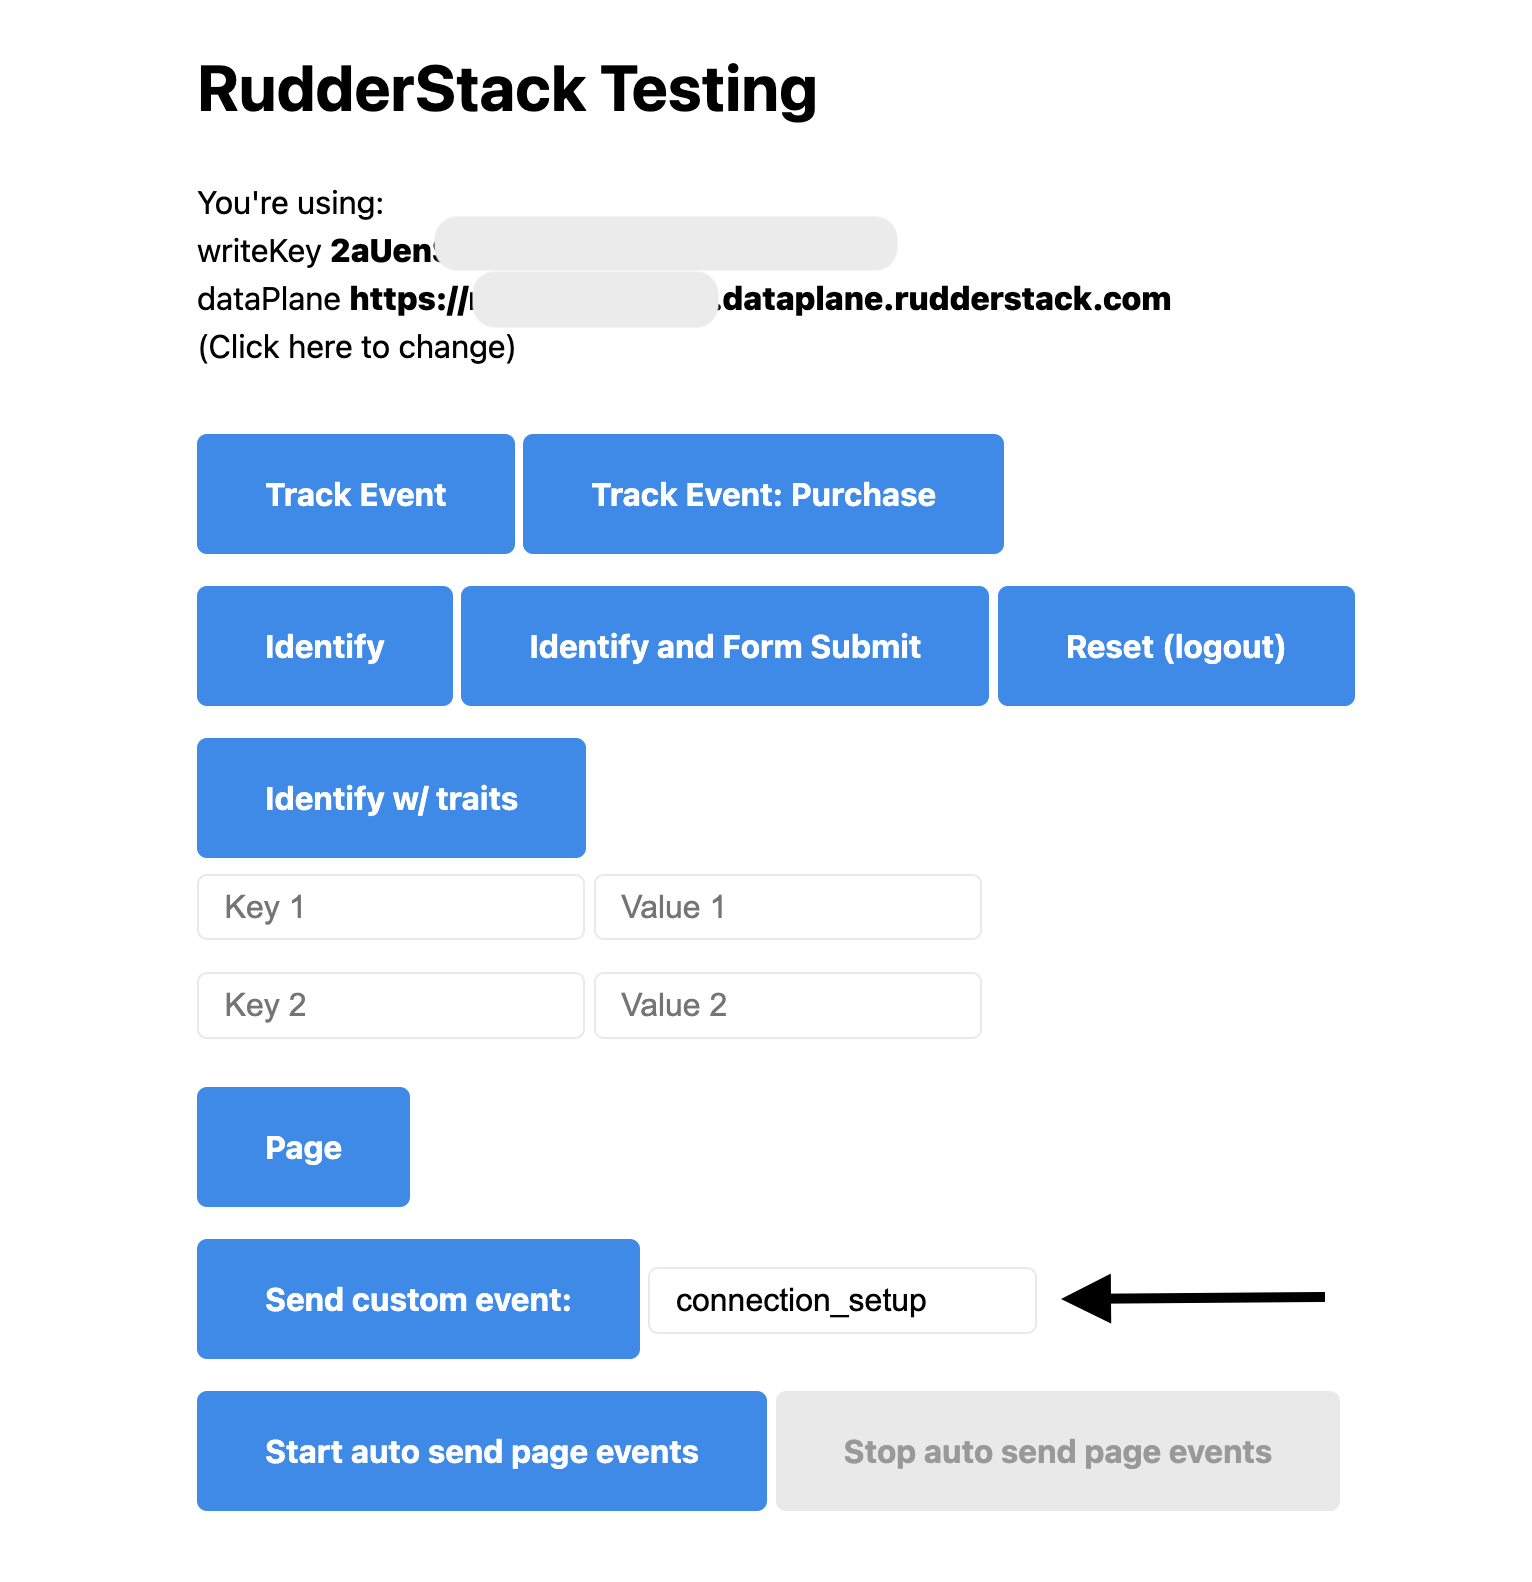
Enter connection_setup into the event_name field next to Send Custom Event and then click on Send Custom Event.
You can check the event using RudderStack’s Live events view or check the Syncs tab in the Snowflake destination.
Note that the test event needs to be delivered to Snowflake to validate the pipeline. If needed, you can run a manual sync by clicking Sync now in the Syncs tab of the Snowflake destination view in RudderStack.
Profiles schema and permissions
Remember that Predictions automatically runs a Profiles job to create an identity graph. In this step, create a new schema where the identity graph and the related tables and views will be generated.
CREATE SCHEMA "<YOUR_DATABASE>"."PROFILES";Now we need to grant permissions to the QUICKSTART role.
Profiles will need the following permissions to run:
- Read access to all input tables to the model (already complete if you followed the previous setup steps)
- Write access to the schemas and common tables that the Profiles project creates.
For the write access run the following statements:
GRANT ALL PRIVILEGES ON SCHEMA PROFILES_QUICKSTART.PROFILES TO ROLE QUICKSTART;
GRANT SELECT ON ALL TABLES IN SCHEMA PROFILES_QUICKSTART.PROFILES TO ROLE QUICKSTART;
GRANT SELECT ON FUTURE TABLES IN SCHEMA PROFILES_QUICKSTART.PROFILES TO ROLE QUICKSTART;
GRANT SELECT ON ALL VIEWS IN SCHEMA PROFILES_QUICKSTART.PROFILES TO ROLE QUICKSTART;
GRANT SELECT ON FUTURE VIEWS IN SCHEMA PROFILES_QUICKSTART.PROFILES TO ROLE QUICKSTART;
You are now ready to run Profiles and Predictions projects in the RudderStack UI!
Profiles CLI setup
Before you start building automated features, you need to perform some additional setup steps so that you can transition seamlessly from the UI-based workflow to the code-based workflow in the code your own custom predictions section.
To build custom features with code, you will need Python3 and the RudderStack Profiles CLI tool (PB, for Profiles Builder) installed on your machine. If you do not have PB installed, follow the instructions below. This includes authentication for your Snowflake environment. Use the warehouse, database, and schema setup in the previous steps. This authentication will be used for accessing your Snowflake warehouse and running Snowpark. For more information about Profiles CLI tool, see documentation.
Install Profile Builder tool
Open a console window and install the Profile Builder PB tool.
pip3 install profiles-rudderstackCheck the version to make sure it is at least 0.10.5
pb versionInstall ML dependency
In order to run ML models you will need to install the python package profiles-multieventstream-features. Run the following command to install it.
pip install git+https://github.com/rudderlabs/profiles-pycorelibEnsure you have the following python packages installed. These are required to use the rudderstack-profiles-classifier package to train classification models for predictive features.
cachetools>=4.2.2
hyperopt>=0.2.7
joblib>=1.2.0
matplotlib>=3.7.1
seaborn>=0.12.0
numpy>=1.23.1
pandas>=1.4.3
PyYAML>=6.0.1
snowflake_connector_python>=3.1.0
snowflake-snowpark-python[pandas]>=0.10.0
scikit_learn>=1.1.1
scikit_plot>=0.3.7
shap>=0.41.0
platformdirs>=3.8.1
xgboost>=1.5.0
redshift-connector
Create warehouse connection
Initiate a warehouse connection:
pb init connectionFollow the prompts and enter the details for your Snowflake warehouse/database/schema/user.
Enter Connection Name: quickstart
Enter target:  (default:dev)  # Press enter, leaving it to default
Enter account: <YOUR_ACCOUNT>
Enter warehouse: <YOUR_WAREHOUSE>
Enter dbname: <YOUR_DATABASE>
Enter schema: PROFILES
Enter user: QUICKSTART_USER
Enter password: <password>
Enter role: QUICKSTART
Append to /Users/<user_name>/.pb/siteconfig.yaml? [y/N]
y
Enable ML models
Finally, enable ML models within siteconfig.yaml.
Open the file /Users/<user_name>/.pb/siteconfig.yaml in a text editor.
At the bottom of the file there is a py_models section. Update it to look like this:
py_models:
    enabled: true
    python_path: $(which python3)
    credentials_presets: null
    allowed_git_urls_regex: ""
Snowpark
Predictive features utilizes Snowpark within your Snowflake environment. It uses the same authentication as Snowflake and is able to run jobs within Snowflake.
This will run python code in a virtual warehouse in Snowflake and will incur compute costs. These costs vary depending on the type of model and the quantity of data used in training and prediction. For more general information on Snowflake compute costs, see Understanding Compute Costs.
