You are viewing documentation for an older version.

Identity Stitching
7 minute read
This guide provides a detailed walkthrough on how to use a PB project and create output tables in a warehouse for a custom identity stitching model.
Prerequisites
Familiarize yourself with:
- A basic Profile Builder project by following the Profile Builder CLI steps.
- Structure of a Profile Builder project and the parameters used in different files.
Output
After running the project, you can view the generated material tables:
- Log in to your Snowflake console.
- Click Worksheets from the top navigation bar.
- In the left sidebar, click Database and the corresponding Schema to view the list of all tables. You can hover over a table to see the full table name along with its creation date and time.
- Write a SQL query like
select * from <table_name> limit 10;and execute it to see the results:
- Open Postico2. If required, create a new connection by entering the relevant details. Click Test Connection followed by Connect.
- Click the + icon next to Queries in the left sidebar.
- You can click Database and the corresponding schema to view the list of all tables/views.
- Double click on the appropriate view name to paste the name on an empty worksheet.
- You can prefix
SELECT *from the view name pasted previously and suffixLIMIT 10;at the end. - Press Cmd+Enter keys, or click the Run button to execute the query.
- Enter your Databricks workspace URL in the web browser and log in with your username and password.
- Click the Catalog icon in left sidebar.
- Choose the appropriate catalog from the list and click on it to view the contents.
- You will see list of tables/views. Click on the appropriate table/view name to paste the name on the worksheet.
- Then, you can prefix
SELECT * FROMbefore the pasted view name and suffixLIMIT 10;at the end. - Select the query text. Press Cmd+Enter or click the Run button to execute the query.
- Log in to your Google Cloud Console
- Search for Bigquery in the search bar.
- Select Bigquery from Product and Pages to open the Bigquery Explorer.
- Select the correct project from top left drop down menu.
- In the left sidebar, click the project ID, then the corresponding dataset view list of all the tables and views.
- Write a SQL query like
select * from <table_name> limit 10;and execute it to see the results.
A sample output containing the results in Snowflake:
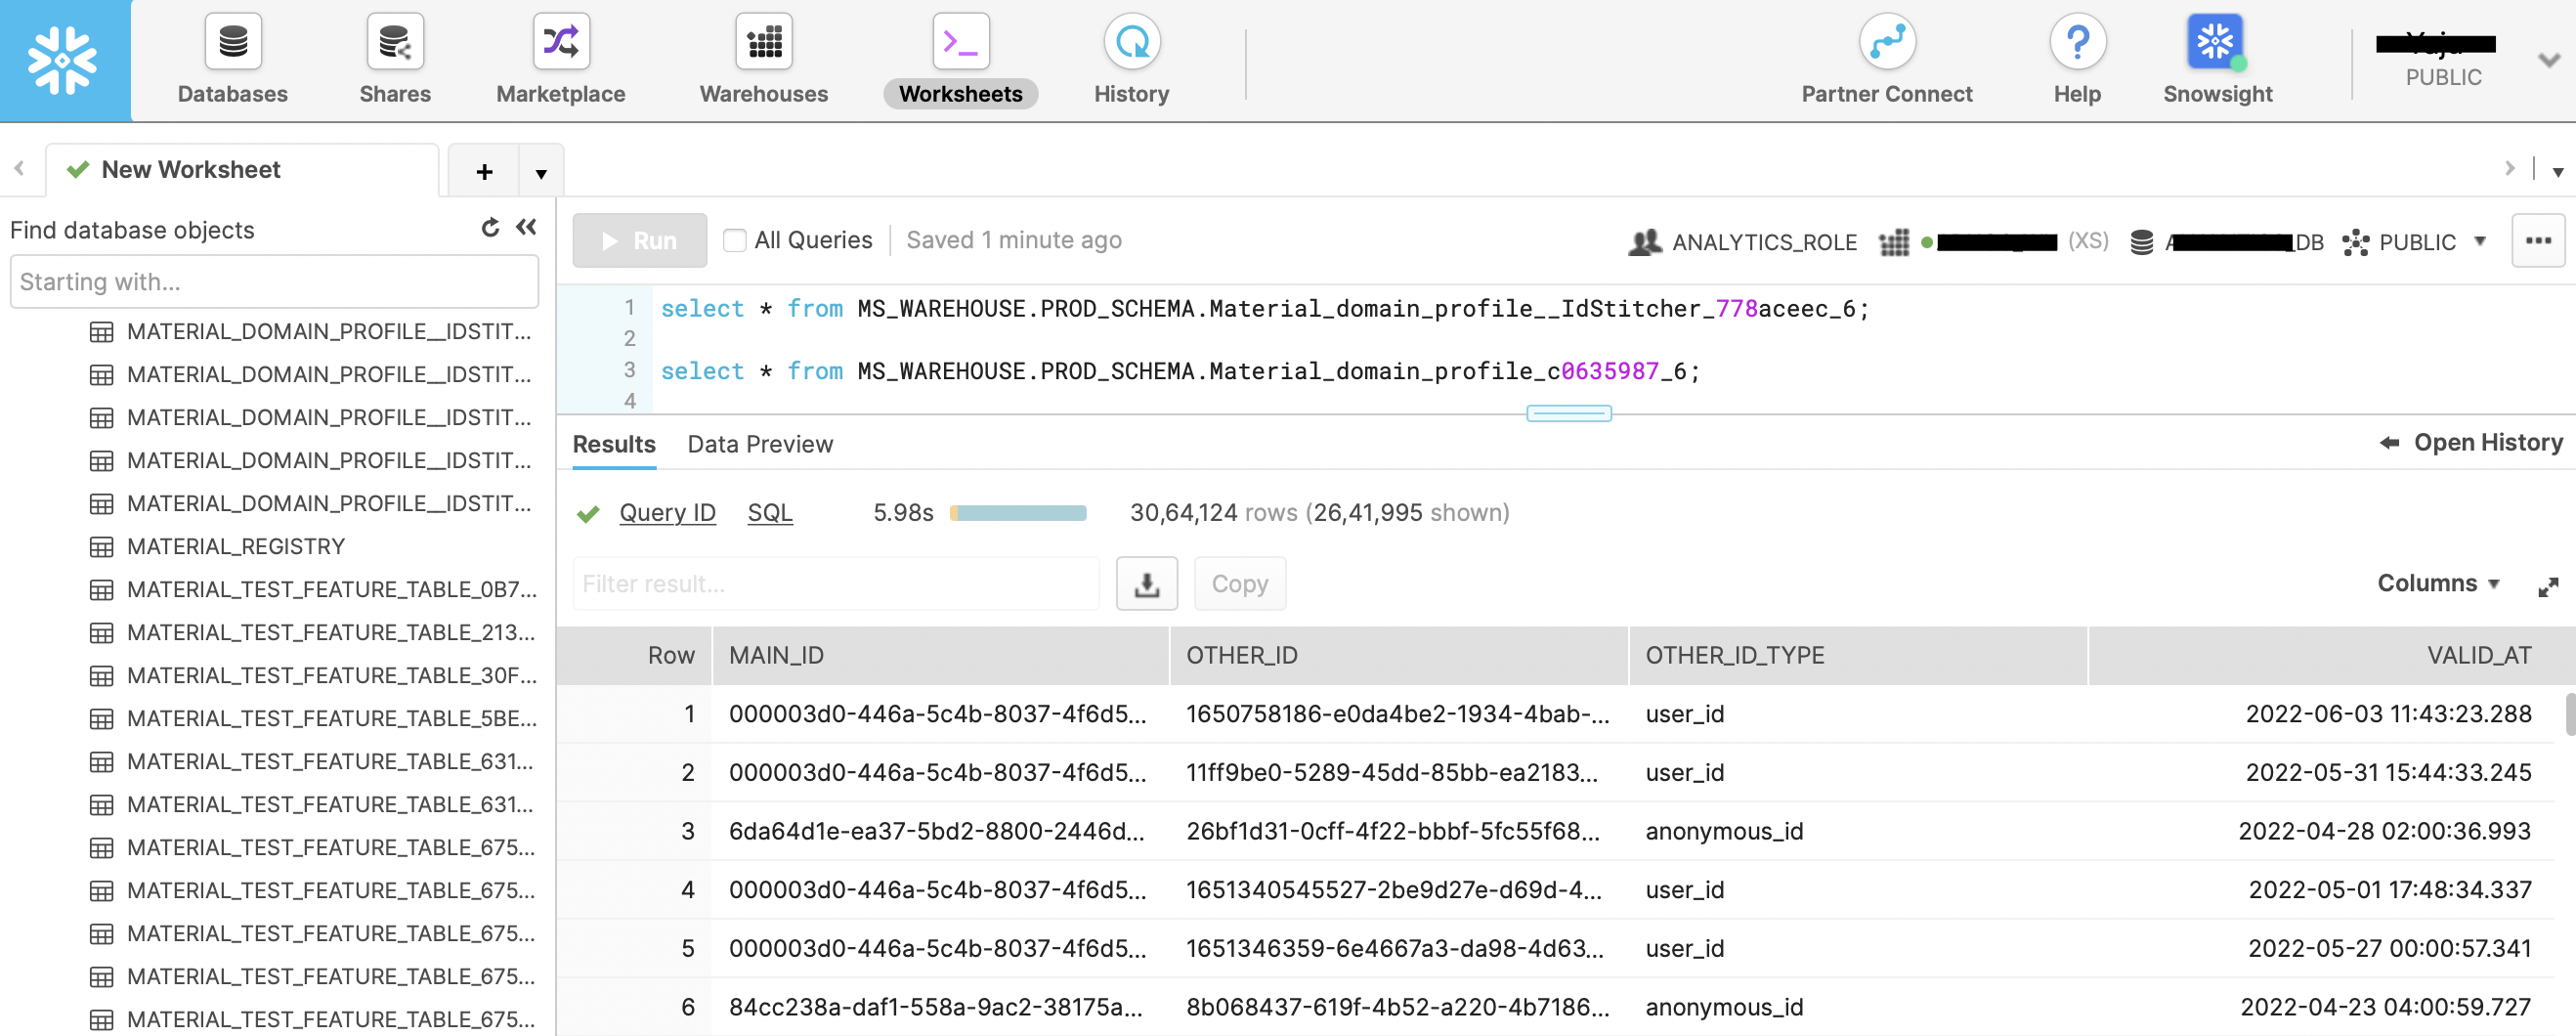
Profiles project includes an ID stitcher model (default_id_stitcher) by default even if you do not define any specs for creating one. It takes all the input sources and ID types defined in the fileinputs.yamlfile. Also, it creates a custom ID stitcher when you define an ID stitcher model explicitly along with the specs.
Sample project for Custom ID Stitcher
This sample project considers multiple user identifiers in different warehouse tables to ties them together to create a unified user profile. The following sections describe how to define your PB project files:
Project detail
The pb_project.yaml file defines the project details such as name, schema version, connection name and the entities which represent different identifiers.
There can be different ID types for an entity. You can include all such identifiers in the id_types field under entities. main_id specified under id_types is not an ID type but a placeholder for the column which serves as the primary identifier for that entity.
In case of id_stitcher model, the main_id for the entity is rudder_id (predefined ID type) by default. For other models, any other ID type can be the main_id, for example session_id. Hence, if you want to specify the ID type of a column as a primary identifier, you can specify main_id.
# Project name
name: sample_id_stitching
# Project's yaml schema version
schema_version: 71
# Warehouse connection
connection: test
# Folder containing models
model_folders:
  - models
# Entities in this project and their ids.
entities:
  - name: user
    id_stitcher: models/user_id_stitcher # modelRef of custom ID stitcher model
    id_types:
      - main_id # You need to add ``main_id`` to the list only if you have defined ``main_id_type: main_id`` in the id stitcher buildspec.
      - user_id # one of the identifier from your data source.
      - email
# lib packages can be imported in project signifying that this project inherits its properties from there
packages:
  - name: corelib
    url: "https://github.com/rudderlabs/profiles-corelib/tag/schema_{{best_schema_version}}"
    # if required then you can extend the package definition such as for ID types.
Input
The input file (models/inputs.yaml) file includes the input table references and corresponding SQL for the above-mentioned entities:
inputs:
- name: rsIdentifies
  contract: # constraints that a model adheres to
    is_optional: false
    is_event_stream: true
    with_entity_ids:
      - user
    with_columns:
      - name: timestamp
      - name: user_id
      - name: anonymous_id
      - name: email
  app_defaults:
    table: rudder_events_production.web.identifies # one of the WH table RudderStack generates when processing identify or track events.
    occurred_at_col: timestamp
    ids:
      - select: "user_id" # kind of identity sql to pick this column from above table.
        type: user_id
        entity: user # as defined in project file
        to_default_stitcher: true # default value
      - select: "anonymous_id"
        type: anonymous_id
        entity: user
        to_default_stitcher: true
      - select: "lower(email)" # can use sql.
        type: email
        entity: user
        to_default_stitcher: true
- name: rsTracks
  contract:
    is_optional: false
    is_event_stream: true
    with_entity_ids:
      - user
    with_columns:
      - name: timestamp
      - name: user_id
      - name: anonymous_id
  app_defaults:
    table: rudder_events_production.web.tracks # another table in WH maintained by RudderStack processing track events.
    occurred_at_col: timestamp
    ids:
      - select: "user_id"
        type: user_id
        entity: user
        to_default_stitcher: true
      - select: "anonymous_id"
        type: anonymous_id
        entity: user
        to_default_stitcher: true
Columns specified under ids field are automatically sent for identity stitching unless you specify to_default_stitcher as false.
Model
Profiles Identity stitching model maps and unifies all the specified identifiers (in pb_project.yaml file) across different platforms. It tracks the user journey uniquely across all the data sources and stitches them together to a rudder_id.
A sample profiles.yaml file specifying an identity stitching model (user_id_stitcher) with relevant inputs:
models:
  - name: user_id_stitcher
    model_type: id_stitcher
    model_spec:
      validity_time: 24h
      entity_key: user
      materialization:
        run_type: incremental # default value is `discrete` for a custom ID stitcher and `incremental` for the default ID stitcher.
      incremental_timedelta: 12h
      main_id_type: main_id
      edge_sources:
        - from: inputs/rsIdentifies
        - from: inputs/rsTracks
Model specification fields
| Field | Data type | Description |
|---|---|---|
validity_time | Time | Specifies the validity of the model with respect to its timestamp. For example, a model run as part of a scheduled nightly job for 2009-10-23 00:00:00 UTC with validity_time: 24h would still be considered potentially valid and usable for any run requests, which do not require precise timestamps between 2009-10-23 00:00:00 UTC and 2009-10-24 00:00:00 UTC. This specifies the validity of generated feature table. Once the validity is expired, scheduling takes care of generating new tables. For example: 24h for 24 hours, 30m for 30 minutes, 3d for 3 days |
entity_key | String | Specifies the relevant entity from your input.yaml file. For example, here it should be set to user. |
materialization | List | Adds the key run_type: incremental to run the project in incremental mode. This mode considers row inserts and updates from the edge_sources input. These are inferred by checking the timestamp column for the next run. One can provide buffer time to consider any lag in data in the warehouse for the next incremental run like if new rows are added during the time of its run. If you do not specify this key then it’ll default to run_type: discrete. |
incremental_timedelta | List | (Optional )If materialization key is set to run_type: incremental, then this field sets how far back data should be fetched prior to the previous material for a model (to handle data lag, for example). The default value is 4 days. |
main_id_type | ProjectRef | (Optional) ID type reserved for the output of the identity stitching model, often set to main_id. It must not be used in any of the inputs and must be listed as an id type for the entity being stitched. If you do not set it, it defaults to rudder_id. Do not add this key unless it’s explicitly required, like if you want your identity stitcher table’s main_id column to be called main_id. For more information, see below. |
edge_sources | List | Specifies a set/subset of inputs from the inputs.yaml file to be considered for the identity stitching model. |
Use cases
This section describes some common identity stitching use cases:
Identifiers from multiple data sources: You can consider multiple identifiers and tables by:
- Adding entities in
pb_project.yamlrepresenting identifiers. - Adding references to table and corresponding sql in
models/inputs.yaml - Adding table reference names defined in
models/inputs.yamlasedge_sourcesin your model definition.
- Adding entities in
Leverage Sql Support: You can use SQL in your
models/inputs.yamlto achieve different scenarios. For example, you want to tag all the internal users in your organization as one entity. You can use the email domain as the identifier by adding a SQL query to extract the email domain as the identifier value:lower(split_part({{email_col}}, '@', 2))Custom ID Stitcher: You can define a custom ID stitcher by defining the required id stitching model in
models/profiles.yaml.
