Manage Member Workspace Policy
2 minute read
This guide explains how to manage members and configure their individual workspace policy for each workspace.
Overview
The Users tab in the Access Management section lets you:
- View member details, upgrade or downgrade their organization role, or remove them from the organization
- Customize a member’s workspace policy
- Manage group membership
Plan-wise limits
The number of members Admins can invite to a workspace depends on the RudderStack plan:
| Plan | Member limit |
|---|---|
| Free | 10 members per organization |
| Growth | Unlimited |
| Enterprise | Unlimited |
See the Plan-wise Features guide for more details.
Configure member workspace policy
When you upgrade a user from Org Member to Org Admin, RudderStack deletes their existing Member Workspace Policies instead of storing them as dormant policies.
If you later downgrade the same user back to Org Member, you must set up their workspace policies again.
- Go to Settings > Access Management and click the Users tab.
- Select the member for which you want to configure the workspace policy.
- Under the Member Workspace Policies tab, select the workspace for which you want to configure the member policy.

- Configure the workspace policy for the member.
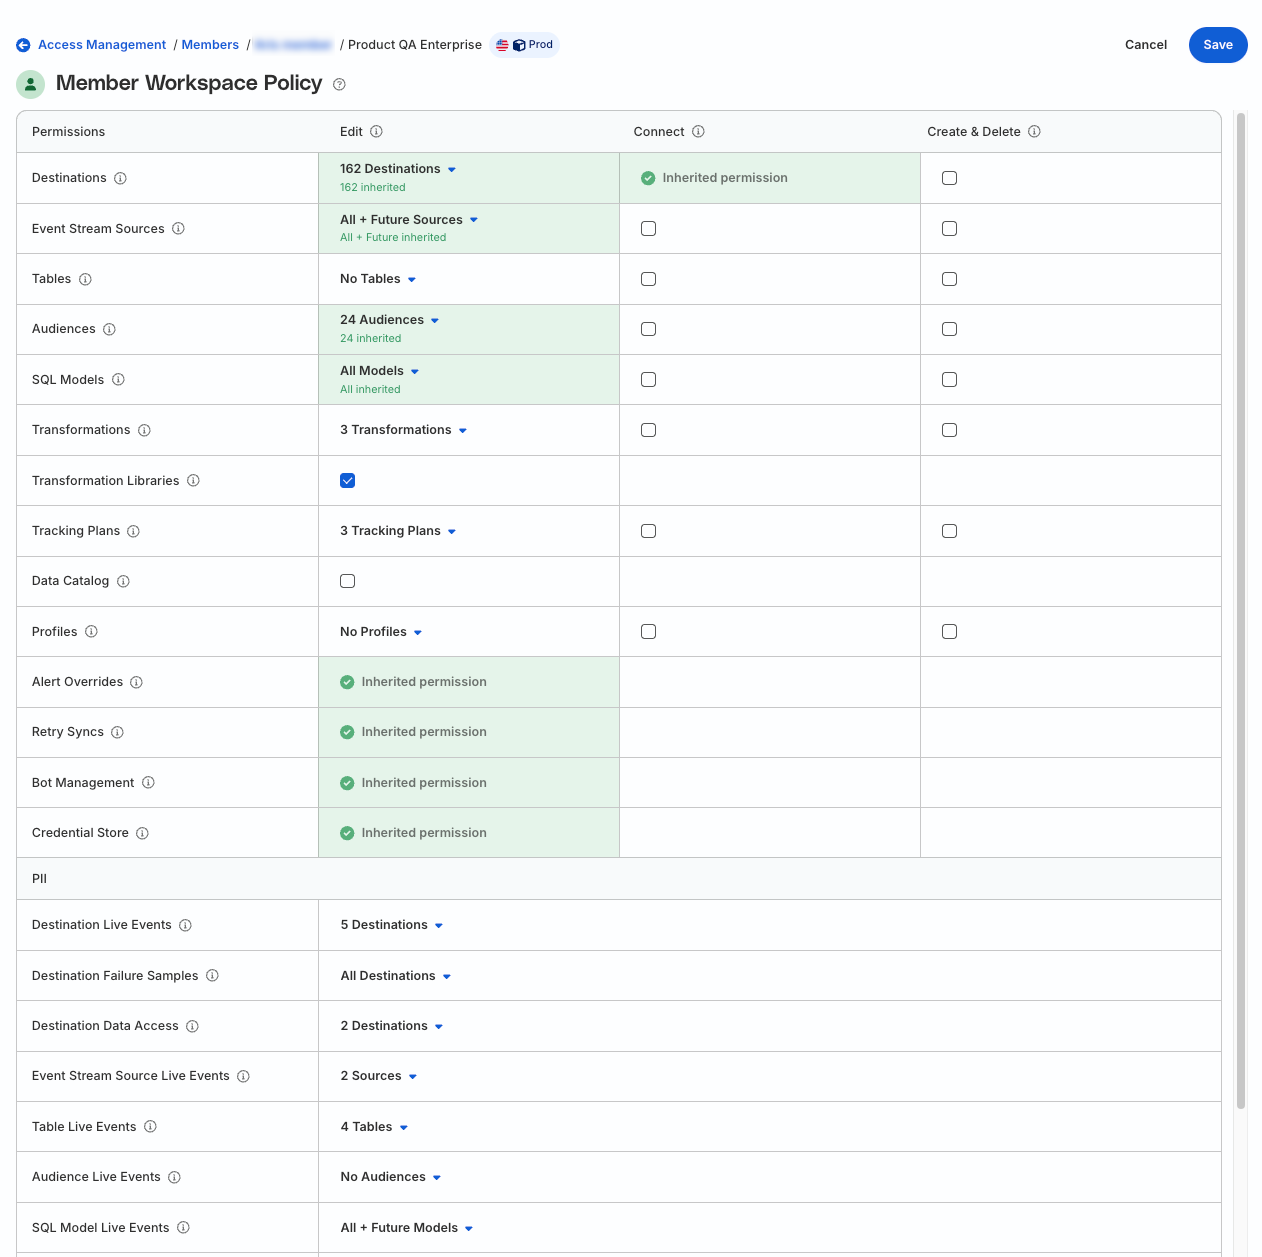
You may see some permissions with a green check mark. These indicate permissions inherited from the Baseline Workspace Policy and Group Workspace Policies of which the member is a part.
As all members inherit permissions from the Baseline Workspace Policy and any Group Policies, these inherited permissions cannot be changed or removed. However, you can configure additional permissions for the member.
- Click Save for the changes to take effect.
A sample member workspace policy is shown below:
Manage group members
hide_lastmod: true build: false _build: render: false list: false publishResources: false
You can easily add or remove members from a group to simplify permissions management.
Add members to a group
- In the Groups tab, click the group to which you want to add members.
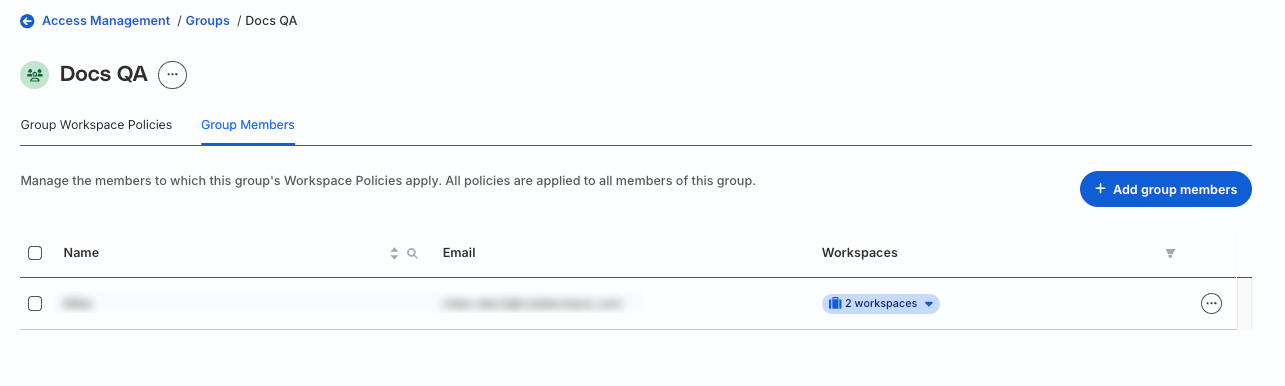
- Go to the Group Members tab and click Add group members.
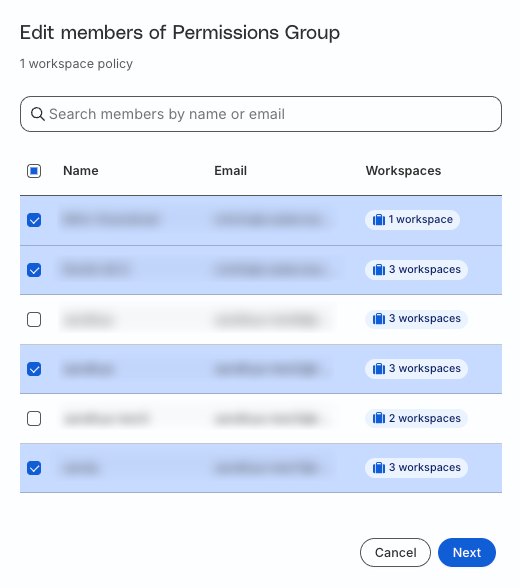
- Select the members to add to the group. Then, click Next.
- In the confirmation window, click Add members to add the members to the group.
Remove members from a group
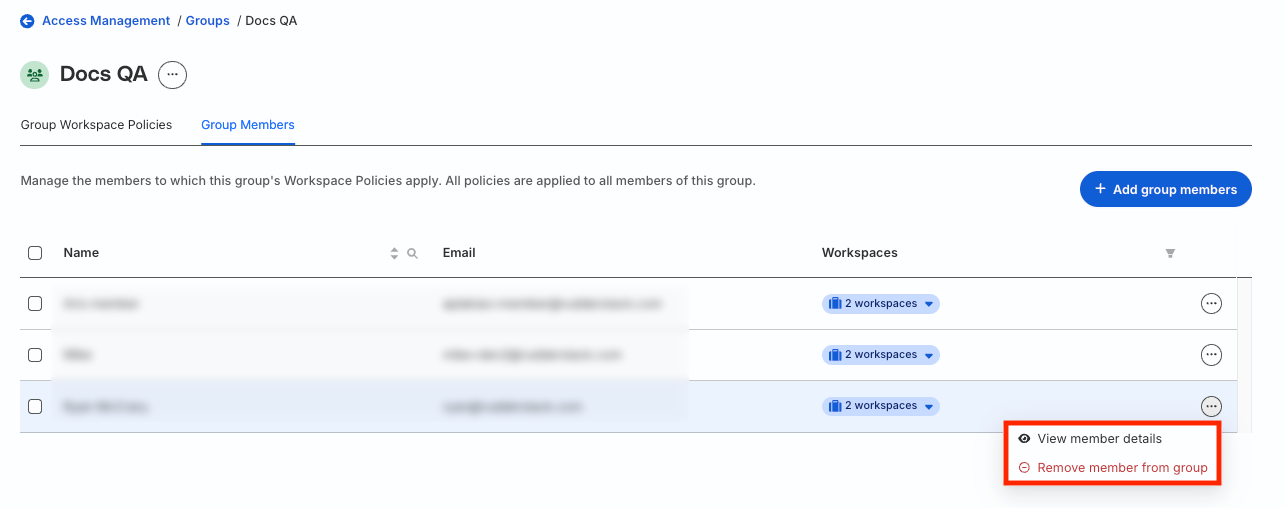
- In the Group Members tab, click the meatballs menu (
...) next to the member. Edit members button. - Click Remove member from group.
- In the confirmation window, click Remove to complete removal.
